
Research Rabbit, you’re new bestfriend for read research paper
Have you ever found yourself lost in a large number of scientific articles related to your field of research? Do you find it difficult to determine a starting point for the articles you need to read without getting lost in study topics that stray from your subject? Or are you simply looking for a way to optimise your organisation for reading your articles?

If this is the case, I can only advise you to use Research Rabbit!
What is Research Rabbit?
It is a web application that will allow you to explore a set of scientific papers in a simple, quick and efficient way.
What will it allow you to do in practice? It will make it easier for you to have a global view of all the studies in the literature that could be directly related to your research topic.
How does it work?
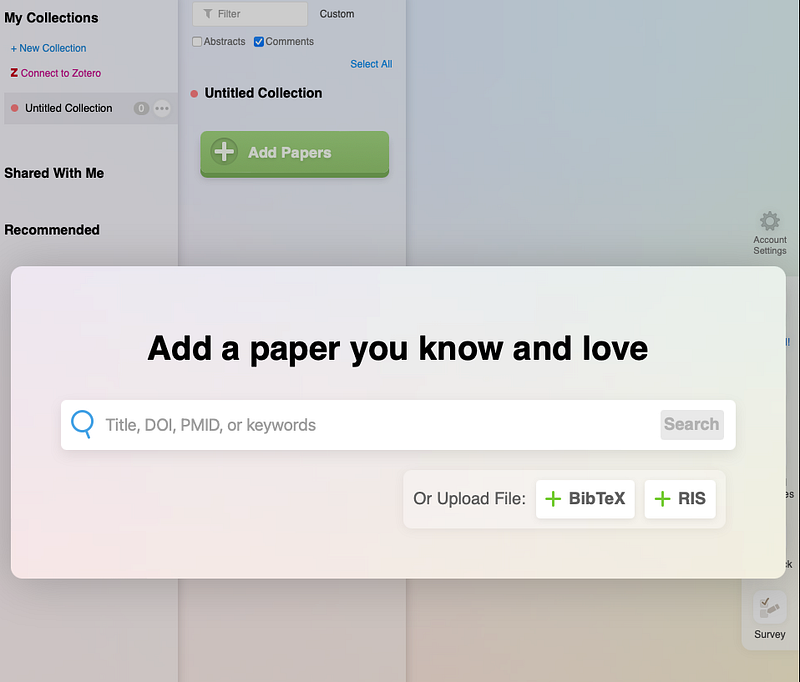
It is very simple, when you first launch the application, a window will appear so that you can fill in a first article which will be used as a basis to build the database.
Let’s take an example to see how the whole thing works. The source article I will take is the following: An Updated Model of Chronic Ankle Instability. This is an important article in my field of research which concerns chronic ankle instability. After entering the information about the article, a second page will open offering you 2 options:
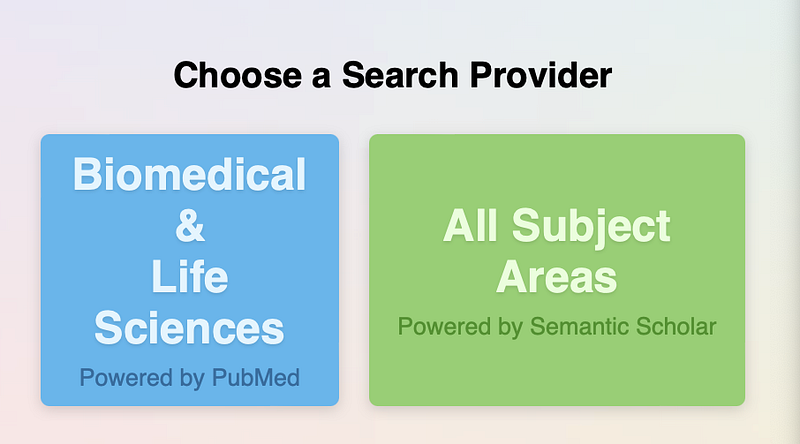
Choose the one you like and we can continue!
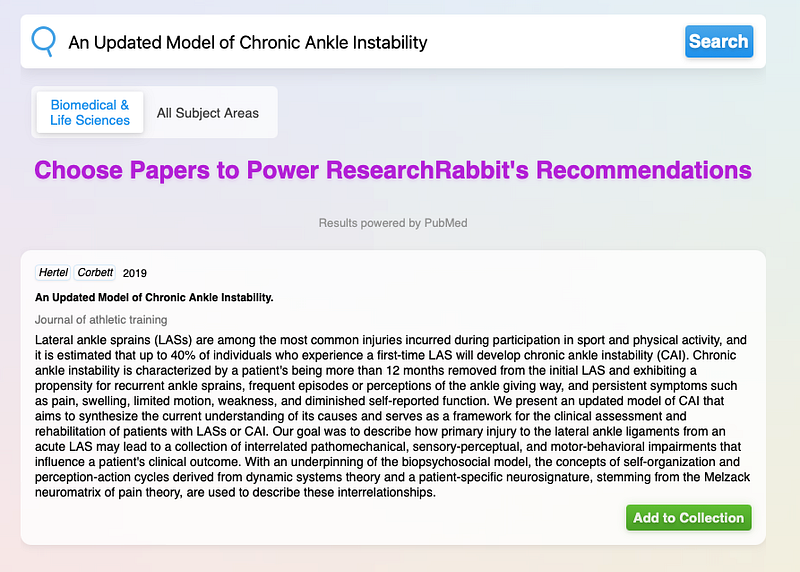
Once you have managed to find the item in the database, add it to the collection:
Alright, now we are at the home page of the application, let’s look in detail at the different information that is presented there:
- The left most part is your database. Here you can create specific collections that will group the items you wish to include. For example, if you want to search on a topic that has nothing to do with the item you were able to define when you launched the application, simply create a new collection and add the items that will serve as your new base
Note that it is possible to link the collection with your Zotero database. This way, if you already have a collection defined in Zotero, you can easily import the articles into the application via Zotero.
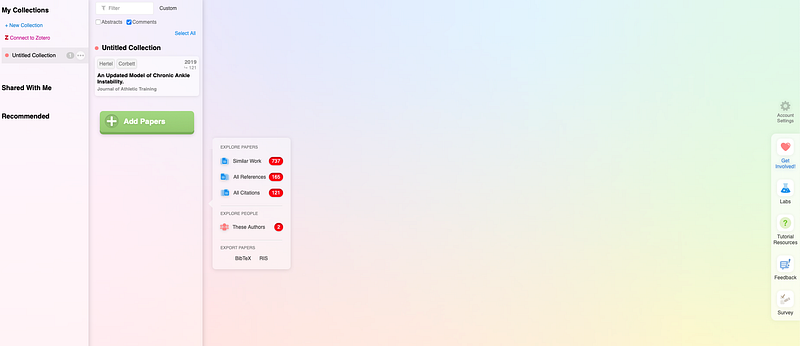
- Just to the right you will find all the papers you have added to your collection. As you can see, it is possible to add more items by simply using the “add paper” button.
- The little window next to it is the heart of the application! This is where all the magic happens.
Let’s say we want to identify papers similar to J. Hertel’s. This is the new window you get:
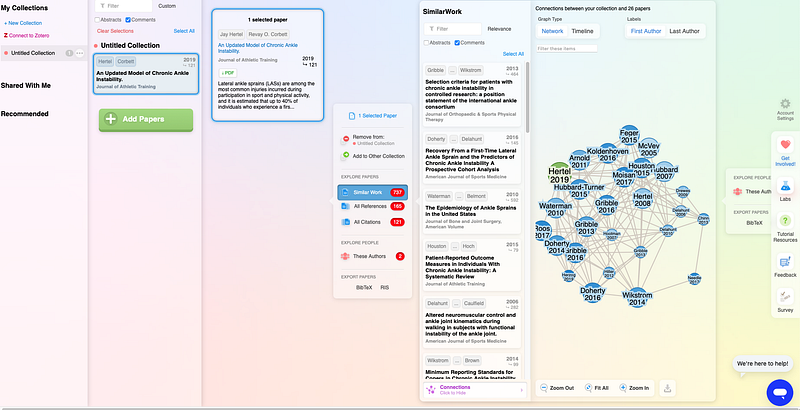
Well, that’s a lot of information for a single click! Let’s see what’s in the window:
- The first tab corresponds to the source article you have chosen to search for similar works. In this case, only one article is used as a reference, but you can choose as many as you like.
- The next tab is the same as above.
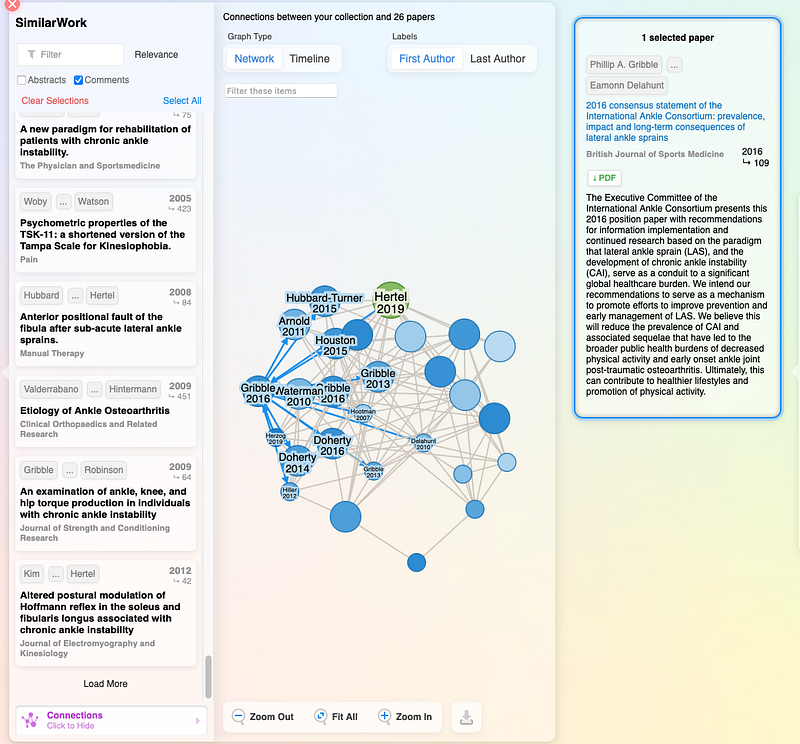
- The “Similar Work” tab groups together all the articles that the application has been able to find in relation to the source article that we have chosen. It is possible to see that a total of 737 articles have been identified as similar or close to ours. It is possible to scroll down if you want to quickly read some article titles.
- Then we can see that a graph is present in the last tab. Let’s take a closer look at what this graph contains
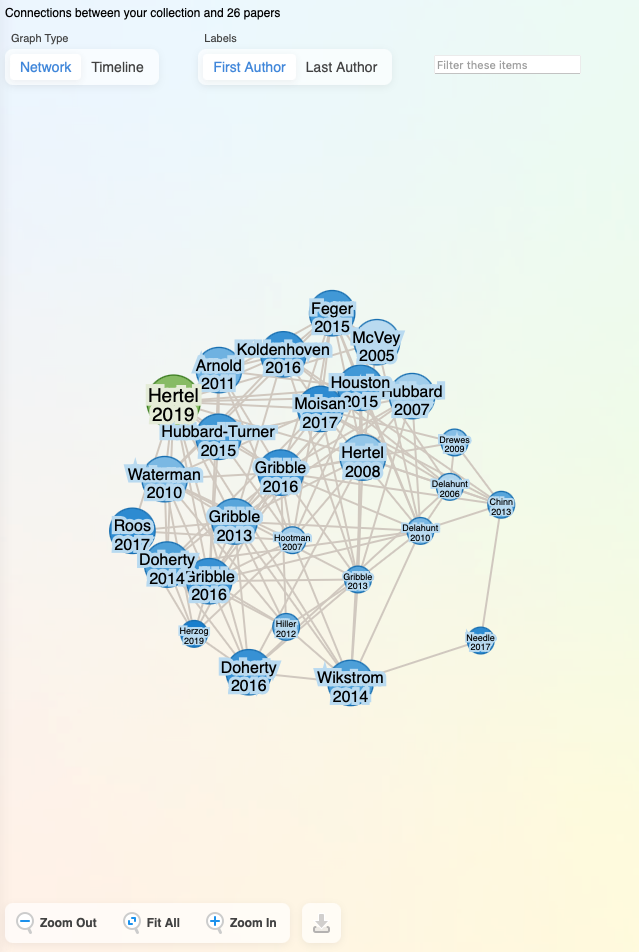
Here is a descriptive list of the different information that can be found on this graph:
- Green node: corresponds to the article that is part of your collection
- Blue nodes: corresponds to a list of articles that are part of the “Similar Word” search. It is possible to see that the intensity of the colour of the nodes is different: a dark colour indicates that the article is recent, while a lighter colour indicates that the article is older.
- Size of the nodes: the green node will always be the most important in the graph. The blue nodes will have different sizes. A large size indicates that the article in question has a connection with the source article. Conversely, smaller nodes have no direct connection to the source article, but have one or more connections to other articles in the graph.
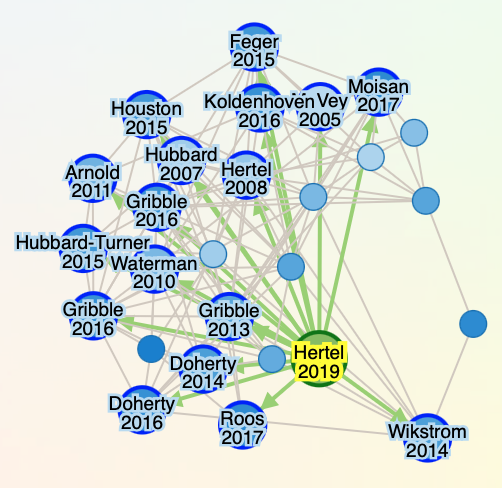
- Arrow: When you move the mouse over a node, a set of arrows appears. These arrows indicate that the article from which the arrow points is cited in the article(s) in question.
Above, in the graph tabs, it is possible to see several settings:
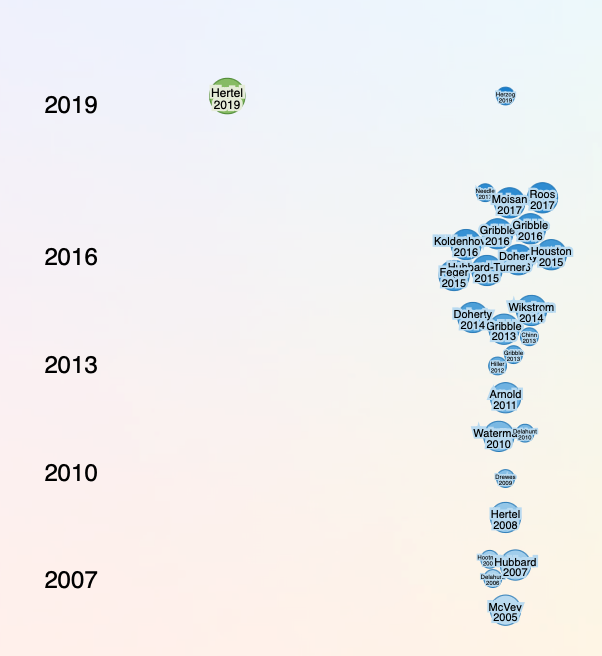
- Timeline & Network: Timeline will show you a graph that ranks the articles from oldest to newest, while the network shows you the view we just saw earlier.
- Last author: this simply allows you to specify which author appears in the node.
All right, these are the main pieces of information we can get from the graph. Now let’s look at what happens when we click on a node.
A new tab appears “Selected Paper” with a very brief description of the article. This is very useful, as it gives direct access to initial information about an article that seems to have caught our attention. It is then possible to read the abstract very quickly and determine whether it is relevant or not.
Clicking directly on “pdf” will take you directly to a site where you can access the article in pdf format (if available).
Once again, if you wish to obtain a graph view from this new article, simply click on “Similar Work” which will return a new graph with the selected article as its source.
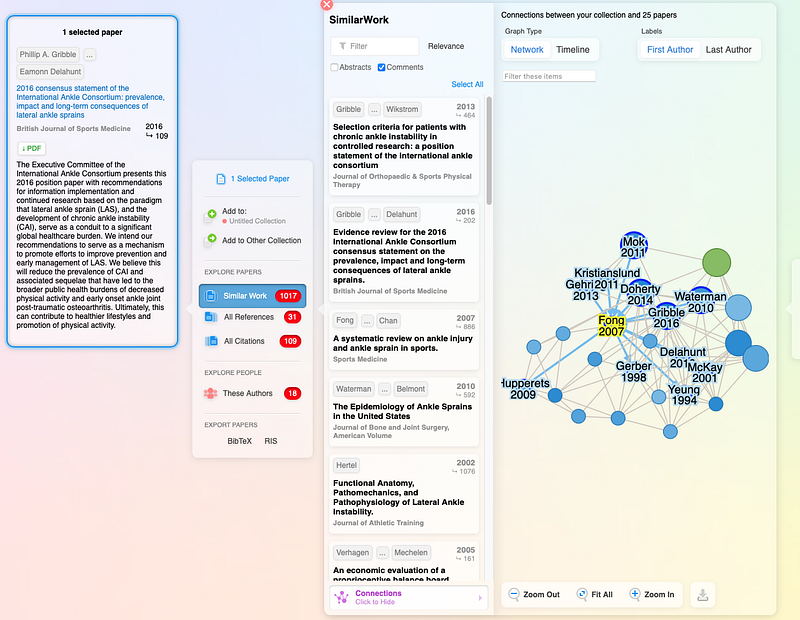
Another interesting point is that it is possible to get a graphical view of all the references that have been used in the article, but also to see all the articles that have cited this article. The result will be the same as for “Similar Work” you will get a graph.
Finally, it is also possible to obtain information about the authors. To do this, simply click on “These Autors” and this will return a new graph, but this time with the authors of the articles.
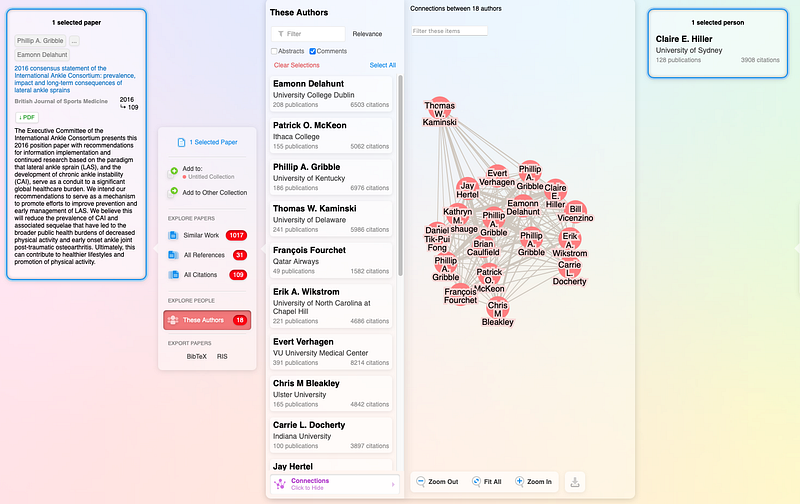
Each line indicates that the authors wrote an article together. Finally, let’s assume that we now have 2 articles in our collection. An interesting feature is that the application offers us 3 types of articles:
- Similar work
- Earlier work
- Later Work
These three parameters can be used as a basis to guide your article selection and reading. If you want to know more about what these parameters represent, I invite you to go and see the documentation where you will find many explanations.
The final word
This application makes my searches much easier. No more wandering around the sites without knowing which keywords to use to reduce the size of the search. In a few seconds, I can have an overview of the articles that are close to my research topic Moreover, in this article, I have not presented all the features that the application offers, others are still to be discovered!


