
Remote VS Code with GCP
Setting up your remote workflow using the Google Cloud Platform.
In this article, we provide a comprehensive guide on how to set up a remote development environment on the Google Cloud Platform (GCP) using Virtual Studio Code (VS Code).

The Benefits of Remote Development
Remote development offers advantages in resource utilization, ensures consistent environments across machines and fosters collaboration amongst team members. In this article, we’ll provide a comprehensive guide to the setup required to work on a GCP (Google Cloud Platform) remote virtual machine from within your local Visual Studio Code (VS Code) interface. Once initialized, Virtual Machines can be reconfigured as needed, a value add quickly realized when faced with the dynamic and ever-evolving business landscape we manage on a daily basis.
Connecting to Remote VMs via SSH
This workflow is achieved via SSH technology, which creates a headless version of VS Code powered by a remote machine connection. A cryptographic key-pair is needed to establish an SSH connection. It’s standard to create both a public and private key when generating an SSH key-pair. The local computer with the private key can then connect to the remote machine holding the corresponding public key.
This may sound familiar if you’ve connected to GitHub (or other git remote) via SSH. By providing your remote machine with the public key, you succeed in connecting your local device. We’ll establish a connection to our GCP Virtual Machine (VM) by a similar process.
- Provision a GCP VM instance
- Generate an SSH key-pair using the Google Cloud SDK
- Set up your local VS Code to connect to the previously provisioned GCP VM instance
- Modify (edit, stop, etc.) VM instance
GCP VM Instances
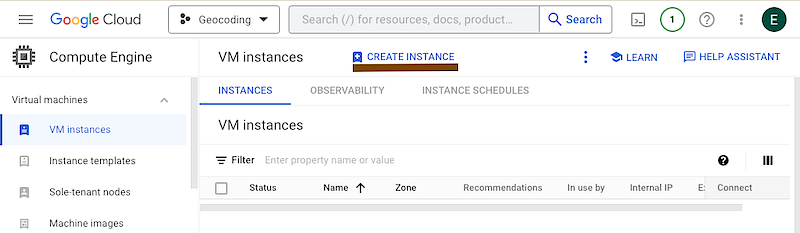
You may or may not have used the Compute Engine API before. If not, you’ll need to enable it. Once enabled, we’ll provision a VM instance by navigating to Compute Engine.
From there, select Create Instance.
There are a few ways to provision a VM instance, including using:
- A New VM instance: provision a VM from scratch
- Marketplace: provision a preconfigured VM, that comes with specified tools
Here, we’ll provision a VM from scratch. However, it’s worth checking out the Marketplace! There you’ll find the Deep Learning VM, a VM image that allows you to select any of the environments available to Vertex AI Notebooks.
Provision your VM Instance
To provision a VM instance from scratch, you’ll need to first name your instance, and then select the hardware you’d like. The default settings will work, but should any settings need updating, you can always update those later.
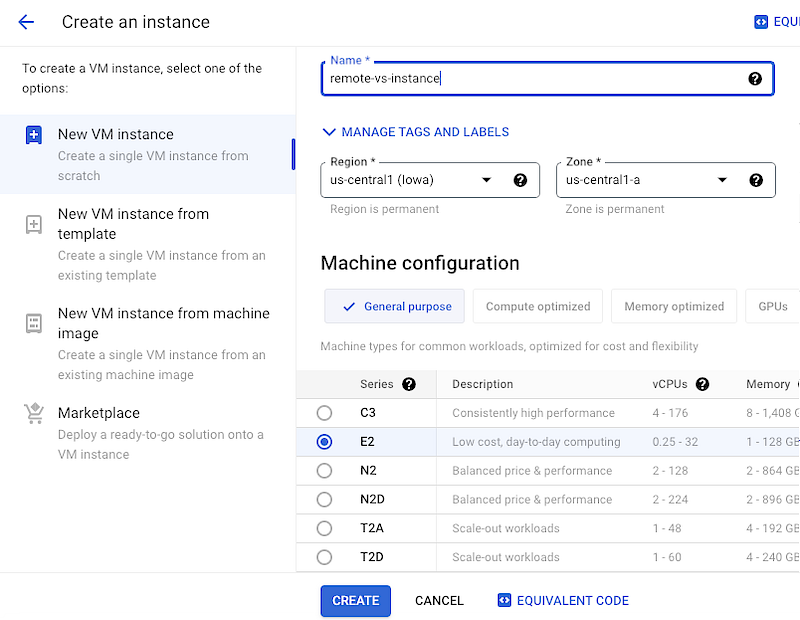
Hit Create.
Generate an SSH key-pair using the Google Cloud SDK
Once your instance is up and running, create your SSH key using the Google Cloud SDK.
Although this method requires installing the Google Cloud SDK, once installed, it allows you to create and add your SSH key in one step. Streamlining a process that otherwise requires generating an SSH key-pair and then storing this to the Google Console UI.
You’ll first need to ensure proper installation and initialization of the Google Cloud SDK. Should you need to troubleshoot, you’ll find those instructions linked here.
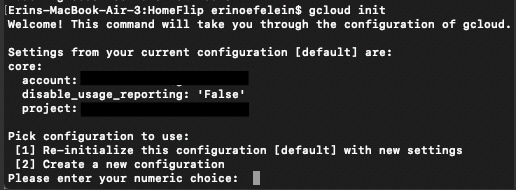
A quick note on the gcloud init process:
Ensure the project ID of the project under which you’ve created your VM, corresponds to the project ID initialized here. In my case, I created my VM under a different project and selected [1] to re-initialize to the correct project ID.
Create your SSH Key
Once initialized, create your SSH key by running:
gcloud compute ssh <username>@<vm_instance_name>
Although you probably log in using your email as your username, here we would only want the letters preceding the @ symbol (so if the email you used to log in was [email protected], your

You’ll be prompted to enter a passphrase.
This command will generate both private and public SSH keys, which will automatically be saved to your $HOME/.ssh/ path.
Configure Local VS Code to Connect to your GCP VM Instance
Next, create your config file utilizing the following format.
Host XX.XX.XX.XXX
HostName XX.XX.XX.XXX
UseKeychain yes
AddKeysToAgent yes
IdentityFile ~/.ssh/google_compute_engine
User your_username
Once created, save it to your home directory.
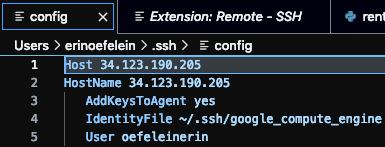
The host and hostname correspond to the external IP address of your VM instance. Find your external IP address by following the instructions shown here.
VS Code Extensions
Next, navigate to extensions from within VS Code:
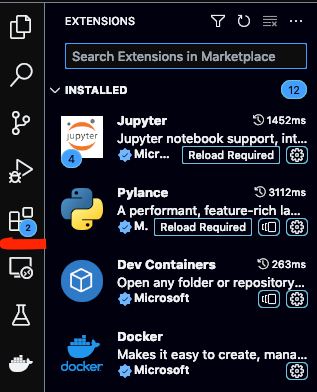
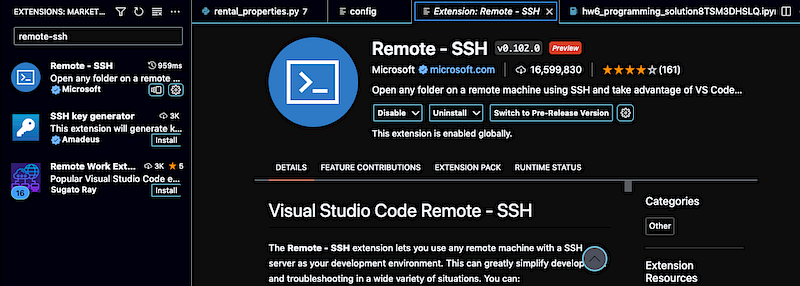
Install the Remote SSH extension on VS Code:
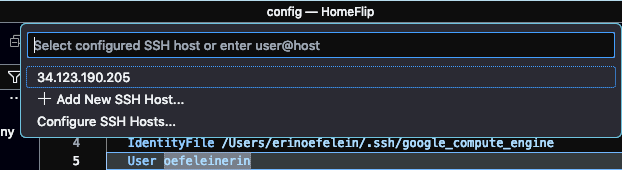
Open VSCode and press ⌘ + Shift + P for macOS or Ctrl + Shift + P for Windows to open the VSCode Command Palette. Type in Remote-SSH and select Add New SSH Host…
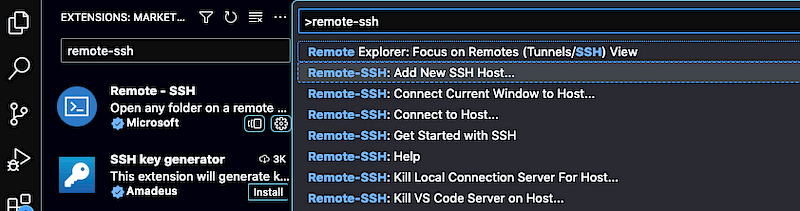
Type in your username and External IP Address of your Compute Engine instance as shown [email protected].

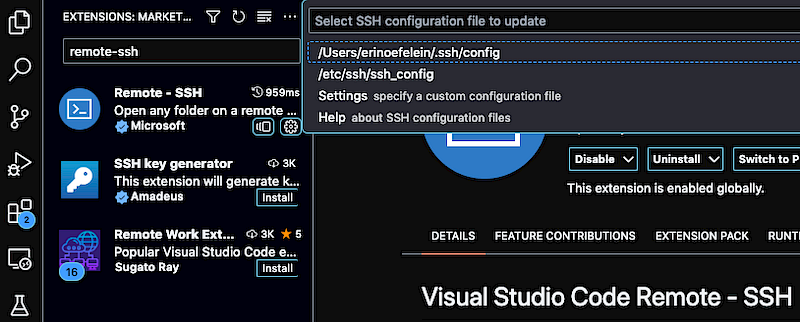
Select the SSH configuration file or create a new one.
Connect to the Host
Finally, connect to the host!
Again, access the VS Code Command Palette by pressing:
- ⌘ + Shift + P for macOS
- Ctrl + Shift + P for Windows
And then type remote-ssh.
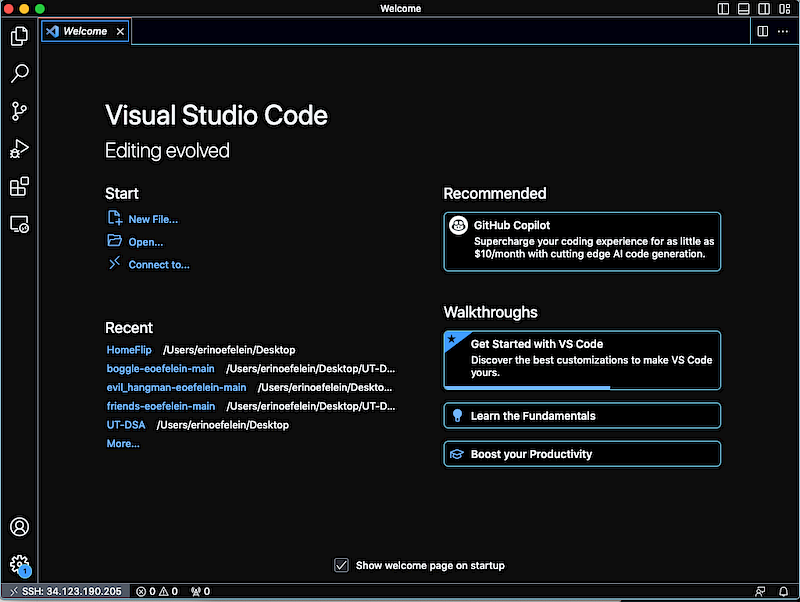
Select Connect to Host.

Select your SSH connection, as specified by the external IP address.
Et voila! We have our remote environment set up, allowing us to connect to any folder on our remote server as if it were a local folder. Making for an extremely productive workflow.
Shut Down your Instance!
Thanks to Google’s compute resources, you’ve optimized your remote workflow. Very helpful, but expensive should you neglect to shut down your instance! Besides, stopping your instance, you may need to edit your VM instance for whatever reason. To do this, navigate to your virtual machine instance from within the Google Cloud Platform. Click on the instance name to access instance details. The details page will display various tabs, providing the ability to edit your instance. Should you wish to stop your instance altogether, click the stop button located at the top of the page. Once confirmed, it may take a minute for the status of the instance to indicate shutdown.
It’s important to note that because disk storage is still associated to your GCP virtual machine instance, stopping it will not prevent fees. To avoid being charged, you may consider deleting the instance, which removes all resources associated with it.
Conclusion
Here, we’ve provided a guide on how to:
- Provision a GCP VM instance
- Generate an SSH key-pair using the Google Cloud SDK
- Set up your local VS Code to connect to the previously provisioned GCP VM instance
- Modify (edit, stop, etc.) VM instance
Thanks for reading!


