
Reading Environment Variables In NodeJS REST API
Learn 5 ways with an example project

Reading environment variables is one of the most common things that we do when we are building apps. It doesn’t matter whether you are developing front end app or backend API you have so many variables that should be outside of your application source code that makes your app or API more configurable. For example, if you want to hide logger statements in production or do something else based on the environment you can pass this as an environment variable. If you want to change later all you need to change in one place.
In this post, we will see multiple ways to do this we can use webpack DefinePlugin, dotenv, or just pass arguments when running node.
- Example Project
- Passing as arguments
- With dotenv library
- Using dotenv for Different Environments
- With Webpack DefinePlugin
- Using DefinePlugin for Different Environments
- With Webpack EnvironmentPlugin
- With DotenvPlugin Plugin
- Summary
- Conclusion
Example Project
Here is an example project simple user API where you get a list of users with Get request and save a user with the post request. Since we are focussing on the Node.js rest API environment variables, let’s go with the simple API. Let’s clone the project and run it on your local machine
// clone the project
git clone https://github.com/bbachi/prod-ready-node-rest-api.git
// install and run the project
npm install
npm run start:dev (with nodemon)Passing as arguments
First, all the environment variables can be accessed in the code with the env on the process object like this process.env.PORT. For example, look at the below files: index.js and logger.js.
We are reading PORT in the index.js file so that we can pass PORT on which nodejs server listens. We are also passing default port number 3070 that can be used if the PORT is not passed via the environment variable.
In the logger.js file, we are reading the ENVIRONMENT from the environment variables so that we can show logger statements depending on the environment we are running.
all we need to do is pass arguments when running starting the API line below.
PORT=3080 ENVIRONMENT=development node index.js
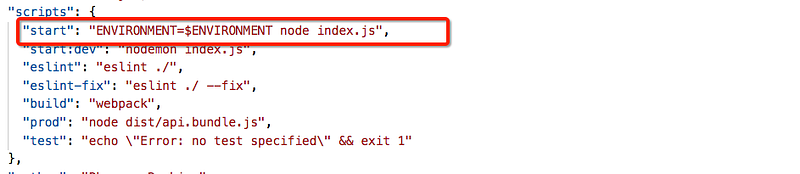
If you want to pass these variables to the package.json and work with npm scripts we have to do in this way. First, we need to add these in the scripts section like below

Then, use this command to send those variables while running npm scripts
// passing environment varibales
PORT=3000 ENVIRONMENT=development npm startPORT=6000 ENVIRONMENT=production npm start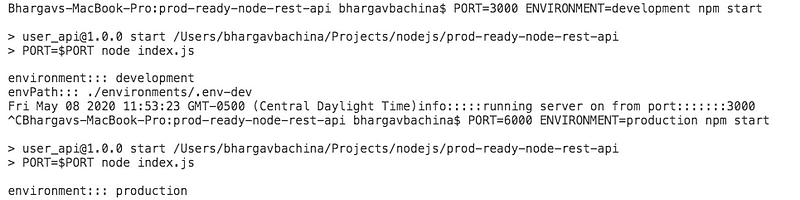
With dotenv library
Dotenv is a zero-dependency module that loads environment variables from a .env file into process.env. Storing configuration in the environment separate from code is based on The Twelve-Factor App methodology.
The first step is to install this library npm install dotenv and put .env file at the root location of the project
We just need to put this line require('dotenv').config() as early as possible in the application code as in the index.js file.
you can just start the application with this command npm start

Using dotenv for Different Environments
We have just seen how to read environment variables with dotenv but the problem with above is that it doesn’t work for different environments since you have only one .env file loaded every time.
Let’s imagine we have three different environments development, test, and production. First, we need to define three .env files for three environments like below under the environments folder.

You need to pass the ENVIRONMENT variable with the start script ENVIRONMENT=production npm start
In the index.js file, load the appropriate env file based on the environment.
Here is the demo of how we can use dotenv for different environments. First, we run the command for the test environment, and then for the development environment, you can see how we can read environment variables for different deployments.
With Webpack DefinePlugin
The DefinePlugin allows you to create global constants that can be configured at compile time. This can be useful for allowing different behavior between development builds and production builds. You can find more here.
We need to place this in the plugins section of the webpack.config.js file. Let’s add all the variables that we have in the .env file. Here is the updated one.
All the defined variables in the plugin are available as global constants in the application code. Check the modified index.js file below
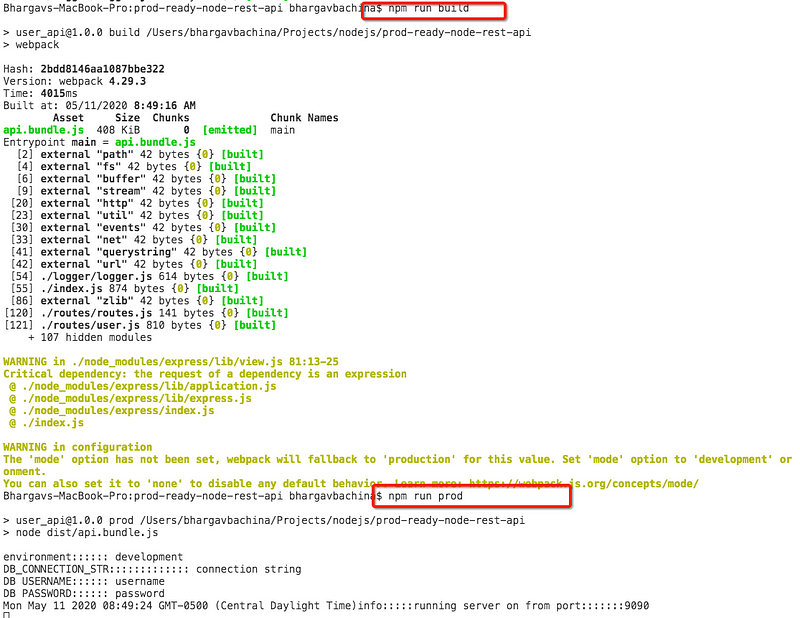
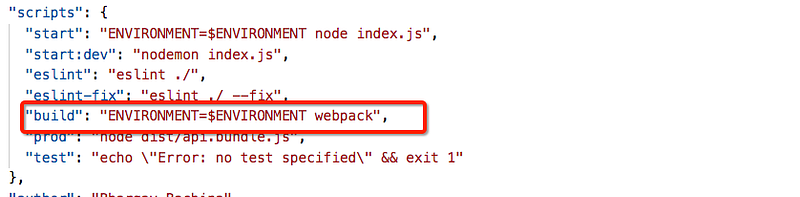
It’s time to build the project with a webpack. When you build the project with the command webpackall the code is compiled and put into this folder /dist Here is the scripts section of package.json.
Run this command npm run webpack to build the project and run this command npm run prod to run the app.
Using DefinePlugin for Different Environments
There are two ways we can use webpack DefinePlugin for different environments. Use conditional statements in webpack.config.js and Use different webpack files.
Use Conditional Statements
You can use conditional statements in the webpack.config.js file like below. We can check the environment and pass environment variables to the plugin.
We have to change the build script to take the ENVIRONMENT that we are building and pass that while building different environments.
Use Different Wepack Files
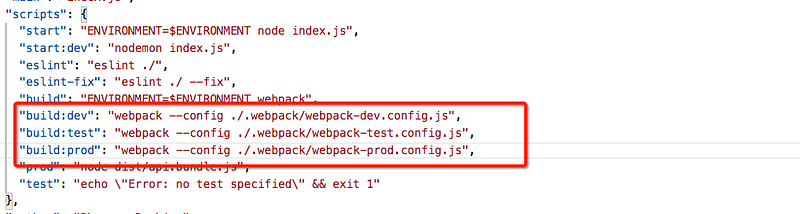
We can use different webpack files like one for development and another for production and change the scripts section accordingly. You can have a separate folder for all the files like below.

You have to change the build scripts accordingly.
In this way, you have a separate file for each environment. You can choose either way depending on your project.
With Webpack EnvironmentPlugin
It is very similar to DefinePlugin. The only difference is that all the keys defined in this plugin are all available on process.env object. You don’t have to use JSON.stringify() as well.
If you look at the below webpack.config.js file we are not using JSON.stringify() on default values and these variables are available on the object process.env.
With DotenvPlugin Plugin
We have seen how dotenv work there is a plugin also that can work with a webpack. But, this is a third-party plugin that you need to install it before using it. Install it with the following command.
npm install dotenv-webpack --save-devHere is the configuration file which uses this plugin. This plugin takes the path for the .env file. We already defined three files in the earlier example use one of the files. In this case, I am using the .env-dev file.
Once just run this command to build the project.
webpack --config webpack-dotenvplugin.config.js
With both these plugins (EnvironmentPlugin, DotEnvPlugin), we can build for different environments as we did in the above section Using DefinePlugin for Different Environments.
Summary
- Reading environment variables is one of the most common things that we do when we are building apps.
- All the environment variables can be accessed in the code with the env on the process object like this
process.env.PORT. - You can pass environment variables while running the node command like this
PORT=3000 node index.jsane the PORT can be available in the application code as process.env.PORT. - But, the above solution doesn't work well when you have more environment variables like 20 or so
- With the dotenv library, you can define all the variables in the .env file and load it in the application code with this require(‘dotenv’).config() all the variables are available on process.env object.
- With the webpack DefinePlugin plugin, you can define all the environment variables on the webpack.config.js file. When you build the project with a webpack all the variables are available to the application code as global constants.
- With the webpack EnvironmentPlugin plugin, you can define all the environment variables on the webpack.config.js file. When you build the project with a webpack all the variables are available to the application code on process.env object.
- There is a third-party DotEnv Plugin that can work with Webpack. If we use this plugin you don’t have to use require(‘dotenv).config() in the application code.
Conclusion
Choose any of these ways depending on your project setup.


