
React router tutorial

What is a react router ?
React Router allows for the development of single page applications (SPA’s) by establishing a dynamic routing system through the web app. It implements a component-based approach by rendering the components depending on the route defined in the URL.
Ok ok , so now how do I get started ?
Well it’s simple! Lets walk through an example together :
- To begin , let’s open up our terminal and create a react — app . I’m calling mine “routing” : npx create-react-app routing
- Now, in order to use react router we need to install it’s package using NPM : npm install react-router-dom
- Next, let’s locate our App.js file. Go ahead and clear everything inside the return statement except a single opening and closing div tag . As such:
import React from 'react' ;function App(){
return( <div>
</div>
);
}
Export default App ; 4. Now let’s move over to our src file and create a folder called “Components”. Inside of this we want to add :
- Navbar folder → navbar.js , navbar.css
- Home folder → home.js , home.css
- About folder → about.js
- Contact folder → contact.js
In each of the .js files you can add a simple
This is the ___ page
to help with identification.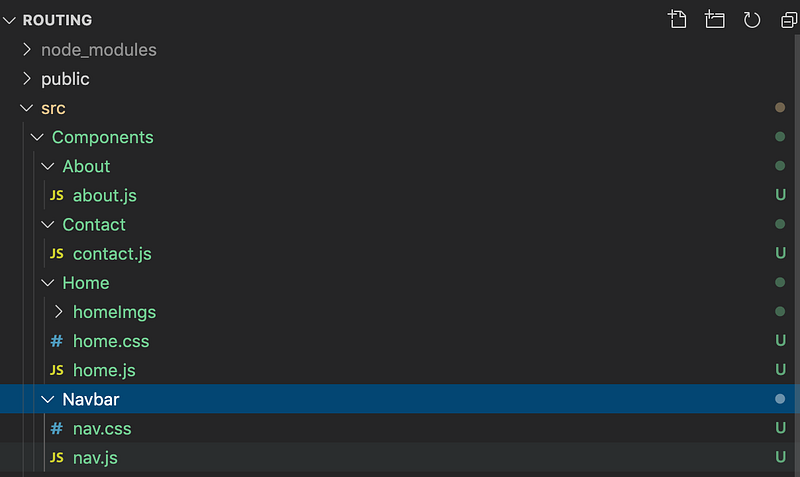
5. Alright , lets transition back to the App.js file and at the top where the import statements are located we want to import our components , BrowserRouter as Router , Switch , and Route :
import Nav from './Components/Navbar/nav' ;import Home from './Components/Home/home' ;import About from './Components/About/about' ;import Contact from './Components/Contact/contact' ;import {BrowserRouter as Router , Switch , Route } from 'react-router-dom' ;BrowserRouter as Router is allowing us to use
6. Next inside of the return statement we want to :
- Wrap the whole div with the
tags so that it can get rendered. This is the component that does all the logic of displaying various components that you provide it with. - Next call the
- Now write an opening and closing
- Inside of it we want to implement
function App() {return (<Router>
<div><Nav/><Switch><Route path = "/" exact component={Home}/><Route path = "/about" component={About}/><Route path = "/contact" component={Contact}/></Switch></div>
</Router> );}
export default App;*We add exact to the route tag so the app only renders the component when there is an exact match otherwise it gets confused and loads the first one to match the route , and this can be hard to deal with.
7. As you may have noticed our site is only navigable using the URL . In Order to get it to be clickable we need to import {Link} from react-router-dom inside of our navbar.js component.
8. Next we need to define a
- and inside , using the
- tags , we can list out the Home , About , and Contact and wrap each of them in a tag and add a pathway as such :
import React from 'react';import './nav.css' ;import {Link} from 'react-router-dom' ;function Nav() {return (<nav className = "navbar sticky"><ul className="ul--navlinks"><Link to ="/home"><li>HOME</li></Link><Link to = "/about"><li>ABOUT</li></Link><Link to = "/contact"><li>CONTACT</li></Link></ul></nav> );}
export default Nav;9. Done ! There you have it , Your site now has clickable routes!
Conclusion
There we go , we did it ! We have successfully established a react router that links to various component based pages that’s organized and easily modifiable . Hope you enjoyed this tutorial , and good luck on your future react endeavors : ) !


