
React Crash Course — Deploying to Netlify
Part 12: Getting a React application ready for deployment on Netlify
Live dev notes taken throughout the following tutorial by Dennis Ivy — React JS Crash Course
In the final part of this crash course series, we’ll look at building our React application so that it’s ready for deployment. In the process, we’ll look at testing the build as well as ways of deploying to Netlify and handling errors that may come up.
Building our React Application
Before we deploy the React application onto Netlify, we’ll need to test that when we build the application it works the same as in development. To do this, we’ll first run the following command:
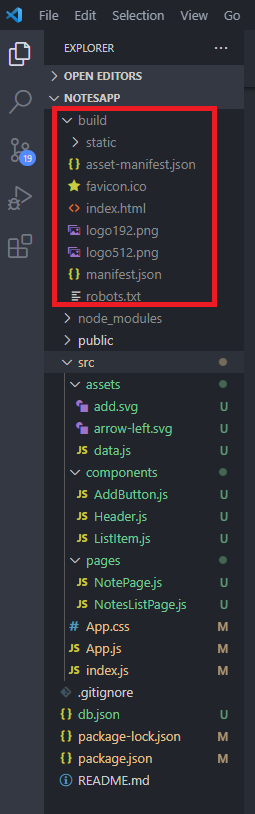
npm run buildThis will create an optimised version of the application which is made up of a series of HTML, CSS, and JS files (also known as static files) which will live inside of the newly created build folder in our project.
With our React application built, we can test that it’s actually working by first installing the serve package globally.
npm install -g serveWith the static server installed, let’s test our built project using the following command:
serve -s buildHowever, if you still currently have your development project running on the default PORT 3000, you can specify a port to serve the built project using the -p flag. In this case, it’s been set to PORT 5000
serve -s build -p 5000Note: any changes we make to our working files located in the src folder will not automatically appear in our built application. In order to see these changes, we would need to rebuild our application to rebundle and replace our current static files.
With our built project successfully served and tested, let’s deploy to Netlify. Make sure to have an account with Netlify before we get started.
Netlify Deployment Option 1 — Drag and Drop
The easiest (but the least efficient way — long term) of deploying to Netlify is to create a new project, then drag and drop the build folder directly into the project.
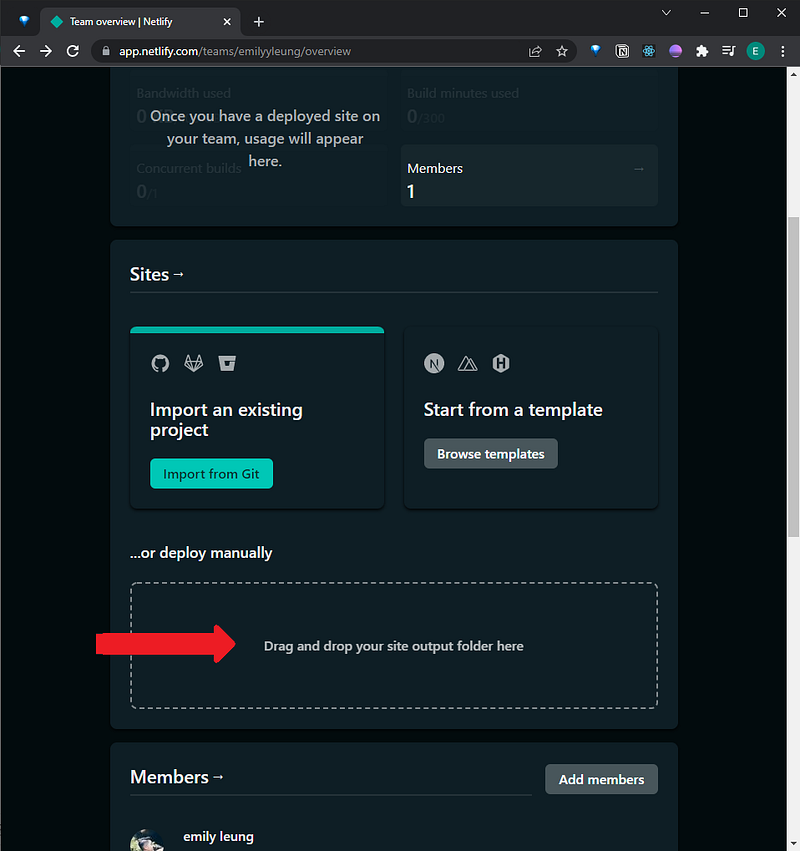
Once it’s finished uploaded, the site will automatically generate, ready to go!
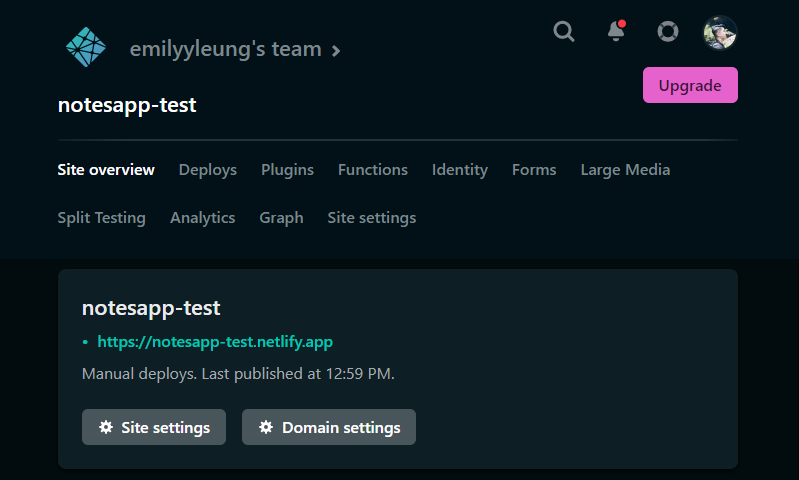
Note: When a site is created on Netlify, it will be created under a random URL. But you are able to change this via the domain settings. Just make sure the name you want isn’t already taken!
If your local JSON server is still running in the background, the deployed application will continue to pick up the notes. Otherwise, by default, if this site was shared with other people, they would not be able to use the application properly — because they cannot connect to your local server on PORT 8000.
Netlify Deployment Option 2 — Deploying from Github
The second method takes a little longer to set up but is the ideal process for deploying over a long period of time when changes are made.
In order to begin, you’ll need to have your project code committed to a Github repository. You can also do this by having created an empty Github repository which will then provide a list of instructions to use the Github CLI to push existing code to the repository.
From here, we’ll head back to Netlify and create a new project by selecting “Import from an existing project”.
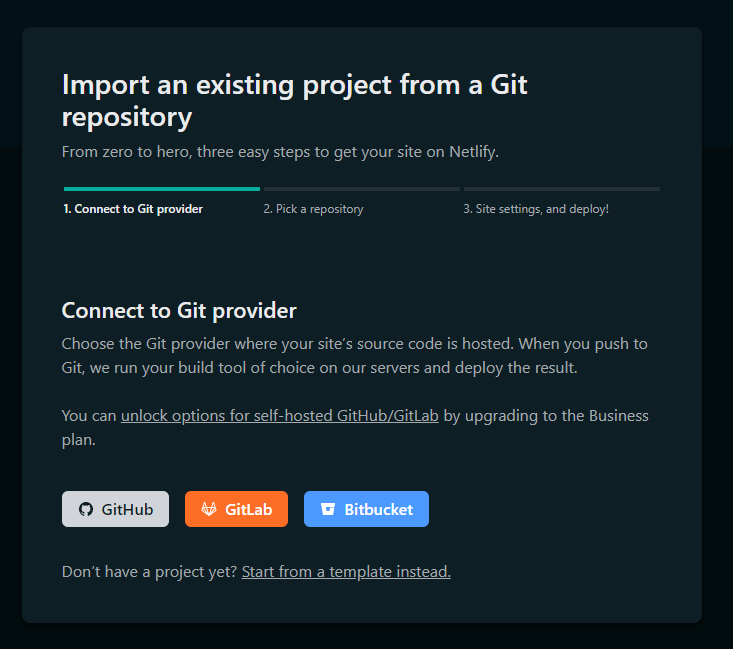
In this case, we’ll choose Github where it will walk us through signing into Github and providing Netlify permission to access our projects. In my case, I gave it permission for only the notes application repository.
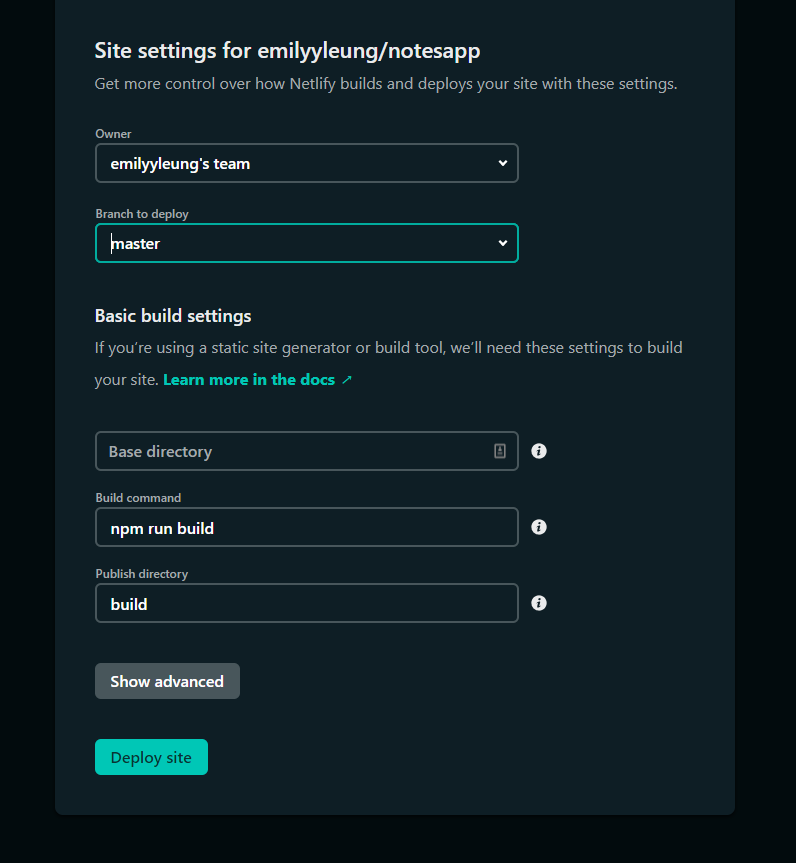
Next, we’ll be greeted with the site settings for our application. Scrolling down, we’ll see that Netlify has provided us a build command — the same command we use for building our React application. What this means is that when we deploy the application, it will call the build command so that we don’t have to. All it needs is the project files we’ve been working with so far. Additionally, since I’ve included a .gitignore file for node, it already had a built-in reference to disregard the build folder when I push any changes to my Github repository.
I also made sure to choose the production branch (which shows as master in the screenshot). That way I can keep the build workflow separate when working on the main/master branch.
At this point, it makes sense to hit Deploy Site—which we are. But the thing is that Netlify will most likely return some errors (which are effectively warnings when we review them in development).
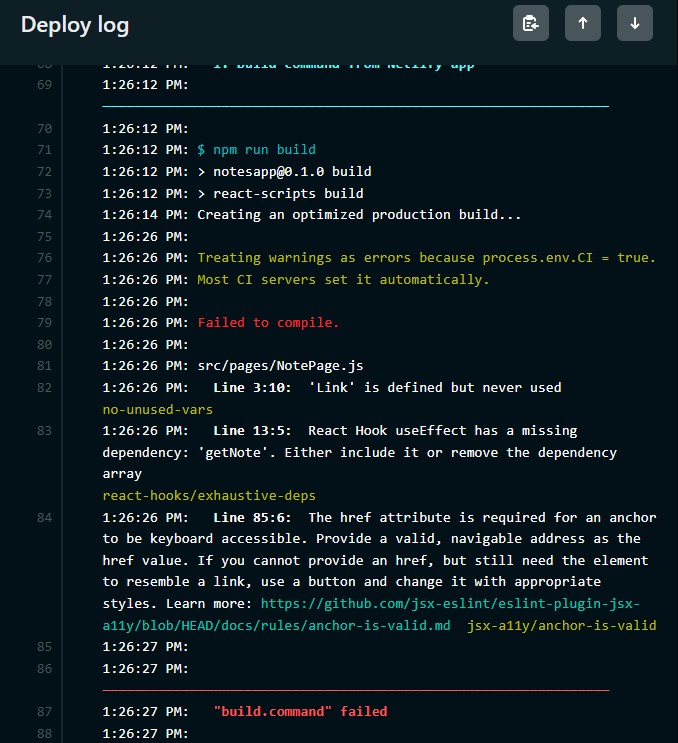
To fix this, we’re going to update the continuous integration environment variable provided by Netlify to false because it’s currently treating these warnings as errors. Anything as small as a package that isn’t used is considered a warning in React, therefore it will cause Netlify to treat it as an error in Netlify’s deployment process.
The purpose of these errors coming through from Netlify is to help us better maintain our code — but for a small test project, this isn’t a critical issue that needs to be addressed.
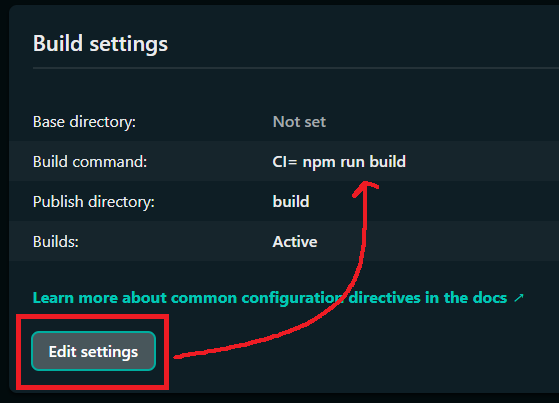
To make Netlify ignore these minor warnings, we’ll head over to:
Site settings > Build & deploy > Build settings
Inside of our build command, we’ll include the following at the beginning:
CI= npm run buildThis will effectively set continuous integration to false.
With the build command updated, we can now redeploy the application.
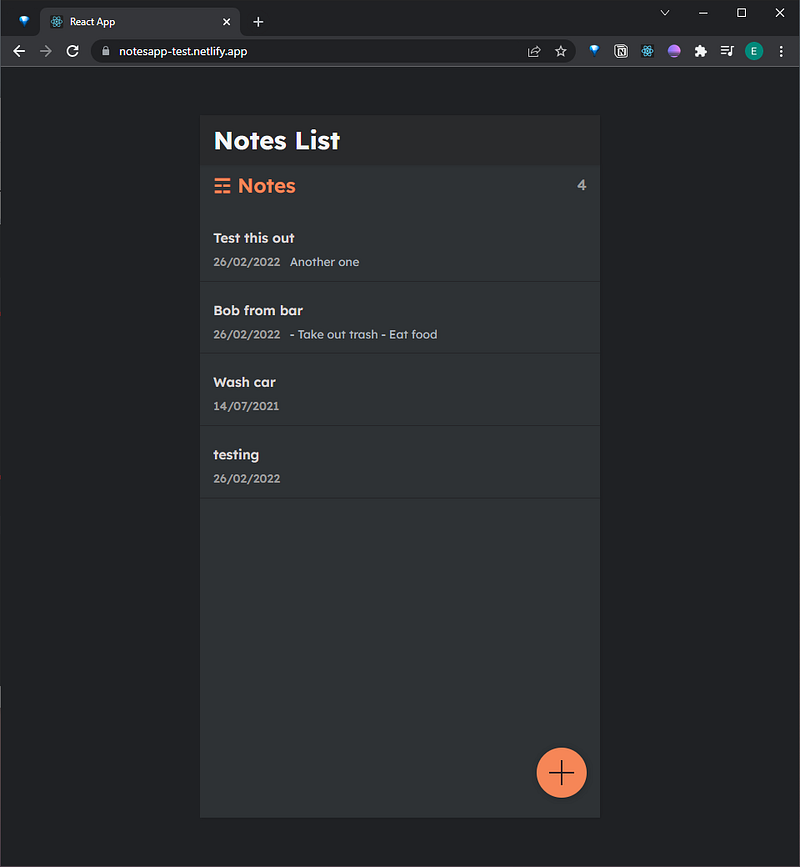
Here’s my live demo:
Here’s my Github repo:
Concluding Thoughts
This entire tutorial series focused on the creation of a simple notes app built with create-react-app. In the process, we learnt how to create React components, pages, and routes that work with JSON data. To test that this application could work with a backend, we created a mock API server with the json-server package.
Because the backend was created using a mock API server that stores the data in a JSON file, the final application we deployed isn’t considered to be fully functioning. Instead, it is only able to work when there’s a local JSON server open on PORT 8000.
Of course, another alternative would be to change the source from a local JSON server to using the localStorage API which I’ve written about in “Sticky Notes — Business Logic” here:
More content at PlainEnglish.io. Sign up for our free weekly newsletter. Follow us on Twitter and LinkedIn. Join our community Discord.