
React:CMS Project Using Playwright
Introduction In modern web development, it is crucial to ensure the reliability and responsiveness of the user interface. Ant Design, a popular React UI library, provides a solid and beautiful foundation for building complex interfaces. However, as the application grows, manual testing becomes unrealistic. At this time, Playwright, a powerful end-to-end testing tool, becomes particularly important. By automating UI testing with Playwright, we can ensure that the quality and integrity of the application are maintained with every code change.
This article will guide you how to configure Playwright in your Ant Design project

Quickly create a CMS project
Use the popular CMS framework: antd pro, you can quickly create a front-end project through the scaffolding provided by the framework, install the antd pro scaffolding globally and create a project
  npm i @ant-design/pro-cli -g
  pro create antd-playwright

  🚀 Do you want the full amount or a simple scaffolding? (use arrow keys)
❯ simple
  complete
Create a successful installation project dependency
 cd antd-playwright
 npm install
Then start the project
npm run start
Then open the browser and visit: http://localhost:8000, the login page will be displayed

Login account and password:
- username : admin
- password : ant.design
You will need your account and password to log in to playwright later.
Install Playwright
Install Playwright dependencies
npm install --save-dev playwright
If you are using TypeScript, you also need to install @playwright/test as the testing framework:
npm install --save-dev @playwright/test
Create a configuration file playwright.config.ts
// playwright.config.ts

import { defineConfig, devices } from "@playwright/test";

export default defineConfig({
  testDir: "./tests",
  use: {
    baseURL: "http://localhost:3000",
  },
  projects: [
    {
      name: "chromium",
      use: {
        ...devices["Desktop Chrome"],
      },
    },
  ],
});
Now write a use case to complete the login
// tests/login.spec.ts
import { test, expect } from "@playwright/test";
test("login cms", async ({ page }) => {
await page.goto("http://localhost:8000");
await page.fill("#username", "admin");
await page.fill("#password", "ant.design");
const button = await page.locator("button.ant-btn");
await button.click();
await expect(page).toHaveURL("http://localhost:8000/welcome");
await page.waitForSelector("text=Welcome"); // The home page loaded when text about "wait welcome" is appearance
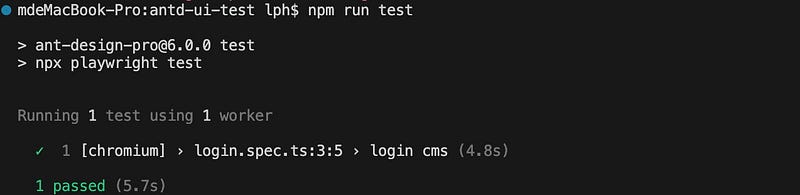
});Run playwright test
npx playwright test
Run successfully:
During the first run, you will be prompted to install playwright:
  ╔═════════════════════════════════════════════════════════════════════════╗
    ║ Looks like Playwright Test or Playwright was just installed or updated. ║
    ║ Please run the following command to download new browsers:              ║
    ║                                                                         ║
    ║     npx playwright install                                              ║
    ║                                                                         ║
    ║ <3 Playwright Team                                                      ║
    ╚═════════════════════════════════════════════════════════════════════════╝
run
npx playwright install
npx will install the environment required for Playwright to run into the cache file, thus avoiding dependency version conflicts caused by different project Playwright versions
auth.setup
Since many tests for cms require login, you can use setup to perform the login operation in advance. Subsequent use cases can set the login state through dependencies setup to avoid repeated writing of login functions.
Login encapsulation into auth.setup
// tests/auth.setup.ts

import { test as setup, expect } from "@playwright/test";

const authFile = "playwright/.auth/user.json";

setup("authenticate", async ({ page }) => {
  await page.goto("http://localhost:8000/user/login");
  await page.fill("#username", "admin");
  await page.fill("#password", "ant.design");
  const button = await page.locator("button.ant-btn");
  await button.click();

  await expect(page).toHaveURL("http://localhost:8000/welcome");

  await page.waitForSelector("text=Welcome"); // 等待 welcome 页面的标志性元素
  await page.context().storageState({ path: authFile });
});
Here is the file: playwright/.auth/user.json, to store user information after successful login, such as: cookies, tokens, etc. after successful login, you need to manually create the folder playwright/.auth
mkdir -p playwright/.auth
echo $'\nplaywright/.auth' >> .gitignore
You need to set ignore in git to avoid using the same login state when generating or running test cases in the team
Modify playwright.config.ts configuration
// playwright.config.ts

import { defineConfig, devices } from "@playwright/test";

export default defineConfig({
  testDir: "./tests",
  use: {
    baseURL: "http://localhost:3000",
  },
  projects: [
+    {
+            name: 'setup',
+            testMatch: /auth\.setup\.ts/,
+     },
    {
      name: "chromium",
      use: {
        ...devices["Desktop Chrome"],
+         storageState: 'playwright/.auth/user.json'
      },
+      dependencies: ['setup'],
    },
  ],
});
Create a new test case to view the home page after successfully logging into the cms, and simulate clicking on the nav search Tableto display Enquiry Form
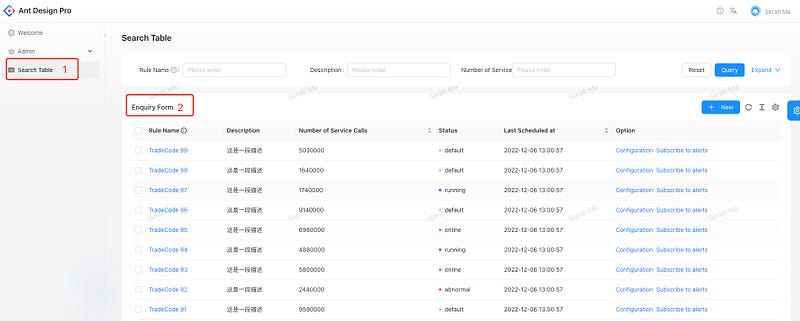
// tests/home.spec.ts

import { test, expect } from "@playwright/test";

test("enquiry table", async ({ page }) => {
  await page.goto("http://localhost:8000/welcome");
  const enquiryNavItem = await page.locator(
    '.ant-pro-base-menu-inline-item-text:has-text("Search Table")'
  );
  await enquiryNavItem.click();

  const textLocator = page.locator(
    '.ant-pro-table-list-toolbar-title:has-text("Enquiry Form")'
  );
  await expect(textLocator).toBeVisible();
});
Run successfully:
Running 2 tests using 1 worker

  ✓  1 [setup] › auth.setup.ts:5:6 › authenticate (4.7s)
  ✓  2 [chromium] › home.spec.ts:5:5 › enquiry table (2.5s)

  2 passed (9.0s)
UI-mode
When some use cases need debugging, you can turn on UI mode, the main instructions
npx playwright test --ui
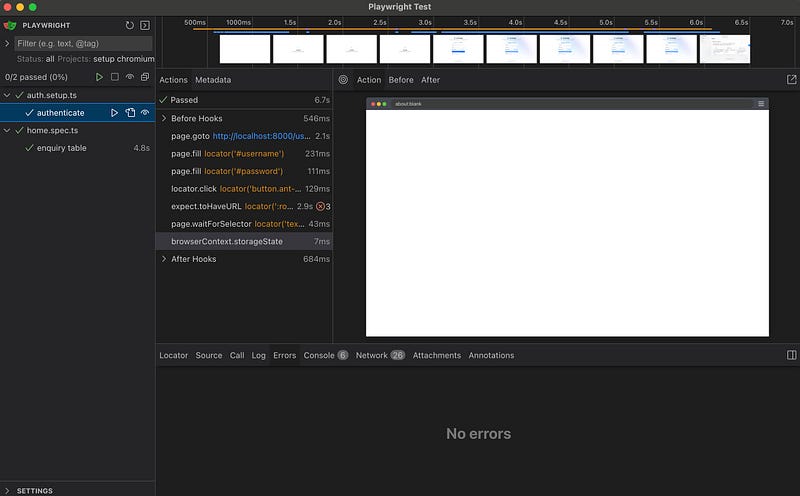
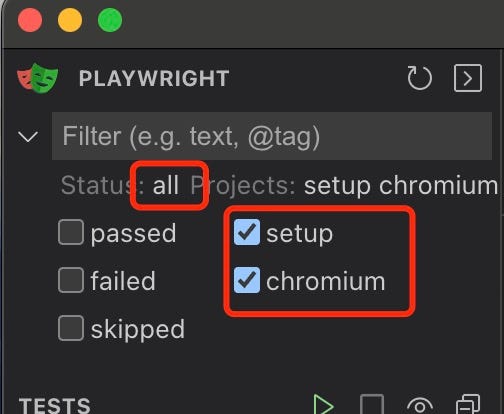
The green triangle on the left is for startup and test cases, where you can choose to start setup or test cases
Click on the use case to see the specific execution

Mock interface return data
In order to ensure the stability of the front-end page test, it is very important to keep the interface with the same data output. You can use mock to keep the interface always returning the same data.
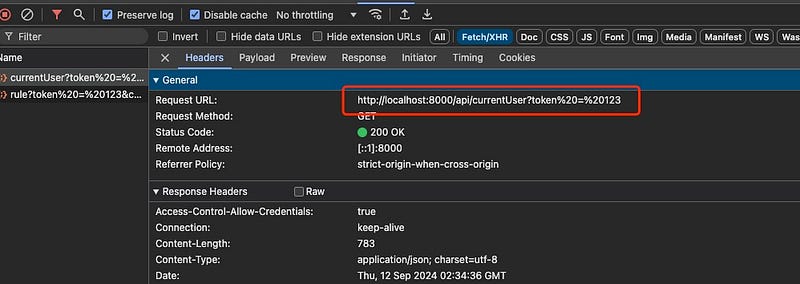
Use the page.route method to mock the interface: http://localhost:8000/api/currentUser?token=xxx , mainly modify the name in the response to “neo-luo”
// tests/home.spec.ts
const currentUserMock = {
"success": true,
"data": {
- "name" : "Serati Ma"
+ "name" : "neo-luo"
...
}
}
test('current user', async ({ page }) => {
await page.route('*/**/api/currentUser*', async (route) => {
await route.fulfill({
status: 200,
contentType: 'application/json',
body: JSON.stringify(currentUserMock),
});
});
await page.goto('http://localhost:8000/welcome');
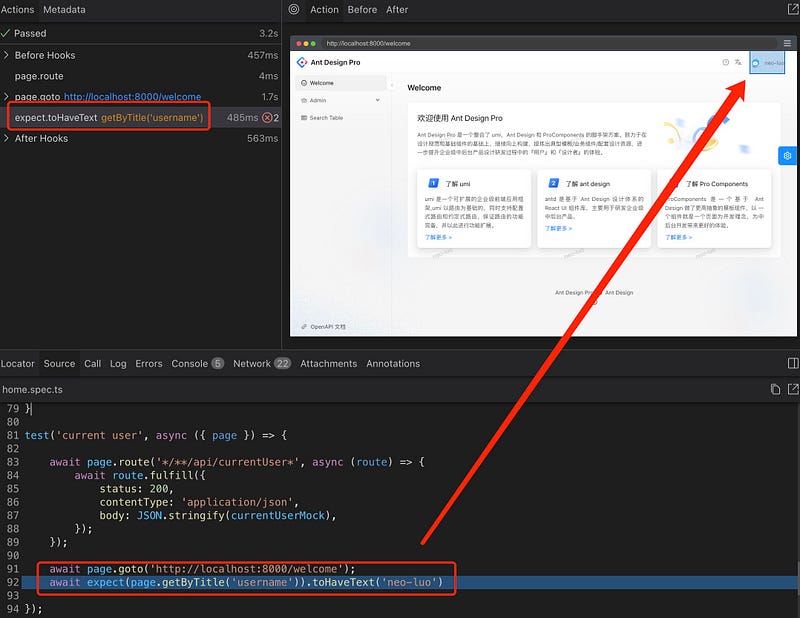
await expect(page.getByTitle('username')).toHaveText('neo-luo')
});page.getByTitle is used here, and you need to add title to the corresponding code tag
// src/components/RightContent/AvatarDropdown.tsx

...
  return (
    <HeaderDropdown
      menu={{
        selectedKeys: [],
        onClick: onMenuClick,
        items: menuItems,
      }}
    >
-     {children}
+     <span title="username">{children}</span>
    </HeaderDropdown>
  );
View in UI modal mode, mock data is successful
In order to make the code look concise and facilitate other test cases to use mock data, you can store it in a json file
// tests/mocks/currentUser.json

{
  "success": true,
  "data": {
    "name": "neo-luo",
    "avatar": "https://gw.alipayobjects.com/zos/antfincdn/XAosXuNZyF/BiazfanxmamNRoxxVxka.png",
    "userid": "00000001",
    "email": "[email protected]",
    "signature": "海纳百川,有容乃大",
    "title": "交互专家",
    "group": "蚂蚁金服-某某某事业群-某某平台部-某某技术部-UED",
    "tags": [
      {
        "key": "0",
        "label": "很有想法的"
      },
      {
        "key": "1",
        "label": "专注设计"
      },
      {
        "key": "2",
        "label": "辣~"
      },
      {
        "key": "3",
        "label": "大长腿"
      },
      {
        "key": "4",
        "label": "川妹子"
      },
      {
        "key": "5",
        "label": "海纳百川"
      }
    ],
    "notifyCount": 12,
    "unreadCount": 11,
    "country": "China",
    "access": "admin",
    "geographic": {
      "province": {
        "label": "浙江省",
        "key": "330000"
      },
      "city": {
        "label": "杭州市",
        "key": "330100"
      }
    },
    "address": "西湖区工专路 77 号",
    "phone": "0752-268888888"
  }
}
Current user use case code modification
// tests/home.spec.ts

import { test, expect } from '@playwright/test';
+ import fs from 'fs';
+ import path from 'path';

test('current user', async ({ page }) => {

+    const mockCurrentUserFilePath = path.resolve(__dirname, './mocks/currentUser.json');
+    const mockCurrentUserResponse = JSON.parse(fs.readFileSync(mockCurrentUserFilePath, 'utf-8'));

    await page.route('*/**/api/currentUser*', async (route) => {
        await route.fulfill({
            status: 200,
            contentType: 'application/json',
            body: JSON.stringify(mockCurrentUserResponse),
        });
    });

    await page.goto('http://localhost:8000/welcome');

    await expect(page.getByTitle('username')).toHaveText('neo-luo')

});
screenshot
Snapshots can quickly record the overall structure and style of a page. If there are changes in the style, it will not be accepted. Write a home page snapshot use case
// tests/home.spec.ts
+ test('home screenshot', async ({ page }) => {
+    await page.goto('http://localhost:8000/welcome');
+    await expect(page).toHaveScreenshot({
+        fullPage: true,
+    });
+ });
Here fullPage = true, which means capturing the entire screen. The default is fullPage = false, which captures the current visible range. Since there is no snapshot for comparison during the first run, an error will be reported. You can pass the second run.
Now modify Ant Design Pro in the home page
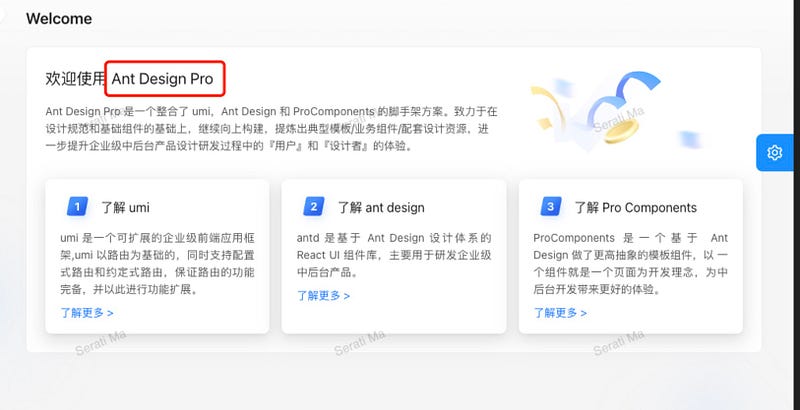
Change to Hello World
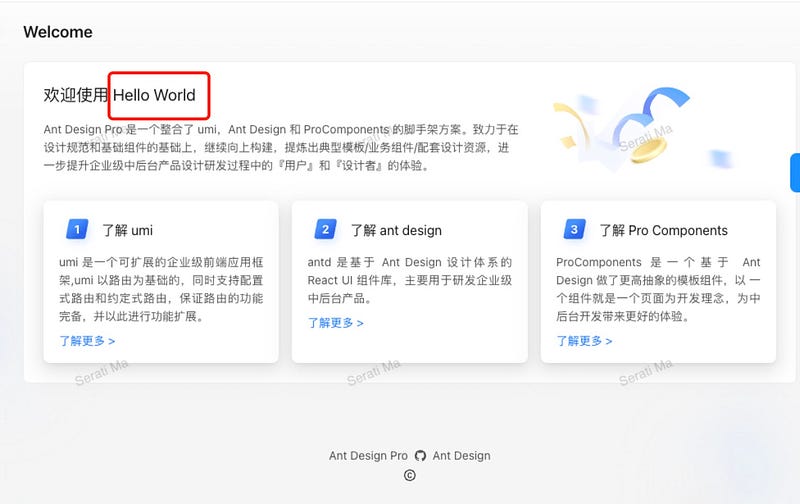
Run the test case again: home screenshot. The differences will be marked. For specific error information, see the xxxdiff.png image in /test-results/home-screenshot-chromium.

- If you need to make the modified page a new snapshot, you can add -u to the test command.
npx playwright test -u
- If you update the specified file snapshot (path/to/test-file.spec.ts is the test case file name that needs to be updated)
npx playwright test path/to/test-file.spec.ts -u
- Update the specific use case (snapshot test is the use case name)
npx playwright test -g 'snapshot test' -u
in conclusion
Using Playwright in a CMS project built with Ant Design Pro simplifies the process of automating UI tests and maintaining the reliability of your application. The ability to quickly create an Ant Design project using the provided CLI makes it easy to get started with development. Adding Playwright as a testing framework ensures that, as your project scales, you can maintain quality through robust testing strategies.
By configuring Playwright with reusable authentication states, mocking API responses, and verifying core interactions in the CMS interface, such as login and navigation, you ensure that essential features function correctly across various scenarios. Snapshot testing further enhances this by allowing you to capture the entire UI’s state, ensuring that any visual or structural changes are easily identified.
Mocking APIs using page.route() guarantees that tests are stable and not reliant on backend changes. If your UI evolves or new features are introduced, updating snapshots allows you to adapt the testing process efficiently. Overall, integrating Playwright ensures that even complex CMS systems remain stable and performant as you iterate and expand.
By using the setup method to handle authentication, combined with Playwright’s flexible API for interactions and assertions, this testing solution becomes invaluable in keeping your CMS project bug-free and scalable.


