
Quickstart with Traefik v2 on Kubernetes
5-minute setup of Traefik, Let’s Encrypt, and Cloudflare
Traefik 2.0 hit GA in September 2019, releasing a host of new features including TCP support with SNI routing, middlewares, canary/traffic mirroring, and IngressRoute Kubernetes CRD. While the team at Containous (the creators of Traefik) did a great job laying out the migration steps from v1 to v2, there’s not a ton of user guides for Kubernetes currently. Besides the “Traefik & CRD & Let’s Encrypt” user guide on the documentation website (which uses k3s docker image), I found myself referencing more extensive Docker tutorials around the web to apply to my Kubernetes cluster. So here is a quick 5-minute end-to-end setup of Traefik, Let’s Encrypt, and Cloudflare to handle HTTPS requests on Kubernetes.
Before we begin, if you need a refresher on Kubernetes Ingress Controllers, IngressRoute CRD, or a comparison of Traefik and other popular Ingress Controllers, please check out:
Prerequisites
To follow this tutorial, you will need a working Kubernetes cluster (e.g. minikube, GKE, EKS, AKS, or k3s) with Helm 3.x installed.
Add Traefik’s chart repository to Helm:
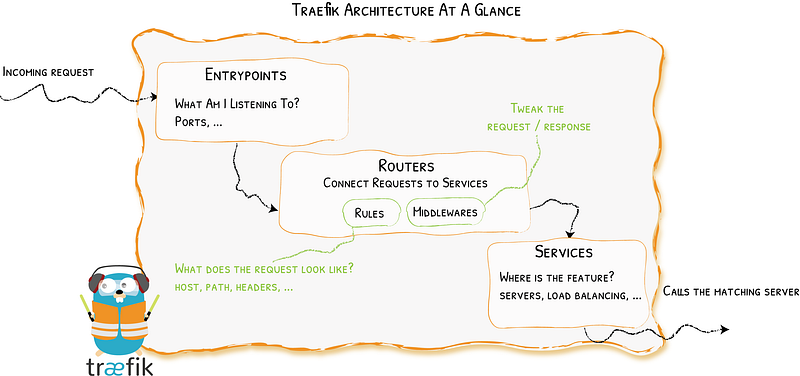
helm repo add traefik https://containous.github.io/traefik-helm-chartIf you are new to Traefik, here’s an overview of basic concepts:
- EntryPoints: listen to incoming traffic
- Routers: analyze incoming requests and connect to services
- Middleware: modify/update the request (e.g. rate-limiting, HTTPS redirect)
- Services: forwards request to corresponding servers/load balancers/applications
Finally, I’ll be using Cloudflare as the DNS provider, but you can also modify the guide with any of the Let’s Encrypt supported providers.
Let’s Encrypt Setup
Traefik v2 Helm chart bootstraps three EntryPoints:
- traefik on port 9000 (used for readiness and liveness probes)
- web on port 80 (http)
- websecure on port 443 (https)
With EntryPoints defined, we can extend the chart to use Let’s Encrypt as a certificate resolver and automatically generate and renew certificates for your domain.
Let’s define a certificate resolve named letsencrypt. Create a new YAML file called traefik-values.yamland add the following sections:
additionalArguments:
  - "--certificatesresolvers.letsencrypt.acme.email=<your-email-here>"
  - "--certificatesresolvers.letsencrypt.acme.storage=/data/acme.json"
  - "--certificatesresolvers.letsencrypt.acme.caserver=https://acme-v02.api.letsencrypt.org/directory"
  - "--certificatesResolvers.letsencrypt.acme.dnschallenge=true"
  - "--certificatesResolvers.letsencrypt.acme.dnschallenge.provider=cloudflare"
  - "--api.insecure=true"
  - "--accesslog=true"
  - "--log.level=INFO"
We are using the dnsChallenge option to generate ACME certificates, but you can also opt to use tlsChallenge or httpChallenge.
Cloudflare Setup
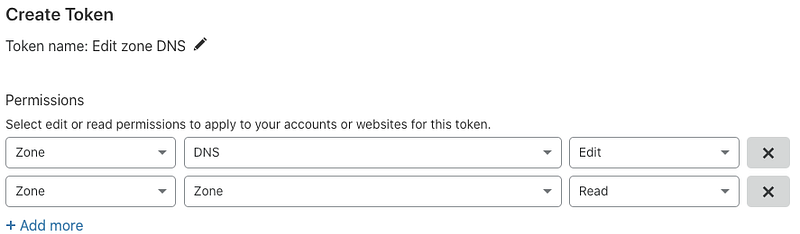
In order for Let’s Encrypt to use Cloudflare, it needs an API Token with DNS:Edit permissions. Under API Tokens section of your domain, click Create Token . Use the Edit zone DNS template or a custom token and give the following permissions:
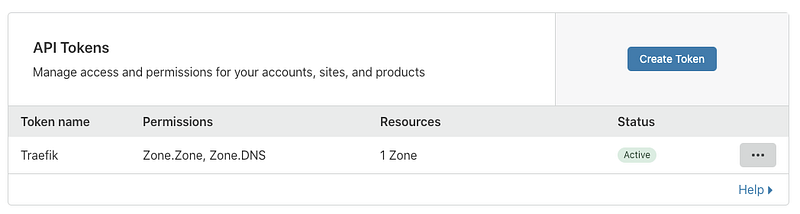
Once you have the token, the status should be Active
Now on Kubernetes, let’s create the secret so Traefik can mount it as an environment variable:
$ kubectl create secret generic cloudflare --from-literal=dns-token=<my-cloudflare-token-here>Finally, append to the env section to your traefik-values.yaml
env:
  - name: CF_DNS_API_TOKEN
    valueFrom:
      secretKeyRef:
        name: cloudflare
        key: dns-token
Installing Traefik
Now, install Traefik via Helm:
$ helm install traefik traefik/traefik -f traefik/traefik-values.yamlOnce the pods are healthy, you can access the Traefik dashboard by port-forwarding:
$ kubectl port-forward $(kubectl get pods --selector "app.kubernetes.io/name=traefik" --output=name) 9000:9000The Helm chart will also create a LoadBalancer to route traffic into Kubernetes. Take note of this IP address (or ELB DNS name on AWS) as we will need it to configure the DNS entry later.
Adding IngressRoutes
Finally, let’s add an IngressRoute to see Traefik in action. I’m going to use Grafana as an example service to expose via HTTPS.
Install Grafana via Helm:
$ helm install grafana stable/grafanaCreate a new file called grafana.yaml
apiVersion: traefik.containo.us/v1alpha1
kind: IngressRoute
metadata:
  name: grafana-ingress
spec:
  entryPoints:
    - websecure
  routes:
  - match: Host(`grafana.example.com`)
    kind: Rule
    services:
    - name: grafana
      port: 3000
  tls:
    certResolver: letsencrypt
Make sure to change the hostname based on your Let’s Encrypt settings and apply the changes:
$ kubectl apply -f grafana.yamlAs Traefik creates the new routing logic and generates the Let’s Encrypt certificate, switch back to Cloudflare and add the A Record (grafana) pointing to the IP address of Traefik’s LoadBalancer (or CNAME for ELB DNS entry).
Navigate to grafana.example.com and you should see an HTTPS-enabled Grafana dashboard:
Wrapping Up
Now that we have a basic example setup, look into enabling HTTPS redirect via middlewares or implementing IP whitelisting to protect access to Grafana. You can extend additional arguments in the YAML file or mount a config.toml via Helm.
To learn more about Traefik, check out the official documentation or look for support on the Traefik forum.


