
Quick CI-CD from Github to Prod with AWS ECR, ECS creating a serverless Docker container
There are so many ways to configure your project CI-CD pipeline when deploying to Amazon Web Services (AWS). In this tutorial, I will give the rundown of how to set up a serverless docker container using AWS ECR ECS that would be suitable as a starting point for a smaller size startup or MVP project.
There are a large number of products of AWS such as CodeDeploy, CodeCommit, S3, CodeBuilt, CodePipeline, EC2, SNS, etc. These products are a good fit for certain configurations for example to create a build and run tests against that built or a build that demands more resources.
However, there are many cases that your App doesn’t need that many resources and can be deployed as Elastic Container Service(ECS) using a serverless compute engine (AWS Fargate) — think shared virtual server vs EC2 dedicated server.
This configuration reduces costs but allows easily scaling, take a look, at a diagram of setting up GitHub using git action to deploy a serverless container on ECS;
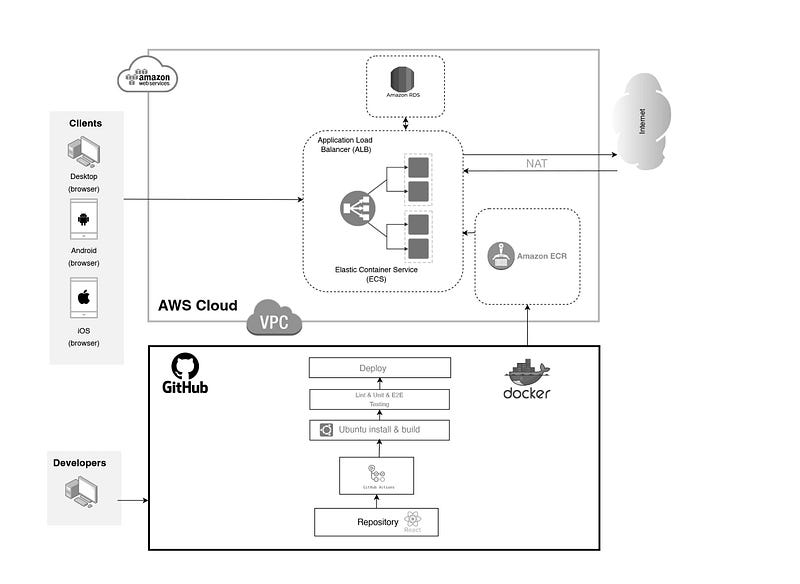
This opinionated CI-CD setup is quick and relatively simple but gives you the power of scaling only when needed and automating your deployment process;
Github Actions > Docker Image > ECR > ECS > AWS FargateThe setup we will create can be split into what we will do in Github, docker, and AWS;
Github — Setting up our project — Create a Git Action — Deployment using Git Action
Docker — Create a docker container
AWS — Get AWS Security Credentials — Set up AWS ECR — Set Task Definitions — Add ECS Cluster — ECS Service
Take a look.
Github
Setting up our project
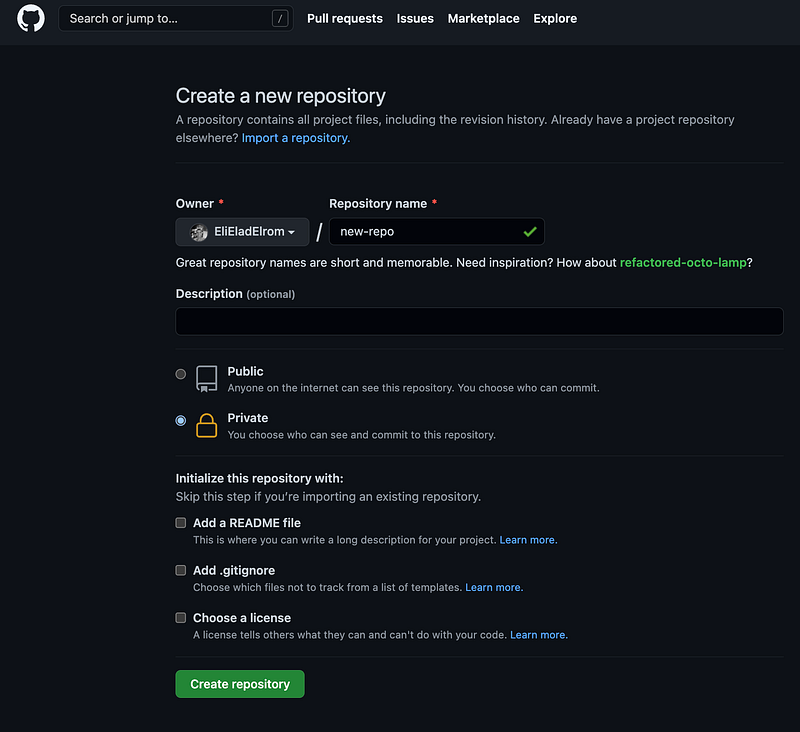
Create a new repo on Github and push the code into that newly created repo.
For the repo files, I will be using the Docker getting started project that can be found here: https://github.com/docker/getting-started
$ git clone https://github.com/docker/getting-started.git
$ cd getting-started
$ rm -rf .git
$ git init
Push existing files:
git remote add origin https://github.com/EliEladElrom/new-repo.git
git add . && git commit -m 'init upload'
git branch --set-upstream-to=origin/main main
git push --set-upstream origin main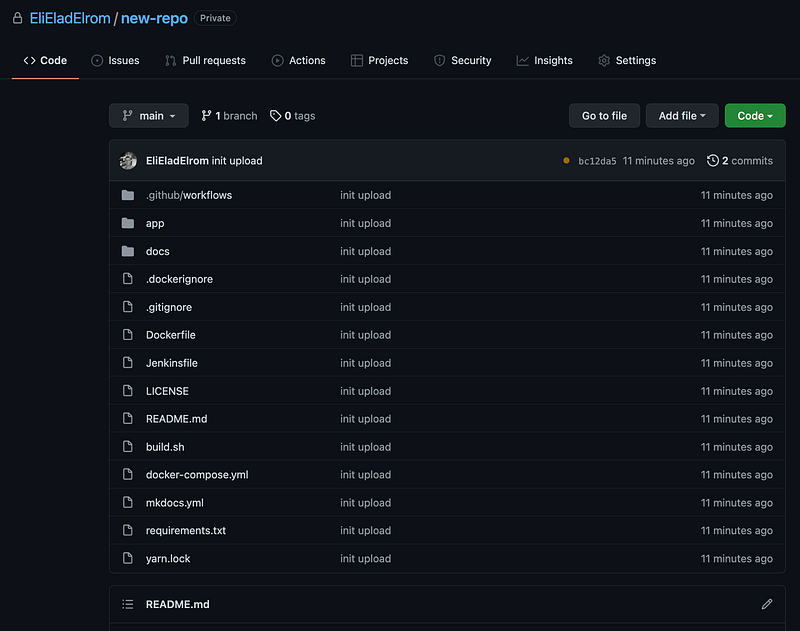
Docker
Now we can create a docker container (make sure docker is open)
docker build — tag latest .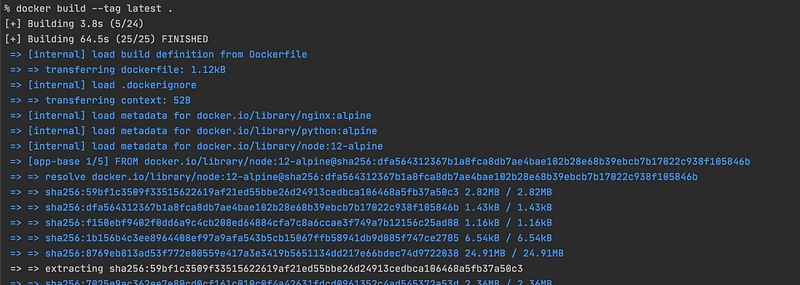
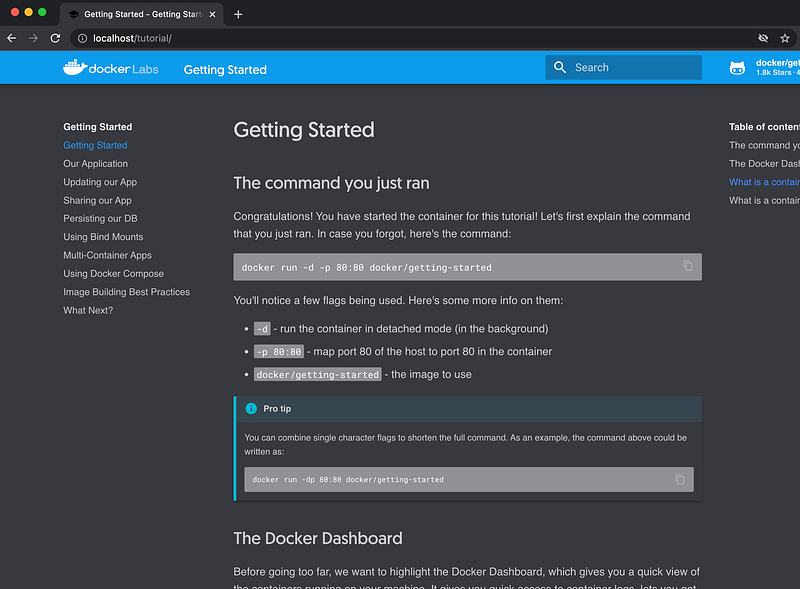
Run the container on port 80;
docker run -d -p 80:80 docker/getting-startedConfirm;
% docker imagesREPOSITORY TAG IMAGE ID CREATED SIZE
latest latest 772be3a09969 1 minutes ago 28.8MB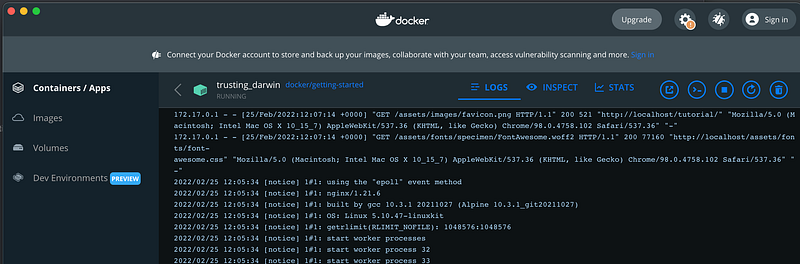
We can view in the browser;
Git Action
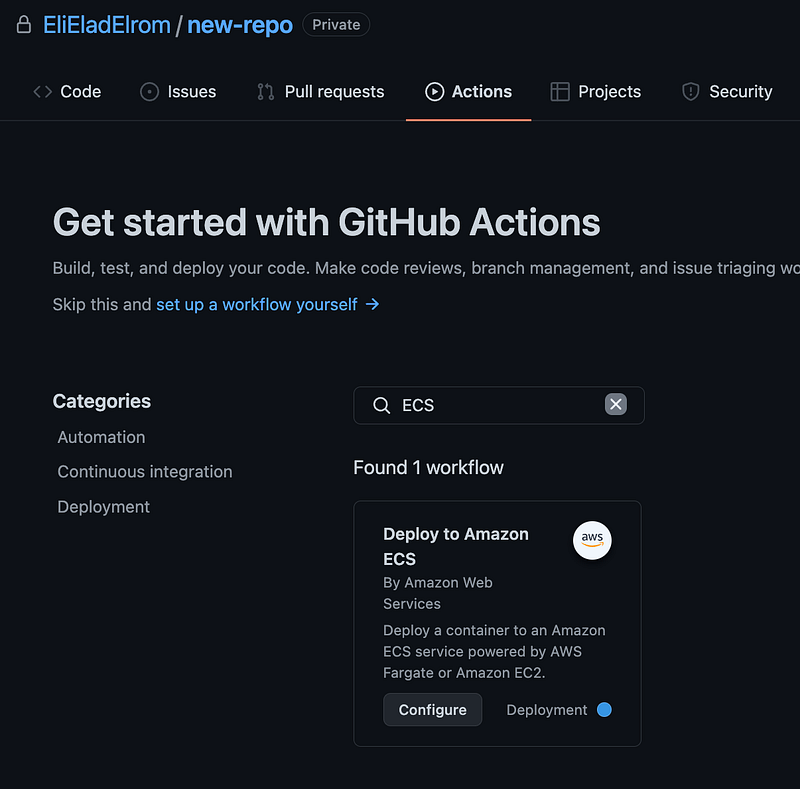
Next, let’s set up git actions: https://github.com/[your account]/new-repo/actions/new
Github > actions > search for ECS > Deploy to Amazon ECS > Set up this workflow by clicking Configure;
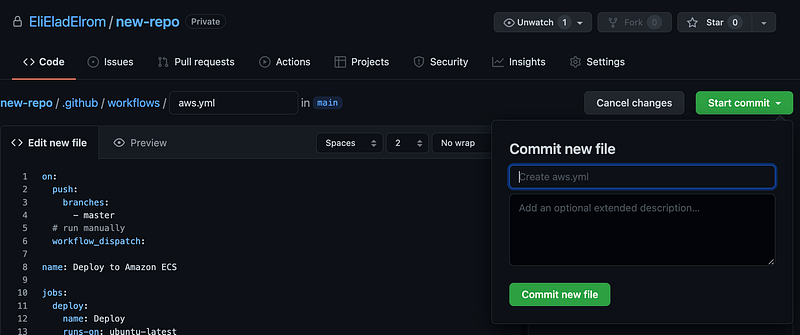
The aws.yml file code view opens up;
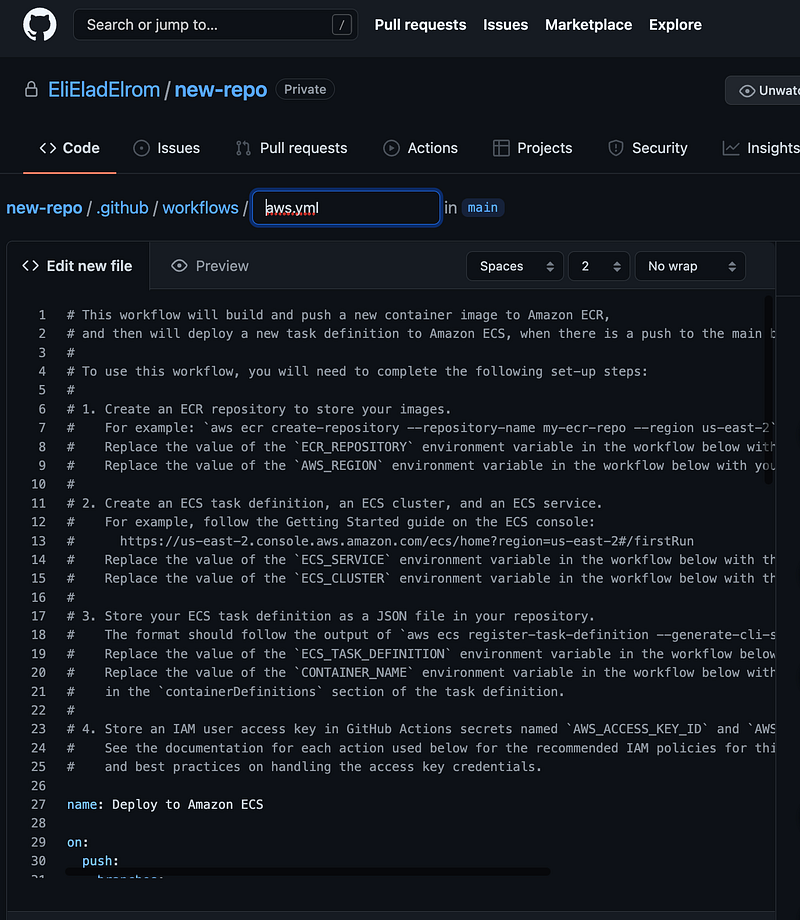
In the aws.yml file, I made some changes such as setting up a hook so you can run the action without committing a push change using the workflow_dispatch hook instead of having every change in the branch create a deployment. Additionally, I placed the region as a secret secrets.AWS_DEFAULT_REGION and changed the environments variables such as repo name, container name, service, and cluster.
Lastly, I will be placing the task def in here: devops/task-definition.json
I put in bold the changes I made;
on:
  push:
    branches:
      - master
  # run manually
  workflow_dispatch:

name: Deploy to Amazon ECS

jobs:
  deploy:
    name: Deploy
    runs-on: ubuntu-latest
    environment: production

    steps:
    - name: Checkout
      uses: actions/checkout@v2

    - name: Configure AWS credentials
      uses: aws-actions/configure-aws-credentials@v1
      with:
        aws-access-key-id: ${{ secrets.AWS_ACCESS_KEY_ID }}
        aws-secret-access-key: ${{ secrets.AWS_SECRET_ACCESS_KEY }}
        aws-region: ${{ secrets.AWS_DEFAULT_REGION }}

    - name: Login to Amazon ECR
      id: login-ecr
      uses: aws-actions/amazon-ecr-login@v1

    - name: Build, tag, and push image to Amazon ECR
      id: build-image
      env:
        ECR_REGISTRY: ${{ steps.login-ecr.outputs.registry }}
        ECR_REPOSITORY: myrepo
        IMAGE_TAG: ${{ github.sha }}
      run: |
        echo "Build docker container"
        # Build a docker container and
        # push it to ECR so that it can
        # be deployed to ECS.
        docker build -t $ECR_REGISTRY/$ECR_REPOSITORY:$IMAGE_TAG .
        docker push $ECR_REGISTRY/$ECR_REPOSITORY:$IMAGE_TAG
        echo "::set-output name=image::$ECR_REGISTRY/$ECR_REPOSITORY:$IMAGE_TAG"

    - name: Fill in the new image ID in the Amazon ECS task definition
      id: task-def
      uses: aws-actions/amazon-ecs-render-task-definition@v1
      with:
        task-definition: devops/task-definition.json
        container-name: development-container
        image: ${{ steps.build-image.outputs.image }}

    - name: Deploy Amazon ECS task definition
      uses: aws-actions/amazon-ecs-deploy-task-definition@v1
      with:
        task-definition: ${{ steps.task-def.outputs.task-definition }}
        service: development-service
        cluster: development-cluster
        wait-for-service-stability: true
Click start commit and commit the aws.yml file to add the git action;
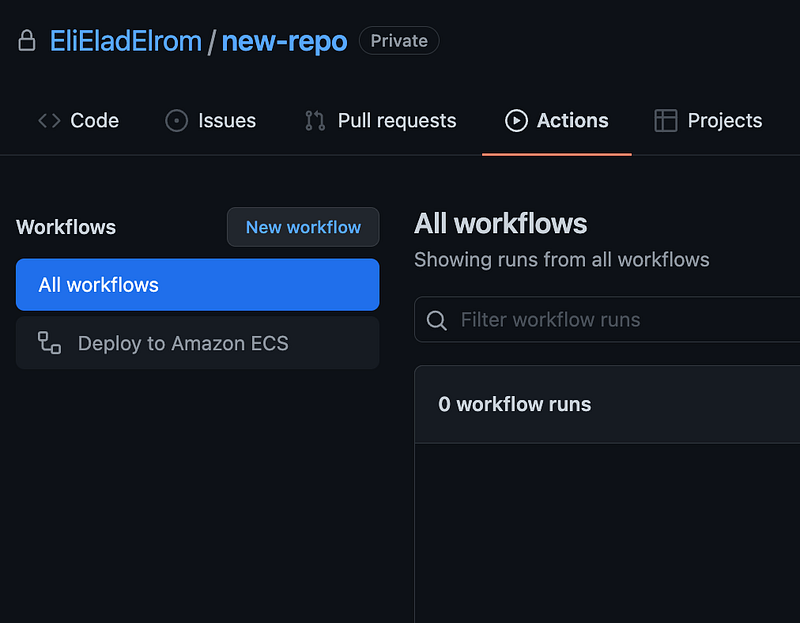
Keep in mind that for the git-action to show they need to be added to the main branch, however when using the workflow_dispatch the hook will take the aws.yml file from the branch it’s deployed from.
If you click the Actions tab in GitHub you will see the Deploy to Amazon ECS there;
AWS Security Credentials
Next, we will set access keys to deploy our container to AWS;
You can get these in;
- Go to: http://aws.amazon.com/
- Sign Up & create a new account
- Go to your AWS account overview
- Account menu in the upper-right (has your name on it)
- sub-menu:
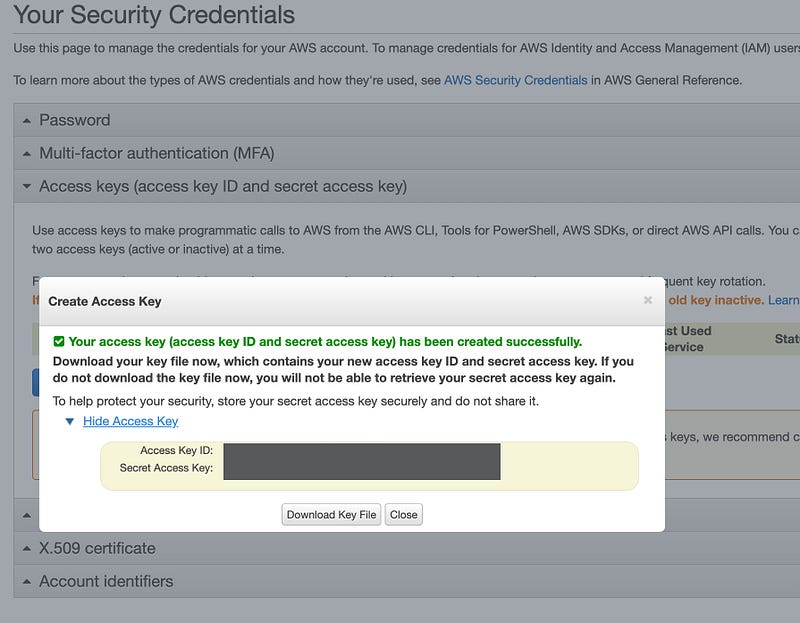
Security Credentials - Click > Create New Access Key
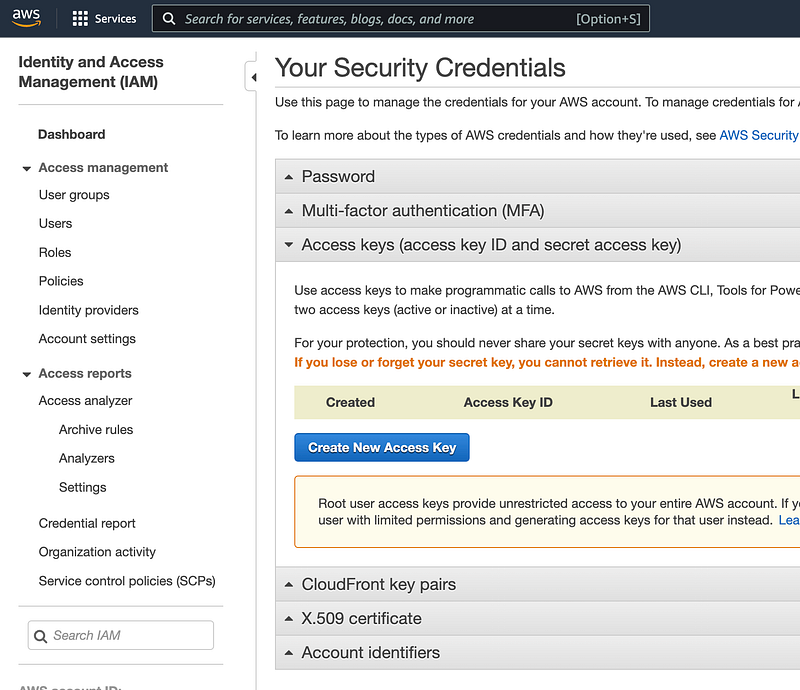
Store your key and secret;
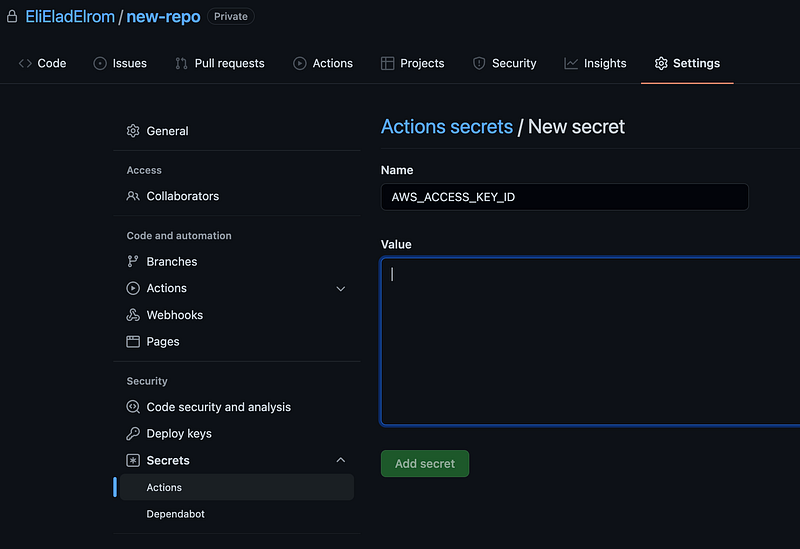
Next, let’s set the secret that we will be using in our deployment.
Project Settings > Secrets > Actions and set these up from the values in your AWS account;
https://github.com/[your-repo]/new-repo/settings/secrets/actions
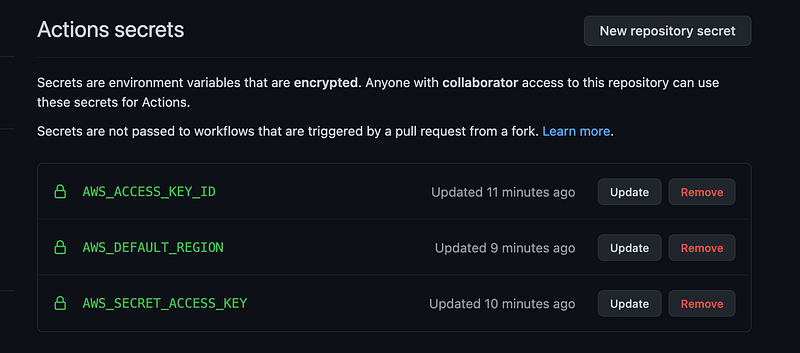
- AWS_ACCESS_KEY_ID — your access key id
- AWS_DEFAULT_REGION — such as; us-east-1, us-east-2
- AWS_SECRET_ACCESS_KEY — your secret access key
In terms of picking a region, I recommend you use us-east-2 or us-west-2 over us-east-1 or us-west-1 they have been proven to be more stable at the time of writing. Keep in mind that without a Global accelerator (https://aws.amazon.com/global-accelerator/) or some product in place that will divert traffic when service is down and available globally quickly.
Take a look;
Another option instead of storing the static passwords, which is more secured is to use static credentials. That can be done with OpenID connect, this allows reduce the need to store AWS credentials as long-lived GitHub secrets: https://docs.github.com/en/actions/deployment/security-hardening-your-deployments/configuring-openid-connect-in-amazon-web-services
AWS ECR
Next, set up a repo that ECR can use. Go here: https://console.aws.amazon.com/ecr/home
Set the name and create the repo;
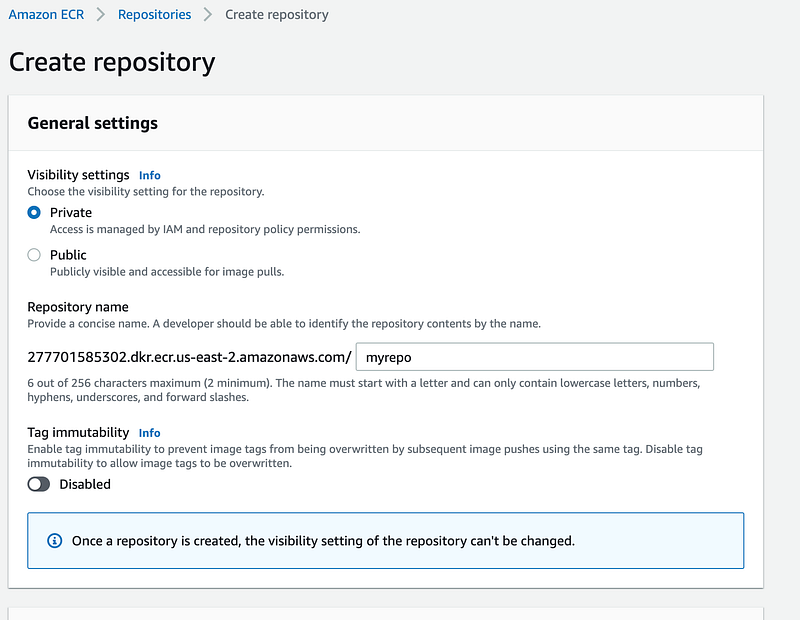
Copy the URI —
[account Id].dkr.ecr.[region].amazonaws.com/myrepoCopy the Docker specific image URI, it will look like this;
[account Id].dkr.ecr.[region].amazonaws.com/myrepo:[commit Id]We will use latest to have the hook use the latest commit;
[account Id].dkr.ecr.[region].amazonaws.com/[repo name]:latest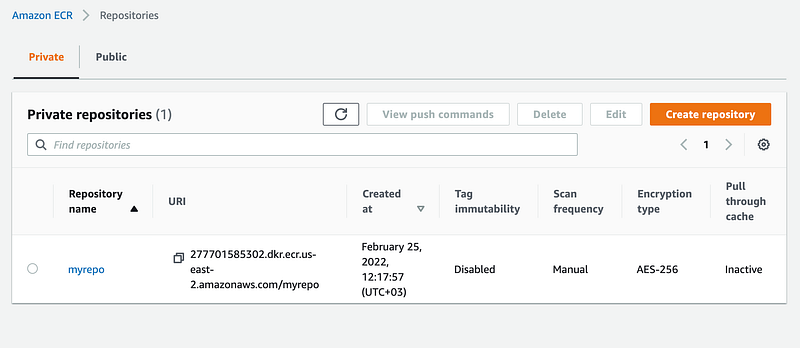
ECR — Task Definitions
Next, I am setting the task definitions. You can read more about the task def in the AWS Docs: https://docs.aws.amazon.com/AmazonECS/latest/developerguide/task_definition_parameters.html
Link: https://console.aws.amazon.com/ecs/home
Create new task definitions

Fargate > Next Step
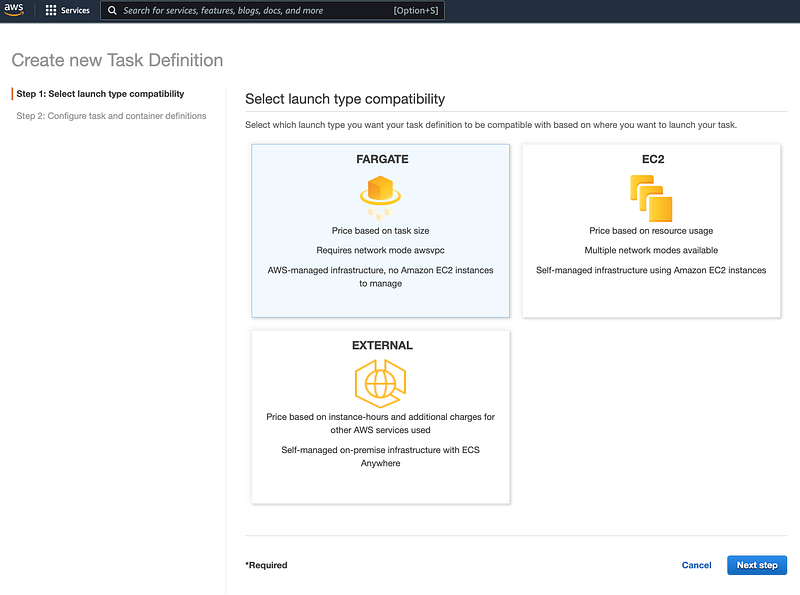
- Task Definition Name: myrepo-development-task
- Role > None
Pick how much you want
- Task memory (GB) > 0.5 GB
- Task CPU (vCPU) > 0.25 GBOpen port 80 and 8000 or whatever port you set;
Security group > Edit > add custom 80, 8000 > SaveAdd container
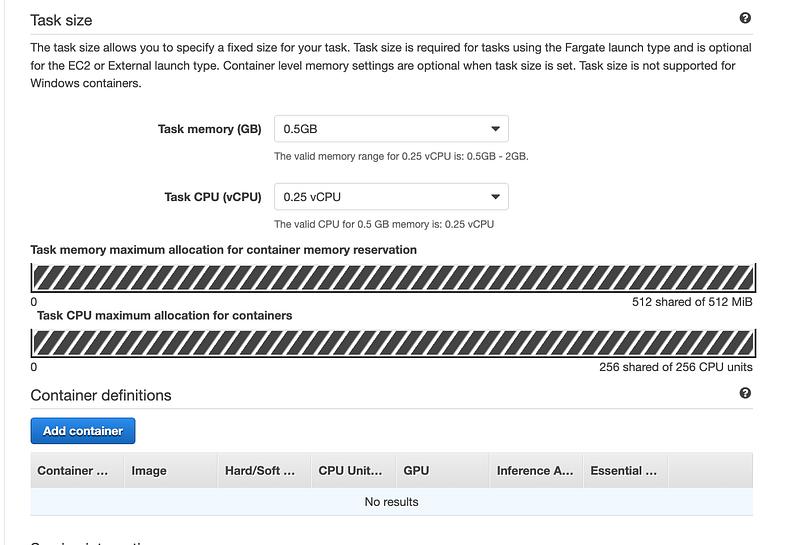
Name > development-container
Image > Docker image URI we stored;
[account Id].dkr.ecr.[region].amazonaws.com/myrepo:latest
Memory Limits (MiB) > Soft limit > 1024
Port mappings (add whatever ports you want open) >
80
8000
Add
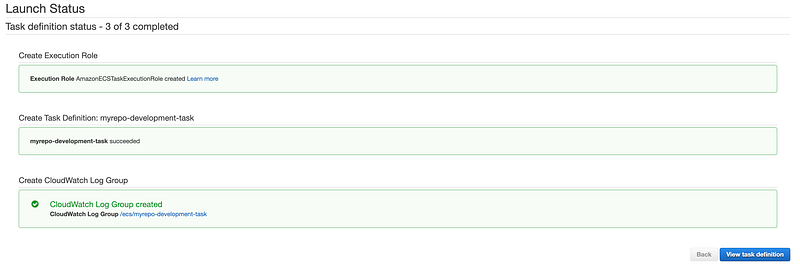
Create
You will get a create message;
Now we will copy the task definition content, and place it in our project, click the json tab;
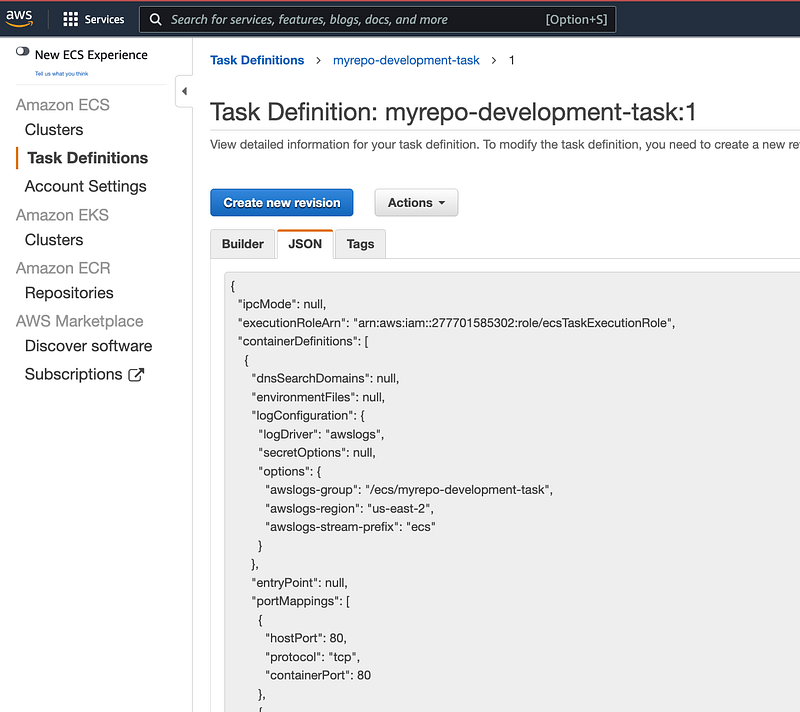
Place in devops/task-definition.json Remember to commit that file into the repo.
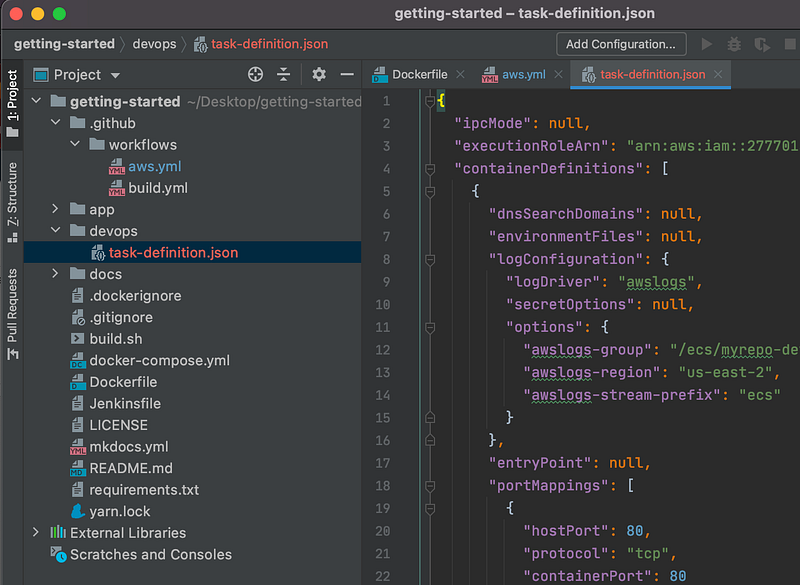
We mapped the aws.yml file to point there.

Add ECS Cluster -
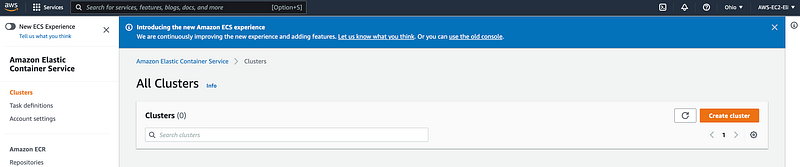
Next, create a Cluster in ECS clusters: https://console.aws.amazon.com/ecs/v2/clusters
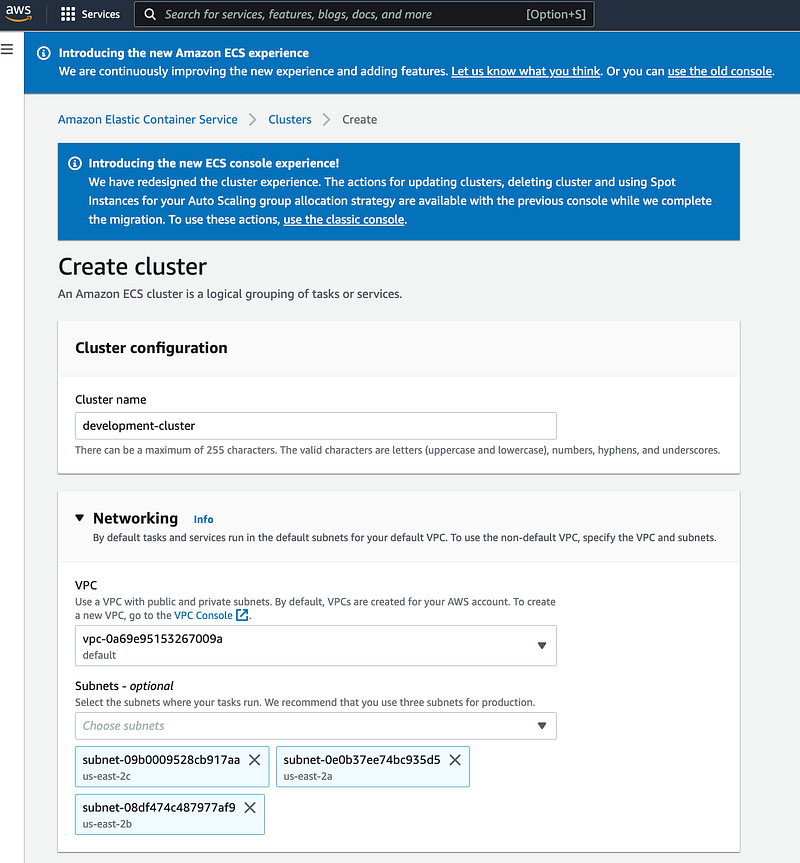
Create a cluster > Networking only > Next Step- Cluster name > development-cluster
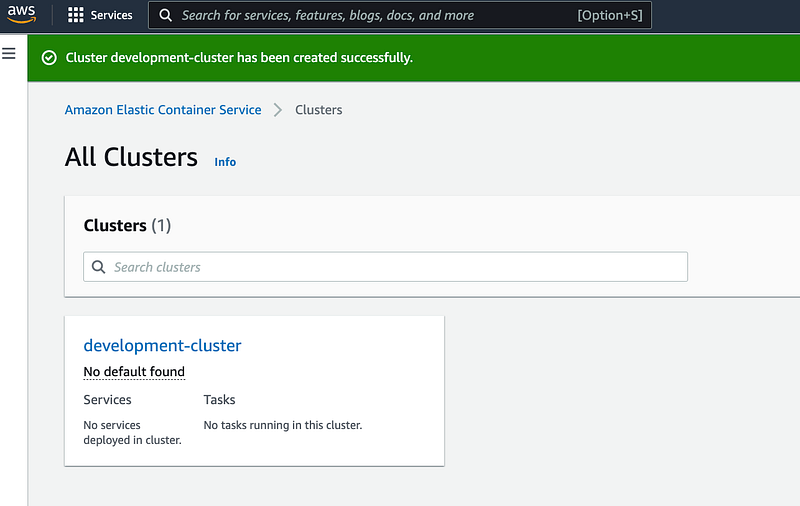
- CreateI picked the name development-cluster to match with the aws.yml file setup.
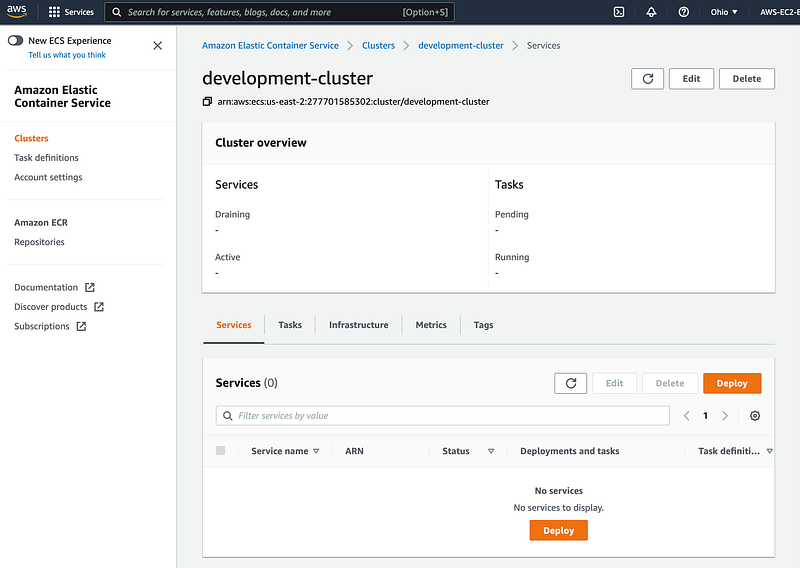
We can see our development-cluster listed;
ECS Service
Next, create a service. Click the development-clustercluster or use the URL;
https://us-east-1.console.aws.amazon.com/ecs/home > Services tab
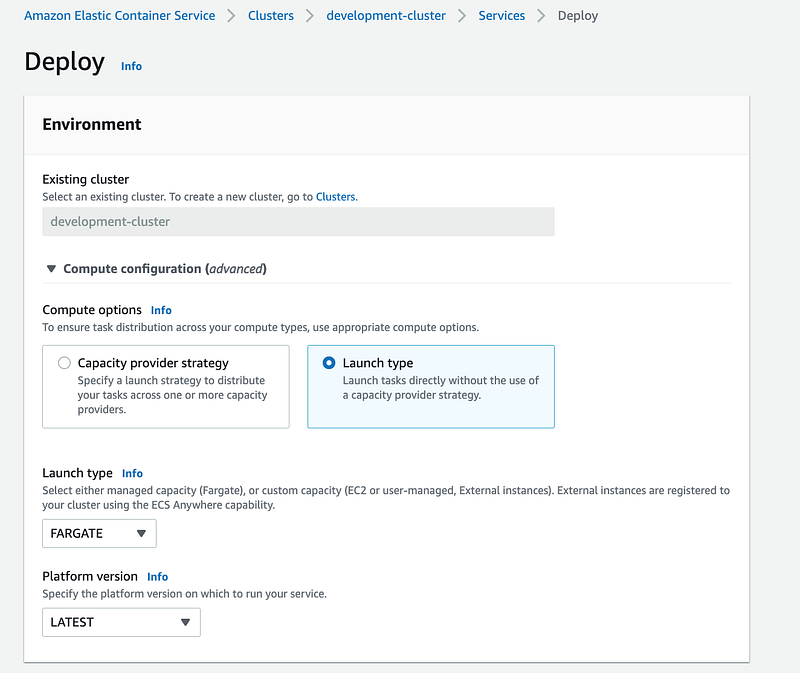
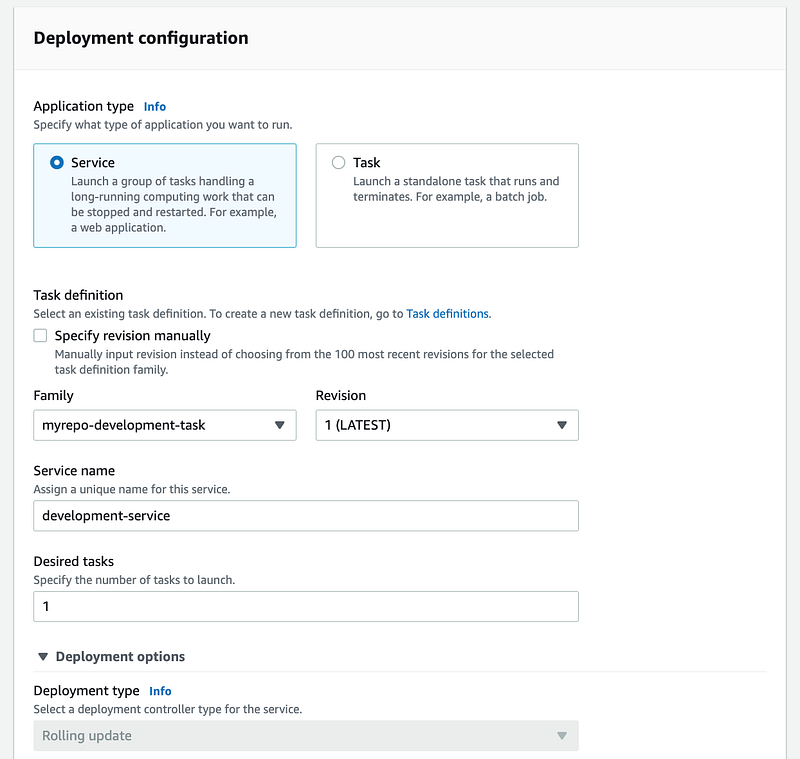
Click Services tab > create- Launch type > FARGATE
- Service name: development-service
- Number of tasks: 1
- Next StepLoad balancing- Cluster VPC > first item
- Subnets > first item
- Security groups > Edit > 80, 8000 > Save
- Load balancer type > none
- Service Auto Scaling > Do not adjust the service’s desired count
- Next step
- Create service
- View serviceWe will name the service development-service to match our aws.yml configurations.
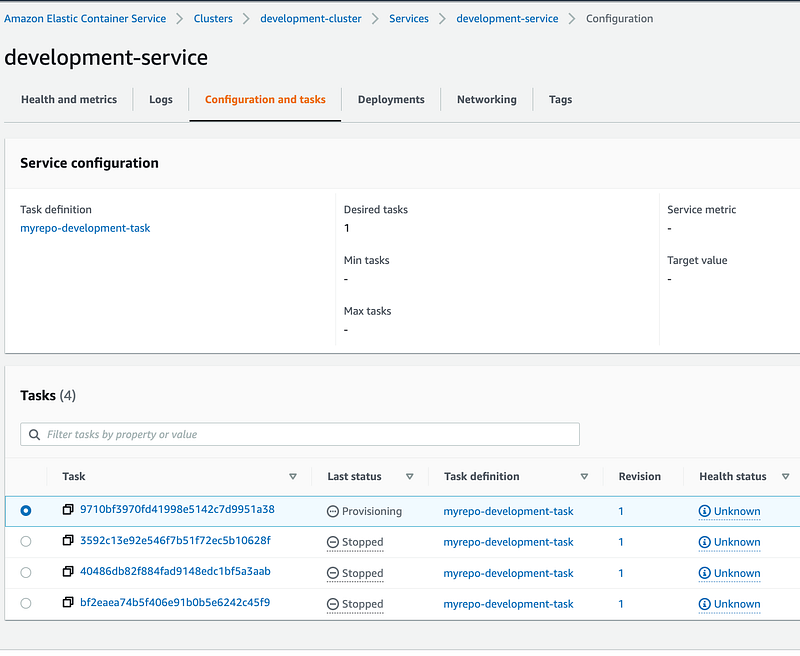
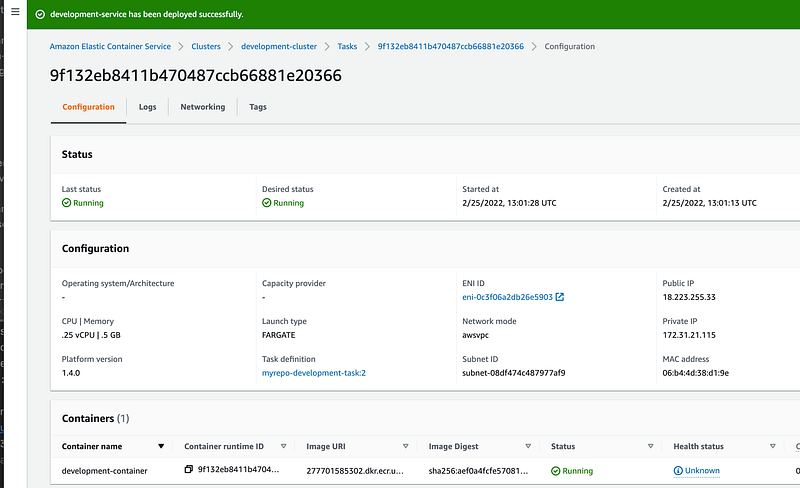
Here are some screenshots for you to see the configuration I set;
Once you complete setting up the service. It will take a few mins;
Last status: pending ... running ...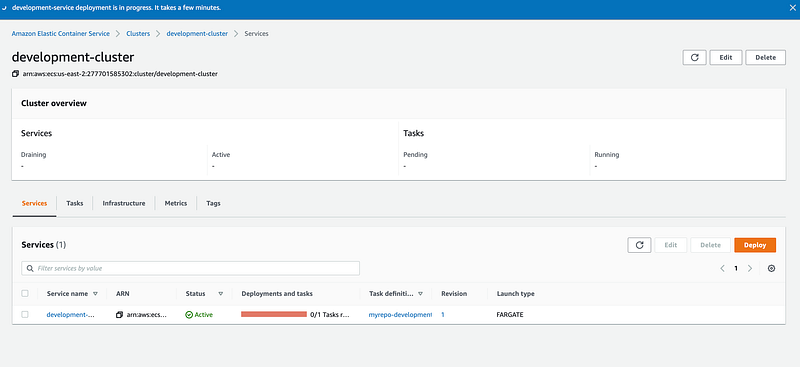
If you check the configuration you will see that the service keeps failing, the reason is that we don’t have the repo set up yet.
Deployment using Git Action
Now we are ready to deploy our Docker container using the Deploy to Amazon ECR git-action we set. If you recall I set it up to deploy using the workflow from a branch instead of automatic deployment, so follow this step to deploy;
Click Actions > Deploy to Amazon ECS > Run workflow > Branch: main > Run workflow;
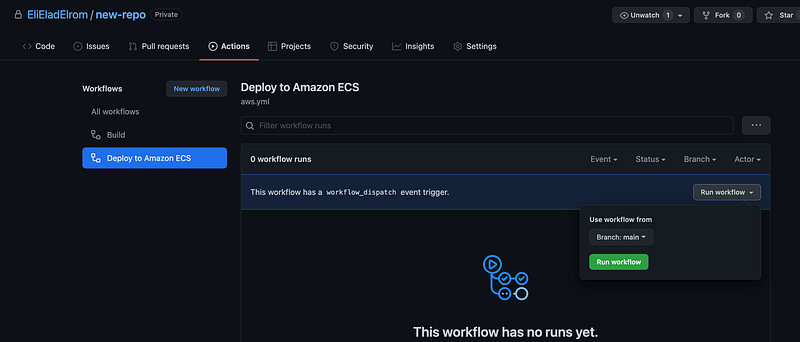
This could be easily changed to deploy on a main branch push instead.
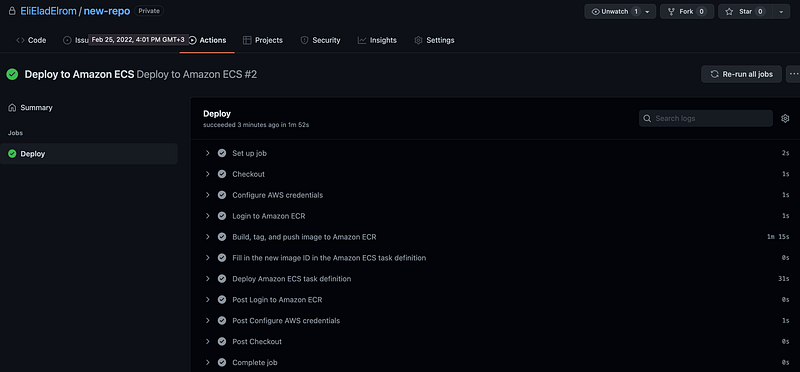
Click the deployment to confirm all went well, of fix any errors you have;
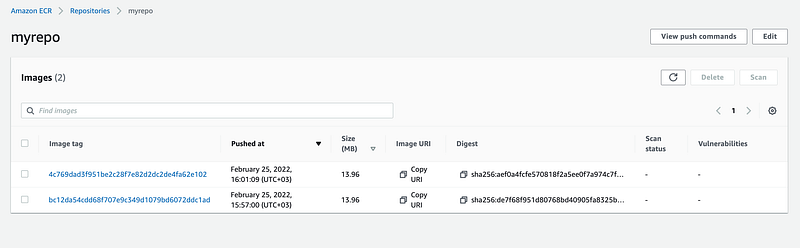
If you check ECR the repo should have the image tag with the container we deployed;
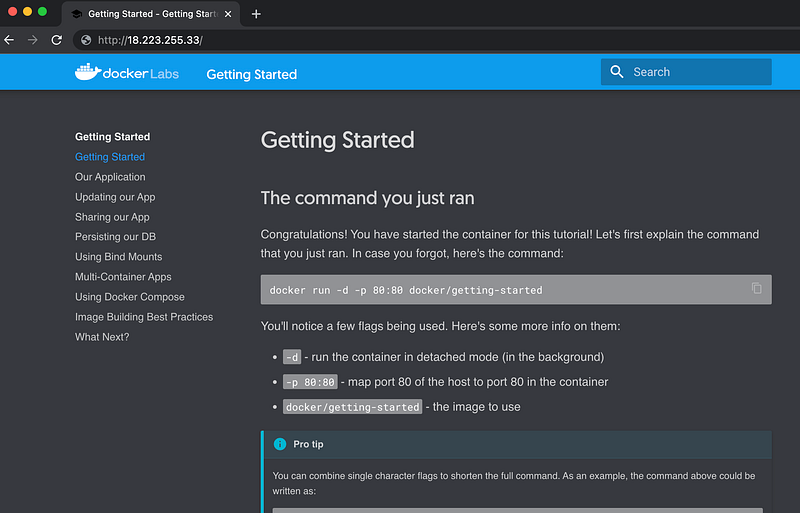
Click the service to extract the public IP address;
Now you can navigate to the URL to ensure the content is there;
As you can tell, there is much that goes into these configurations and much you can change, however for the sake of simplifying this article I did not go into a deep explanation but feel free to explore on your own;
Related Amazon articles:
- https://docs.aws.amazon.com/AmazonECS/latest/developerguide/getting-started-fargate.html
- https://us-east-2.console.aws.amazon.com/ecs/home?region=us-east-2#/firstRun
- https://aws.amazon.com/blogs/devops/build-a-continuous-delivery-pipeline-for-your-container-images-with-amazon-ecr-as-source/https://285146546915.signin.aws.amazon.com/console
Where to go from here
- Download the code from this example: Learning React >
ecr-ecs-github-ci-cd