Python3 Command and Control How to Guide
Chapter Two — Socket Communications Part 1
In Lesson 1 we talked about how to configure a basic socket connection between two points and transfer data. In this lesson we will construct the foundations of the server and client, which will eventually be our payload. Prior to beginning, you will need some type of text-based editor. I use Visual Studio Code throughout the course; however, you are free to use what you wish (unless it’s Vim of course).
Opening our first file, we can call that sockserver.py (sockserver from here on out), and our second file sockclient.py. (sockclient from here on out). At the top of both files, we need to import socket as before. In the sockerserver file, we can set our host_ip and host_port values accordingly. Set the same values in the sockclient file as well.

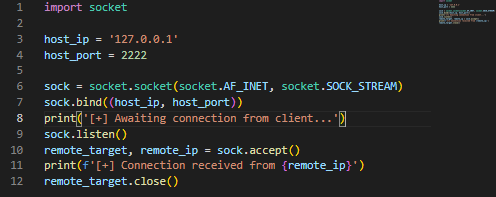
As before, we now need to configure the sockserver to declare the sock variable, bind to the address, listen for incoming requests, and to accept connections. The entire code looks like the following so far. Next, add a message after sock.listen() that says we are awaiting connections, and another message after sock.accept() that returns the IP address of the client. In order to do that we will need to call the remote_ip value from the call. See below and save the file once complete. Finally, add remote_target.close() to gracefully shut down the socket so we can continue easily after testing.
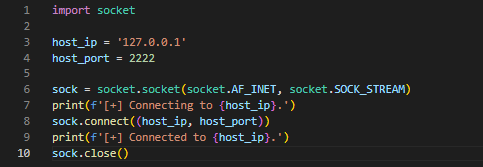
Back in the sockclient file we can set up our connector information as we did in lesson 1. We need to set our sock variable, and then sock.connect() to make the connection to sockserver. Add in some print output to show the different stages of the script we are in. This is something I always do as a way to debug my projects, and I recommend you do the same. Finally, add in sock.close() to gracefully close the socket for future testing. The completed code looks like the following.
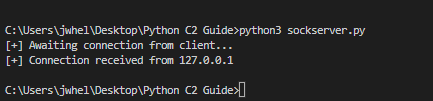
Run the sockserver script first, followed by the sockclient script. If everything is successful, the print statements we declared should output appropriately, and the socket should close once complete.

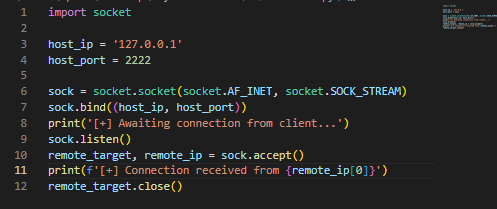
As you can see the sockserver waits for the connection, and when the client connects, the IP address of the client is output. The sockclient responds with connected, and both scripts close. From here we can continue to modify our program. First, if you notice in the sockserver output, the IP address has both an IP and the port that the socket has been opened on. We can use [0] to select the IP address only from the data. Rerun and it should look like the following.
With the output cleaned up some, it’s time to clean up the code as well and start looking at overall functionality. Rather than simply having one long, linear script, we can use a function to hold most of the script and make a call to the function while including the host_ip and host_port. It isn’t necessary at this stage, but it will be later in the project, and cleaning it up now will help immensely. See the sockserver and sockclient scripts below for updates.

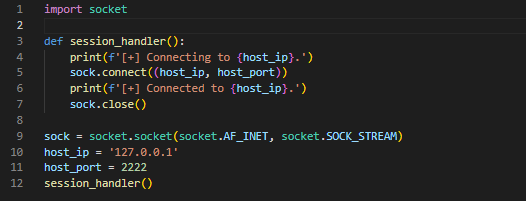
With the code cleaned up and the functions implemented, try running both again and see that the output is the same.

This wraps up Part 1 of this lesson. In Part 2 we will implement loops to handle data transfers through the addition of some basic chat functionality that will be expanded upon later.
Interested in the full course? You can get it on my Ko-fi here for $10 USD.
Joe Helle is a Red Team Lead, former mayor, and creator of Movement, Pivoting, and Persistence for Pentesters and Ethical Hackers course. Joe holds multiple web application CVEs. See what Joe is working on at https://www.themayor.tech .