
Python Threat Hunting Tools: Part 10 — The Power of Jupyter Notebooks

Welcome back to this series on building threat hunting tools. In this series, I will be showcasing a variety of threat hunting tools that you can use to hunt for threats, automate tedious processes, and extend to create your own toolkit!
Most of these tools will be simple, focusing on being easy to understand and implement. This is so that you, the reader, can learn from these tools and begin to develop your own. There will be no cookie-cutter tutorial on programming fundamentals like data types, control structures, etc. This series will focus on the practical implementation of scripting through small projects.
You are encouraged to play with these scripts, figure out ways to break or extend them, and try to improve their basic design to fit your needs. I find this the best way to learn any new programming language/concept and, certainly, the best way to derive value!
In this installment, we will look at Jupyter Notebooks and how they can be used to structure your threat hunting workflow.
What are Jupyter Notebooks?

Jupyter Notebooks have been dubbed “interactive documentation.” They allow you to create and share documents that contain a mixture of code and Markdown content in a series of cells. A user of the Notebook can then read the Markdown content and execute the code as they work their way through.
Markdown is a lightweight markup language that adds formatting and structure to plaintext. You may have seen it before on sites like Github and Gitlab to format code documentation. To learn about its common elements, read this guide.
The name “Jupyter” is derived from the three core programming languages it supports: Julia, Python, and R. These languages are used extensively in data science for analyzing and visualizing data, hence Jupyter Notebooks are typically used in data science.
That said, Notebooks are also a great tool for prototyping your threat hunting tools and gathering them in a single location so a threat intelligence analyst can seamlessly integrate them into their workflow. For instance, you may include the browser automation tool we created to perform threat hunts (along with Markdown text that describes how to use it) and follow this with the Maltiverse API tool so you can check if any unknown IP address you come across is malicious.
This is how I use Jupyter Notebooks as a senior threat intelligence analyst. Our team builds and maintains Python tools that we integrate with a shared Jupyter Notebook. An analyst will go through this Notebook and run the custom-built tools as part of their daily tasks. One tool automates running threat hunting queries for our EDR solution, another for our SIEM, and another can be used to check if an IP/domain/URL/file is malicious. This shared document contains Markdown text about using each tool and the checks an analyst should perform.
Jupyter Notebooks have made our small team incredibly efficient by providing a shared medium for automating our daily tasks and documenting our standard operating procedures. Let me show you how!
The Problem
As a threat intelligence analyst or any cyber security professional, our resources tend to be limited. You are unlikely to have only some of the latest and greatest tools or the staffing to crush any problem. Instead, to be effective at your job, you must learn how to streamline your workflow and make your processes as efficient as possible.
If you have been following this series, you have one piece of the puzzle — Python threat hunting tools. However, these tools are atomic. They fill one specific need, lack documentation, and there is no efficient process for using them.
So what’s the solution?
Obviously, it is Jupyter Notebooks that includes our Python tools all in one place.
The Solution
Jupyter Notebooks are a single screen where you can document and run your Python threat hunting tools. As mentioned, I use them to keep track of my daily tasks and have all my custom details in one place. Let’s look at how to do that.
In this article, I will demonstrate how to use Juptyer Notebooks inside the popular code editor Microsoft Visual Studio Code. It is free, cross-platform, and has powerful integrations that let you easily create Jupyter Notebooks.
Installation & Setup
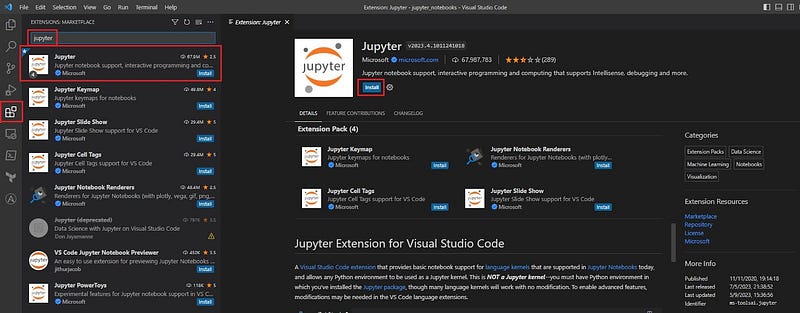
To use Jupyter Notebooks with Visual Studio Code (VS Code), you first need to install the Jupyter extension provided by Microsoft from the VS Code marketplace. Just search “jupyter” and select the Jupyter extension. Then click the Install button.
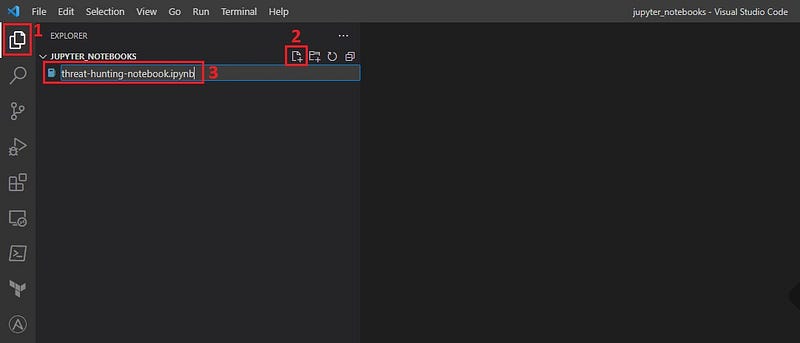
Once you have installed the Jupyter extension, you can create your Jupyter Notebook by clicking on the Explorer icon (1), clicking the New File button (2), and entering a filename followed by the .ipynbextension. This extension tells VS Code this is a Python Jupyter Notebook file.
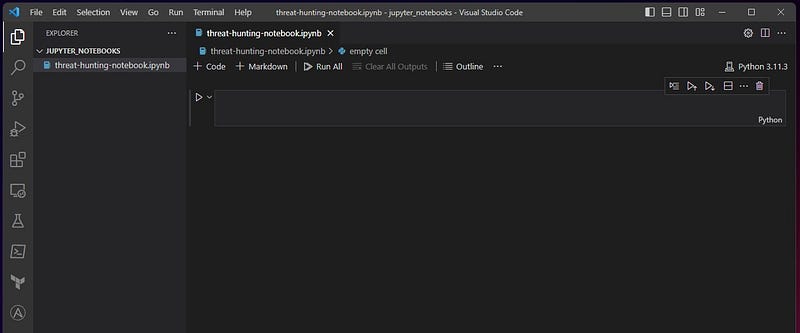
You are now ready to begin creating your Jupyter Notebook!
Creating Documentation
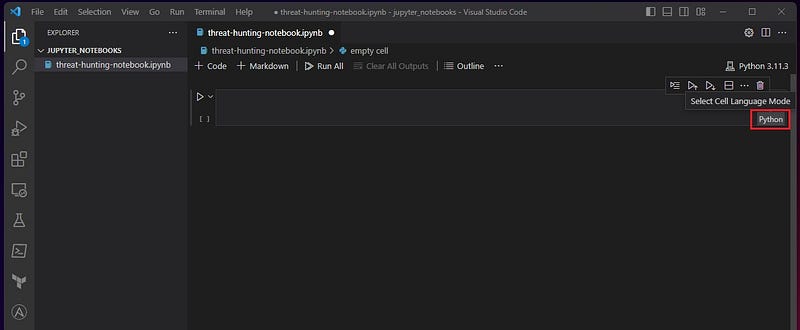
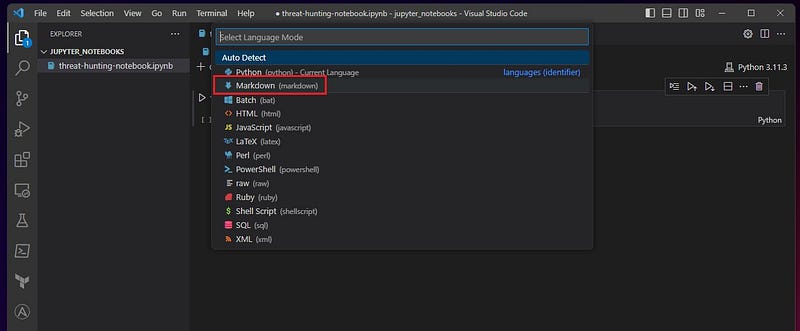
Let’s start our Notebook with some documentation explaining its purpose and the tools it will include. You can write your documentation in Markdown to give it some style and formatting. To do this, click on the cell type (here it is Python) and change it to Markdown.
You can now start adding Markdown content to this cell.
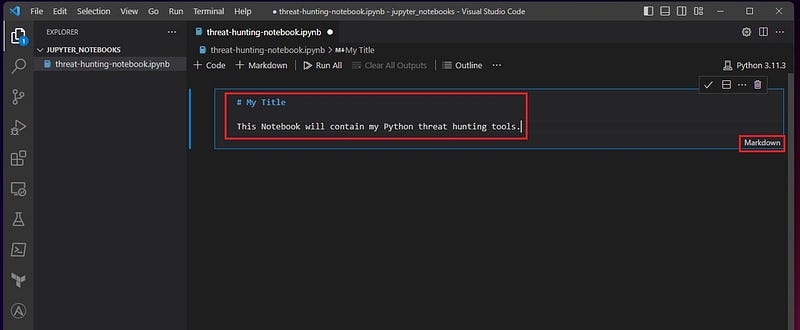
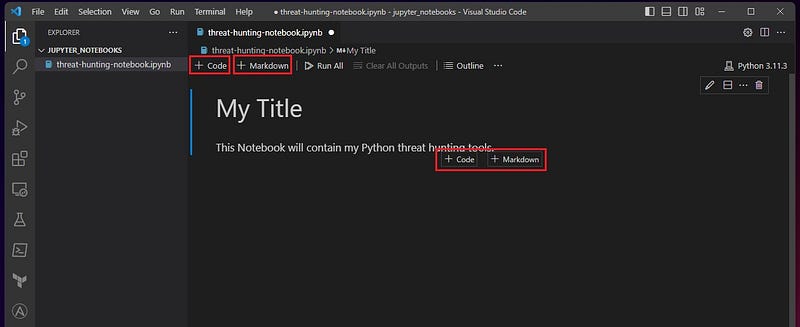
When you are down, click the tick icon or press <ctrl>+<enter>to execute the cell. The Jupyter Notebook will then style and format your Markdown content. You can find out how this happens in this Markdown guide.


To add another cell to your Jupyter Notebook, select the Add Code Cell or Add Markdown Cell. This will add another cell to your Notebook to which you can add Python code or Markdown content.
Add Python Code
Select the Add Code Cell button to add Python code to a Jupyter Notebook (as shown above). This will create a cell where you can execute Python code by selecting the Execute Cell button.


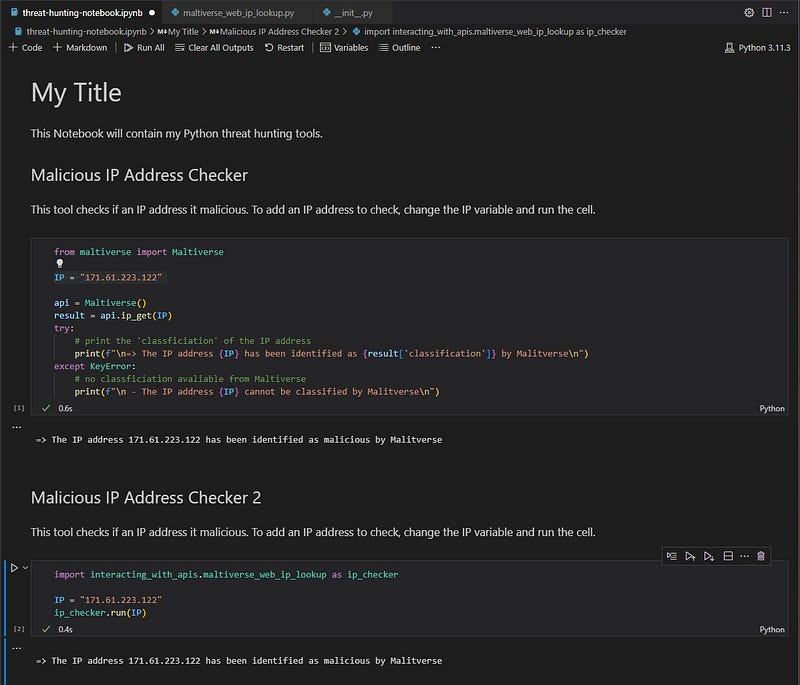
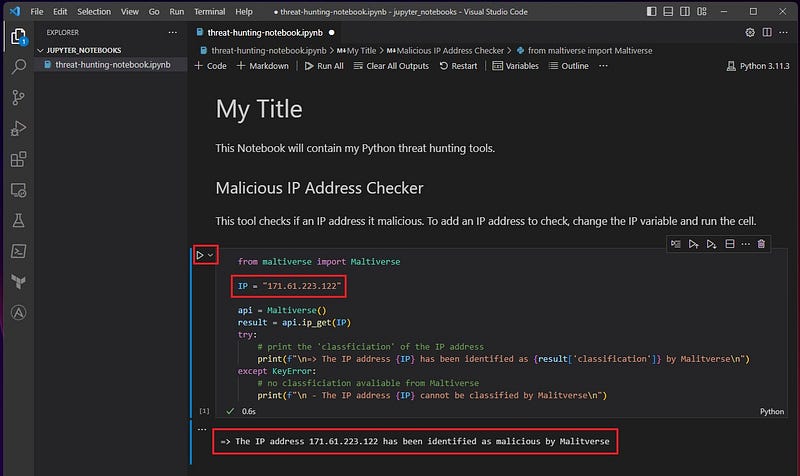
Adding Threat Hunting Code to Jupyter Notebook
To simplify this example, I have copied some of the code from the Maltiverse API tool. This code uses the Matliverse API to check if an unknown IP address is malicious. I have also included some documentation above that describes how to use the code.

To use this code, you only need to add the IP address you want to check to the IP variable and execute the cell.
Importing Threat Hunting Tools to Jupyter Notebook
You can also import your threat hunting tools into a Jupyter Notebook code cell as a module and access their functions, methods, and classes directly in the Notebook. This is similar to executing Python code directly in the terminal through the language’s interactive shell.
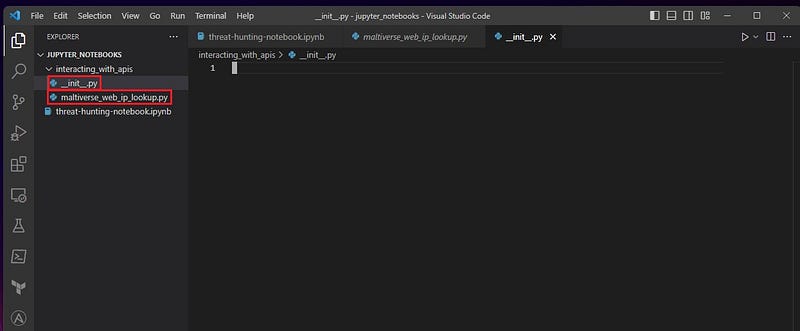
To import a Python threat hunting tool into a Jupyter Notebook, you need to turn it into a module by adding a __init__.pyfile in the tool’s directory. Here I have renamed the filemaltiverse_ip_lookup-v2.py from the Maltiverse API tool we created previously in this series to maltiverse_web_ip_lookup.py and added an __init__.pyfile to the tool’s directory. This tool is now ready to be imported as a module.
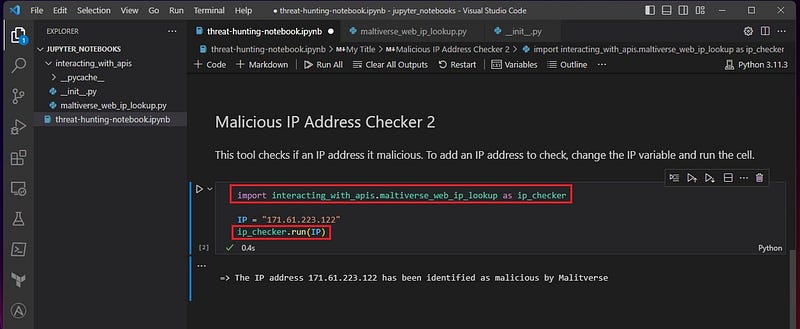
To import a module in Python, you use the import keyword followed by the module’s name. Here it is the name of the tool’s directory, followed by the name of the Python script. I have imported the tool under the name ip_checkerusing the askeyword to make it easier. Also, I have refactored some of the code and added it to a run()method so this tool can be used as a module.
Just change the IP variable to check different IP addresses and execute the cell to use the tool:
The refactored code and Jupyter Notebook can be found on my GitHub.
Conclusion
Well done, you’ve discovered the power of Jupyter Notebook!
But don’t stop here. Try creating your own, adding your Markdown content, and integrating your Python tools! Cloning my Notebook and adding Python code interactively is a good place to start. This will let you quickly prototype your ideas and get used to the features of Jupyter Notebooks.
Once you feel comfortable, add the Python tools showcased in this series to your Notebook. You can do this by refactoring the code into modules or copying chunks directly into Jupyter cells.
Good luck mastering Jupyter Notebooks, and hopefully, you can use them in your threat hunting or cyber security workflows!
This will likely be the last installment of this series for some time, as I have a malware analysis series coming up. If you would like to see more threat hunting tools in Python or other languages, please leave a comment!
Enjoyed this content and want to see more? Consider subscribing to Medium or giving me a follow.

Interested in learning the dark arts of penetration testing and red teaming? Check out these courses offered by Zero-Point Security. They will teach you all things red teaming from creating exploits to emulating real-world threat actors.
If you want more of a challenge, take on one of their certification exams and land your next job in cyber:

Do you want to learn more cyber security skills today? Check out The All-Access Membership Pass by TCM Academy. It will provide you with access to courses on all things cyber security, including hacking/pentesting, malware analysis, digital forensics, programming/scripting, and GRC!
If you’re looking to level up your skills even more, have a go at one of their certifications:


