
Publishing Your Java Library to Maven Central: A Step-by-Step Tutorial

Introduction
Creating a Java library is a significant milestone for many developers, offering a way to encapsulate reusable code for personal projects or for sharing with the global developer community. Whether it’s to avoid duplication of effort across projects or to contribute to the open-source ecosystem, publishing your Java library to Maven Central is a rewarding endeavor. This detailed guide will walk you through the entire process, using a practical example of a Java library for generating universally unique identifiers (UUIDs) for entities in applications.
Step 1: Setting Up Your Java Library Project
Project Initialization with Maven
To kick things off, you’ll need to generate your project structure. Open your terminal and run:
mvn archetype:generate -DgroupId=com.example.uuidgenerator -DartifactId=uuid-generator -DarchetypeArtifactId=maven-archetype-quickstart -DarchetypeVersion=1.4 -DinteractiveMode=falseEnsure you replace com.example.uuidgenerator with your desired group ID. This step generates a Maven project with a default pom.xml file.
Customize pom.xml for Java 17
Open the generated pom.xml and modify the properties section to use Java 17 (Default comes 1.8), enhancing compatibility and leveraging newer language features:
<properties>
    <project.build.sourceEncoding>UTF-8</project.build.sourceEncoding>
    <maven.compiler.source>17</maven.compiler.source>
    <maven.compiler.target>17</maven.compiler.target>
</properties>
Step 2: Developing the UUID Generator Library
Developing a versatile Java library requires going through important stages starting with establishing a solid licensing agreement and proceeding to carefully develop and test your code. In this segment, we will explore these procedures in detail using the UUID Generator library as a case.
Adding a License
Selecting the right license for your project is crucial as it defines how others can use, modify, and distribute your work. Open-source licenses vary in their terms, from permissive licenses like MIT, which allows almost unrestricted freedom, to more protective ones like GNU GPL, which requires derivative works to be open-sourced under the same terms.
For our UUID Generator library, we’ll choose the Apache 2.0 License, known for its permissive nature while also protecting contributors from patent claims. To apply it, follow these steps:
- Obtain the License Text: Visit the Apache License 2.0 webpage to copy the license text.
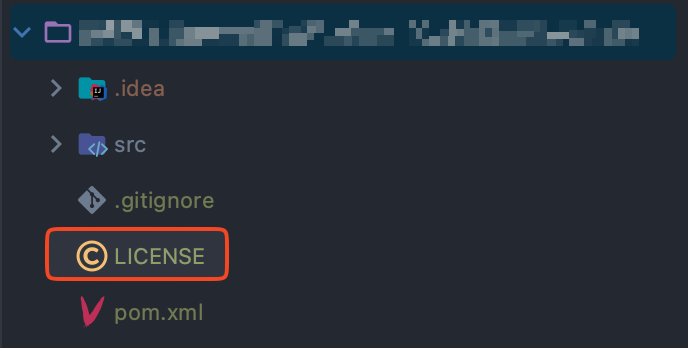
- Create a LICENSE File: At the root of your project, create a file named
LICENSE. Paste the Apache License 2.0 text you copied into this file. This action effectively applies the Apache 2.0 License to your project, making it clear to all users and contributors under what terms your library is shared.
- Reference the License in Your
pom.xml: It's good practice to mention the license in your project'spom.xmlfile as well. This makes the licensing information easily accessible and visible, especially on platforms like Maven Central. Include the following snippet in yourpom.xml:
<licenses>
    <license>
        <name>Apache License, Version 2.0</name>
        <url>http://www.apache.org/licenses/LICENSE-2.0</url>
    </license>
</licenses>
Implementing the Library
The core of the UUID Generator library is straightforward: generating unique identifiers. The UuidGenerator interface defines the contract for our generator, promising a generateUuid method.
Here’s a closer look at implementing this functionality:
- Defining the Interface: The
UuidGeneratorinterface acts as a blueprint for our UUID generation logic. It includes a single method,generateUuidwhich returns a new UUID as a string.
package com.example.uuidgenerator;

public interface UuidGenerator {
    String generateUuid();
}- Implementing the Interface:
UuidGeneratorImplprovides the concrete implementation of theUuidGeneratorinterface, utilizing thejava.util.UUIDclass to generate random UUIDs.
package com.example.uuidgenerator;

import java.util.UUID;

public class UuidGeneratorImpl implements UuidGenerator {

    @Override
    public String generateUuid() {
        return UUID.randomUUID().toString();
    }
}
Testing Your Implementation
Writing tests is crucial to ensure the reliability and quality of your library. For the UUID Generator library, testing involves verifying that the generated UUIDs conform to the expected format and uniqueness. We will use JUnit 5 for our testing framework, alongside AssertJ for more fluent assertions.
First, let’s add those dependencies to our pom!
<dependencies>
    <!-- https://mvnrepository.com/artifact/org.junit.jupiter/junit-jupiter -->
    <dependency>
        <groupId>org.junit.jupiter</groupId>
        <artifactId>junit-jupiter</artifactId>
        <version>5.10.2</version>
        <scope>test</scope>
    </dependency>
    <!-- https://mvnrepository.com/artifact/org.assertj/assertj-core -->
    <dependency>
        <groupId>org.assertj</groupId>
        <artifactId>assertj-core</artifactId>
        <version>3.25.3</version>
        <scope>test</scope>
    </dependency>
</dependencies>
Always Maven Repository to guarantee that you have the version updated!
For the Unit test, here’s an example test class:
package com.example.uuidgenerator;

import org.junit.jupiter.api.Test;
import static org.assertj.core.api.Assertions.assertThat;

class UuidGeneratorImplTest {

    private final UuidGenerator generator = new UuidGeneratorImpl();

    @Test
    void generateUuid_returnsValidUuid() {
        String uuid = generator.generateUuid();
        // UUID format: 8-4-4-4-12 hexadecimal characters
        assertThat(uuid).matches("[0-9a-fA-F]{8}-[0-9a-fA-F]{4}-[0-9a-fA-F]{4}-[0-9a-fA-F]{4}-[0-9a-fA-F]{12}");
    }
}
This test checks if the generated UUID matches the standard UUID format, ensuring that our library functions as expected. It’s good to remember that this is only an example. You should implement and test whatever you want to deploy to Maven Central!
Next Steps
After implementing your library and writing tests, the next phase involves preparing your library for distribution, adhering to Maven Central’s requirements, and finally, publishing your library. The forthcoming steps detail this process, guiding you through preparation, package management, and deployment to Maven Central.
Step 3: Preparing for Maven Central
Getting your Java library ready for Maven Central involves a meticulous setup of your project’s pom.xml file to meet specific criteria. This preparation ensures that your library is not only compliant with Maven Central's requirements but also provides essential metadata that facilitates its discovery and use by developers worldwide. Below, we dive into the specifics of these requirements and illustrate how to configure your pom.xml accordingly.
Maven Central Requirements
To successfully deploy your library to Maven Central, you must adhere to a set of prerequisites outlined by Sonatype (the service that hosts Maven Central). These include:
- Non-SNAPSHOT Versions: Maven Central accepts only release versions of your library. Snapshot versions, are typically used for development and they’re not allowed.
- Project Metadata: This includes a descriptive name, description, and URL for your project.
- Licensing Information: Clearly defined license(s) under which your library is distributed.
- Developer Information: Details about the contributors to your library.
- Source Code Management (SCM) Information: Links to the source code repository (Public Repository).
- Distribution Management: Configuration settings for deploying to Sonatype’s repositories.
- Signing Artifacts: All artifacts must be signed with GPG/PGP signatures.
Example pom.xml Adjustments
Below is an illustrative guide on configuring your pom.xml to meet the above requirements:
- Set the Version to 1.0.0 (non-SNAPSHOT):
<version>1.0.0</version>- Add Project Description, URL, and SCM Details:
<name>UUID Generator Library</name>
<description>A simple library for generating UUIDs.</description>
<url>http://example.com/uuid-generator</url>

<scm>
    <url>http://github.com/yourusername/uuid-generator</url>
    <connection>scm:git:git://github.com/yourusername/uuid-generator.git</connection>
    <developerConnection>scm:git:ssh://github.com:yourusername/uuid-generator.git</developerConnection>
</scm>- Configure
maven-javadoc-plugin,maven-source-plugin, andmaven-gpg-pluginfor Artifact Signing. These plugins are crucial for ensuring that your library is accompanied by source code and documentation, and that your artifacts are securely signed. - Source Plugin Configuration:
<build>
    <plugins>
        <!-- https://mvnrepository.com/artifact/org.apache.maven.plugins/maven-source-plugin -->
        <plugin>
          <groupId>org.apache.maven.plugins</groupId>
          <artifactId>maven-source-plugin</artifactId>
          <version>3.3.0</version>
            <executions>
                <execution>
                    <id>attach-sources</id>
                    <goals>
                        <goal>jar-no-fork</goal>
                    </goals>
                </execution>
            </executions>
</plugin>- Javadoc Plugin Configuration:
        <!-- https://mvnrepository.com/artifact/org.apache.maven.plugins/maven-javadoc-plugin -->
        <plugin>
          <groupId>org.apache.maven.plugins</groupId>
          <artifactId>maven-javadoc-plugin</artifactId>
          <version>3.6.3</version>
            <executions>
                <execution>
                    <id>attach-javadocs</id>
                    <goals>
                        <goal>jar</goal>
                    </goals>
                </execution>
            </executions>
</plugin>- GPG Plugin Configuration:
Signing your artifacts is a security measure that verifies you as the source of the library. This step requires installing GPG and generating a key pair.
        <!-- https://mvnrepository.com/artifact/org.apache.maven.plugins/maven-gpg-plugin -->
        <plugin>
          <groupId>org.apache.maven.plugins</groupId>
          <artifactId>maven-gpg-plugin</artifactId>
          <version>3.2.1</version>
            <executions>
                <execution>
                    <id>sign-artifacts</id>
                    <phase>verify</phase>
                    <goals>
                        <goal>sign</goal>
                    </goals>
                </execution>
            </executions>
        </plugin>
    </plugins>
</build>
Always Maven Repository to guarantee that you have the version updated!
GPG Configuration for Maven Central
One of the essential steps in preparing your library for Maven Central is ensuring all your artifacts are signed with GPG (GNU Privacy Guard), an implementation of the OpenPGP standard. This section will guide you through creating your own key pair, distributing it to a key server, and integrating GPG into your build process.
Installing GnuPG
GnuPG, or GPG, is freely available and provides the necessary tools for signing your artifacts and managing your keys. Here’s how you can get started:
- Download GnuPG: Visit GnuPG’s official website to download the binary for your operating system. Alternatively, you can install GPG using Brew:
brew install gnupg
- Verify Installation: Confirm that GPG is correctly installed by running the following command in your terminal:
gpg --version
- You should see an output similar to the following, detailing the version of GPG installed, along with supported algorithms and configurations.
$ gpg --version
gpg (GnuPG) 2.4.5
libgcrypt 1.10.3
Copyright (C) 2024 g10 Code GmbH
License GNU GPL-3.0-or-later <https://gnu.org/licenses/gpl.html>
This is free software: you are free to change and redistribute it.
There is NO WARRANTY, to the extent permitted by law.
Generating a Key Pair
A key pair is crucial for signing your artifacts; it consists of a public key, which you will share, and a private key, which you keep secure. Here’s how to generate one:
- Use the
gpg --gen-keycommand to start the key generation process. You'll be prompted to provide a real name and email address, which are used to identify the key. Optionally, you can set the expiry date for the key; it's common practice to set this to one or two years.
gpg --gen-keyKey Generation Output:
- The process generates a lot of random bytes to ensure the key’s security. You might be prompted to perform some actions (like moving the mouse or typing on the keyboard) to help generate entropy.
$ gpg --gen-key
gpg (GnuPG) 2.4.5; Copyright (C) 2024 g10 Code GmbH
This is free software: you are free to change and redistribute it.
There is NO WARRANTY, to the extent permitted by law.

Note: Use "gpg --full-generate-key" for a full featured key generation dialog.

GnuPG needs to construct a user ID to identify your key.

Real name: Central Repo Test
Email address: [email protected]
You selected this USER-ID:
    "Central Repo Test <[email protected]>"

Change (N)ame, (E)mail, or (O)kay/(Q)uit? O
We need to generate a lot of random bytes. It is a good idea to perform
some other action (type on the keyboard, move the mouse, utilize the
disks) during the prime generation; this gives the random number
generator a better chance to gain enough entropy.
We need to generate a lot of random bytes. It is a good idea to perform
some other action (type on the keyboard, move the mouse, utilize the
disks) during the prime generation; this gives the random number
generator a better chance to gain enough entropy.
gpg: key 8190C4130ABA0F98 marked as ultimately trusted
gpg: revocation certificate stored as
'/home/mylocaluser/.gnupg/openpgp-revocs.d/CA925CD6C9E8D064FF05B4728190C4130ABA0F98.rev'
public and secret key created and signed.

pub   rsa3072 2021-06-23 [SC] [expires: 2027-06-23]
      CA925CD6C9E8D064FF05B4728190C4130ABA0F98
uid                      Central Repo Test <[email protected]>
sub   rsa3072 2021-06-23 [E] [expires: 2027-06-23]
Completion:
- Once completed, GPG will display the details of the generated key, including the key ID and expiration date. It’s important to note the key ID, as you’ll need it for future operations like signing artifacts or uploading your key to a key server.
Distributing Your Public Key
To allow others to verify your signed artifacts, you must distribute your public key to a key server. Here’s how:
Send the Key to a Key Server:
- Use the
gpg --keyserver [keyserver] --send-keys [Your-Key-ID]command, replacing[keyserver]with the address of a key server (e.g.,keyserver.ubuntu.com) and[Your-Key-ID]with your key ID.
gpg --keyserver keyserver.ubuntu.com --send-keys [Your-Key-ID]For more details, please visit SonaType GPG Tutorial!
Completing these steps meticulously prepares your library for the final push to Maven Central. It’s a process that underscores the importance of transparency, security, and ease of use — qualities that significantly enhance the value of your library to the developer community.
Step 4: Publishing to Maven Central
Publishing your Java library to Maven Central makes it accessible to developers worldwide. This process involves several steps, including registering for an account with Sonatype’s OSS Repository Hosting (OSSRH), configuring your project, deploying your library, and finally, releasing it to Maven Central. Here’s a detailed breakdown of each step.
Register to Publish Via OSSRH
As of March 12th, 2024, the registration for publishing artifacts to Maven Central through OSSRH (OSS Repository Hosting) has shifted to the Central Portal. This new approach streamlines the process but comes with specific requirements and steps that you need to follow closely to ensure successful registration and subsequent artifact publication. Here’s a detailed guide on how to proceed:
Create an Account
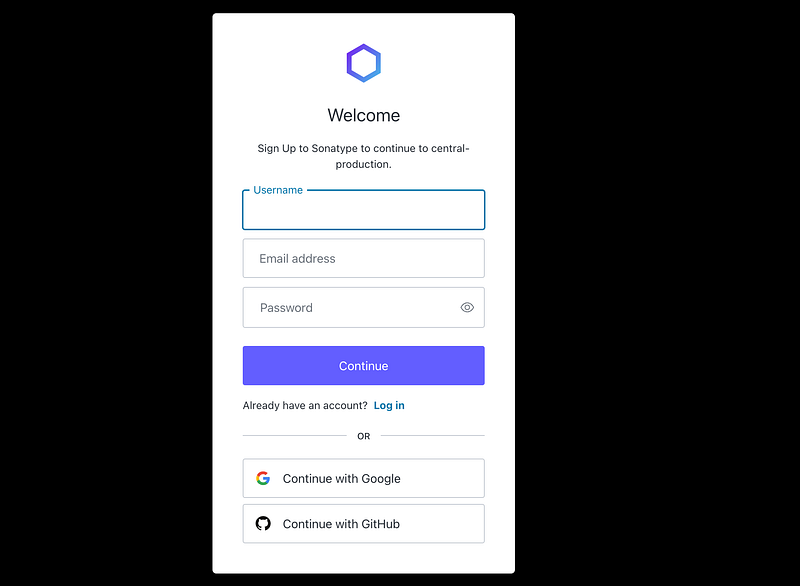
Important Note: When creating an account for OSSRH, avoid using social logins (Google or GitHub). Instead, opt for the traditional username & password method. This is crucial because social login accounts are not compatible with the OSSRH login system.
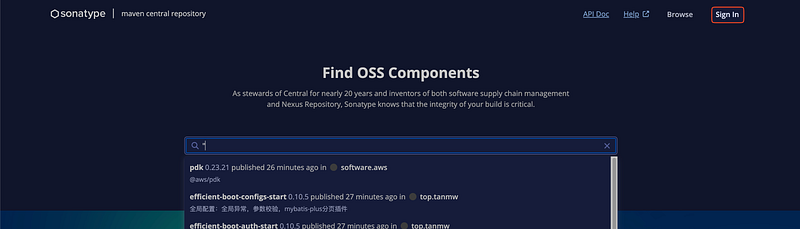
- Account Registration: Go to Central Sonatype and click on the “Sign In” link at the top right corner.
- When prompted, choose the option to create an account using a username and password. Ensure the email address you provide is valid and accessible, as it’s essential for email verification and future communications with Sonatype.
- Email Verification: After signing up, check your email for a verification message from Sonatype. Click the verification link to activate your account. Unverified accounts will face limitations, including the inability to respond to your OSSRH requests.
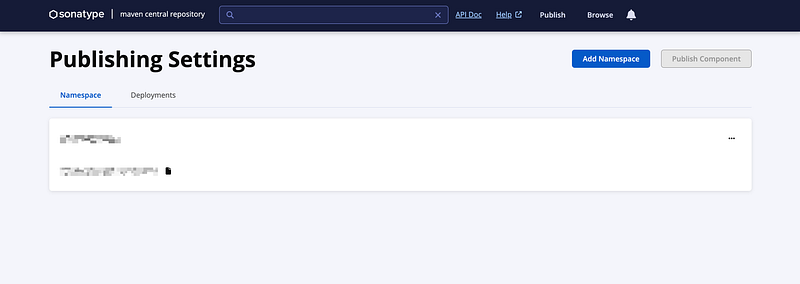
Create a Namespace
Once your account is set up, you’ll need to establish a namespace for your project. This namespace will serve as a unique identifier for your artifacts in Maven Central. Follow the instructions on the Central Portal to register your namespace.
Caution: Decide carefully between publishing directly in the Central Portal or using OSSRH. Once you publish your first artifact, migrating released components back to OSSRH can be cumbersome. If you prefer using OSSRH, contact Central Support before making any publications.
Contact Central Support at Sonatype
With your namespace verified, reach out to Central Support to initiate the transfer of your namespace to OSSRH. Provide essential project details, including:
- Reason for choosing OSSRH over direct Central Portal publishing.
- Group ID: The unique identifier for your artifacts, following Maven’s coordinate requirements.
- Project URL: The location of your project’s website or repository.
- SCM URL: The source control URL.
- Username(s): List of usernames authorized to deploy artifacts under this group ID.
The review process typically takes less than two business days. Await confirmation from Sonatype before attempting to deploy your artifacts.
Publishing
After receiving approval and completing the necessary setup, you are ready to publish your artifacts via OSSRH. This step involves configuring your project’s pom.xml for deployment and performing the actual upload of your artifacts using Maven or Gradle.
Managing Your Project
To add or remove publishing permissions for your project, contact Central Support with your request details. Currently, permission management for OSSRH projects is handled directly by the Central Repository maintainers.
Configure pom.xml for OSSRH Deployments
To deploy your artifacts to OSSRH and subsequently to Maven Central, you must configure your project’s pom.xml file with the OSSRH repository information:
<distributionManagement>
    <snapshotRepository>
        <id>ossrh</id>
        <url>https://s01.oss.sonatype.org/content/repositories/snapshots</url>
    </snapshotRepository>
    <repository>
        <id>ossrh</id>
        <url>https://s01.oss.sonatype.org/service/local/staging/deploy/maven2/</url>
    </repository>
</distributionManagement>
This configuration directs Maven to deploy snapshots and releases to OSSRH. Snapshots are development versions that can be frequently updated, while release versions are more stable and immutable once uploaded.
Deploying Your Library
With everything configured, you can now deploy your library to OSSRH using Maven. Open your terminal and navigate to your project directory. Run the following command:
mvn clean deploy -P releaseThis command compiles your project, packages it, and deploys it to the OSSRH staging repository. The -P release flag activates any Maven profiles configured for release builds, which might include additional steps like artifact signing.
Releasing and Syncing to Maven Central
Once your library is deployed to a staging repository on OSSRH, you must close and release the staging repository to sync it to Maven Central. This process is done through the OSSRH Nexus Repository Manager interface:
- Log in to OSSRH Nexus Repository Manager: Access the Nexus Repository Manager, and log in with your Sonatype Jira account credentials.
- Find Your Staging Repository: Navigate to the Staging Repositories section, and locate your newly uploaded staging repository. You can filter repositories by your
groupId. - Close the Staging Repository: Select your staging repository and click Close. Closing the repository triggers a series of checks to ensure your artifacts meet Maven Central’s requirements. You may be required to fix any issues identified during this process.
- Release the Staging Repository: Once successfully closed (verified by the absence of any errors), you can Release the repository. Releasing makes your artifacts available in Maven Central. It might take a few hours for your artifacts to become visible due to indexing delays.
Congratulations! Your Java library is now published to Maven Central and available for use by developers worldwide. Remember to monitor your project for any updates or security fixes and follow a similar process to release new versions.
Explore More on Spring and Java Development:
Enhance your skills with our selection of articles:
- Spring Beans Mastery (Dec 17, 2023): Unlock advanced application development techniques. Read More
- JSON to Java Mapping (Dec 17, 2023): Streamline your data processing. Read More
- Spring Rest Tools Deep Dive (Nov 15, 2023): Master client-side RESTful integration. Read More
- Dependency Injection Insights (Nov 14, 2023): Forge better, maintainable code. Read More
- Spring Security Migration (Sep 9, 2023): Secure your upgrade smoothly. Read More
- Lambda DSL in Spring Security (Sep 9, 2023): Tighten security with elegance. Read More
- Spring Framework Upgrade Guide (Sep 6, 2023): Navigate to cutting-edge performance. Read More
References:


