
Progressive Enhancement Techniques for React Part 1
Server rendering is well-known in React, and there are many benefits to it. Besides the main benefit of server rendering giving faster page loads, it also enables large amounts of the site to run without JavaScript. There are many reasons why you would want this, but my personal reasons are that it allows you to completely drop support JavaScript in older browsers, but still have the site function.
However, server rendering on its own will only go so far, and it is common that a lot of the interactivity of the site — including data submission — will not function. In the next few blog posts, I’ll be discussing techniques you can have the site function without JavaScript in a way that does not duplicate efforts between the server and browser.
For these examples, we’ll be using React, Redux, and React Router, so you’ll need to be familiar with these before!
A Simple Form
Note: the demo project was updated to use a variation on the technique written here. See the readme for changes.
In this project, we’ll be creating an application where you can add, edit, delete, and list details of cats. Our first step will be to add a form to create a cat entry.
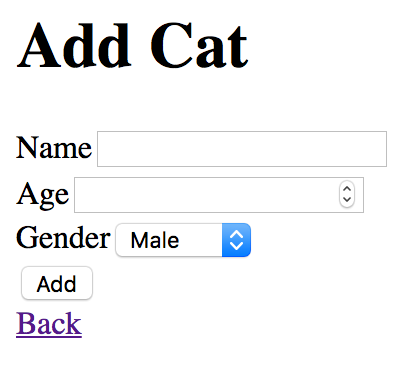
This is a regular form, so when JavaScript is disabled, the form will be submitted to the server, and the server can use the data to dispatch an action accordingly.
However, when JavaScript is enabled, we want to dispatch the action directly from the browser. In React, it’s quite common to do this by keeping the entire form in the state or a store using two-way data binding, and then using this state when submitting the action. However, doing this means that you’ll have to have two separate ways of getting the form data for client and server.
Instead, we can skip storing the state of the form all together using uncontrolled components. When the form is submitted, we’ll read the data present in the form in exactly the same way the browser does when a form is normally submitted, and dispatch an action using this data.
Below, I’ve used a function handleCatAddition that does exactly this, but we’ll get into the implementation of that later.
I’ve added a hidden input called action-creator, which I’ll detail later.
The Action Creators
We haven’t covered how we get the data yet, but assume we get an object with the keys name, age, and gender with corresponding values.
Firstly, we’ll need to validate the input. Secondly, since this data came from a form, all values are strings. For validation and casting the strings to JavaScript types, I’ll be using the library yup, but there’s also Joi among others.
For the actual action creator, I like to split it into two parts: a bit that takes valid input and performs something like an AJAX call; and a bit that validates the input and calls the first action.
In practise, both these can fail, so you’ll want to handle those cases.
Earlier, I said that I added an input called action-creator into the form. We’ll need to create a map of the value of these inputs to actions creators we want to dispatch when the form is submitted. In this case, we only have the add-cat action creator.
Putting it Together: Browser
We’ll use Redux’s mapDispatchToProps to create handleCatAddition function from earlier. This function will be called event that contains the form element submitted. To read the data from this form element, I’m using form-serialize.
The data we get from this be an object keyed by the name of the form elements, and values with the corresponding form element values. This object will include the key action-creator, which when combined with the action creators map previously, will give us an actual action creator to call.
Now we know what action creator to call, and we have the data for this action creator, it’s just a case of linking it all together. Since this method is generic to all form submissions, we’ll create a factory.
This factory is then used when connecting your components.
Putting it Together: Server
The server is actually even simpler — the basic setup is over at React Router’s documentation. We just need to extend this to create a store and handle the form actions.
When you create the store on the client, you’ll want to use the global variable __INITIAL_STATE__. There’s more information for this over at the Redux documentation.
Summary
This was a quick overview on how to handle user input in a uniform way between the server and client.
Because we handle data in a consistent way and perform actions in a consistent way, it became really easy to share code between the client and server.
Earlier, I said that submitting a form could fail validation — for example, if the age was not a number. It’s easy to add form errors to the store and then show these in the form. By putting the errors in the store, you’ll get consistent form validation between the server and client.
In the few next posts, I’ll be detailing a bit on data fetching and how to handle more complicated forms.
You can view the code for the completed project at https://github.com/jacobp100/react-isomophic-demo