
Preparing CSV Files In AWS S3 To Ingest By Data Cloud
There are seven steps that you need to perform to create an AWS S3 bucket and the credentials required to allow for the ingestion of data in Data Cloud. I am providing brief instructions in text for each step, but you are welcome to watch the full description in a video if you need help on a particular step.
1. Login
The first step is to log in to https://aws.amazon.com/console/ or create an account and then log in in case you do not have an account yet.
2. Create AWS S3 Bucket
Once you are logged in, you will need to create an AWS S3 bucket. The name of the bucket should be using kebab case and must be unique across all buckets in AWS S3 (not just your buckets), that’s the reason in the video I had to change the name.
3. Create An IAM Policy
You need to create a policy with these characteristics:
- Set the actions allowed to: Write.DeleteObject and Write.PutObject
- Set a specific resource, specifying the bucket’s ARN
- Give the policy a name
4. Create An AWS User
When creating the user you need to:
- Give the user a name
- Assign two policies: AmazonS3ReadOnlyAccess, and the one you created above
5. Create Credentials
Follow these steps to create the credentials
- Create the Access Key
- Download the Access Key and Secret Key into a .csv file.
Keep this file secure, and you will need these credentials (Access and Secret keys) when ingesting the data in Data Cloud.
6. Validate User (Optional)
This step is optional, but highly recommended. You want to make sure the user got created correctly.
AWS offers a policy simulator that allows you to validate the user is properly set up.
Follow these steps:
- Select the user you want to validate
- Indicate you are testing the S3 settings
- Select these actions: DeleteObject, GetBucketLocation, GetObject, ListBucket, PutObject
- Configure the DeleteObject and PutObject to indicate the bucket to test
- Run simulation
7. Upload Files
Follow these steps
- Create a folder, or select it if you already created one before
- Navigate to that folder
- Upload files
8. Ingest Data Files
Once the CSV data has been loaded to the AWS S3 buckets, then you can use that in Data Cloud. You must provide:
- S3 Bucket Name (Step 2)
- S3 Access Key (Step 5)
- S3 Secret Key (Step 5)
- Directory (Step 7)To select the root directory, leave this field blank. To select any other folder, write the name without a leading slash, for example, ‘Sales/OrderHeaders/’, not ‘/Sales/OrderHeaders/’.
- File Name (Step 7)
- Source
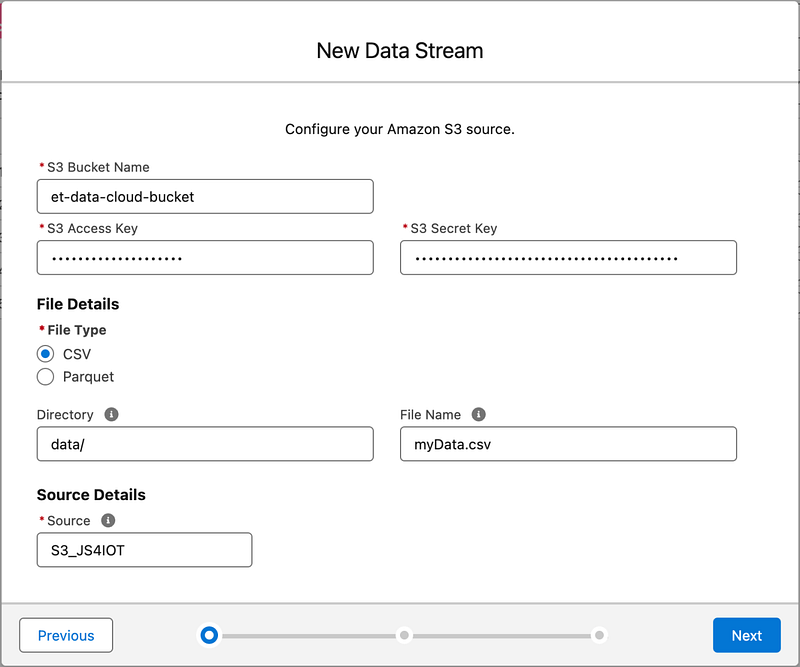
Complete the details while ingesting the data


