
Plant Perennial Seeds the Easy Way and Save Some Green This Spring
Happily, my native plant lady friend shared how she plants seeds, Southern Style.
I come from a long line of Midwestern gardeners and farmers. My great-grandfather kept bees, tended fruit trees, and gathered his neighbors’ leaves for garden compost. My grandparents employed me as chief weed-puller in their huge garden. I picked weeds in my parents’ garden while mom dropped seeds into holes.
When we moved to the farm, I baled hay, walked rows of soybeans (again with the weed pulling), and worked with Mexican ladies on a tomato harvester.
I left the farm and lived in Chicago for 25yrs without a garden. But that didn’t stop me from starting tomato plants from seed. Every spring, I planted little pots and set them on my bookshelf in front of my south-facing kitchen window. After the last frost, I gave them to friends with gardens. In return, they gave back some of ‘my’ tomatoes.
After I married a suburbanite, and finally had a yard for gardening, I became an Illinois Master Gardener. For 11yrs, I learned and experimented, taught classes, and did presentations for assisted living residents.
Then we moved to Alabama, where I discovered a whole new world of gardening.
First thing I did after we settled into our new digs? I joined the local garden club and realized how much I needed to learn about gardening in the South.
Last year, Jessica, my native plant lady friend, taught me how to start perennials from seed … in the winter, outside in flats.
I’d never heard of such a thing.
She is a certified nursery grower and plants thousands of perennial seeds each year. She tends them to maturity and sells them right there in her yard on the lake.
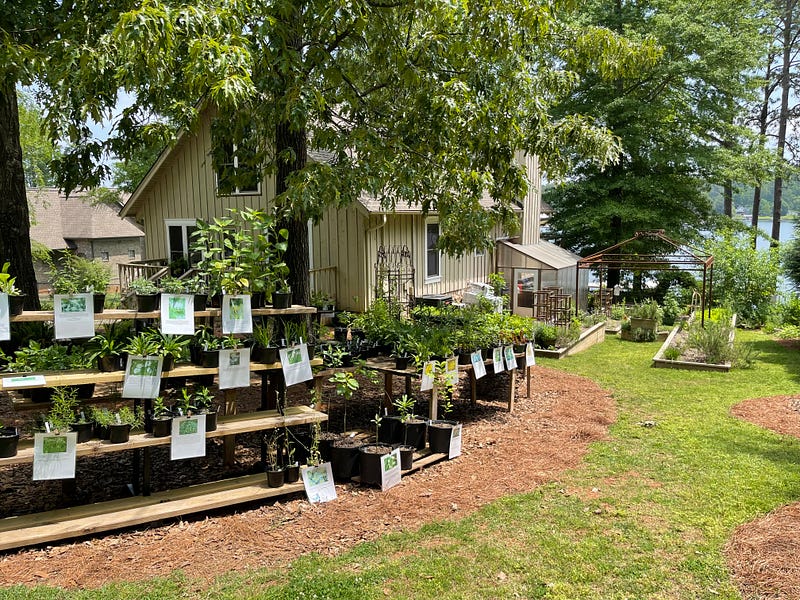
They’re beautiful and reasonably priced, and I’m happy to support her business. Unfortunately, my enthusiastic support soon exceeded my budget.
Then a funny thing happened.
I found several of my purchased varieties growing wild in my own woods. Since I love to forage for seeds and grow my own plants, I asked her how she, a native Alabamian herself, propagates perennials.
Bless her heart, she was happy to tell me how she does it.
Jessica’s on a mission to promote native plant gardening. That’s what motivates her. If one of her customers wants to help the cause by propagating more native species, she’s happy to help.
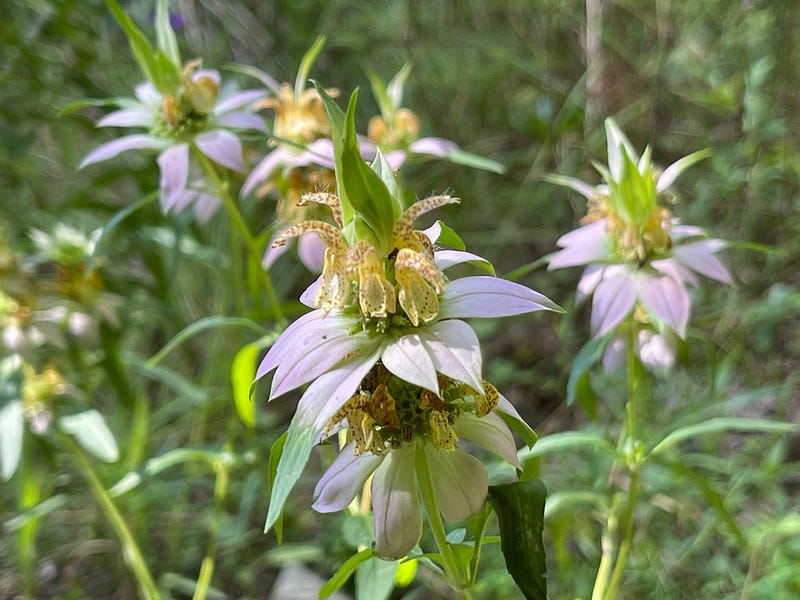
Last winter, I followed her directions and planted the seeds from the plants I bought from her. I had great success with Coreopsis, Blue Mist Flower, three native varieties of Echinacea, Blue Cardinal Flower, and Spotted Bee Balm.
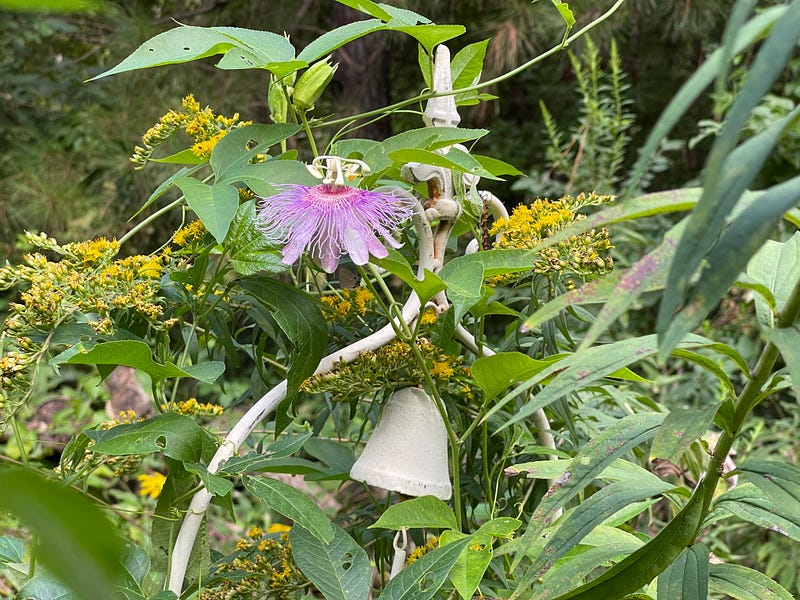
I even got a Passion Flower to grow, but it died. This one grows in a patch that I found next to the driveway.
If you plant them, hopefully, some will grow.
I just recently planted my seeds, most of which I collected this fall. I was still hunting for Evening Primrose seeds last week. I also planted some leftover seed from 2022. Why not?
Most gardeners keep leftover seed. You probably have some perennial seeds, ripe for the planting, and most everything else you need to experiment this year.
Perennials can be a challenge. They don’t sprout or grow as fast as annuals. Perennials don’t ‘bolt’ like their leggy cousins. They take time, which is why they cost so much more than annuals.
Usually, perennials germinate at a lower rate than annuals, but even if you only get a 50% germination rate, you’ll save a bushel of green by growing your own. A perennial in a six-inch pot can cost upwards of ten dollars or more. If you follow the odd-number-over-one rule — avoid planting just one plant and group in odd numbers of plants — you’re looking at $30, $50, $70 just for one good grouping of one variety.
Gather your supplies
Potting soil. I don’t use seed starter to start any seeds, perennial or annual, just plain old potting soil.
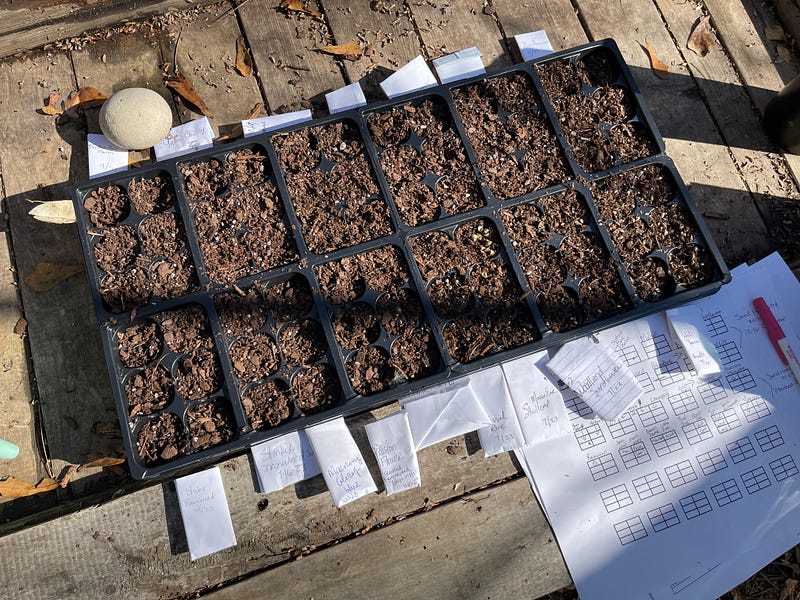
Flats. I buy the two-piece sets that have a separate drainage tray in which the cell packs sit. They’re light and easy to carry. You won’t need as much soil compared to small pots or bigger, individual containers. Plus, it’s easier to keep a record of what you plant and where you plant them in the flat.
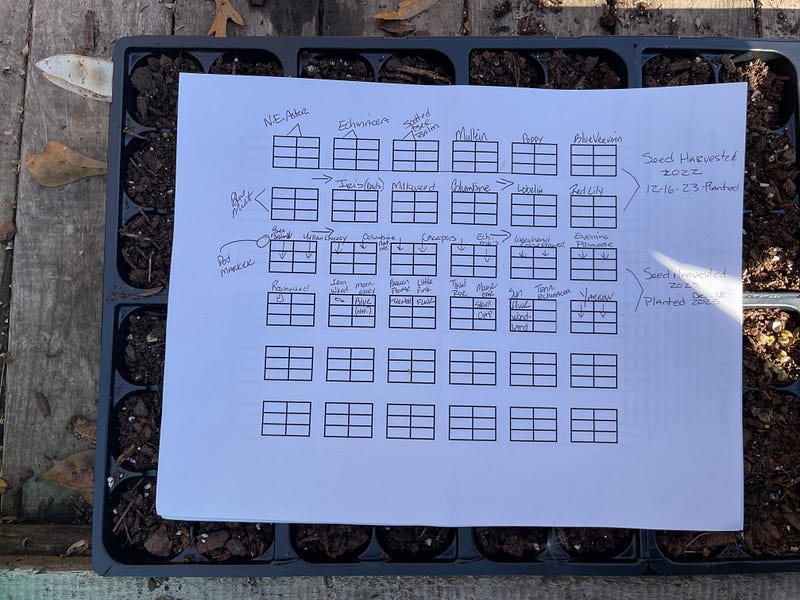
A list of your seeds and a diagram. I make a list of the seeds and check them off as I plant them.
A simple diagram of your cells helps keep track of where you plant your seeds. I’ve neglected this step, but trust me, don’t skip the diagram. I’ve used plant markers, but the permanent ink always fades away.
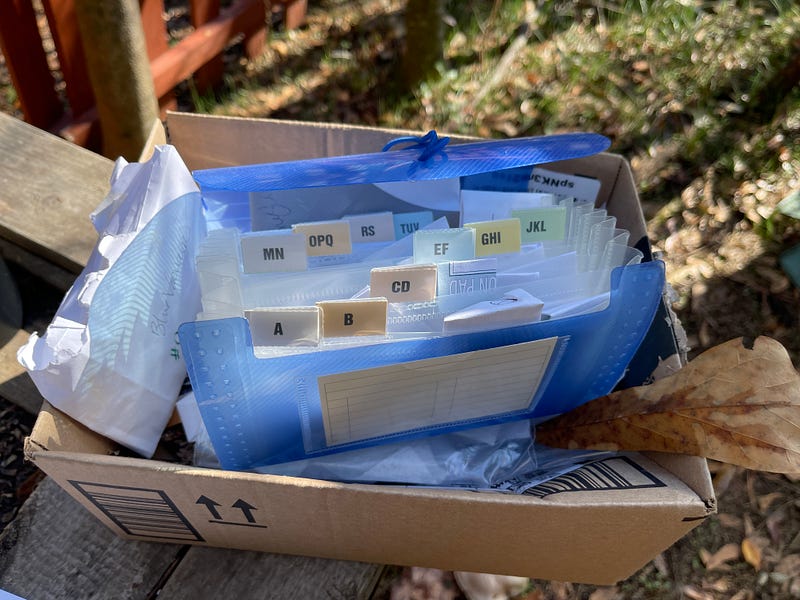
Seeds. I forage seeds in the wild, save them from my own plants, and purchase some. I keep them in little paper envelopes and file them in a collapsible file folder.
Gloves and a trowel. I wear gloves and use a trowel to fill the flats with soil. I’ve tried to pour soil out of the bag, but inevitably a giant clump falls out and I end up with a giant mound on top of the flat and a big mess. It’s just easier to control this process if you use a trowel. Potting soil isn’t cheap and I don’t want to waste it.
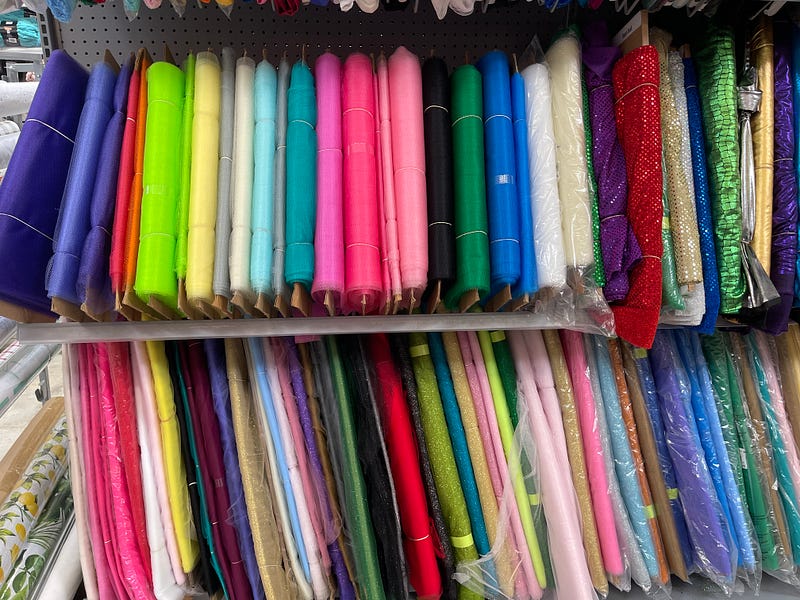
Tulle fabric. That’s not a typo. I buy mine at Walmart. It comes in luscious colors and makes a great netting to keep squirrels and birds from messing with your flats.
The simple process
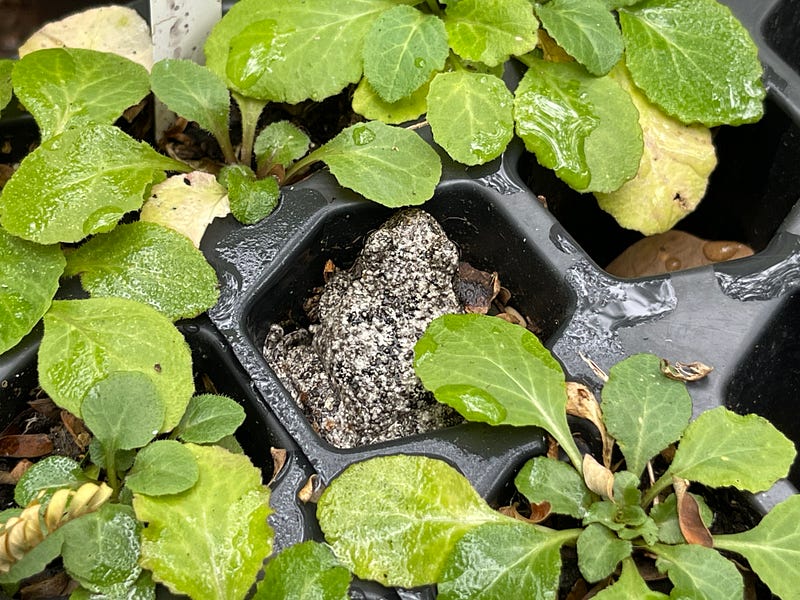
Trowel the soil into the flats and leave about half an inch of space in the cell for the seed and the top layer of soil.
Once the soil is in the flat, I remove my gloves. Bare, dirt-free hands work best when handling tiny seeds.
Pour some seed into one hand and drop them on top of the soil with the other hand. Aim for two or three seeds per cell, but sometimes they’re teeny tiny and hard to plant individually. Often, I drop many more than a few into each cell. Not to worry, I can thin them after they appear in the spring.
I don’t bother with planting depth at this point. My echinacea plant just drops seeds onto the ground where they over-winter, and in the spring, some will grow.
I simply want to mimic that process as best I can.
As you plant, note on your diagram which seeds are in which cells. Sprinkle a layer of soil on top of your seeds, and you’re almost done.
I moisten the soil with a watering can to keep the soil from blowing away or moving around while I take the final step.
Remember that pretty tulle fabric from Walmart? Cut it to fit over the top of the flat with about six inches extra on each side. Tuck it underneath the flat like you’re making a bed. The tulle helps deter seed eating critters like squirrels, chipmunks, and birds from digging up your flats.
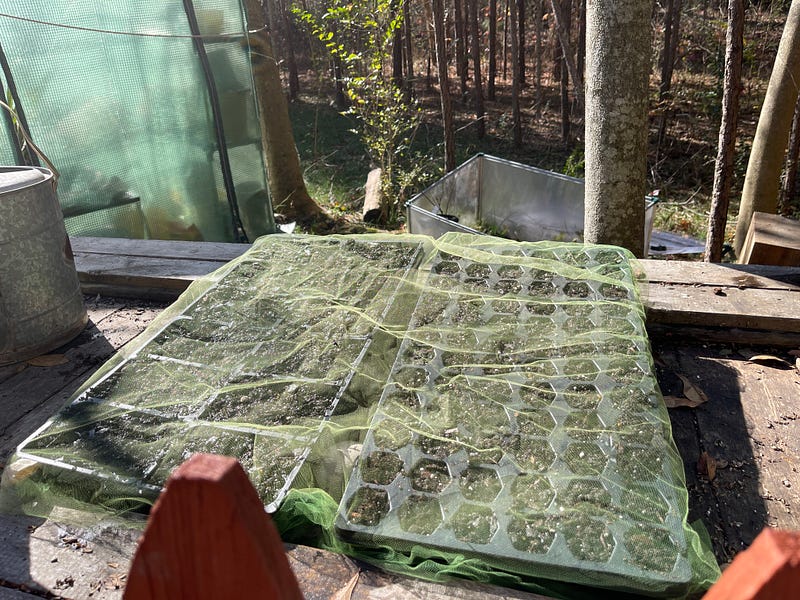
Now, step away from your planted flats. Leave them alone. If it rains a lot, like it did the other night, tip your flat to the side and drain the water out of the holding tray. This prevents the soil from getting so waterlogged that your seeds rise to the top and float over the edge of the cell.
Depending on where you live, you can do a couple of things.
Here in the south, I just leave the flats outside on a potting bench or table, like Jessica taught me. Anywhere off the ground.
If I still lived up north, I would plant them the same way, but leave the flats in an unheated shed or garage, and outside only if I could protect them with something more critter-proof than tulle.
In the dead of winter down south, there’s no snow or permafrost, and food isn’t as hard to find. Up north, during a snowy, frozen winter, starving critters and birds employ more aggressive tactics when they forage for food, like seeds.
Plant and learn. That’s my motto.
When I moved out of Chicago to the western suburbs, I collected seeds from local perennials and planted them right in the ground before the hard frost, and some came up that spring. Why not start them in flats? Maybe wait until February or March?
I’d give it a go, but I’m a natural risk taker.
I make no promises of success. Many of my seeds didn’t germinate last year, but many did. I transplanted them and they flourished, especially the Lobelia.
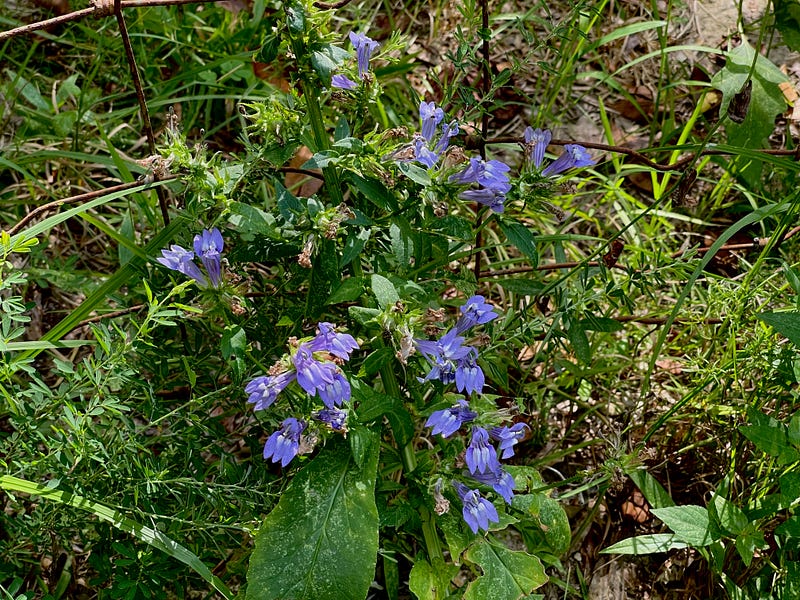
Hopefully, they’ll come up bigger and bluer this spring and be even lovelier.
Remember, we’re talking perennials, not annuals.
The great thing about starting perennials from seed is that you can grow lots of them in a small space, and they can live in those flats for months until you decide where to transplant them. I still have some Lobelia and Blue Mist in pots planted last winter, waiting patiently for me to plant them. There’s no rush. They’re perennials. They take time.
If starting your perennial seeds in the winter doesn’t work for you, plant them in the ground later this spring. Don’t forget to make a note of where you plant them.
No matter where you live, you’ll be able to start annuals indoors in a few months. Gardeners take great comfort in the promise of spring.
In the meantime, while you wait, you can plan your vegetable garden, peruse the seed catalogs for new heirloom varieties, pick out some colorful annual flowers for your cutting garden, and decide which culinary and medicinal herbs you need to replenish your stock.
If you’re a gardener, you know that there are always new techniques to learn, especially from other gardeners. Not all techniques work for all gardeners, but some work for some gardeners some of the time.
If you’re like me, you’re willing to try just about anything to get things growing.