
picam — Using raspberry pi camera module as home cctv
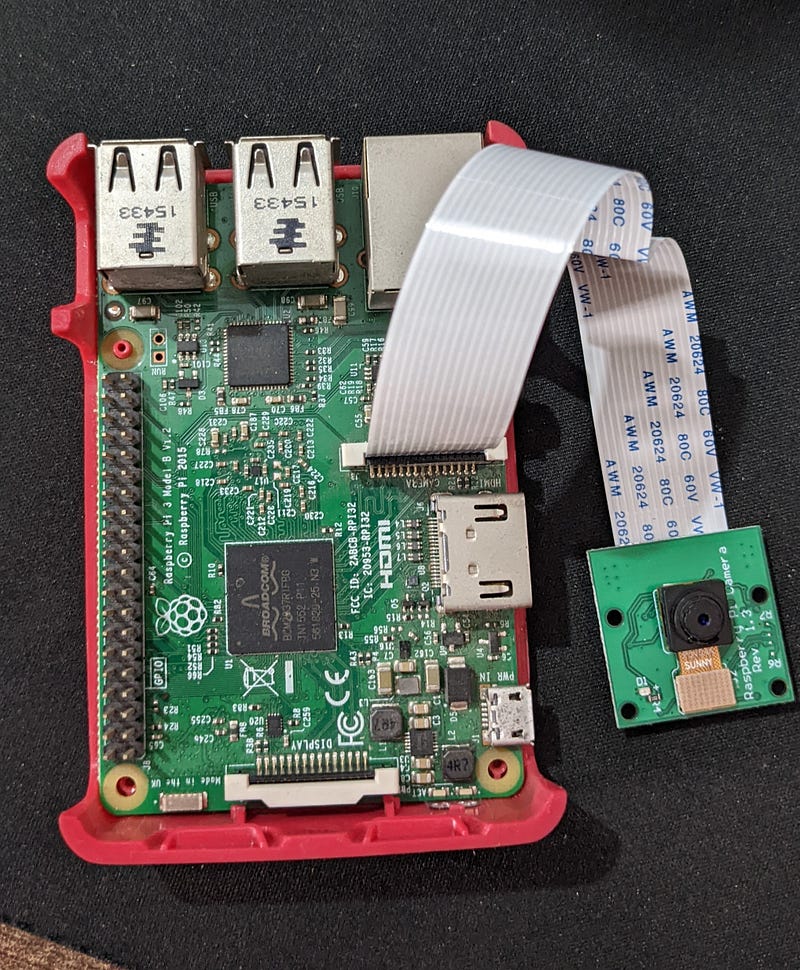
We decided to go for a trip to Mathura and we don’t have CCTV camera security installed in our house. I was worried about this and wanted a quick and cheap solution that I can use for. As days passed and the day when we had to leave was coming close, one day I saw raspberrry pi 3B which I purchased in my sophomore year in college. I went to rajendra electronics in sector 35 and bought a raspberry pi camera module. Then I attached the cable of camera module to pi as mentioned in their official website. Then I ran the command
raspistill -o Desktop/abc.jpg
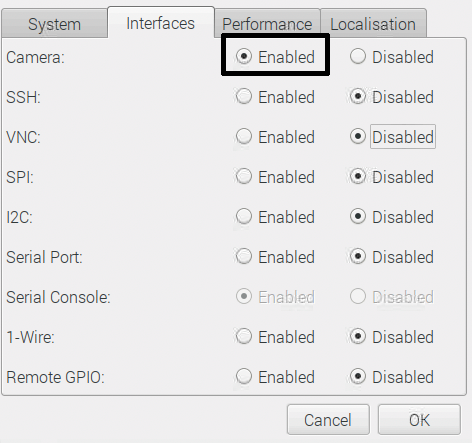
and camera was not working. It took me 3 or 4 attempts of plugging and unplugging the camera cable to pi3 and after that camera was working. The above command was storing an image to desktop. Also if your Camera interface is not enabled you need to enable it first by going into Preferences > Raspberry Pi Configuration and then in interfaces tab enable the camera radio button.
After that I installed motion by using the command —
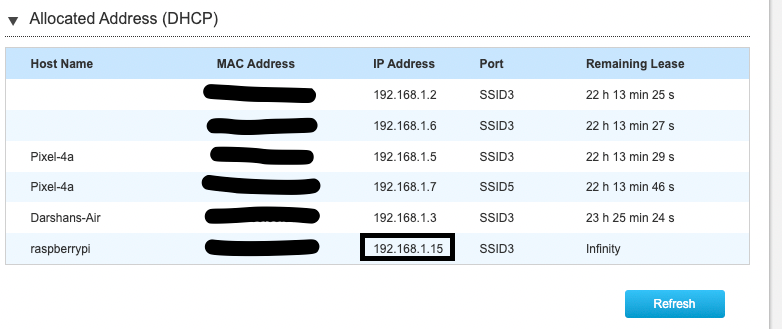
sudo apt install -y motionAfter that we need to do some configuration tweaks to make the camera record 24 * 7 and stream it at 192.168.1.15:8081. Please note that before doing all of this I have already assigned 192.168.1.15 as static IP to my pi by adding it in router’s admin panel which you can access at 192.168.1.1
Open /etc/motion/motion.conf in editor of your choice and modify the following configurations
videodevice /dev/video0
v4l2_palette 15
input -1
width 640
height 480
framerate 25
quality 75
target_dir /home/pi/stream
stream_port 8081
stream_localhost off
Search for the config type (Ctrl+W if using nano) (/
Then you have to enable the daemon for motion and start it everytime pi boots. For this open /etc/deafault/motion in editor of you choice and make sure following entry is present in it.
start_motion_daemon=yesAfter that issue the command
sudo systemctl enable motion
rebbot
After rebooting pi head over to 192.168.1.15:8081 in browser of your choice and see the live stream —
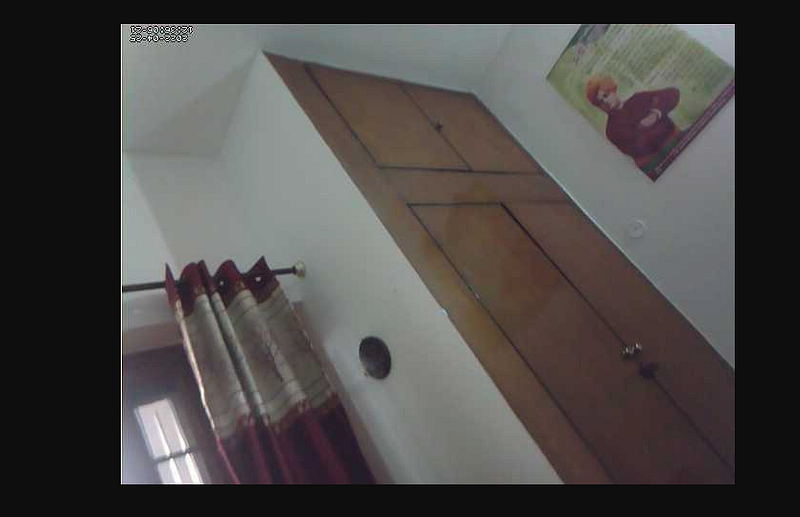
Please do not confuse the above video for an image. Above picture is just a screenshot of the stream running.
Now you can access the stream from any device present inside the LAN by heading over to 192.168.1.15:8081. But I want to access it from anywhere in the world. To do that I created an account on NO-IP (noip.com) and installed their config file on my pi which reported my public ip to them after a set interval and they assigned a domain name to that public IP. And after that I make sure to do port forwarding to accept internet traffic and forward the traffic to appropriate device and port which is pi in this case.
I did this as I had very less time available to me otherwise I would’ve bought an static IP for myself and instead of using motion I would’ve created a script in python to upload the images to s3 bucket or maybe uploading those images to a external hdd/ssd shared through NAS.
Now I suppose it’s time I should put down my pen.