
iction|Non-Fiction|AI-Generated Images
Photo-Realistic AI Images
Beginners guide to using Midjourney!
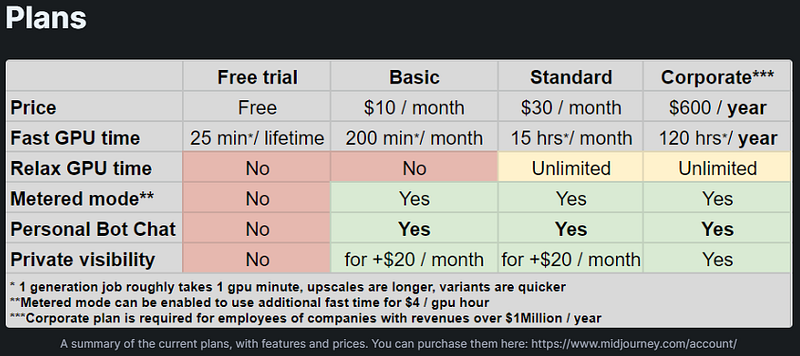
Midjourney is an Artificial Intelligence art generator (AI.) You are given twenty-five free minutes to use during the free trial, which equates to about twenty-five images. Each Upscale, Variation, or remake of images is considered approximately one minute worth. Then (at the time of this article) you have the below options to upgrade to other packages.
During the free trial, you will enter prompts in one of the Newbie channels and all images are created in fast mode. (I generally use relaxed mode.) After subscribing, you can have everything privately generated in a bot channel (only you will see this,) called Midjourney Bot.
Midjourney can be used via their website or in Discord.

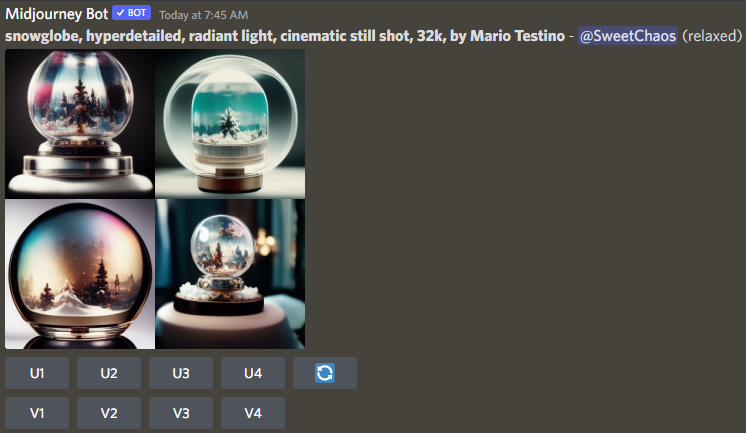
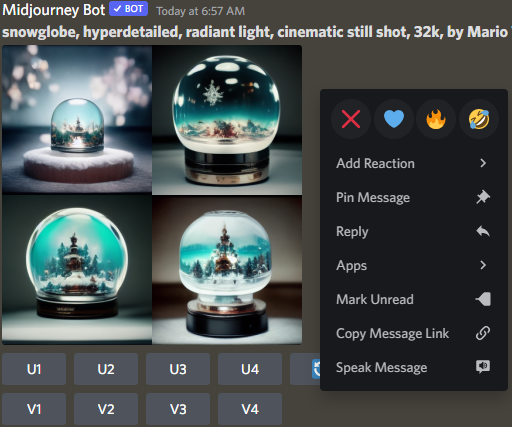
Each prompt begins by typing /imagine, then you add the rest of the prompt. It will only submit text without /imagine. (The above prompt is the prompt I used for this article.
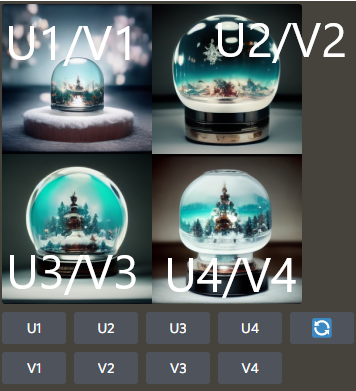
The above image shows a breakdown of what image corresponds with each button listed. U1 through U4 means you want to Upscale (produce a better image) the image shown. V1 through V4 means you want a new variation of the image. If you don’t like any of the images, you will click the double arrows at the end to generate four new images.
For the above set, I clicked the double arrows to re-generate the images a few times. I am pleased with the third option and will Upscale (U3) that choice.
Your feed will get quite messy generating new images. To remove unwanted images, right-click beside the unwanted image (or the gray smiley face at the right corner of each image prompt), then click the red X. If one does not show, type X in the search box — then it will appear.
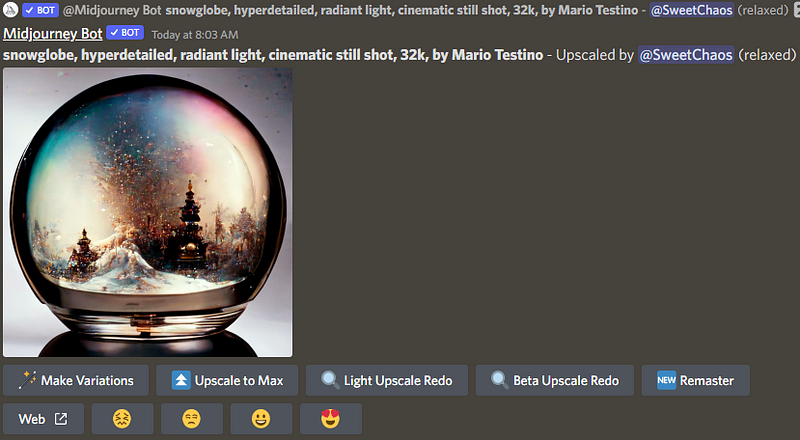
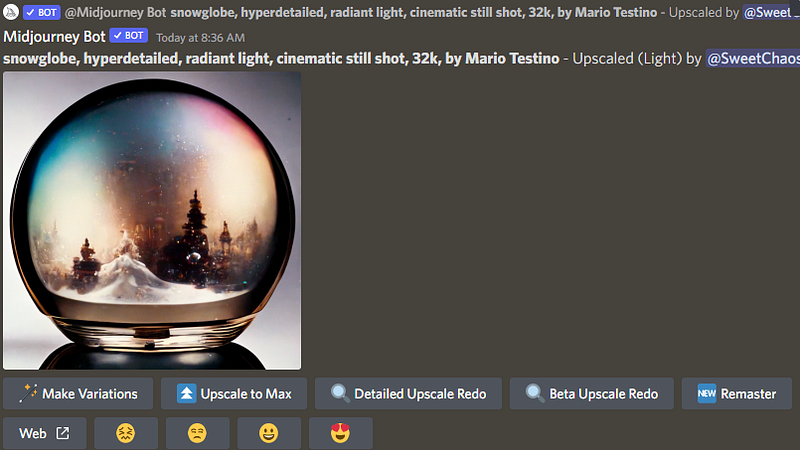
After Upscaling one time, we have new button options: Make Variations, Upscale to Max, Light Upscale Redo, Beta Upscale Redo, and Remaster. If you click the Web button, it will open the image on a Midjourney web page (you can download the image here.) To save the image on a mobile device, click the image, then the download arrow. The emojis allow you to vote on your own images if you choose.
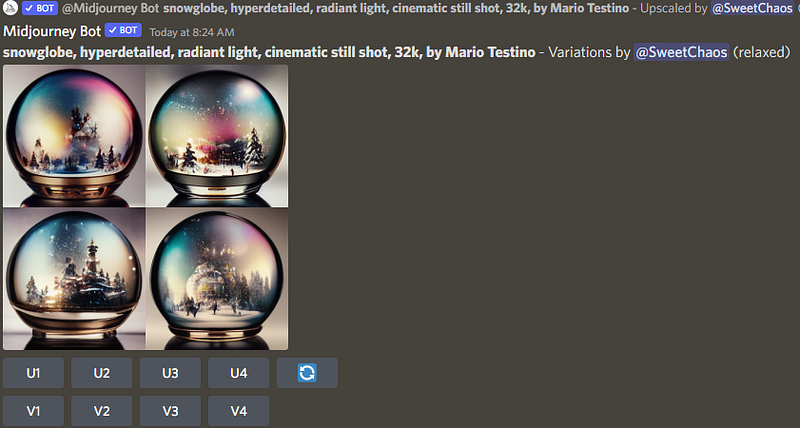
When you Upscale an image, you receive four new ones to choose from, as above.
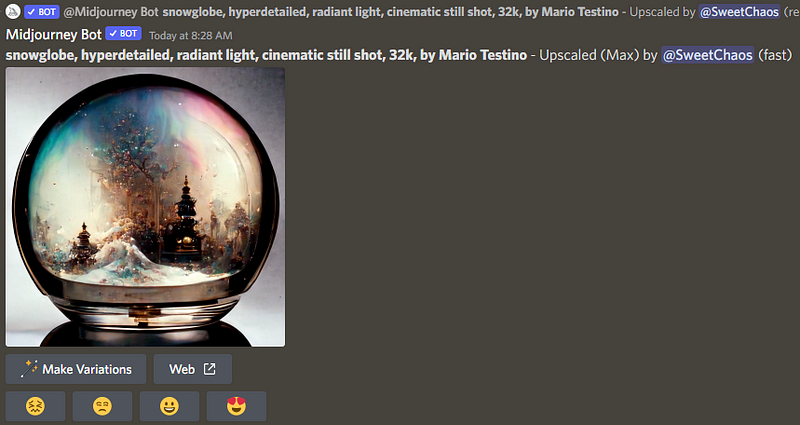
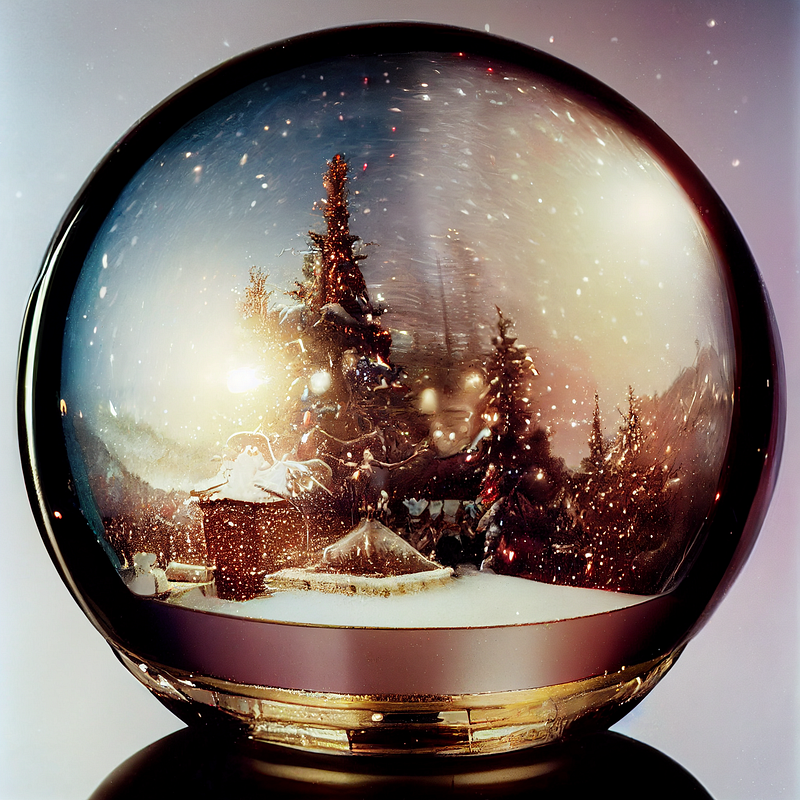
This is how the snow globe looks when Upscaled to Max (this is the only option that must be done in fast mode.) It has created interesting detail.
Here is how the snow globe looks after using Light Upscale Redo. The colors are more blended and the background details are softer than Upscale to Max.
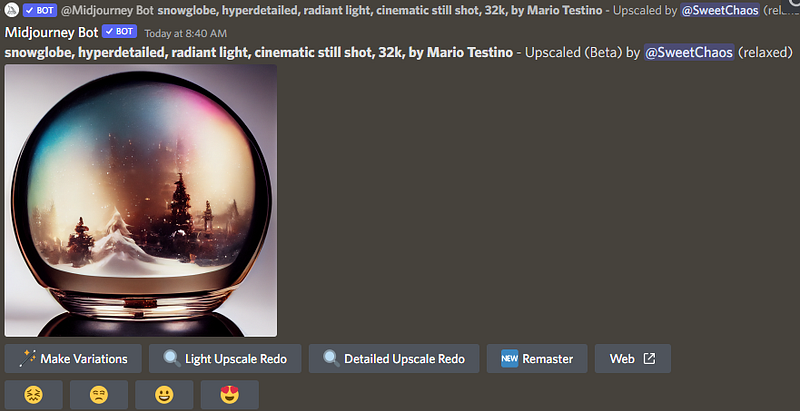
Using Beta Upscale Redo resulted in beautifully blending the colors and a clear image with subtleties in the background.
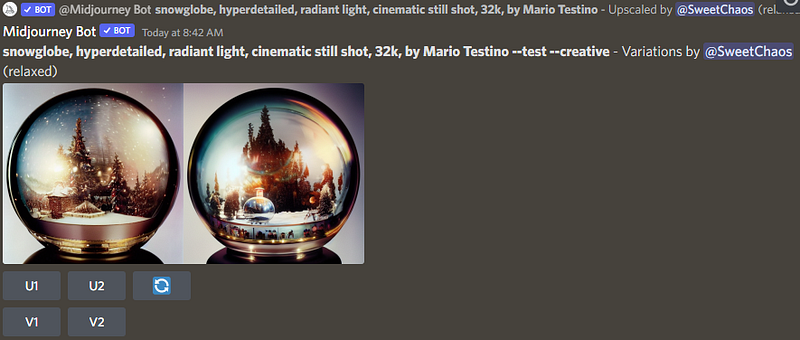
When you choose to Remaster an image, you are given two variations of the image to choose from to Upscale, get a Variation of an image, or remake the choices. I chose to Upscale option 1.
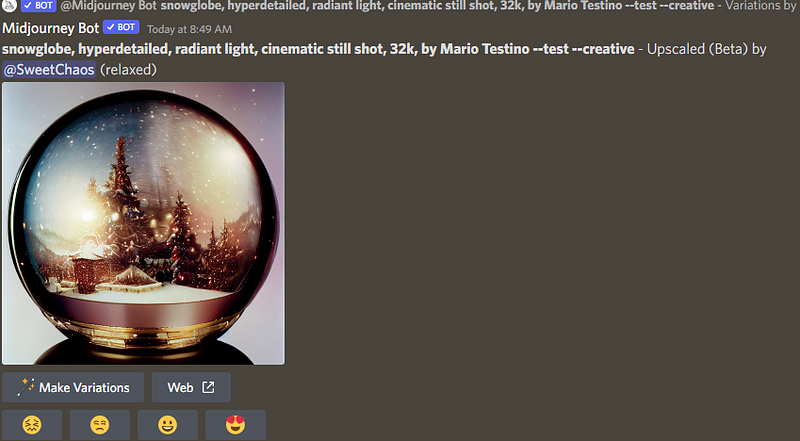
From the two choices using Beta Upscale Redo (above,) the above is the image result Upscaling the first option. (This is also the main image at the very top of this article.)
I almost always Remaster an image, then upscale it as above.
Let me know what you think and what you’d like to learn!
October 31, 2022 — Sizing — how to have different shaped images
For more writing and AI tips, check out my link below!
Sweet Chaos — Tickling your senses through fiction writing while shocking you with the outcome! Nothing is as it seems! Ready to read every addicting story leaving you on the edge of your seat?
Joining through my link gives me a smidge extra at no cost to you, and a treat for my dog!
Check out my publication — The Fictioneer’s Treasure Trove to raid and fill the library!