Organizing Web Bookmarks Can be a Mess, Here’s an Easy Fix with Notion.
…and sync it across every browser and device!
When it comes to internet browsing, I’m all over the place. I switch between several different devices…Mac, PC, and an iPad, all with slightly different browsers, from Chrome, to Brave, to Safari.
After too many instances searching (and often not finding) a bookmark, I figured…why not build a bookmarks page in Notion?
It’s pretty easy and surprisingly effortless. With a few additional browser plugins, it works even better. Let’s dive in!
Why Create a Bookmarks Page in Notion?
There are plenty of bookmark managers out there, probably with a lot more features, but the key benefit to making a bookmarks page in Notion is ensuring it is synced across any browsers and devices you use regularly.
Sync Everywhere
I tend to jump around browsers and devices often, which makes the bookmarks library far less effective.
Customize the Look
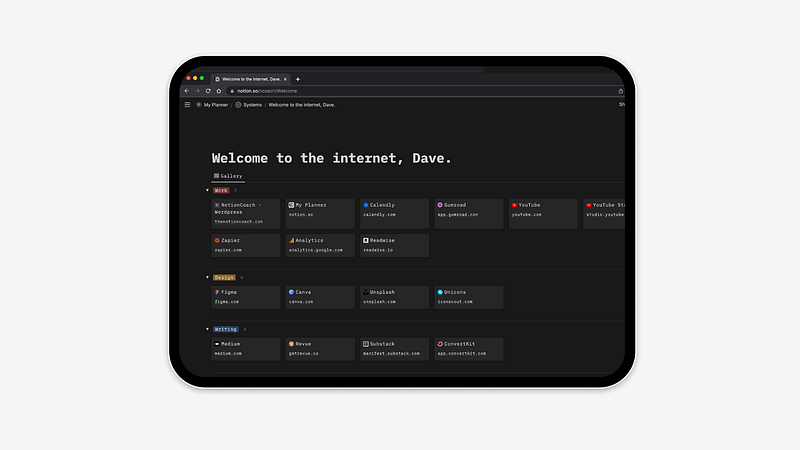
If you prefer Notion’s minimal aesthetic to a browser start page with ads or a bunch of information, the gallery view gives you a clean, no frills page with just bookmarks.
Easily Capture Website Links
With the Save to Notion extension installed, saving websites is possible in just a few clicks.
1. Create a Bookmarks Database
The first thing we need to do is create a new page and database. In this example, we’re using a gallery, for a few reasons:
- Gallery cards allow us to display more bookmarks without scrolling
- We can optionally display tags, categories, or other properties
To create a Bookmarks page:
- Create a new page
- Inside the page, create a database, and select the gallery option
2. Add Properties
Database properties allow us to add additional information to bookmarks. The most common example would be categories (for example, work, design, social media, etc.), but you can also add properties like Date Added or Notes.
To get started, create the following properties:
- URL (required)
- Tags or Categories
3. Customize Page
In order to see as many bookmarks on the page as possible, we need to make a few changes to the default view:
- Make page full width
- Change Card Preview from Content to Off
- Make URL visible
4. Install Save to Notion Extension
There’s a bunch of reasons why Save to Notion is a lot more useful than Notion’s Web Clipper, but the most important feature is customizing where links are saved, with the option of applying a template, or clipping page content.
To install Save to Notion:
- Navigate to Save to Notion Chrome Extension page
- Install on browser (Chrome, Brave, Edge)
- Open the extension button, and sign in to your Notion account
5. Connect Save to Notion to Your Bookmarks Database
Once Save to Notion is installed, there’s a few steps to connect it to your new database.
- In Save to Notion, Click Add a Form
- Make sure Workspace is correct.
- In Add to: type in the name of your Bookmarks database to find it.
- (optional) If you want to auto-categorize bookmarks, create templates, and apply a template. You will have to create new forms for each template in this scenario
- Save a site to check the connection
6. Download & Install New Tab Start Page Extension
This plugin will allow you to set your Notion page to open any time you open a new tab.
- Download the extension here: New Tab Start Page
- When prompted, add your Notion URL
- Test it out to make sure it works!
7. Save a Page!
Open a page you’d like to save, and use the Save to Notion extension. The new link should show up in your Bookmarks database. That’s it!
Want to dive deeper?
I shot a walkthrough video on how to get your bookmarks page up and running!
If you’re interested in the free template, you can also access it here! Notion Web Bookmarks Template
Lastly, if you’d like Notion + Productivity tips straight to your inbox, consider signing up for my newsletter!