
Unleash Your Productivity With Notion!
Make your Life Well Organized by using Notion as your Second Brain.
“ A dream written down with a date becomes a goal, A goal broken down into steps becomes a plan, A plan backed by action makes your dreams come true ” — Greg Reid
Focusing on a single task at a time results in higher productivity, and this can be attained when you toss all your Tasks from your mind onto a piece of Paper (Or a Digital Page).
One of My biggest strengths has been to focus like a laser on whatever task I pick. To overcome the overwhelming feeling of the deadlines of the University Assignments, going through the Lecture materials, Office and Personal Tasks, I have been using a lot of digital tools to organize my life, and one of my favorites is Notion.
MOTIVATION
WHAT IS NOTION?
Notion is a productivity software that is used for note-taking, task management, organizing, tracking and many more. The app uses databases and markdown pages for personal and collaboration work.
Most of the people feel so overwhelmed because of the countless features what Notion provides, but once you get used to them, it is a no brainer.
The only Key you have to remember is / , that is it.
SETTING UP NOTION
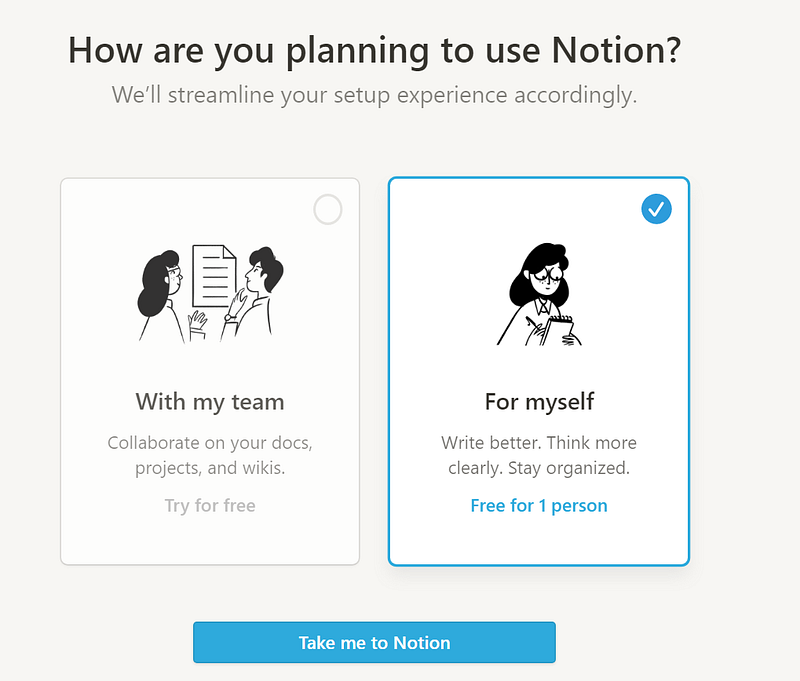
If you are creating an Account and using Notion for the very first time, you will have to select an option whichever is suitable for you. (If you are using it for Personal Purpose, then select For Myself)
Once you login, on the Left Toolbar you will see a lot many options like Getting Started, Quick Note, Personal Home, Task List, Journal, and Reading List, these are just templates provided by Notion, and we will park them aside for now.
You will see a button Add a Page on the left. Click on it, and write Archive on the heading section. (Notion Auto Saves your work). Now, one by one on the left toolbar take all the existing Pages [Templates](the ones I mentioned above) and drag them under Archive. (Steps shown below)
You’ve just created a Parent Page (called Archive) and placed all the existing template pages inside it as the Sub-pages. This will make our left toolbar a little uncomplicated for the start. (Meanwhile, feel free to navigate and understand the structure of the pages).
Click on the New Page, and name it ‘My First Page’, and just press enter. (Don’t worry about the hints, which are suggested below to import, these all can be called by just typing / on the screen, which I have covered below).
The most powerful and premier feature of Notion is there are blocks that can be created for each item. Press / and you will see a lot many options for each use.
BLOCKS
Text
- The first and the most basic block is Text, where you can directly start writing. Write ‘This is my First Line’.
- Another way to add a Text Block is, by typing
/Text + Enter). Try this below the first line and write ‘This is my Second Line’. (Steps shown below)
Congratulations you have created two successful blocks.
Now if you hover your mouse at the start of any Block (in this case text), you will see 6 dots. Either by clicking on the Dots, you can change the type of the block, or you can drag the entire block anywhere you want on the page.
Try to move the ‘This is my Second Line’ text block right above the 1st block which says ‘This is my First Line’. (Steps shown below)
Simple isn't it? These are what blocks are and just like Text, you can add any other Block like Heading, To Do Line, Divider, Audio, Video, Quote, Bulleted List, GitHub Gist and many more.
Page
The Second option is /Page + Enter, you will be redirected to a new page, name that as Sub Page. Since you have created a page inside My First Page, the Sub page will be a child page of the My First Page, which you can see on the Left Toolbar as well. (Steps shown below)

Note : This way you can create any number of child pages inside each page and all the pages will have the exact functionalities as the Parent Page.
Databases
Databases are one of the most powerful features of Notion. There are 6 different types of databases that Notion provides :
- Table - Comprising rows and columns, tables are great for giving you a tabular view of large data sets.
- Board - Also called Kanban View, can be seen as sticky notes, where you can move your cards on the board based on the status.
- Gallery - Creative thinkers use gallery view to put visuals front-and-center.
- List - A minimalist database view best used to collect certain types of pages.
- Calendar - Great for planning and seeing important dates at once.
- Timeline - The Timeline view helps you visualize the length of projects and get ahead of upcoming deadlines and to plan your day.
Steps to Create a Table Database
Type /Database and select Table Database — Full Page.
Why Full Page? This will create a separate page for the Table.
Since you have selected Full Page, a separate page itself will be created for the Table, and you will see an empty table.
Each Column (Property) Type can be configured as per your wish. Below are few of my favorites :
- Text - By Default the Type when you add a new column — As the name suggests you can write any normal text in it (Like Name in my above screenshot)
- Select - One of my personal favorite, where you can give mutually exclusive values (i.e. only one option can be selected) like Status of a Task (Not Started, In Progress or Completed). Note : You can create as many labels as you want and give them separate colors.

- Multiselect - Unlike Select, Multiselect allows you to select multiple values (labels). (Think of it as the Instagram’s Hashtags function)

- Date - Date types will allow you to add dates and Notion gives you the flexibility to make it Relative (Like Tomorrow, Today) or Exact Dates like 01.01.2022. Obviously, you can customize the date format as per your wish.
- And many more…..
You can add as many columns as you want, with any property type which suits you the best. (Steps shown below)
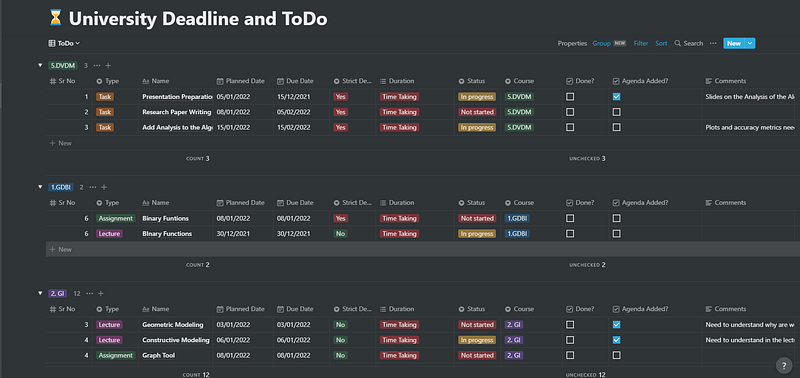
Grouping the Table Database
Once you are done with the Table creation, you might want to group the entries based on some Values. (Like Courses) You will see a group button, which gives you the option to group your entries by any column. (Steps shown below)
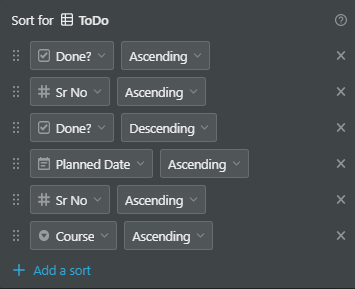
Sorting The Table Database
Unlike Grouping, Sorting can be done based on Multiple Property (Columns) based on the Priority that you give. Sorting will sort all the entries (Even in Groups) according to the Property(s) you have mentioned priority wise. (Sort can be found just beside the Filter Button)
Filtering the Table Database
Once you have completed a task, there is no point keeping that in the To-do list, however deleting the task would be a bad idea as you might need it later for some reference. For that, I use the filter option to filter out the tasks which are completed based on the column Done (which is a Checkbox).

Want to have a look at the List of the Finished Tasks?
If you would like to see the tasks that you have finished, there are two ways :
- Replace the filter with Done instead of Not Done Checkbox (Not a good idea).
- Create a Separate View of the List of the Completed Tasks(Archive) itself. (My Preferred Way and steps shown below)
To Create a Separate View of the Database table
You can create multiple different views of the same database table that you created.
- You have to click
Add a Viewbutton on the top left. - Enter the name of the View (Archive would be the best)
- Select List and then click on Create.
You will see a List View (Not the Table View) of the Database what you just created in the Table View. You can add a Filter option of Tasks Completed here, so you will have two different views now.
- To-do - A Table View with all your Pending Tasks.
- Archive - A List View with all your Completed Tasks.
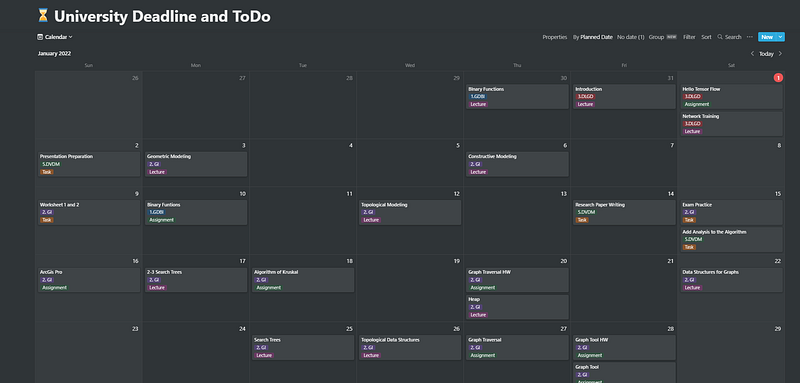
CALENDAR VIEW
Now having a list of 40 Tasks would look overwhelming at First, hence calendar view comes here as a Savior. Create a Calendar View, the way you created a List View and all the entries (Tasks) which you entered will come up in the Calendar as a Planner. This will enable you look at the tasks for the whole month. You can also further breakdown and create a TimeLine View to be more specific to each hour (But since it was not necessary for me, I didn’t create it).
KANBAN (BOARD) VIEW
Kanban view is where the tasks can be seen as sticky notes, which allow you to stick it according to the Status of it. (Steps shown below)
WHY NOTION OVER PHYSICAL DIARY PLANNER?
A lot many might argue why not use a Diary Planner to organize your To-dos. There are numerous advantages of Notion over Diary Planners :
- Everything is moving digital, there is a lot of content that you need are uploaded to the Google Drive, GitHub, or possibly anywhere on the Web. Organizing things digitally will always help you access them from Notion faster.
- Sitting in the Bus and an Idea/To-do Task pops up in your mind? Notion is available across all the devices; Laptops, Tablets and Smartphones.
- Everything is on Cloud so you will never lose them ;)
- To-do is just one of the applications of Notion. You can use it for other things like Writing Notes, Storing important documents, Habit Tracker, Finance Tracker, Reading Book List and many more…
- There are numerous existing templates that are so practically designed, you just to have to import them and use it. You can freely select the templates from Notion Picks — Template Gallery
CONCLUSION
Notion is an extremely powerful tool that gives you the flexibility to completely be dependent on it. I would suggest you to take some time away from Social Media and organize your action items on Notion, and follow it continuously.
These things will take time initially but once you get a grasp of it, you will save a lot of time, reduce your procrastination and eventually be more productive, organized and efficient.
“For every minute spent in Organizing, an Hour is earnt”
- BENJAMIN FRANKLIN
There are still a lot many features on Notion which I am yet to find, but if you know any of them, please write below in the Comments section and help others.
If you liked my article, please Follow Me, or support by giving a Clap (👏) or by Tipping me for a Coffee.