
NodeJS Webhook for Dialogflow Fulfillment

When you are building an agent on Dialogflow, it is important to set up webhook fulfillment especially when your agent grows and has a number of intents. It becomes difficult to manage those intent and intent handlers, especially when you are dealing with any 3rd party API or building a multi-channel agent within the default provided Inline Editor(Powered by Cloud Functions for Firebase). So, it’s a good idea to create and set up a webhook server from your local codebase.
So, let's create a NodeJS webhook fulfillment
Prerequisite: Beginner-level knowledge of JavaScript, NodeJS, ExpressJS, Dialogflow
Steps:
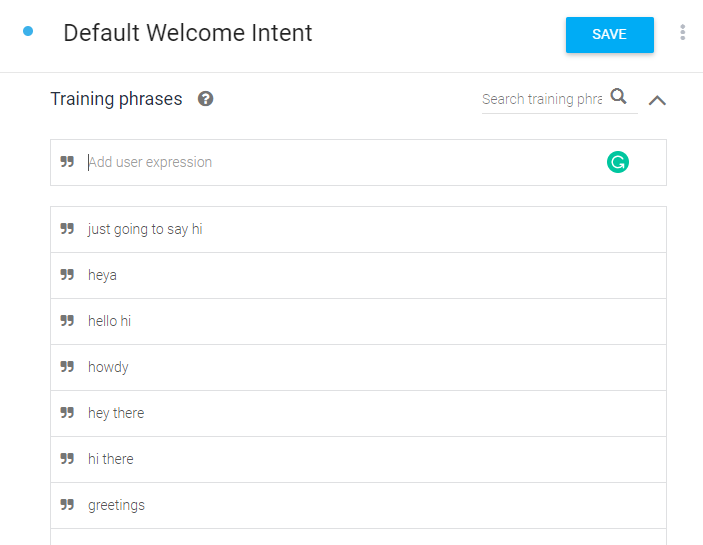
- Create an agent, it will have Default Fallback Intent, Default Welcome Intent and enable webhook call for Default Welcome Intent
Now enable the webhook call for this intent. You can find the option in the fulfillment section at the bottom.
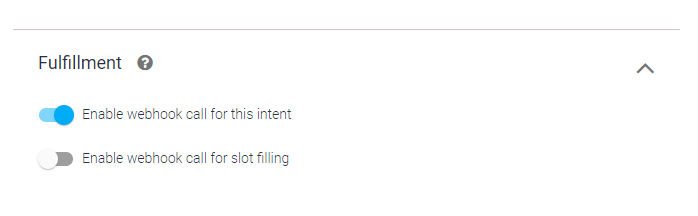
Similarly, enable webhook call for Default Fallback Intent. This option lets your agent call the webhook API with a post request. You can enable webhook calls for all those intents that required some backend processing, database query, or any this-party API integration.
2. Now let's create the webhook server.
create app.js file, add one API route with ‘/dialogflow’. All the agent webhook requests will be handled by this route.
When the agent will grow, it will have a number of intent based on different functionality. It is recommended to create a different intent handler file, based on the feature.
Now, we are ready to run the server. let's configure some commands and check out the package.json file.
Let's look at the configured script in package JSON.
“dev”: “nodemon — inspect src/app.js”, I am using nodemon, that automatically run the file whenever its content changes.
"tunnel”: “ngrok http 8080” This is a very important part. Ngrok will create a public URL for our webhook and listen to the 8080 port.
Run both the npm script, one is to start the server in development mode the other is to get the public URL for webhook.
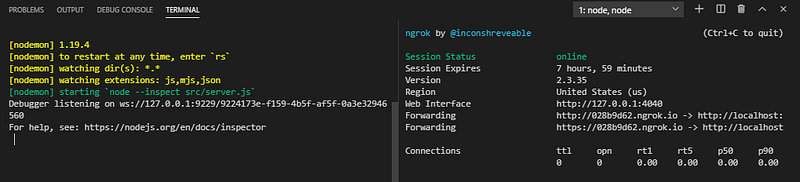
You will get the URL like https://028b9d62.ngrok.io. For Dialogflow fulfillment, you will need https secured server localhost will not work.
3. Now configure the URL in Dialogflow fulfillment.
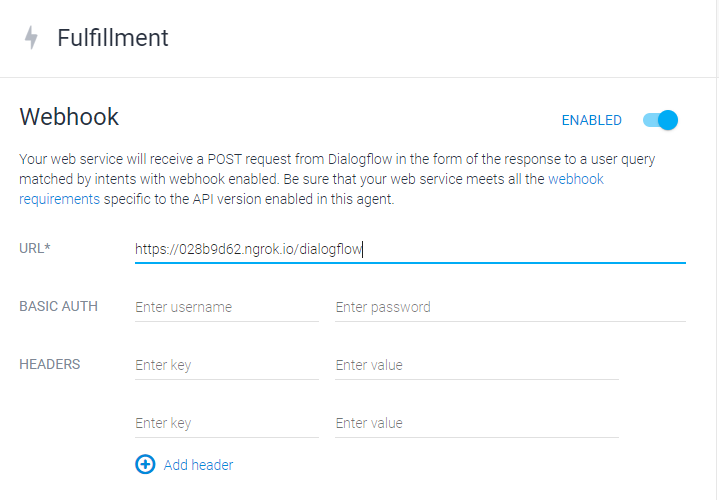
That's it. Now your webhook is ready to respond to the Dialogflow request.
Let me know with a comment if you tried it or anything, really. Bye! Happy Coding!
I hope you found it interesting to read. If you’d like to support me as a writer, consider signing up to become a Medium member. It’s just $5 a month, as you get unlimited access to Medium.