
No Need For Photoshop Anymore: DALL-E-2 AI For Figma Is Here
Image Generation Is Getting a Lot Simpler
The days of switching through countless brushes, ambiguous modes and design software are soon to be over. No they are not, at least not yet but things are moving forward making creative endeavours much more straightforward and now it’s time for Figma + DALL-E-2.
OpenAI released DALL-E-2 last summer and the art industry got really heated. Whether using such images is ethical or utter blasphemy against the works of artists is not a subject to take lightly nor to write a tiny article about.
If you’re already sold and want to try it out straight away get it for Figma here, contribute to the repo or support the launch on Product Hunt.
That’s why this post is strictly about using it directly in Figma to up your images to an alien level, iterate through concept art for advanced 3D UIs and even make amazing edits with a single brush and a creative imagination.
What is DALL-E-2?
AI: DALL-E-2 is a deep learning algorithm that takes text as input and generates images related to the description of the user. It is a huge leap forward in AI technology, allowing users to generate complex graphical representations with just a few words.
ME: I see DALL-E-2 as an evolution of current creative tooling not as a replacement. It can generate and edit images impressively fast but the quality of the output is correlated to the skills of the prompt that it is given.
Instead of 10 panels and a thousand brushes you use the single most powerful brush, language.
In a nutshell DALL-E-2 provides the following features:
- Generate x images from a given prompt and resolution (256x256, 512x512, 1024x1024)
- Generate x variants from a given image (must be 256x256, 512x512, 1024x1024)
- Edit an image from a mask (area to replace) and a given prompt

The 3rd feature is the most complex since it practically allows users to generate endless artworks by patching together new generated frames (WiP), therefore extending the resolution and even seeing what might be hiding outside the borders of a famous image.
Why Figma?
AI: DALL-E-2 was made for the creative industry and Figma is the most popular tool for UI/UX designers. That’s why I thought it would be a great idea to integrate DALL-E-2 directly in Figma, so designers can start playing with AI generated Art right away without leaving their workflows.
ME: My AI counterpart was pretty bang on this time, I’ll add and admit I’m most familiar with Figma out of all the design tools and the Plugin API is in JavaScript and with the help of create-figma-plugin it was extremely easy to setup.
To note there are some similar plugins/addons/extensions built for other tools like Stability for Photoshop but they use other AI models like Stable Diffusion (which is free and open-source).
Summon.AI Showcase
Ah the ever-so-present pain of having to switch between multiple tools to complete your design workflow, and having to pay big evil corps for using their proprietary software.
I built Summon.AI to solve parts of these problems by extending Figma’s core features with AI image generation/edit capabilities powered by OpenAI’s DALL-E-2.
Like any Figma plugin, after installation you can access it via the context menu or the Quick Actions search bar. There are 3 main commands each leading to a modal popup with further fields to fill up.
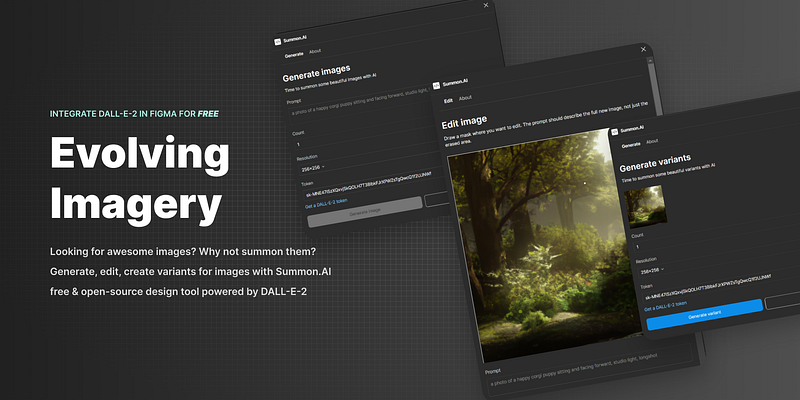
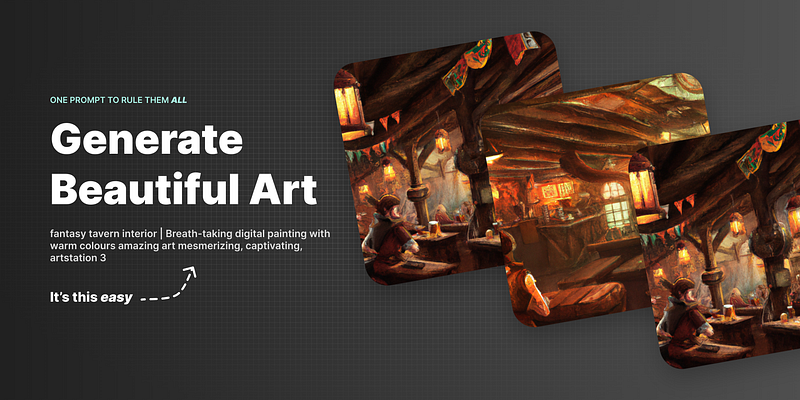
Generate images
Identical to the DALL-E-2 generate flow you’ll have to insert the prompt but can also customize the number of variants to generate and resolution.
Additionally you must add the API Token to authorize requests (it’s only stored locally so it’s as safe as it gets). Create an account and get a free one over here.
After a short loading time you’ll see the result within the frame/element initially selected alongside the prompt used to generate the images.
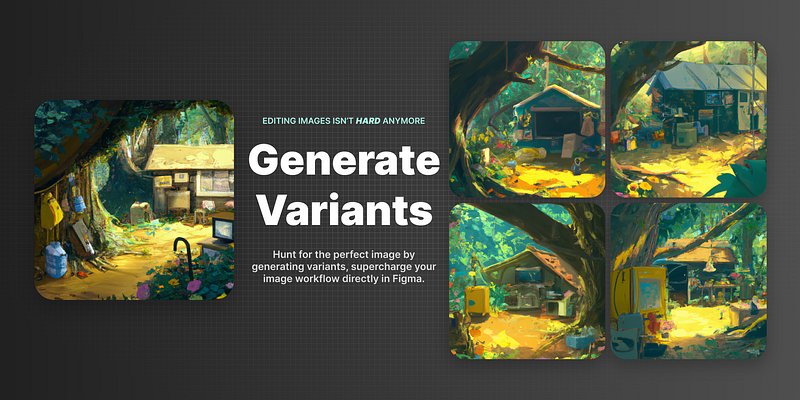
Generate variants
First select the image you want to create variations of, the API only supports square images in the resolutions mentioned below, change the count and resolution and wait for DALL-E-2 to work its magic.
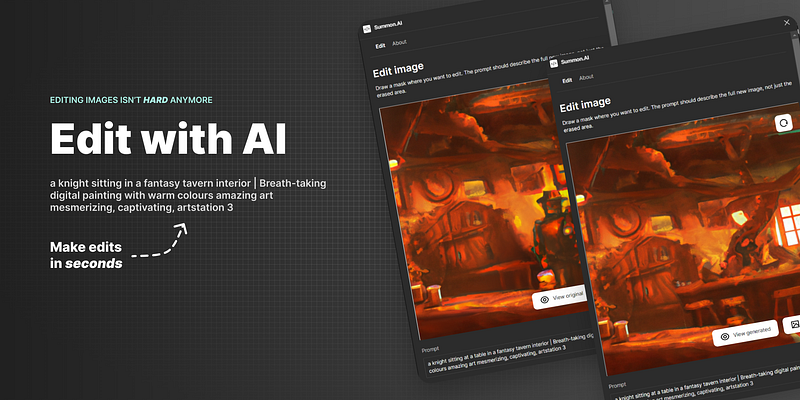
Edit image
Select the image you want to edit and one command later you’ll be able to use a brush to draw out a mask where you want to make an edit. It will take into account the context and art style of the image making the edit hopefully smooth and look not out of place.
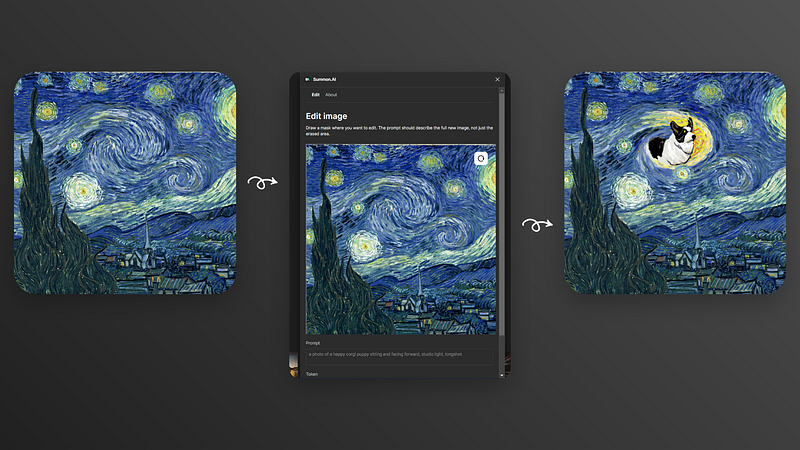
You can always reset and redraw or even export the image if you’re happy with the result. I’ll be adding a history (undo) feature soon after the initial launch to make the workflow a lot more efficient.
Code Breakthrough
If you got here you’re likely looking for some TypeScript madness and insanely optimized WASM code (since that’s how Figma runs under the hood), with no further ado let me disappoint you with this ‘simple’ solution.
To bootstrap the plugin I initially followed the official Plugins API docs, butI wondered whether there was a more modern, clean approach to quickly get the boilerplate for something like a Preact-powered plugin, later I came across the awesome create-figma-plugin.
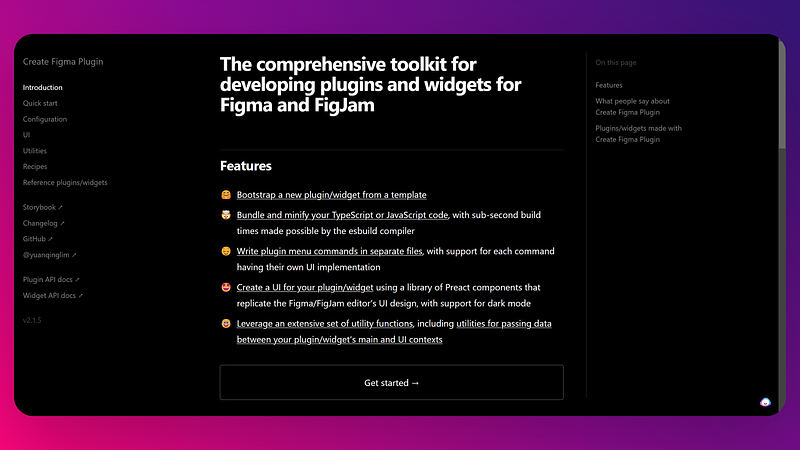
The toolkit makes it wildly easy to setup a new plugin as it comes with UI components and utilities to make the plugin look and feel like it’s part of Figma and not a separate entity. I’ve also added Tailwind CSS, because heck why not? on top of the Preact starter.
The package.json file is a tad bit different then your run-of-the-mill config since it has a figma-plugin key where you add the configuration to be used by Figma when it registers the plugin, what are the commands to be used when triggering the addon files.
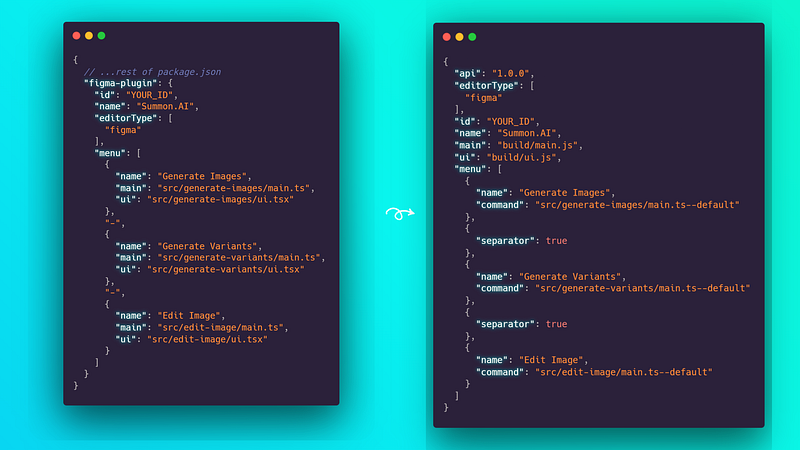
A Figma plugin architecture has 2 primary components, the UI and the main contexts. UI covers everything the user directly interacts with, usually the ‘modal’ that opens up. The main context is the ‘backend’, here you gain access to the Figma API to make changes or pass data to the UI.
It’s not mandatory to have a UI, the plugin can be headless and commands can have direct effect when triggered.
Edit Image
The main.ts file exposes 2 events, one to export the prompt and generated images to Figma and the other for closing the modal. It also listens to notifications from the UI side and passes them forward to figma.notify.
It also registers an interval function that checks selected frame and if it’s an image matching the resolution it forwards to the UI as the image to edit.
It’s important to validate selections so users don’t waste time wondering why the plugin doesn’t work.
The types.ts file contains shared types for the event handlers registered to pass data between the UI and main contexts.
To power the mask drawing I used Konva, it was the first comprehensive option that worked decently with Preact that I can also extend in the future with features like history and out-painting.
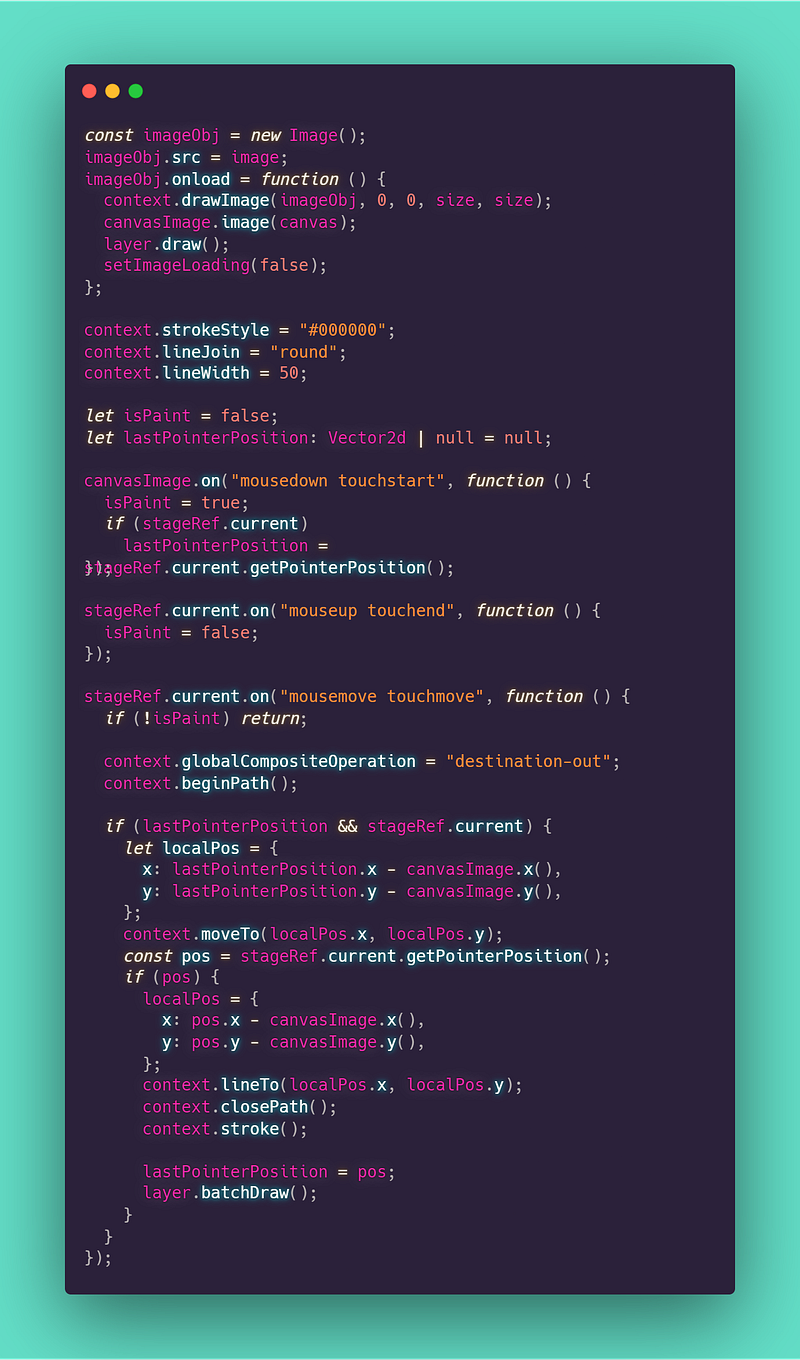
There’s nothing particularly advanced, only listening to events and managing different states, there’s also the request to the /images/edits API (form data is mandatory to post the initial and mask images).
I believe great code shouldn’t need much explanation if good documentation already exists.
Since the project is open-source I’ll happily welcome any contributors to the repository, anything from suggestions to bugs and even features is much appreciated.
You can also support the project on Product Hunt as I’m looking into developing such integration for other software (Blender coming soon).
Thank you for reading this beautifully chaotic, inherently mad article I spent days to architect, kidding I wrote it in like 2 hours with AI to prove a point.
AI is amazing at writing about itself, showcasing egotistical tendencies and often, arrogance.
Do you have any questions or suggestions? Feel free to reach out 🚀! If you want to stay updated on my future writings follow me on Medium or Twitter.