Neovim for Beginners — LSP (Part 1)
Configure the built-in LSP (Language Server Protocol) client.
Neovim supports the Language Server Protocol (LSP), which means it acts as a client to LSP servers and includes a Lua framework vim.lsp (:h vim.lsp) for building enhanced LSP tools. The language servers are provided by third parties.
In this article, we are going to
- Configure the
nvim-lspconfigplugin that provides common configuration for various language servers. - Configure a language server installer to make it easy to install any language server.
- Configure key mappings for the LSP features.
- Configure the
vim.lsp.omnifuncfunction (:h vim.lsp.omnifunc) as theomnifunc(:h omnifunc) handler. Theomnifuncoption specifies a function to be used for insert modeomnicompletion withCTRL-X CTRL-O. - Configure the
vim.lsp.formatexprfunction as the handler forformatexpr(:h formatexpr). Theformatexproption specifies an expression that is evaluated to format a range of lines for thegqoperator or automatic formatting (:h formatoptions). - Configure LSP completion using
coq.nvimandnvim-cmp. Previously, we talked about these two completion plugins in this article.
This article is part of the Neovim for Beginners series.
The Neovim configuration files can be found in this repository.
Unlike treesitter or ctags, LSP facilitates features like go-to-definition, find-references, hover, completion, rename, format, refactor, etc., using semantic whole-project analysis. We will get started by installing and configuring nvim-lspconfig.
nvim-lspconfig
nvim-lspconfig is a collection of common configurations for Neovim’s built-in language server client.
Installation
In thelua/plugins.lua file, add the following lines.
We also install nvim-lsp-installer which is a companion plugin for nvim-lspconfig that allows us to install LSP servers locally.
Language Servers
Create a new file lua/config/lsp/init.lua with the following content.
- We install the language servers for Go (
gopls), HTML (html), JSON (jsonls), Python (pyright), Rust (rust_analyzer), Lua (sumeko_lua), Javascript/Typescript (tsserver), and Vimscript (vimls). - Check out the list of supported language servers here.
- Currently, we do not configure any specific settings for all the language servers so the Lua tables are empty. We will see how to fine-tune a particular language server later.
- The
on_attachfunction is called when a language server is attached to a buffer. In this function, we attach the LSP handlers toomnifuncandformatexpr. We also call the function to configure the key mappings. - Check out the documentation (
:h vim.lsp.start_client) on the LSP configuration. Thedebounce_text_changesflag debouncesdidChangenotifications to the server by the given number in milliseconds. No debounce occurs if nil.
LSP Installer
Create a new file lua/config/lsp/installer.lua with the following content.
- We use the
nvim-lsp-installer plugin to install the language servers. - The language servers are installed automatically.
Note: We leverage the utils module which uses vim-notify to show a popup notification.
Key Mappings
Create a new file lua/config/lsp/keymaps.lua with the following content.
- We configure key mappings for some of the LSP functions in normal mode. E.g.
[d,]dto navigate the diagnostic messages,Kto show the hover documentation. - We also use
whichkeyto map the prefix<Leader>landgto several LSP functions. E.g.gdto show the definition,gtto show the type definition.
Tip: For a newer version of Neovim (0.7 and above), try using the new keymap APIs (:h vim.keymap.set()). E.g. we can define the key for hover action like below. Buffer 0 or true means the current buffer.
-- For normal mode
vim.keymap.set("n", "K", vim.lsp.buf.hover, { buffer = 0 })
-- For normal and visual mode
vim.keymap.set({"n", "v"}, "K", vim.lsp.buf.hover, { buffer = 0 })Screenshots
Run the :PackerInstall command to install the plugins now.
The language servers are installed automatically.
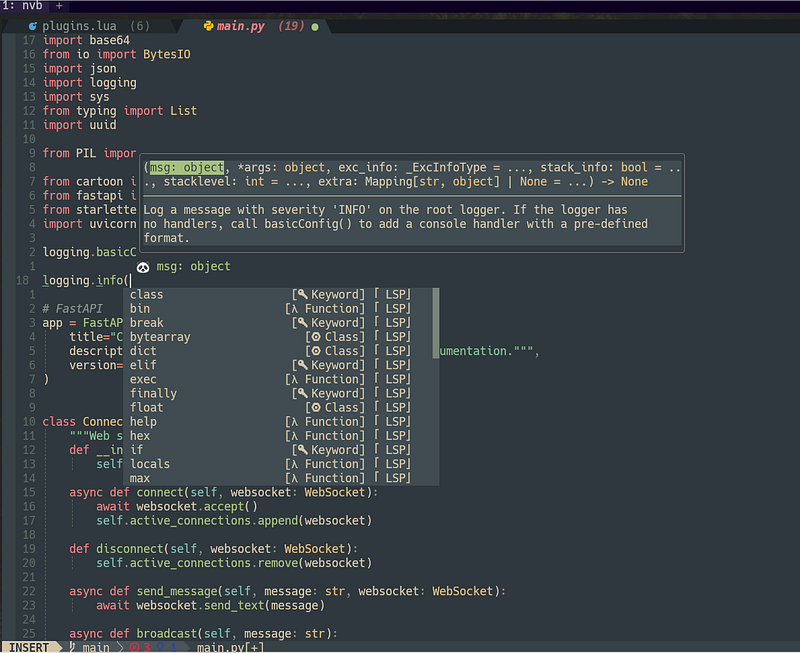
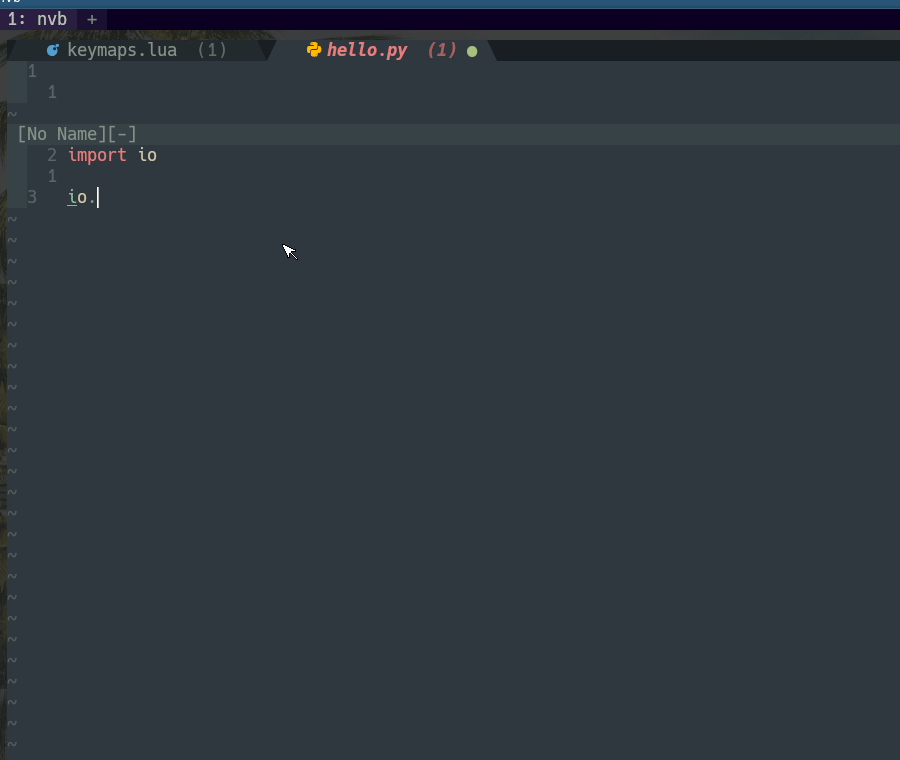
Omni completion (CTRL-X CTRL-O) should work now.
The LSP key mappings should also work if the capability is supported. E.g. gd to go to the definition, and gs to show the signature help.
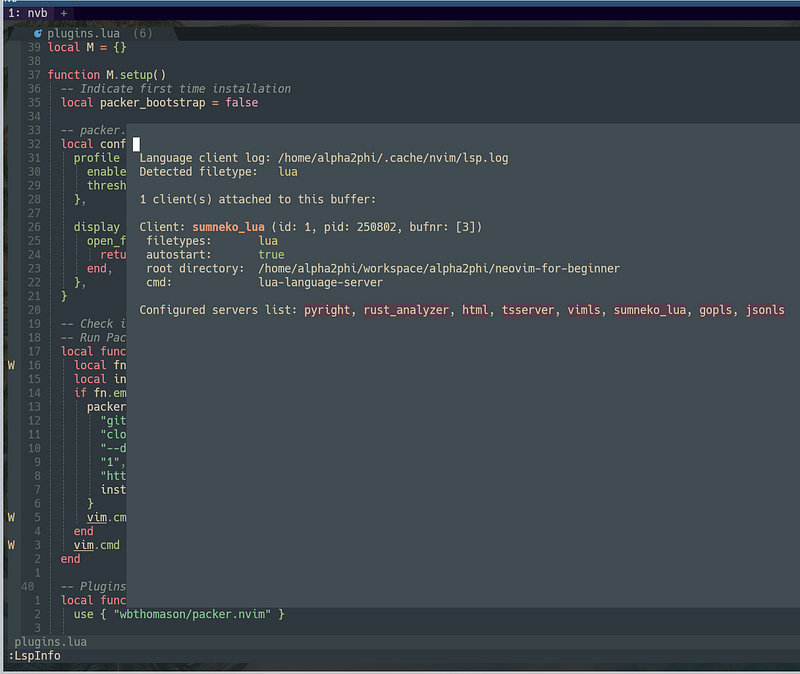
Type :LspInfo and we can see the language server details for the current buffer.
Tip: We press K to show the documentation. To go into the hover documentation, press K again. To exit, press q.
Tips:
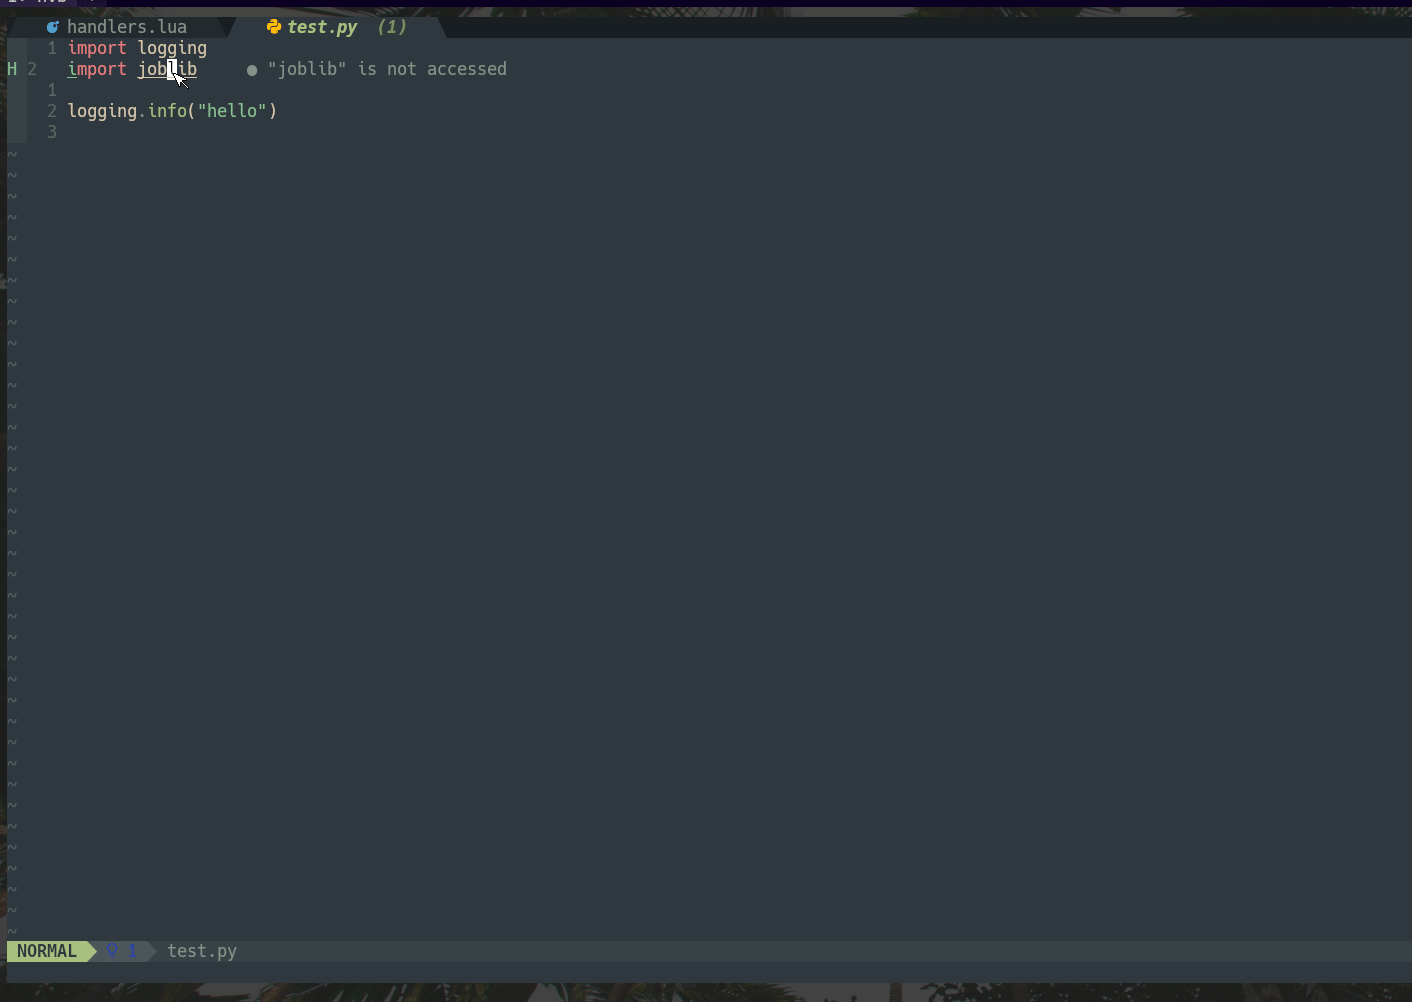
- We press
gd,gt,gIto navigate to the definition, type definition, or implementation. To go back, we can pressCtrl-t(:h Ctrl-t).Ctrl-tjumps to an older entry in the tag stack. - Type
:tagsand we can see that the older entries are saved into the tag list.Ctrl-oandCtrl-iare used for the jump list (:h jumplist). - E.g. in the below screenshot, we press
gdto go the definition of thejoblibmodule. We jump to different locations within the file. To go back to thejobliblocation, instead of pressingCtrl-omultiple times, we just need to pressCtrl-t.
nvim-cmp
The built-in omni completion is not so helpful. Let’s proceed to configure a completion plugin.
In the lua/plugins.lua file, for nvim-cmp add the lines to install cmp-nvim-lsp(line 16).
We also install lsp_signature.nvim (line 12) to show the function signature as we type.
In the lua/config/lsp/init.lua file, we configure lsp_signature.nvim and update the capability for cmp-nvim-lsp.
In the lua/config/cmp.lua file, we add the completion source for cmp-nvim-lsp.
Screenshots
Run the :PackerInstall command to install the plugins now.
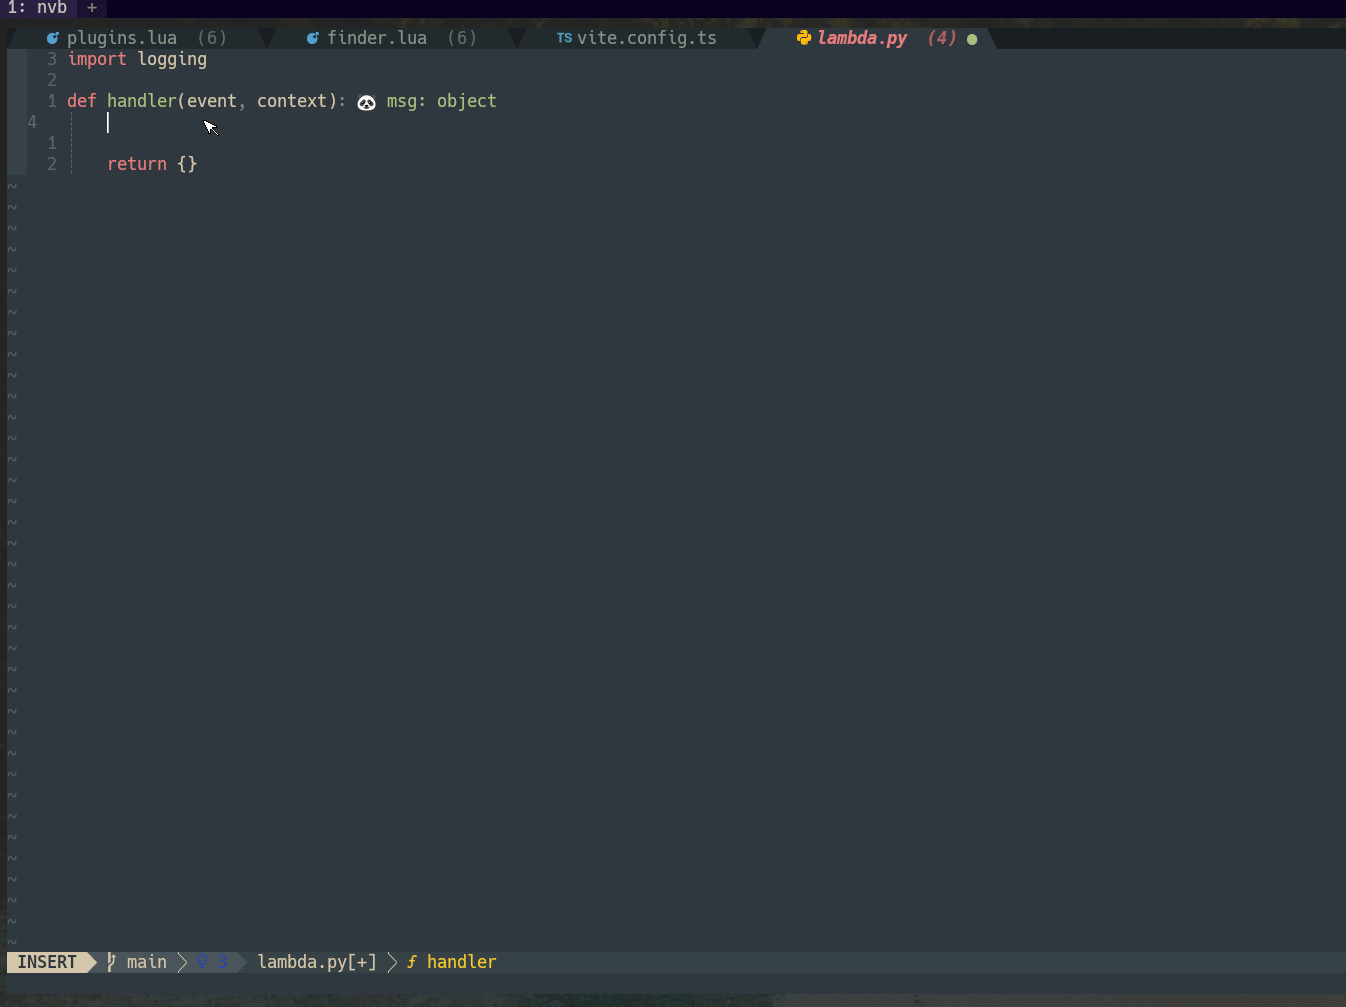
Completion should work now for the configured language servers, and we can also see the function signature as we type.
coq.nvim
Let’s try out coq.nvim.
First, we need to disable nvim-cmp. In the lua/plugins.lua file, set the disable option to true. For coq_nvim we set it to false.
use {
  "hrsh7th/nvim-cmp",
  disable = true
}
use {
"ms-jpq/coq_nvim",
disable = false,
}For the nvim-lspconfig plugin, instead of cmp-nvim-lsp, we want to use coq_nvim.
In the lua/config/lsp/init.lua file, comment out the lines for nvim-cmp.
Now in the lua/config/lsp/installer.lua file, add the lines for coq.nvim.
Screenshots
Run the :PackerInstall command to install the plugins now.
Completion should work now for the configured language servers, and we can also see the function signature as we type.
In the next article, we will fine-tune the configuration to further improve the coding experience.
Check out Learn Neovim The Practical Way for all the Vim/Neovim articles!
If you are not a Medium member yet and want to become one, click here. You will gain unlimited access to all Medium articles and support my work directly.