
I earned $250 in quarantine by conducting Zoom lesson at home. Here’s what you need to make the transition butter-smooth
A table top mirror?
Let a little context, I am a small-time tutor with a small class of teenagers to teach. My subject area is Physics. It’s been some 5 weeks since classes were moved online, and I have learnt some things about conducting online classes.
Here’s what I recommend at hand:
- iPhone with Zoom app
- Laptop with group chats
- Tablet and stylus (optional)
- Table Top Mirror
- Paper and pen
Step 1: Join the newly created Zoom meeting on 2 separate devices.
iPhone with zoom app will be your primary host device — this will be where your video and audio will be turned on.
Tablet and stylus will be the secondary device joining the meeting— make sure to turn off audio for this device to prevent an unpleasant audio feedback. Although the iPhone alone can be used for whiteboarding purpose, I find that the tablet is generally easier to writing on with higher precision.
Laptop with group chats will be used for on-the-fly searching for information on the web, replying text messages, sending pictures or files to a group chat, or receiving handed-in assignments. This device need not join the meeting.
As the teacher, few matter more than class management and control. An unfamiliar environment like online class may throw you off. Fret not. With 2 separate devices signed into the same meeting, you are going to be able to control the camera angle, navigate the whiteboard writing, and address class questions/conversations with flair.
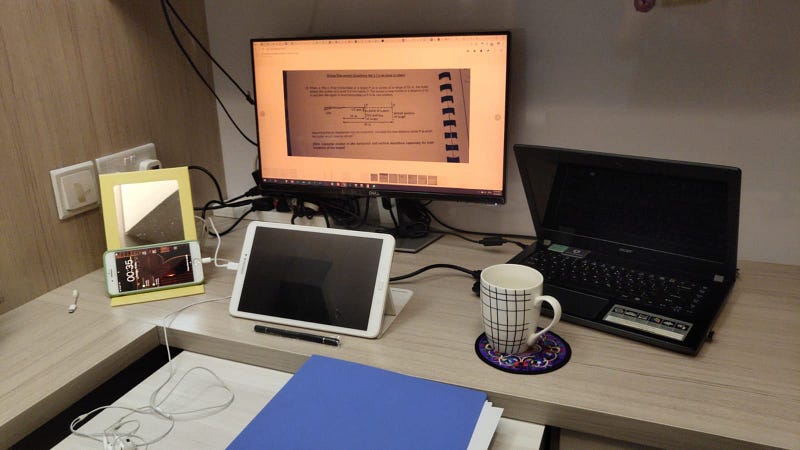
Step 2: Set up your rig
Place the iPhone propped up against a Table-top mirror.
This seemingly innocuous set-up goes a long way in monitoring your presentation to your audience. The mirror doubles up as prop for your camera, thus removing the need for another iPhone stand. At the same time, you can simply shift your gaze slightly upwards to see in real-time your appearance to the Zoom audience.
The mirror doubles up as prop for your camera, thus removing the need for another iPhone stand. At the same time, you can simply shift your gaze slightly upwards to see in real-time your appearance to the Zoom audience.
Here is a picture:
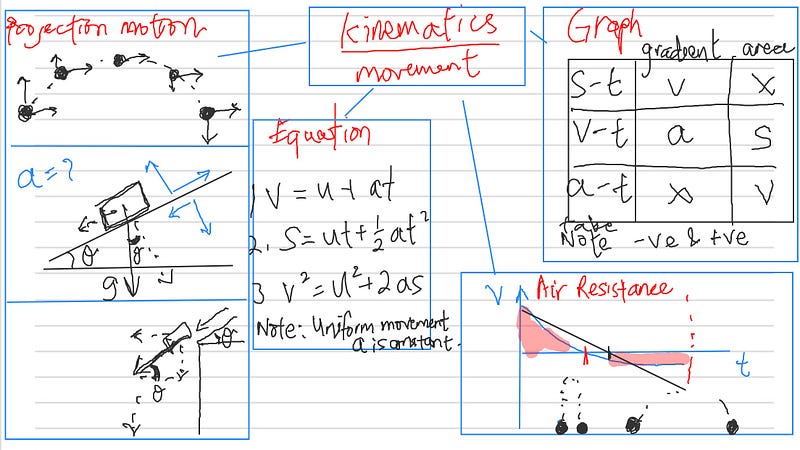
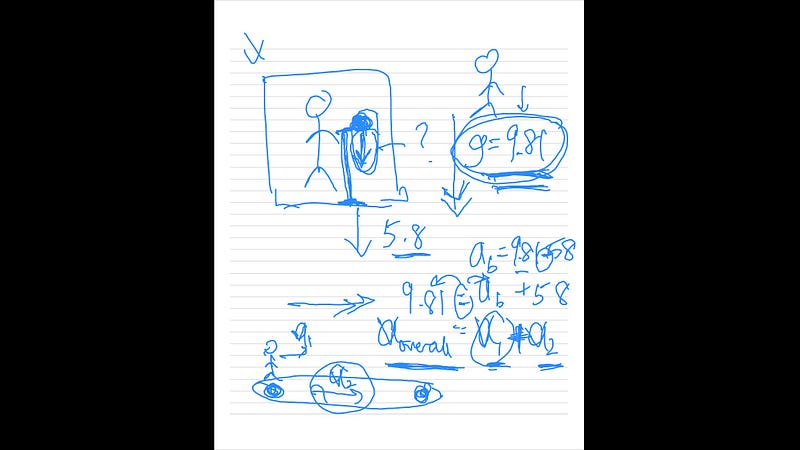
Here’s some screenshot of the whiteboards:
See you really don’t need much to set up a simple Zoom rig.
Step 3: Use whatever you can!
Paper and pen at the side come in handy at times. Notes can be taken down quicker, and ideas recorded before they fleet into oblivion. Personally, I use them to do class preparations like listing question numbers.
There are no rules to the best set-up. At times like these, Zoom is but a temporary measure that is convenient. We might not be sure if things will continue this way for the rest of our teaching career.
Even more minimalist alternative
I have done classes with only my iPhone. I will share my experience here.
The links to the items in the picture are listed here:
Overall, the Zoom classes have managed to save my tutoring career, all with but existing devices lying around the house.


