
My Obsidian Setup (Part 21) — Automate Everything with QuickAdd
In this article, I’ll go through the QuickAdd plugin in depth. This plugin is fantastic and is one of my top 5 favorite plugins.
This plugin allows you to quickly add new pages or content using preconfigured macros, templates, multi-choice menus, and variables.
Getting started
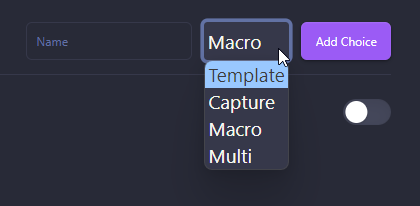
First of all, you’ll need to create a choice, which can be of type: template, capture, macro, or multi.
Template
Creates a note based on a template.

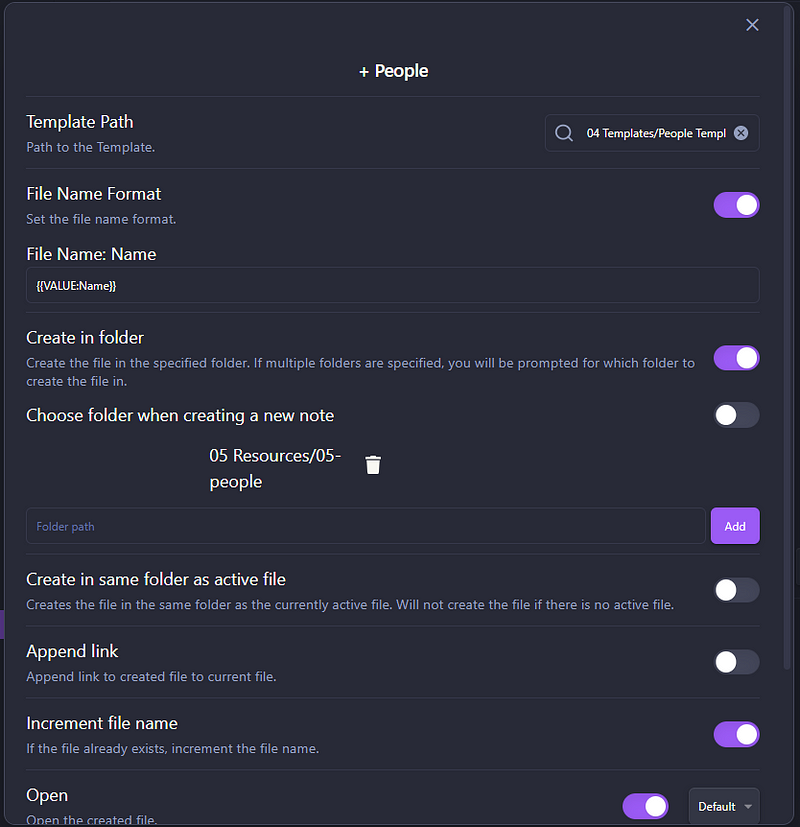
You can configure the template to use, the file name format (using variables like date or prompt for a value), the folder where the note will be created, or append a link in the current note to the new one.
I’m using this to create contacts in my vault. My “+People” action looks like this:
And People Template.md:
---
name: {{VALUE:Name}}
company: {{VALUE:Company}}
nif: {{VALUE:Nif}}
address: {{VALUE:Address}}
phone: {{VALUE:Phone}}
email: {{VALUE:Email}}
dateAdded: {{VDATE:DateAdded, YYYY-MM-DD}}
tags: people
---
## ✅ Tasks
```tasks
done
description includes [[{{VALUE:Name}}]]
sort by start date
```## 🧾Daily Log
```query
block:(/🧾+.*\[\[{{VALUE:Name}}\]\].*/ OR /🧾+.*\[\[{{VALUE:Name}}\]\].*/)
```The {{VALUE:variable_name}} means that when running, it will prompt for a value for variable_name. This can be a formatted date value like I’m using for dateAdded: {{VDATE:DateAdded, YYYY-MM-DD}}. Another curiosity is that the {{VALUE:Name}} in the template file is the same as already prompted in the QuickAdd action, so it won’t prompt twice.
So if I run this QuickAdd action, it will prompt for Name, Company, NIF (fiscal number), Address, Phone, Email, and Date Added and will save the file with the name stored in {{VALUE:Name}}.

Capture
This type of choice allows you to capture text into new or existing notes, in the section you want, and in the format you want. You can also capture text into a task if you use the Obsidian Tasks plugin.
I’m using this to add journal entries to my daily notes.

In the filename, I’m using the format of my daily notes, including the full path.
Note that while {{VDATE:DateAdded, YYYY-MM-DD}}, used in the previous example, prompts for a date value, {{DATE:format}} inserts a date value with the specified format.
As I want to insert the daily journal entry in a specific section of my daily note, I check Insert afterand specify the block, in this case, ###### ◧ DAILY JOURNAL. And in the case that the section does not exist, which is not likely because the daily note is created using a template, I instruct it to create it at the bottom of the file.
And then the capture format. I’m using an emoji 📃, followed by the time, entry text, and a line break.

I’m also using QuickAdd Capture choice to create a new task and add it to the weekly tasks file. As mentioned in Part 2 of this series, this part was based on Obsmd-Life-Manager (thanks Eli Wimmer). Here’s the QuickAdd Capture:

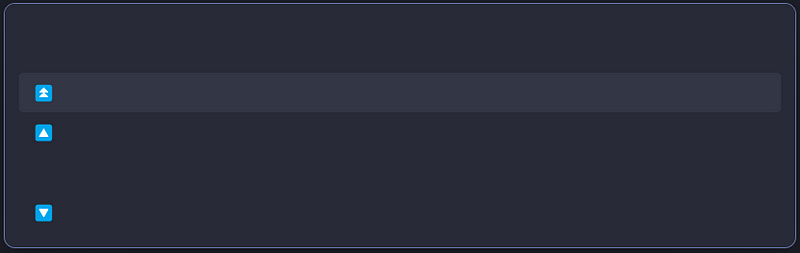
The configuration is almost the same. I just wanted to show you that you can also prompt with suggested values. The {{VALUE:⏫,🔼, ,🔽}} will show this:
Macro
The Macro choice allows you to combine multiple choices and also run Obsidian commands or even your custom scripts.
I’m using this choice for creating my projects. My +Projects macro is composed of:
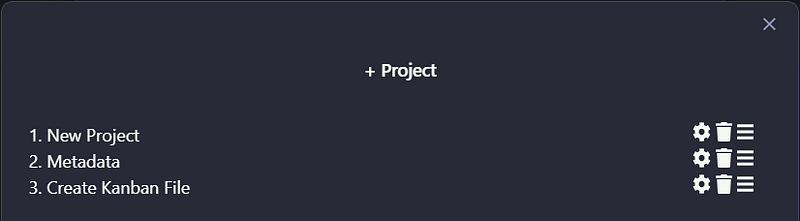
In the first step, “New Project” I’m prompted to enter the project name and it creates a project main file inside a folder with the same name.

Then, on the “Metadata” step, I fill in the project main file with the project details that are prompted and create the Activity History graph.

In the last step, “Kanban”, I create a new Kanban file, based on a template and using the Kanban plugin, with the specific name of “


I’m also using this to create a new task directly on the focused note, using just the command “Tasks: Create or edit task.”

Multi
The last type of choice is “Multi”. Multi is used to group choices. We can then create a shortcut to that group, instead of to each choice individually, and it will prompt you to choose from all of the choices.
I have a Multi choice for all my QuickAdd actions. When I use the keyboard shortcut, I see this:

Then I just have to select what I want to do 😀.
I hope you have enjoyed the reading and already have a bunch of ideas to implement in your vault like I did when I first saw this plugin.
If you have any questions, please read the plugin documentation here, or send me a message and I’ll gladly try to help. Stay tuned for more articles on My Obsidian Setup.
You can read the previous parts of My Obsidian Setup series here:
Click here to be notified every time I publish a new story 😉.
If you’re not a Medium member yet and wish to support me or get access to all my stories, click here.


