
Modern Approach of JavaScript Bundling With Webpack

As a Front-End developer, I’ve worked on various e-commerce web sites. In the beginning, I included every JavaScript file using separate script tags. But after some hard lessons learned about Front-End performance, I started to combine and minimize web site’s scripts. Also adopted referencing vendor and framework scripts from CDN servers as a common practice.
I must admit it worked well for some time. But while transforming from pure Front-End to Full-Stack-ish developer, and learning the good parts of C# and PHP back-end development — especially how the dependencies are included in Back-End code — I started to face the cons of this approach more often. The one thing I don’t particularly like is the magic behind the scenes. When you include some library — jQuery in markup as separate <script> — then write some web site’s JavasScript code, depending on that jQuery API, there’s no including of jQuery in the code. It just works automagically.
The outdated way
The image above illustrates the automagic effect. But as we know, there’s nothing magic about it. It’s the way we used to reference dependencies necessary to make our web sites work.
From my point of view, this approach has two main flaws. First, the global namespace gets polluted with a lot of global variables. Starting with the third party libraries like jQuery, Angular, Lodash, other third-party plugins, and ending with our own utility, helper, and service scripts because they're added globally. Here, the order of loading and execution is important.
Secondly, we are hiding the dependencies from our main script. We must assume the necessary scripts have been loaded before, and we are safe to use their API. And time to time, we have to switch context to ensure that these scripts are included and available to us, or we add extra scripts in the markup file. Finally, to see if the application, website, or view is working, we must launch it and verify everything loads and runs correctly.
A more modern approach
With the rise of the web apps and modern front-end frameworks, eventually, the JavaScript development process started to shift. We’ve seen great changes in the way we're developing our code. One of the processes, static file bundling, shows some of these changes.
A task once done using server-side technologies is removed from the Back-End frameworks. We now use tools built on modern front-end technologies. For example, one can bundle all project's JavaScript using Microsoft.AspNet.Optimization package in ASP.NET prior version 5
// App_Start\BundleConfig.cs
public static void RegisterBundles(BundleCollection bundles)
{
  bundles.Add(new ScriptBundle("~/Scripts/scripts.js").Include(
    "~/Scripts/lib/jquery-3.1.1.js",
    "~/Scripts/lib/timepicker/jquery.timepicker.js",
    "~/Scripts/lib/jquery.datetimepicker.js",
    "~/Scripts/textExtensions.js",
    "~/Scripts/numberExtensions.js",
    "~/Scripts/app.js"));
}
<!-- And then you just render the bundle in _Layout.cshtml -->
@Scripts.Render(“~/Scripts/scripts.js”)
</body>You can do the same in ASP.NET 5 using an
<!-- _Layout.cshtml -->
<environment names="Development">
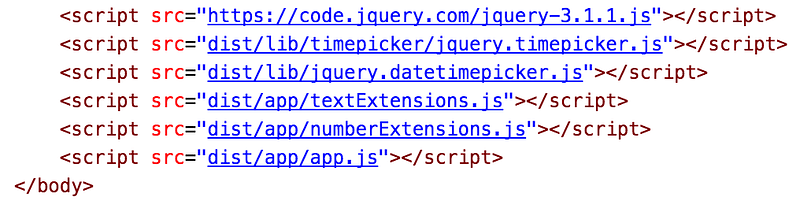
<script src="~/Scripts/lib/jquery-3.1.1.js"></script>
<script src="~/Scripts/lib/timepicker/jquery.timepicker.js"></script>
<script src="~/Scripts/lib/jquery.datetimepicker.js"></script>
<script src="~/Scripts/textExtensions.js"></script>
<script src="~/Scripts/numberExtensions.js"></script>
<script src="~/Scripts/app.js"></script>
</environment>
<environment names="Staging,Production">
<script src="~/Scripts/scripts.js" asp-append-version="true"></script>
</environment>In the example above, we can see how a particular back-end framework handles the bundling. But eventually, everything that can be done using JavaScript will be done by using JavaScript. And as there are already many tools to achieve this, let's take a look at one — Webpack. This is one of the tools which has currently gained a lot of popularity.
Webpack

Webpack is a modern static file bundling tool. In case of JavaScript file bundling, it helps to eliminate the implicit dependency on sorted
To do so, we should first create those bundles. And to create bundles, we need to configure Webpack. Of course, Webpack should be installed on the machine — for example by command npm install webpack --save-dev.
At its bare minimum, all that Webpack needs is an entry point and output. It can then be called simply by executing the command:
./node_modules/.bin/webpack app/entry.js dist/output.js
In this case, Webpack will load entry.js and will look up for import or require keywords within it to determine whether it should load more dependencies. If dependencies are found, it will load them recursively and also include them in the output file.
JavaScript modules
As noted in the previous section, the script file can include dependencies referenced by import or require.
// CommonJS
require ('lodash')
console.log(_);
// ECMA6
import 'lodash'
console.log(_);
// Notice currently you need to transpile ECMA6 import using for example Babel to make it run in browsersWhich is similar to referencing classes in .NET Framework by using:
using Microsoft.AspNetCore.Authorization;
using Microsoft.AspNetCore.Identity;
or as with the Symfony 2 framework:
use Symfony\Component\HttpFoundation\Request;
use Symfony\Component\HttpFoundation\Response;
This is just to point to the fact that one can use the feature of referencing dependencies within a JavaScript file. With default Webpack configs, it will bundle an output script which won’t be compatible with current browsers. And as noted in the comments, we need to process the script files containing imports or requires. This can be done using Babel JavaScript transformer whose task is to take JavaScript written in ECMA6 and translate it to working ECMA5 JavaScript. You can find out more about JavaScript import and export on the Mozzila Developer Network site.
Bundling JavaScript the Webpack way
You can bundle your JavaScript using the CLI command by providing an entry file and output path. Webpack will automatically resolve all dependencies from import and requireand bundle them into a single output together with your app’s script.
But that’s just the bare minimum it can do. To extend the functionality, we can create a Webpack config file and configure various tasks the bundler performs when processing JavaScript.
Configuration
First, we need to create a webpack.config.js file and require Webpack from node_modules.
// webpack.config.js
var webpack = require('webpack');module.exports = {
entry: {
entry: __dirname + '/entry.js'
},
output: {
filename: '[name].bundle.js'
}
}Here, we have provided the entry file as entry.js and prefixed the path of the current directory where Webpack is executed. Also provided the output path where to put the content of bundled JavaScript. Note the [name] prefix of the file. This instructs Webpack to concatenate the entry file name with .bundle.js ending. Now by executing a CLI command,
./node_modules/.bin/webpackit will create an entry.bundle.js file in the current module’s directory.
Loaders
As I wrote earlier, if you use import to reference JavaScript dependencies in your script you have to transpile it from ECMA6 to ECMA5 script using Babel. Webpack can do this on the fly by utilizing its loaders feature. To make it work, we must first install necessary node modules npm install babel-core babel-loader babel-preset-es2015 and update webpack.config.js with a modules section.
// webpack.config.js
var webpack = require('webpack')
module.exports = {
entry: {
entry: __dirname + '/entry.js'
},
output: {
filename: '[name].bundle.js'
},
module: {
loaders: [
{
test: /\.js$/,
loader: 'babel-loader',
exclude: /node_modules/,
query: {
presets: ['es2015']
}
}
]
},
}In this modules section, we can set many loaders which will apply to the JavaScript at processing time. Notice we have set it so that all files ending with *.js, excluding node_modules, should be processed through babel-loader. Thus it will generate ECMA5 compatible code as its output. So now, if we would add a dependency to helloWorld.js in the entry.js, for example, the Webpack would be able to generate working code.
// helloWorld.js
export const helloWorld = 'Hello world from imported JS!';
// entry.js
import {helloWorld} from './helloWorld'console.log(helloWorld); // Will print 'Hello world from imported JS!' in browser's consolePlugins
So we have seen the entry, output, and modules configuration in action. But there is one more section for base configuration which is worth looking at — its plugins. Simply, a plugin is the same to bundled JavaScript as a loader is to a single JavaScript dependency. Plugins allow us to perform various tasks on bundles. For example, extracting duplicate code chunks into separate files or uglifying the output.
// webpack.config.js
var webpack = require('webpack')
module.exports = {
entry: {
entry: __dirname + '/entry.js'
},
output: {
filename: '[name].bundle.js'
},
module: {
loaders: [
{
test: /\.js$/,
loader: 'babel-loader',
exclude: /node_modules/,
query: {
presets: ['es2015']
}
}
]
},
plugins: [
new webpack.optimize.UglifyJsPlugin()
]
}As you can see, we have added a new section to the Webpack config plugins. It can contain many plugins to be executed on the bundled JavaScript. By itself, Webpack provides a list of useful plugins. But you can also build your own customized list to suit your specific requirements.
Conclusion
This post provides a short introduction and examples of how to start using Webpack. Thus improving the JavaScript development process and gaining more control over dependencies your script relies on. Before you go, here is a short summary of pros and cons around switching to Webpack.
Cons:
- A need to install an extra tool when a feature already exists in the framework
- The developer must define all entry points, one per page or view, in the configuration
- JavaScript must be modular for both applications and third-party plugins
Pros:
- More control over dependencies as view imports only scripts required for functionality
- Usage of modern JavaScript — ES6 features
- Webpack can analyze the content of JavaScript during compile time, thus providing more info for optimization
- Referencing classes is similar to doing it in C# or PHP
I hope you will find this useful, and if you’ve noticed some flaws, don’t hesitate to let me know.
Thank you for reading! If you have comments, I would appreciate your feedback in the comments section. Have a good one!


