
MidJourney V6 Deep-Dive Series
MidJourney V6: The 11 Powerful Prompting Tricks That Nobody Talks About 👀 (1)
Discover these little-known but powerful tricks that will help you master MidJourney V6 prompting like a pro!
If later you find this article valuable, throw me some Medium love! 🥰 What you can do to support me: Clap up to 50, leave a message, highlight some text if you see fit & be sure to follow. 💌
This is not just another ordinary guide for MidJourney V6 prompting. Since the release of MidJourney V6 Alpha, many people on the internet have been sharing their experiences, guides, and unique formulas on V6 prompting.
While some of them are very useful, some overcomplicate things. Creating images on MidJourney shouldn’t be a chore but fun and explorative, don’t you agree?
Today, I would like to share 3 of the 11 powerful but little-known MidJourney V6 prompting tricks I discovered while exploring V6 — These tricks will help you master MidJourney prompting like a pro.
They are all fun, easy to follow, and do not require a mathematical degree to understand! 😊
Let’s explore these 3 MidJourney V6 prompting tricks in detail together!
*The rest of the prompting tricks will go to Part 2 and 3 of this article, so stay tuned!✨
📌 If you’re new to MidJourney V6, don’t worry! Here is <Your Quick Start Guide> to get started:
MidJourney V6 Deep-Dive Series — 3 of the 11 Powerful Prompting Tricks (Almost) Nobody Talks About 👀
Table of Contents:
- Prompting Trick #1 — Want to create images that look like real photos? Tell MidJourney to make it “uglier”!
- Prompting Trick #2 — How many objects should you include in your prompt?
- Prompting Trick #3 — Please, avoid including these junks in your prompts.
Prompting Tricks #4 to #11 will be explored in Part 2 and 3 of this article, stay tuned! ✨
Prompting Trick #1 — Want to create images that look like real photos? Tell MidJourney to make it “uglier”!
As you may already know, MidJourney V6 can create super realistic images, like the best we’ve seen so far. But…
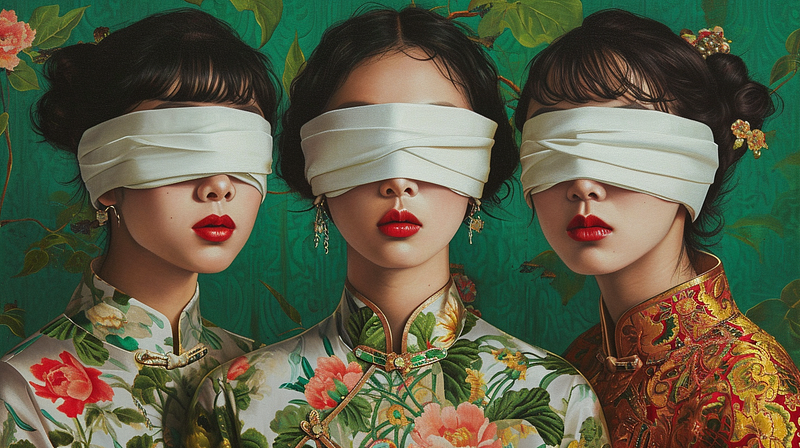
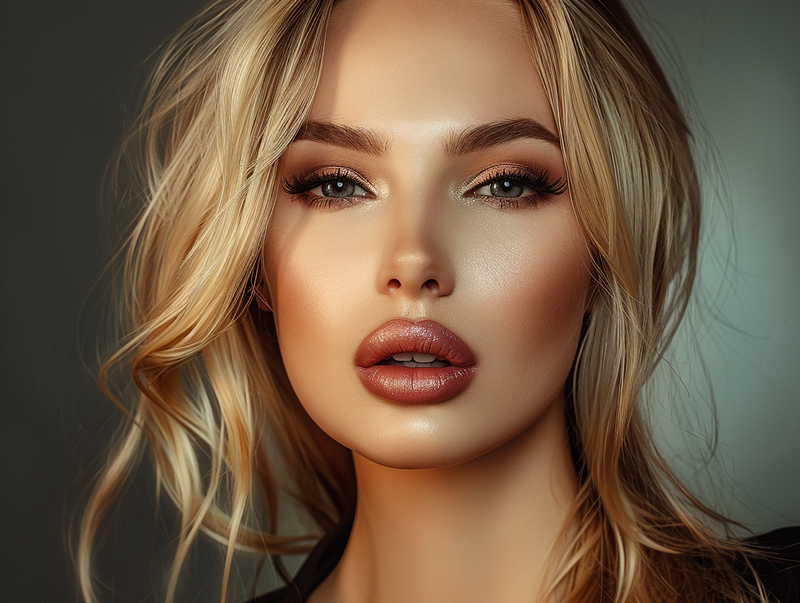
There’s this whole other level of realism that people call “MidJourney realism” — It’s like those images that are way too polished, airbrushed and staged, that they feel almost unreal in their perfection.
An example of “MidJourney realism” we all know too well:
If you don’t want your AI images to look over the top but to look more like real-life photos, here are 3 tricks you can apply:
✨ 1. Add these terms to your prompt
By adding these terms to your prompts, you can help MidJourney understand you’re looking to create images that are closer to real-life photos:
Low camera quality phone photoPhoto taken on phonePhoto posted on Facebook/ Reddit
✨ 2. Set the Stylize value to 0
Stylize value has a significant role in determining whether your AI image will look more or less “MidJourney-like”.
Cranking up the Stylize value can make your images look pretty cool and cinematic; keeping it low can make them look more natural and less like they’ve been through the Midjourney filter.
Here’s what you can do if you want to keep the images that look like real photos:
- Set the Stylize value to zero by typing
--s 0in your prompt. - The default MidJourney Stylize value is 100 if you don’t specify, you can play around with the value from 1 to 1000 to see what works best for you.
✨ 3. Use --style raw
Style Raw is to tell MidJourney to have a less default aesthetic while following your prompt instructions closely.
It takes away some of the “fancy stuff”, like over-the-top style, image composition and lighting, to make your AI images look more “raw” and “unopinionated”.
So here’s what you can do:
- Type
--style rawin your prompt, to point to the style that has less MidJourney beautification applied.
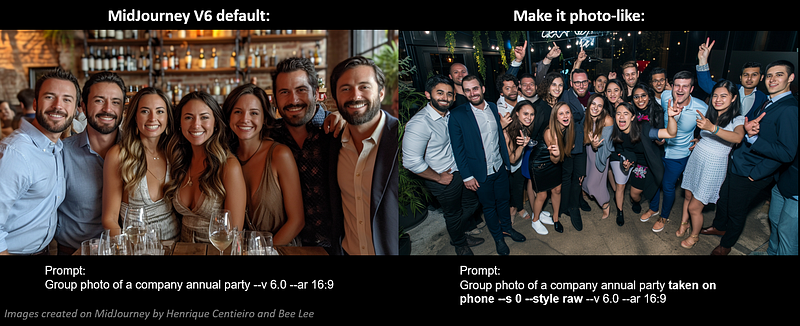
🖼️ Let’s look at two examples (Default VS. Apply the 3 tricks to make it photo-like):
- Group Photo
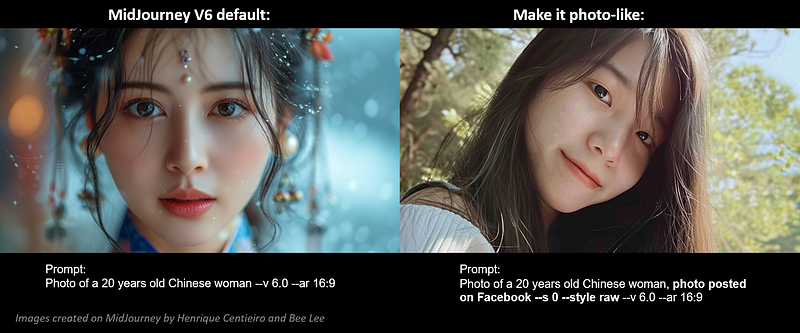
2. Photo of a 20 years old Chinese woman:
💁🏻♀️ My Pro-Tip for you:
While
--s 0and--style rawwork very well in tuning down the MidJourney default aesthetic and making your images look more authentic; sometimes this can lead to some wonky details popping up in your images, like a distorted face, a missing finger or an extra arm.😅
You may need to re-roll it several times and adjust the
--svalue to get the desired result!
Prompting Trick #2 — How many objects should you include in your prompt?
I’ve been playing around with V6 since its release; in my experience, it can juggle around a maximum of 5 specific objects in an image pretty consistently.
However, if I throw in anything more than that, it starts to get a bit forgetful and misses stuff out.
🖼️ Let’s take a look at the examples with 4/5/6/8 objects in the prompts:
• 4 Objects
All the 4 objects mentioned are accurate, and the image is cohesive:
A woman with fuschia hair, Y2K fashion style, wearing sunglasses --ar 16:9 --v 6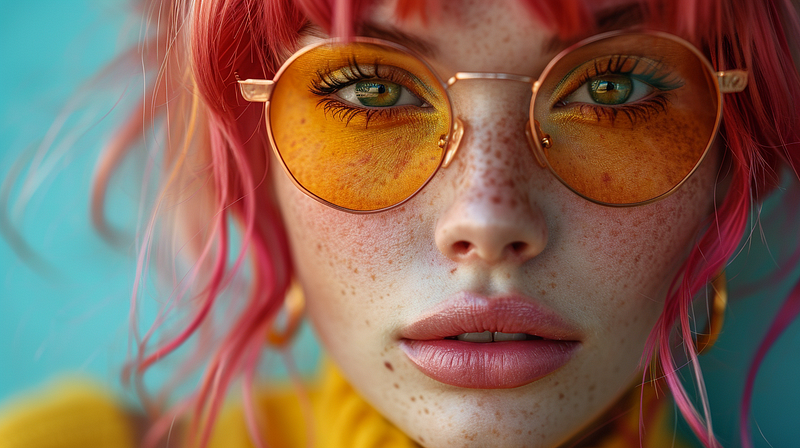
• 5 Objects
All the 5 objects mentioned are still accurate, and the image is also cohesive.
A woman with Fuschia hair, Y2K fashion style, wearing sunglasses and golden earrings --ar 16:9 --v 6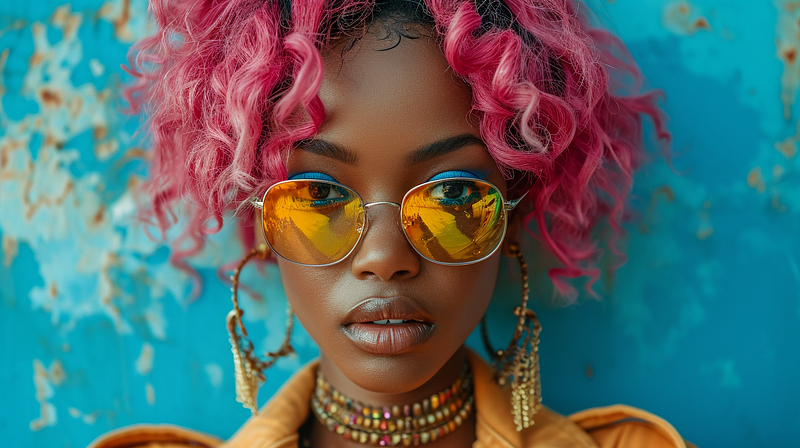
• 6 Objects
It starts to lose accuracy (missing sunglasses), but overall still impressive:
A woman with Fuschia hair, Y2K fashion style, wearing sunglasses and golden earrings, standing next to a phone booth --ar 16:9 --v 6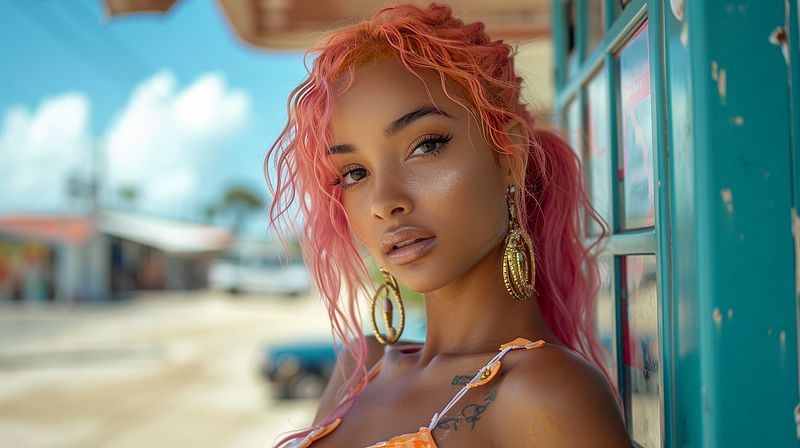
• 8 Objects
It’s struggling to get all the details right (no phone booth and leather purse), and starts to show wonky details in the image (distorted fingers with the lollipop placed at a weird spot):
A woman with Fuschia hair, Y2K fashion style, wearing sunglasses and golden earrings, one hand is holding a small leather purse, the other hand is holding a lollipop, standing next to a phone booth --ar 16:9 --v 6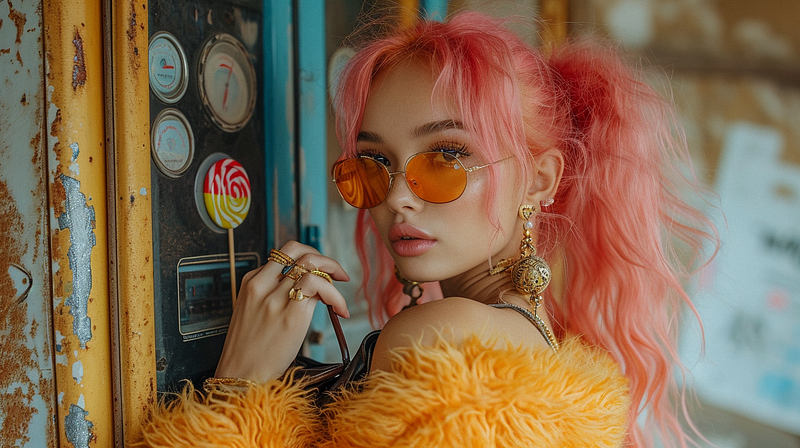
💁🏻♀️ My Pro-Tip for you:
Now, I’m not saying 5 objects is the limit in your prompts — What I’m saying is that MidJourney V6 is pretty good with up to 5 things with the best accuracy. But once you go over that, that’s when MidJourney might start to skip some details and get wonky.
It’s important to try out yourself to find out what works, as different prompts may work differently!
Bored of photorealism on MidJourney? No worries! If you want to explore more unique art styles to play around, you’ll love these two articles:
Prompting Trick #3 — Please, avoid including these junks in your prompts.
MidJourney Version 6 is more proficient in understanding prompts than the previous versions. It can interpret the prompts more literally, meaning that the words you choose to include in your prompts carry way more weight now than before. However…
If you were all about throwing in a bunch of random, weird words in your prompts to try to make them work, I can tell you: The V6 model wouldn’t respond to the junk words and would even weaken the weight of other essential elements in your prompts.
So please, don’t prompt like this with V6:

The MidJourney founder, David Holz, mentioned when MidJourney V6 was released that we should stop using fancy buzzwords and junk words, and “You will need to ‘relearn’ how to prompt.”
With that said, the new V6 model responds very well if you’re into giving tons of specifics and describing how things are placed, like ‘above’ this or ‘inside’ that in natural language, which I will explore more in-depth in another article dedicated to an easy V6 prompting technique for my MidJourney V6 Deep-Dive Series, so stay tuned!
🚫 Avoid using these junk words in your prompts:
4k, 8k, 16k, 32k(you get the point, whatever “K” wouldn’t work now 😅)Photorealistic / ultra-realistic / hyper-realisticHigh-resolution / HD / UHD / Full HD / Ultra HDUnreal engine / Octane renderAward-winningMasterpiece / insane pieceAmazing, awesome, incredible, crazy, excellent, therefore, on the other hand, moreover, thereafter, before, after, during, etc.(any murky words that have zero contribution to what you want to create in an image)
🖼️ Let’s look at an example:
(Left image) Prompt with a ton of junk:
Fine art style, alternative photo angles, faces, minimalist, minimalism, flowers, fashionista, model in motion, double exposure, glitched, mirrored, distortion, cinematic, 8k, ultra-detailed, dramatic lighting, ultra-detailed, award-winning masterpiece, cinematic lighting, 200mm photography, hyperrealistic photography, narrative-driven visuals --ar 4:3 --v 6(Right image) Prompt that is clear, descriptive and on-point:
Double exposure photo of faces and flowers in alternative photo angles, mirrored, distortion, minimalistic background, fashionista --ar 4:3 --v 6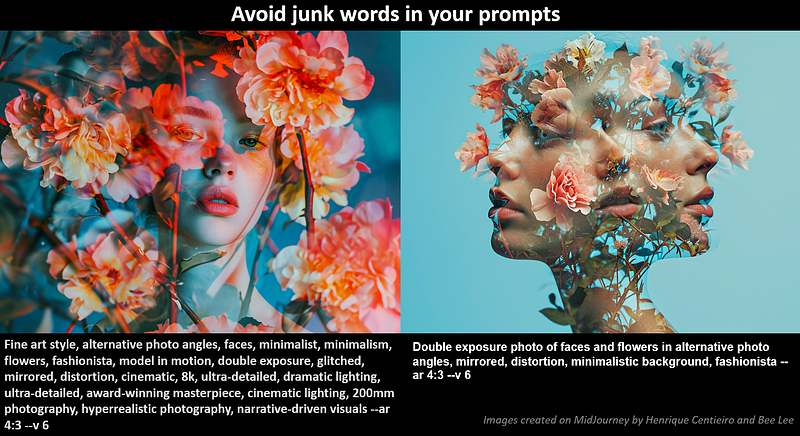
As you can see, the image on the left is missing some important elements, including “mirrored”, “distortion”, and “minimalistic background”, because all the junk words in the prompts are weakening the weight of those important elements.
💁🏻♀️ My Pro-Tip for you:
The previous MidJourney versions paid a lot of attention to the first five words in your prompts, and it kind of snoozed on anything longer than ~40 words.
With V6, although it can handle a much bigger chunk of words in your prompts of 350+, the more junk and filler words you include in your prompts, the weaker the weight of each word would be.
So, be thoughtful and deliberate in your word choices and avoid any unnecessary junk to achieve your desire reults.
Thank you for staying with me till the end. 😊 I hope you’ve learned something valuable today!
Make sure you Stay Tuned for the upcoming Part 2 and 3 for the rest of exclusive Prompting Tricks for MidJourney V6! 👀
— Bee Lee 💃🏻
🥰 If you found any value in this article, why not throw me some Medium love? To support my work: Clap up to 50, leave a message to share your thoughts & Be sure to follow for more future content like this one! 💌
🤗 Hiya! I’m Bee Lee — A 3X Top Writer on Medium and a (really) Passionate Enthusiast of Generative AI.
My love for creating beautiful things and exploring the creative possibilities of Generative AI and MidJourney is unmatched, and sharing my wealth of experience and knowledge with you gives me great joy. 😊 I invite you to come join me as we dive deeper into the fascinating world of AI together! 🎨🤖⛵ Know more about me here.
- Here is the folder for my
:
- To learn more about how to create ultra-photorealistic MidJourney images, this is my highly-rated series where I shared my prompting formula and 100+ cheat codes:
🌞 Stay in touch:


