
Manage Cookie Consent in Next.js 13 with Google Tag Manager
A guide on how to get Cookie Consent from the user in a Next.js 13 project using App router with server component and handle it with the Google Tag Manager built-in consent overview.

Note: if you are looking to implement this method in Next.js Page Router, check this tutorial https://javascript.plainenglish.io/manage-cookie-consent-in-next-js-with-google-tag-manager-4d58818266ea
Most websites today need a Cookie Consent System to comply with GDPR (and other) European regulation. Basically, this means that you can’t store cookies on a user’s computer if they don’t give you permission to do so. And you can’t allow other services that are active on your site (like Analytics or Advertising) to store cookies on your domain.
In this article, I will show how to get Cookie Consent from the user in a Next.js 13 project and handle it with the Google Tag Manager built-in consent overview.
Prerequisites
To follow along with this project you need:
- A Google Tag Manager account and its container with enabled consent overview (I’ll show you how to enable it)
- A service that a set cookie implemented using Google Tag Manager (we will use Google Analytics because most Google services have automatic consent checks, but other services can be implemented easily)
- A basic Next.js 13 project using App router where we will implement the banner for cookie consent
- A basic knowledge of Next.js 13, App router, server and client components
Limits
We will build a basic example where the user can accept or refuse the cookie with no granularity or choice about which cookies to accept and which to refuse. But it will be an easy task to extend this example to a more complete solution.
How will it work
Our Next.js 13 project will include in the pages (using layout.js) a Tag Manager Container, which will be the entry point for all our monitoring codes (analytics, advertising, remarketing…), Tag Manager will “run” the codes based on the user consent, so we will make a banner to let the user giving us (or denying) consent. Consent (consents to be precise, since there are more of it) is persisted and sent to Tag Manager on every page request so that tags are fired correctly and cookies are set based on user choice.
As we said there are more consents and more cookie types, Tag Manager will support:
- ad_storage (cookies that will track for advertising)
- analytics_storage (cookies tracking statistics)
- functionality_storage (cookies that store data for site use, like the language)
- personalization_storage (cookies that customize the user experience on the site based on their preferences)
- security_storage (cookies that store login information, keys, and so on)
There are also necessary cookies that are enabled by default, which are required to have the site working (for example cart functionality in e-commerce)
Google services (like Analytics and Ads) have the consent check built-in, for other services you need to specify the needed consent to work (more on this later)
For this example, we will implement Google Analytics with built-in consent.
Setting up Tag Manager
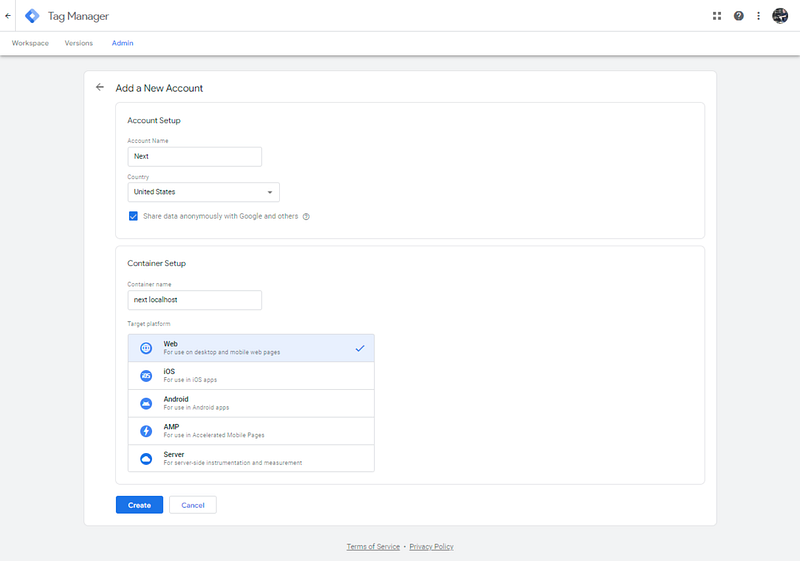
Login to your Google Tag Manager account and create a new account and a new container, give it a name and choose Web as Target platform.
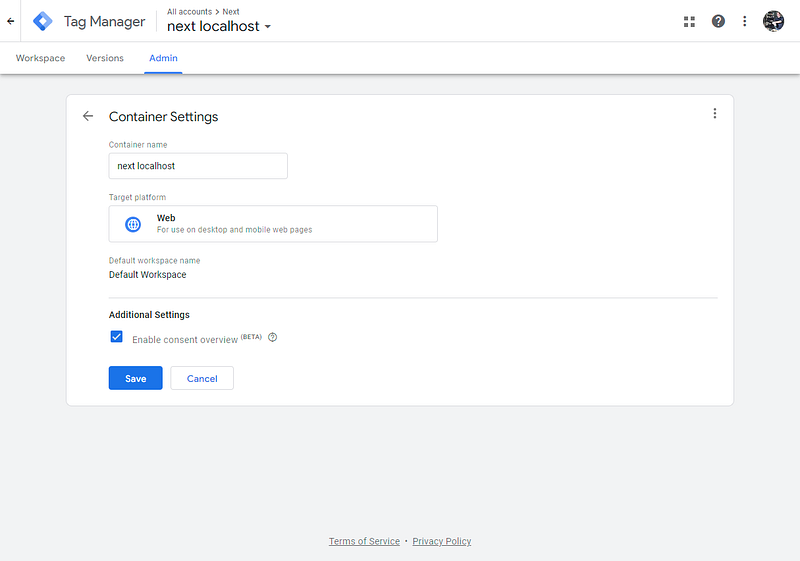
Enable consent overview in Tag Manager heading to Admin -> Container Setting:
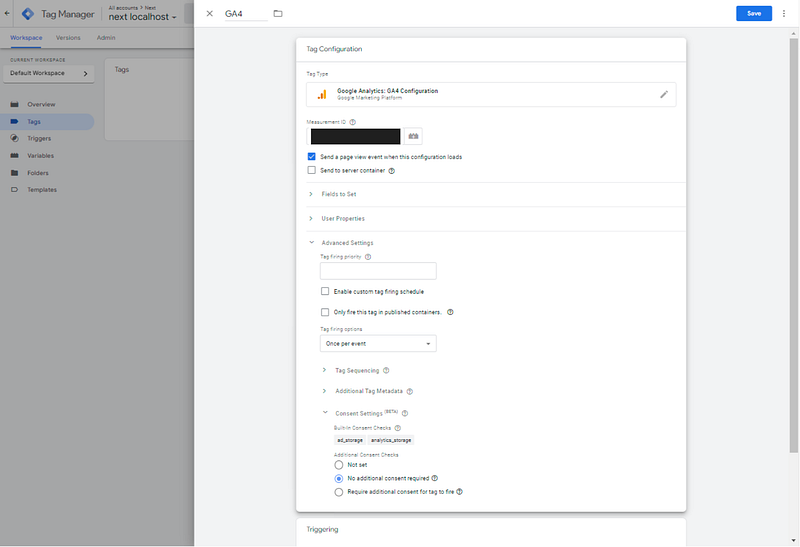
Create a new Tag to handle Google Analytics (you need a Google Analytics GA4 active account and its Measurement ID): go to Tags, click the New button, click Tag Configuration and add the Google Analytics: GA4 Configuration tag type. Configure it by adding the Measurement ID (you can get it from Google Analytics configuration), then scroll down to Consent Settings, and choose No additional consent required. As you can see GA4 got a built-in consent check enabled for ad_storage and analytics_storage. This means that you need to give Tag Manager these two consents to enable cookie storage and tracking from Google Analytics.
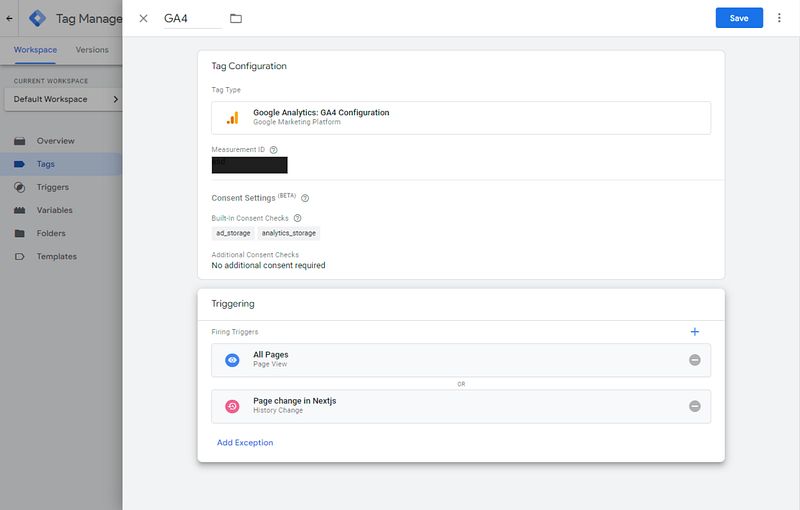
Then you need to configure the Firing Trigger, for Analytics to be fired on every page in Next.js you need to trigger both All Pages and on History Changes. Click Choose a trigger to make this tag fire… Select All Pages, then click the + button to add another trigger, and click the + sign again to create a custom trigger. Name it Page change in Nextjs click Choose a trigger type to begin setup… choose History Change and save it. In the end, your Tag configuration should look like this:
Do not forget to submit the Workspace to publish it.
Create a new Next.js 13 project
We can now create a new Next.js 13 project and install the dependencies we need, we will use cookies-next to handle cookies in client component.
Create the new project:
npx create-next-app@latestWhen requested give it the project a name, add the TailwindCSS support and App Router support.
Add the cookies-next module:
npm install --save cookies-nextAt this point, if you run the app with npm run devand head to
Add Tag Manager Code to the project
First of all, we need to add the Tag Manager Code to our project; to do so, we will use the next/script API (https://nextjs.org/docs/api-reference/next/script). Grab the JavaScript code (you need to get the one which goes in the head) from Tag Manager Admin -> Install Google Tag Manager:
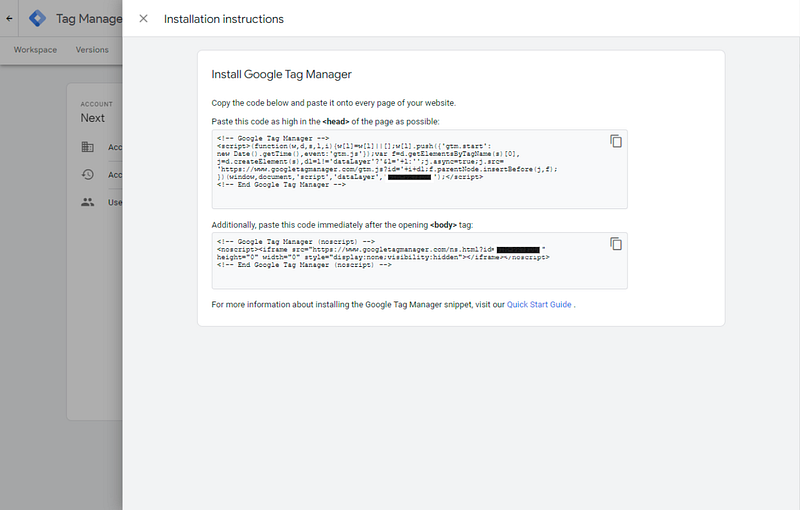
The copied code will be added to our layout.jsso that it is executed on every page of our project:
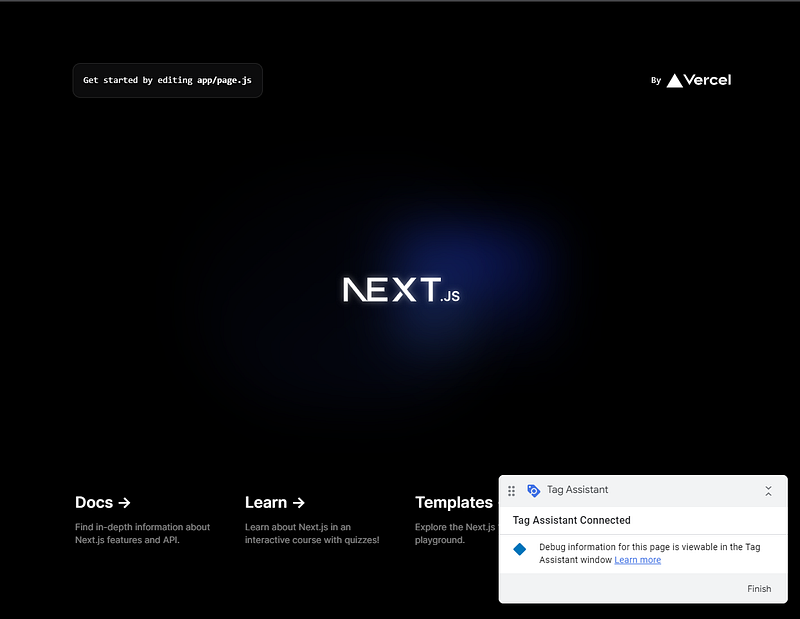
To test if everything is correct, you can use the Preview function in Tag Manager. Go to the workspace you are currently using in Tag Manager and click the Preview button. You will be prompted for the URL to be tested, type in http://localhost:3000, and connect. A new page will be open with your local site, and if everything is configured this page will have a notification that Tag Manager is connected:
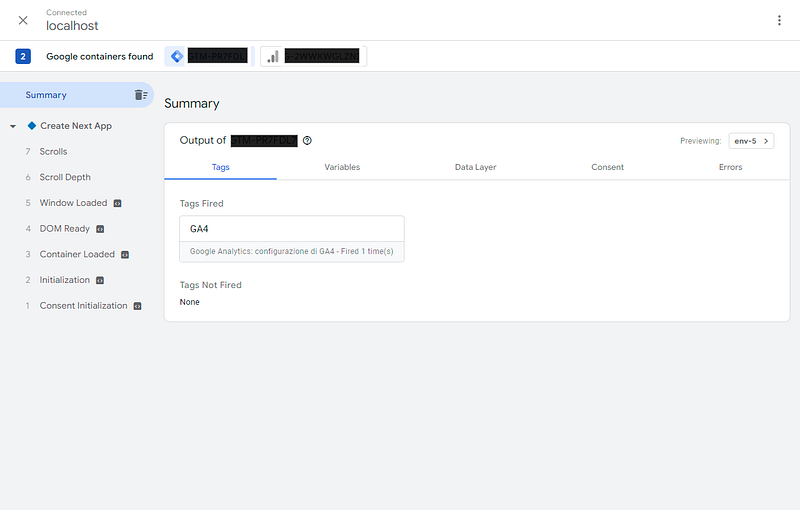
You will also be able to see the workflow of the page rendering and tags fired on the Tag Assistant page, as you can see Tag Manager will fire correctly the GA4 tag (it will be fired in Container Loaded):
Adding the consent pop-up on every page
We now need to add a consent pop-up on every page of the project, the pop-up will have a close button, a deny cookies button and an accept cookies button. Based on the user’s choice a consent cookie will be saved on the user’s computer with the preference. The pop-up will open only if the preference cookie is not present. The close button will not save the cookie so the pop-up will show again.
There are many strategies to create a pop-up with these features, we will include a client component inside the layout of our app.
First of all, we create a new client component (in component/consent.js):
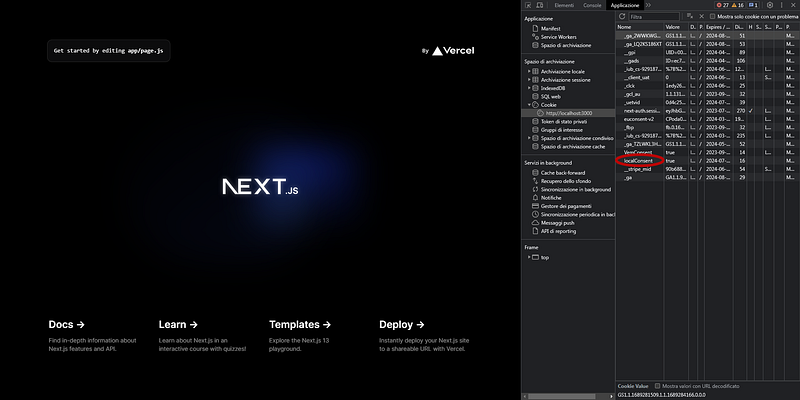
It is a basic div absolutely positioned at the bottom of the page with 3 buttons, every button click closes the banner (by hiding it), also the accept and deny buttons will set a cookie (with the name localConsent and a year duration) that can have a value of true or false. The simple presence of the cookie on the user will not show the banner again, the value of the cookie will be used later to enable (or disable) consense on Tag Manager.
The Consent.js component will be added to the pages by adding it to layout.js.
This way every page will contain the consent banner.
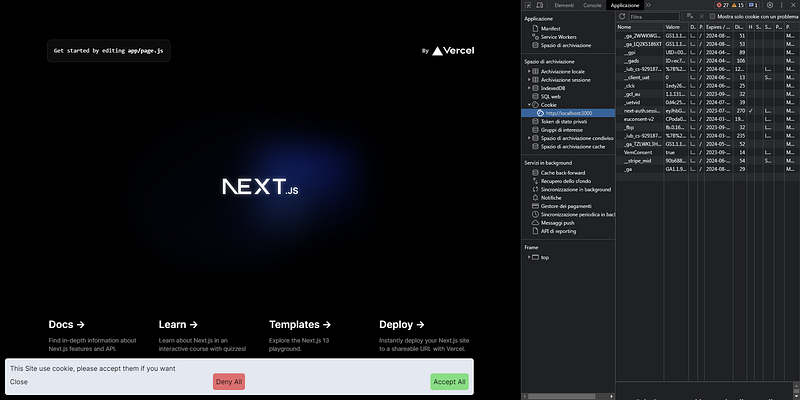
At this point, if you run your project, at the bottom of the page the consent banner will appear, when you click one of the buttons the banner will hide, and (in case you clicked Accept or Deny) the localConsent cookie will be set. If the localConsent cookie is present the banner will not show again, but if you (manually) delete the cookie the banner will show back.
As you may notice there are two more cookies set by Google Analytics (via Tag Manager) that will track you since we haven’t yet implemented the consent mode.
Implementing consent mode
Now that all the pieces are in place, we can start to link them together. As documented by Google, consent mode should always start as denied and then should be updated using the locally stored preference of the user. This check must be done on every page of the site, so we now have to modify the layout.js again to add the default consent value to denied to our Tag Manager code:
gtag(‘consent’, ‘default’, {
   ‘ad_storage’: ‘denied’,
   ‘analytics_storage’: ‘denied’
});
So that it becomes:
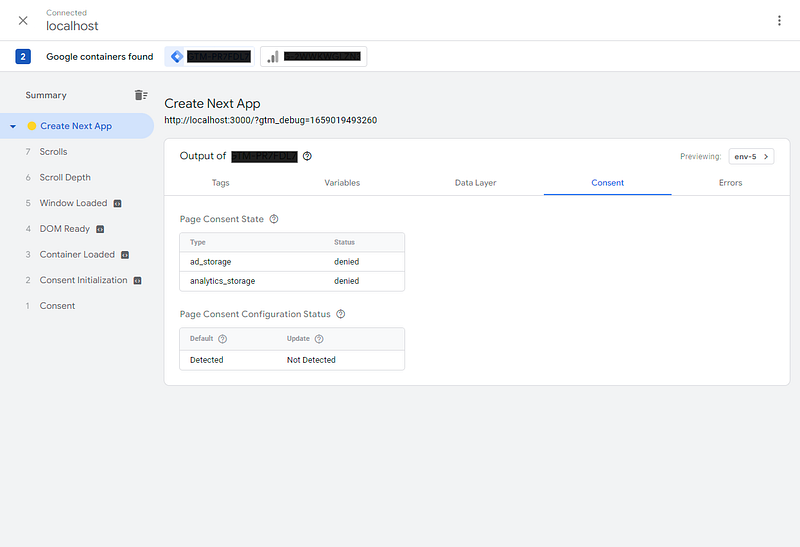
If you delete the localConsent cookie and test now your project using Tag Manager Tag Assistant, you will see the consent state is denied for the two specified scopes and also that we sent a default value and no update:
If you click the Accept now nothing will happen on the Tag Manager side, also if you reload the page with the localConsent cookie set to true you still will have the consent as denied and the Update Not Detected. We need to find a way to notify Tag Manager of the update, both on button click and on page load once the Consent is granted.
This is achieved by sendint to Tag Manager a consent update event:
gtag(‘consent’, ‘update’, {
   ‘ad_storage’: ‘granted’,
   ‘analytics_storage’: ‘granted’
});
For the (Accept) button click we add the gtag update in the accept function inside the Content.js component:
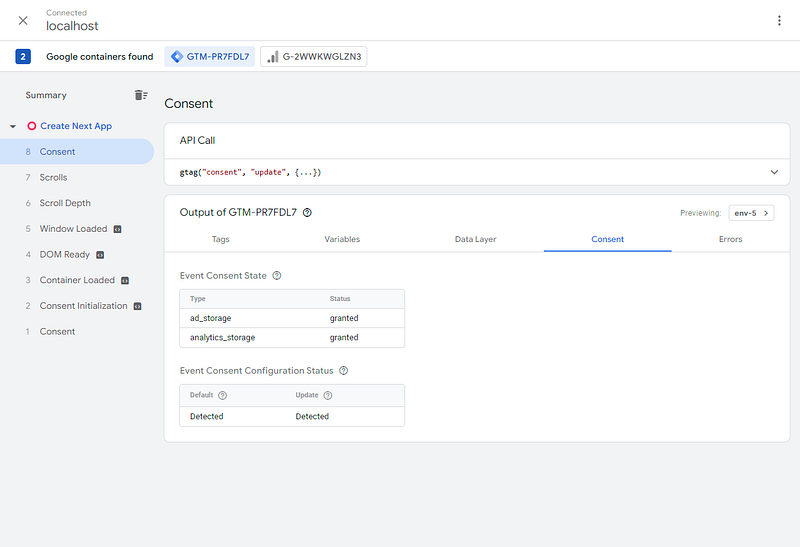
So that when the button is clicked the consent is set to granted on Tag Manager for ad_storage and analytics storage. Delete all localhost cookies and test it again with Tag Assistant, you will see that when you click accept all a new Consent event is fired that will detect the update. You will also notice that one of the GA4 cookies is not set if you do not click Accept, that cookie is the one tracking you. If you click Deny, the consent is not updated so the tracking cookie is not sent by GA.
If you reload the page or move to another page the consent is initialized again to denied, so to persist during navigation we need to implement the update in layout.js file, by reading the cookie and sending the gtag update event if needed. To read the cookie we use the cookie function in next/headers (https://nextjs.org/docs/app/api-reference/functions/cookies) that can read cookies from the client in server components:
If you test in Tag Assistant now you will see that the updated to granted is sent when moving to pages or reloading (if previous consent was given).
Implementing consent on more services
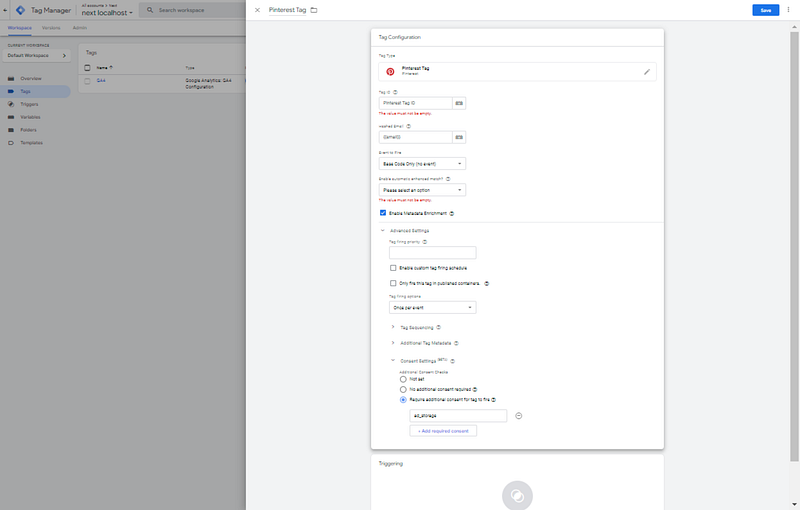
As we mention before, Google services have already a built-in consent check. If you need to implement it for other tracking services (Facebook pixel, Pinterest tracking, other advertising or analytics system), you need to know which are the scope of the services to be enabled (ad_storage, analytics_storage, and so on) and add them to the Require additional consent for tag to fire in the Consent Settings of the Tag:
Improving and extending
As this is a base project and just a concept on how to manage consent in Next.js with Google Tag Manager, it can’t be considered a complete and production-ready project.
You may want to improve and extend the project, here are a couple of things you can/should do for a production environment:
- Besides the Accept/Deny all, you want the user to manage the consent scope individually by giving the user the opportunity to choose which scope to accept and which to refuse; you can store the preference in multiple cookies or in a serialized object inside a single cookie.
- Let the user manage cookie preference, giving the ability to remove or grant single consent scope after they are set for the first time.
Thanks for reading.


