
Make Your Own Scheduling Page with Fantastical and Your Website Provider
I’ve moved from a hybrid environment of Windows, Android, and iOS to be fully macOS/iOS. I want to take as much advantage of that move as possible through streamlining and automation. One of the first places I did that was through creating my own scheduling page with Fantastical.
Why Fantastical?
Fantastical is a lovely piece of software the integrates beautifully into Mac and iOS. While not free, Fantastical also is priced far less expensively than alternatives like Calendly and Morgen. Morgen is an excellent alternative if you are cross-platform, and the version that includes a scheduling page option is less expensive than Calendly.
Specifically for scheduling, Fantastical has something called “Openings” which allows you to create your own scheduling page.
What do you need to do this?
You’ll need a Fantastical account set up as well as a website where you want to add your links. For this demonstration, I’m going to use my website maintained through Wix.com — Monarch Strategies LLC, but you could even do this on a free website you make through Google Sites.
As you can see from my Scheduling Page, I’ve built all of my scheduling options, at least for now, onto a single page. The orange buttons which take you to the different Fantastical scheduling pages are a part of my website provider’s toolset. If you want a prettier button, you’d need to make that on your own — but otherwise this is pretty straightforward.
Setting up Fantastical for Scheduling
Want to watch a video of this process — check out the companion video on YouTube.
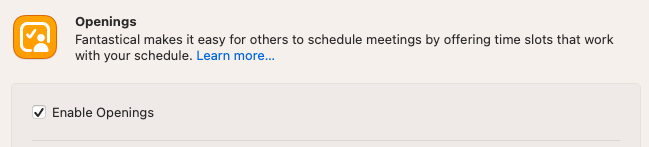
In Fantastical, the feature you’re going to use to create a scheduling page is called Openings. You access Openings from the Settings Menu (Fantastical > Settings, or Command Comma).
First, you’ll need to check the box to Enable Openings.
Next, you must select the Calendar Set that will be checked against to see if you have times available. I’ve created a specific set of calendars — called Scheduling — that Fantastical checks against.

If you haven’t created a Calendar Set, you can use all calendars by default. For most people, this will work fine. I have calendars that I don’t want checked against (for instance by daily block schedule overlay) and so I exclude those kinds of calendars from the Scheduling set.
Once Openings are enabled, and you’ve selected the calendar set to use, you’re ready to create a Meeting Template.
Creating Meeting Templates
Your meeting templates set the parameters for a specific meeting type — including days of the week and times of day you’ll allow those to be scheduled. You can also specify whether you want breaks to be enforced between meetings, add web meeting links (zoom, google meet, and phone are available options as of right now), and more. I’ve walked through all of those in the video that accompanies this article.
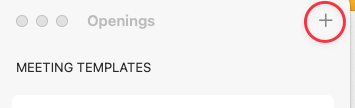
To create a new meeting template, Click the Meeting Templates button on the Openings page of Settings. Then click the + at the top right-hand screen of the Openings page.
In the window that pops out, you’ll begin creating the parameters of this specific type of meeting. For this example, we’ll be creating a 45-minute phone call. Here is an image of what that looks like, and I’ll walk through the options for that below:
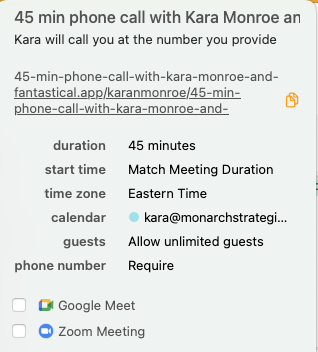
You give the meeting a name (here, 45-min phone call with Kara Monroe and). Fantastical’s scheduling page includes a place for your meeting participant to include their name. The appointment you receive will include the name at the end of the title of the appointment.
I decided to add a description to each meeting of this type that says, “Kara will call you at the number you provide”. If you don’t need a description for your meeting, feel free to leave this blank.
Next, I set the duration to 45 minutes.
This will get scheduled as an event on my Business calendar. For me, each calendar is color coded, so I can easily see if this is a personal or business appointment. These will be color coded as business appointments.
Finally, I selected in this section to require a phone number.
Now, you want to select the days of the week and times of the day that you’ll allow this kind of meeting. For example, let’s say I only want to do this type of call in the afternoons on Tuesday, Wednesday, and Thursday. That would look like this:
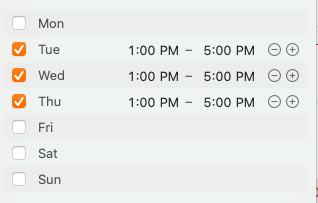
Using this method, people will only be able to see available time slots for this type of call on those days and between those times. If you practice time blocking, this is an EXCELLENT tool to help you create a boundary in your time management system.
Finally, you select the options around approval, how far in advance people can schedule, how soon people can schedule (lead time) and whether you want an enforced break between meetings. Let’s look at this example:
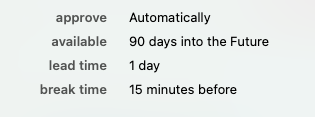
I chose automatically approval. Given the small window of available times, I went with a 90-day availability. I did tweak the lead time to not allow anyone to do same day scheduling for this specific type of meeting. And I also noted that I wanted a 15-minute break before a meeting.
Once all of those are set, it’s time to click add meeting template.
You will now see that template in your list of meeting templates.
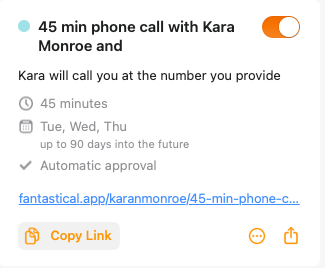
You need to copy the link that was generated (using the handy Copy Link) button, so we can go create your scheduling page on your website.
Creating the Scheduling Page On Your Website
In your web provider, create a scheduling page and add any appropriate text. Again, you can see my example at Monarch Strategies LLC. Now, add the link that you copied from Fantastical either as a link in the text or as a button on the page.
Since this process varies so much by web provider, I do walk through quickly how I do it in my provider — Wix — in the video that accompanies this article.
Please don’t hesitate to post any questions here on this article or in the comments on the video about how this might work on your website. I’ll do my best to help.
Automations and the Calendar
One of the big reasons I moved to the macOS/iOS environment is the ability to automate routine activities. While you can do this with paid for services like Calendly, Zapier, and others, I’ve found that most of my automation needs can, at least for now, be taken care of locally using macOS and iOS tools. Although some of my favorite time savers are also available on Windows. Let’s start with those.
The first automation I have is not Mac specific — although you could do it with Keyboard Maestro — the Mac only equivalent of TextExpander. That is, to set a link to your calendar page as a text snippet that you can type a few characters and get a much bigger block of text added in its place. I use the letters z c a l (without the spaces) to insert my scheduling page link in all sorts of contexts.
I also have very specific email templates created in Text Expander that I send to people who book coaching calls with me. These contain links to forms, other web pages and more. While I’ve not tried it yet, I think there is a way to run an automation that would check my calendar and let me generate these emails even more automatically.
For the Mac/iOS specific stuff, I also have a Shortcut on macOS that creates Obsidian meeting notes automatically from my calendar appointments. Since I teach and take many classes and lead numerous webinars, I’m considering expanding that automation to apply different templates based off the specific agenda item type.
I’d love to know if you have favorite time-saving shortcuts and automations for Mac, or favorite text expansions. If so, feel free to drop a comment on this article and share about those.
📰 Want to make sure you never miss a story from me? Subscribe to my newsletter. I send out a fresh new article and do a round up of everything I published that week. It is released for free every Monday morning.
🌐 You may find other copies or versions of this article at places where I publish my work. You can find me at Medium, on the Hive Blockchain, on my personal website, on my business website, on LinkedIn, and on Twitter.


