
Make A Simple Vanilla JS Web App Skeleton With AWS Amplify
AWS Amplify for Firebasers

Following on from my first Amplify article in which I gave an overview of the Amplify service, in this article I would like to create a simple vanilla JS website to test and compare the dev experience of Amplify with Firebase.
Getting Started
Google’s vast experience with user interfaces becomes apparent to Firebasers when they start to use Amplify. The UI and layout of the AWS website is horrible. It’s very hard to find what you’re looking for. There also seems to be a lot of scattered information. For instance, why is the console documented in two places — here and here. These different documentation sites look like two different websites. It’s very confusing.
AWS Amplify Console is the equivalent of Firebase’s console. It took me a while to find the console. It’s hidden away. To get to the console, go to this page, then click console. Why can’t there be a button at the top of the Amplify page — “Go To Console”? And, in the Amplify documentation, there is no link to the console! Another way to get to the console is by clicking the “Get started for free” button at the top of the main Amplify page, and then, on the page that you are taken to (the sandbox), clicking the “Connect app repo” button. What a run-around!
Another way to get to the console for a specific project is to run amplify consolein the terminal of your current project folder, but you can only do that after the setup below.
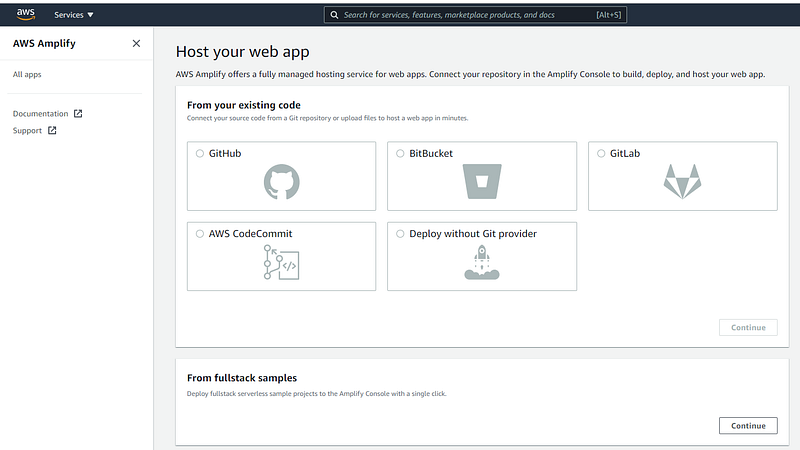
Before you create an app the console looks like below:
Next, we get started with our vanilla JS app. You can also follow this tutorial on AWS to create this JS app.
Installing the Amplify CLI On Your Dev Machine
Similar to the Firebase CLI, there is a CLI for Amplify.
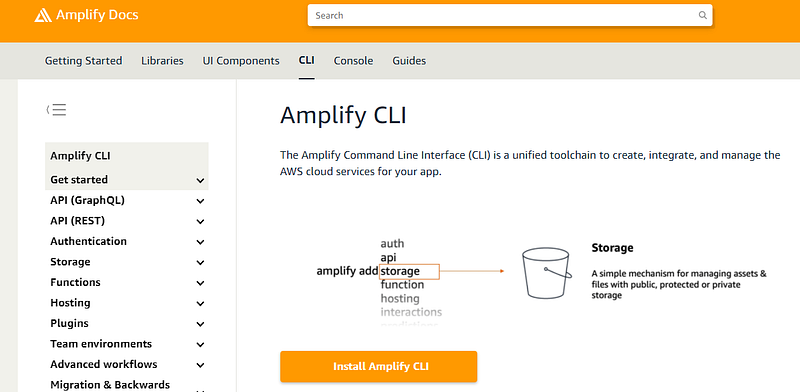
To install it on your machine, go to the CLI docs for Amplify, and click on the “Install Amplify CLI” button (screenshot below), and you will be taken to the instructions page, or just click this link.
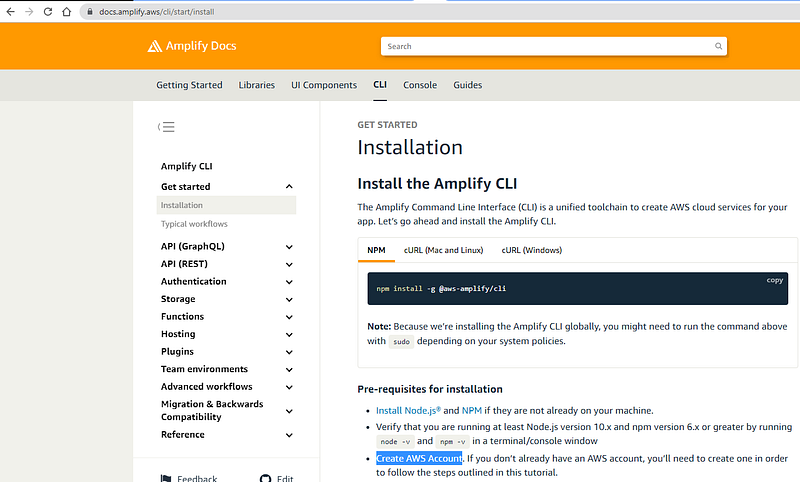
Use the command for your dev environment. I used npm install -g @aws-amplify/cli for NPM on W10 from a Visual Studio Code terminal. The installation takes at least 2 minutes, at least for me it did.

Note that you have to create an AWS account before you can configure your CLI. I did that in my first article. Configuring your CLI sets your machine up to be able to interact with your AWS account in the cloud.
Next run amplify configure to allow your computer to interact with your AWS account in the cloud. A few seconds after you enter this command you will be directed to a new browser tab to sign into AWS. You will find yourself signing in a lot to AWS. After signing in go back to the terminal.
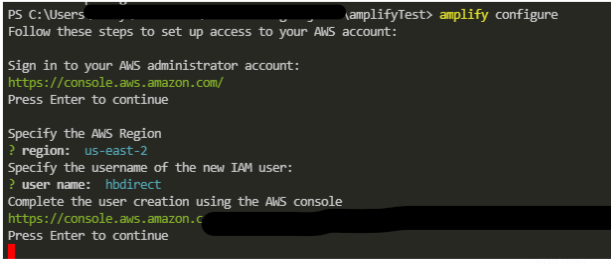
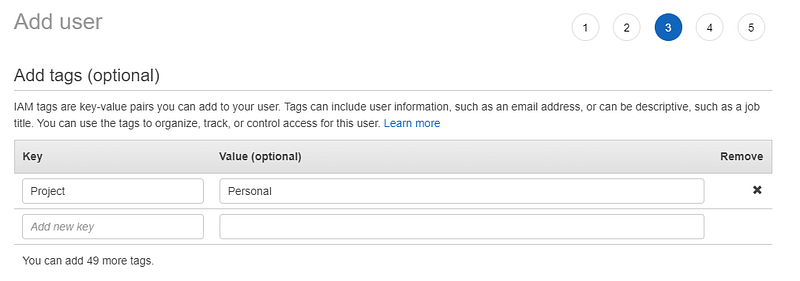
After you choose an IAM user name, you will again be directed to a browser tab where you must configure the new user. Go through each screen to set the user permissions.
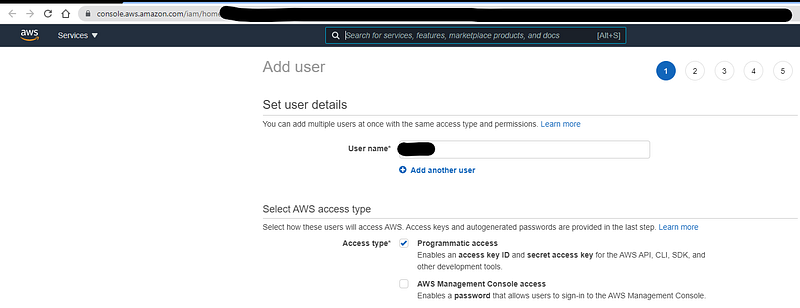
You must “Create a user with AdministratorAccess to your account to provision AWS resources for you like AppSync, Cognito, etc”, as below.

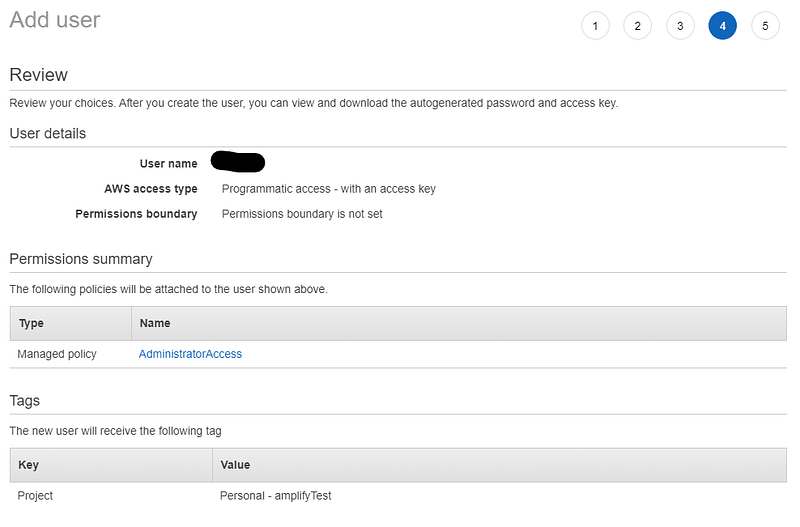
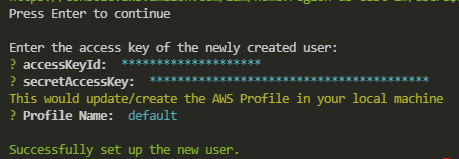
You need the keys on the final screen to use in the terminal to finish the CLI setup.
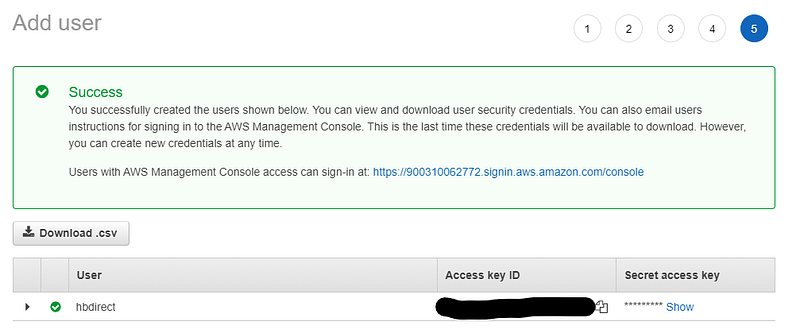
In your terminal, press enter and add the access keys.
You’re now set to use the Amplify CLI.
Start Creating The Project — Client-Side First
You can follow along with the instructions on this page. Create your project directory by using mkdir -p amplify-js-app/src (the instructions create the folders with terminal commands, but it might be easier to create them manually in your code editor) and then navigate into the new folder with cd amplify-js-app in the terminal.
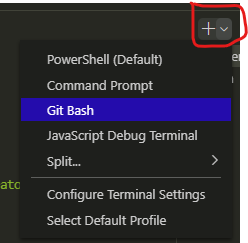
If you’re using Windows Powershell terminal inside VSC and getting an error like “The token ‘&&’ is not a valid statement separator in this version”, then try using a Bash terminal. You can create a bash terminal in VSC as shown below:
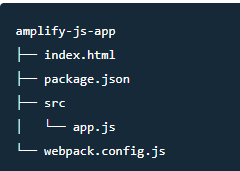
You can also create the files and folders manually in your code editor — this is what I ended up doing because of errors. The final directory structure should be like this:
You now need to add stuff inside the files you have created. Follow the instructions on the page I mentioned earlier to do that. After you’ve added the code inside package.json, remember to run npm install in the terminal to install packages to your project. npm install adds the node_modules folder and the package-lock.json file.
Now run npm start in your terminal. This will add the dist folder. You can now open your dev server in a browser tab on localhost:8080.
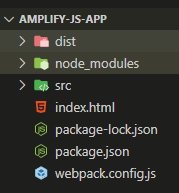
In VSC the folder structure at this stage looks like this:
Your skeleton vanilla JS app looks like this in a browser:

So your basic client-side is all done now.
Add An Amplify Backend
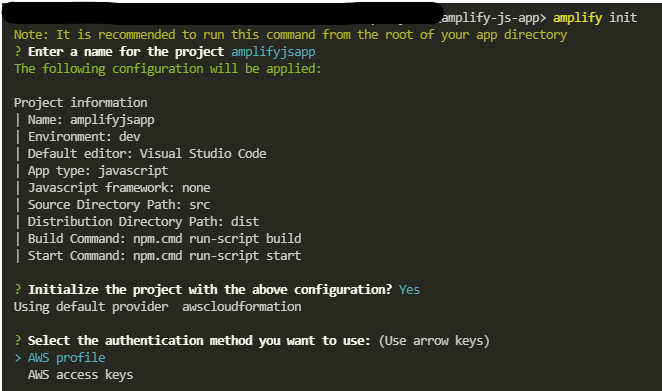
The magic words to create an Amplify backend are amplify init . Run them in your terminal, and answer all the config questions, they’re all straightforward. As you can see below, this command will initialize a project in the cloud that is tied to your client-side.
According to Amplify docs, amplify init,”…creates a file called aws-exports.js in the src directory that holds all the configuration for the services you create with Amplify. This is how the Amplify client is able to get the necessary information about your backend services.”
Notice the tips for using Amplify that are printed in the console (see below).

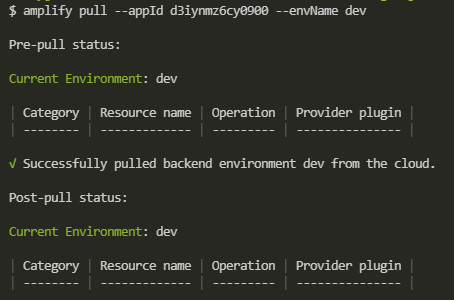
To get to the amplify console, use amplify console in your terminal, which will take you to a browser tab where you can log in and see the backend that has been created. When you open the console you will see this note:

This is how to keep the backend and VSC in sync. If you run that command in your terminal, you will see that the project folder is synced with the backend. This is important if you are adding backend services on the Amplify website, and not on the client-side.
At this stage your project folder structure should look like this:
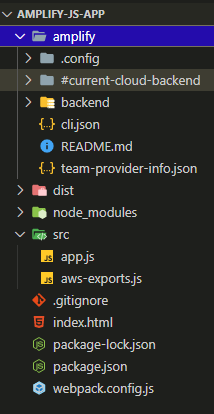
At this stage, your back end and front end skeletons are complete and connected. You can now start adding backend services eg runningamplify add api will add a GraphQL database to your backend. In a future article, I will go through adding amplify auth (Cognito) to the app.
Final Thoughts
So far in my comparison of Amplify to Firebase, the setup steps have been similar. After the initial struggle of finding the documentation on AWS, there is not really anything to complain about so far in the setup.
The difference I noticed is that with Firebase you create a new project in the Firebase console, and then you add the project object to the environment file. Amplify does this slightly differently, but it is quite easy to do. No complaints about it so far. In a future article, I will add more backend features and compare them to Firebase.
Thanks for reading. If you enjoyed this article, consider subscribing here to Medium membership to get access to thousands of other articles.


