
Local Kubernetes Development using Vagrant and K3s
A step-by-step guide to set up K3s on your local Vagrant machine, and deploy an application to the cluster from your host machine.

Prerequisites:
- Install Virtualbox
- Install Vagrant
- Install Kubectl
Why local development with Vagrant and K3s?
Using Vagrant helps a lot to prevent polluting your host machine. Every developer knows the pain. You want to play around with some program or technology. You have to install it, add a few dependencies, and suddenly your host machine is full of programs, libraries, and dependencies you will never use again, and your used disk space is pilling up. Vagrant or virtual machines, in general, help prevent this by providing an encapsulated space you can play around, and when you are done, you can shut down and delete the whole thing. Another benefit is that the entire setup is easily reproducible using a Vagrantfile on other developer machines, e.g., in this tutorial here 😉.
K3s is a very lightweight Kubernetes distribution helping to reduce resource usage, making the initial startup and the overall development way faster due to having more resources available. Also, installation is as easy as running one single shell command. So if there is no specific need to go for a full-fledged distribution, I would always recommend K3s for local development.
What will you have running on your local machine after this tutorial?
After this tutorial, you will have the following result:
- A Vagrant VM with a Kubernetes (K3s) cluster that you can reach from your host machine.
- The possibility of running
kubectlcommands from your host machine to access your cluster directly runs on the VM. - A simple web server will run on your Kubernetes cluster that you can access from your host machine to validate that everything is working as expected.
Let's start
To get started fast, I prepared a repository on GitHub that you should use to follow the steps described in this tutorial, even though I will highlight the essential parts of the repository in this article.
Setting up the Vagrant Machine
The first step is to set up the Vagrant VM on our local machine. For this, I have prepared an Vagrantfile in the linked GitHub repository. You can access it under vagrant/Vagrantfile.
The Vagrantfile
There are three significant parts to highlight here.
First of all, we are exposing several ports of our Vagrant VM to our host machine. The first port is 6443 and acts asthe port of the Kubernetes API server. You need to expose this port to have your host machine reach the Kubernetes API server via the kubectl commands.
# Kubernetes API Access
config.vm.network "forwarded_port", guest: 6443, host: 6443
If you don't expose this port in the Vagrantfile you will later get the following error when running kubectl on your host machine:
The connection to the server 127.0.0.1:6443 was refused - did you specify the right host or port?Second, we expose the port range 30000 to 30100. We do this to later access our webserver on one of these ports from our host machine. In theory, it would also be enough only to expose one single port here since we will only have one single service running on our cluster. But often, you will have several services running and reachable, so a range is an excellent way to achieve this with low effort.
# Expose NodePort ports
for p in 30000..30100
  config.vm.network "forwarded_port", guest: p, host: p, protocol: "tcp"
  end
Third, we tell Vagrant to run a shell script when we provision a new machine. In our case, the setup scripts name is k3s.sh and is located right beneath the Vagrantfile. As you can guess the k3s.sh script intends to install K3s on our VM right after provisioning, so you don't have to do it manually.
# Run some setup script to install K3s on he VM
config.vm.provision "k3s shell script", type: "shell",
    path: "k3s.sh"
The content of the k3s.sh file:
Starting the Vagrant VM
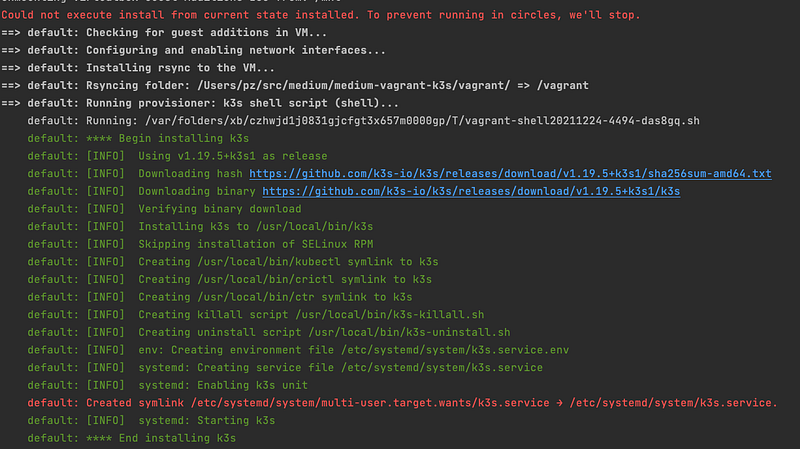
After we verified the configuration of our Vagrantfile we are good to go and can create the VM using vagrant up. For this command to work, we have to be in the same folder as the Vagrantfile.
Depending on the power of your machine and your internet connection speed, it might take several minutes to provision the initial VM. In the console output of your terminal, you will also notice that at the end of the provisioning, Vagrant will execute the k3s.sh script and install K3s on the VM.
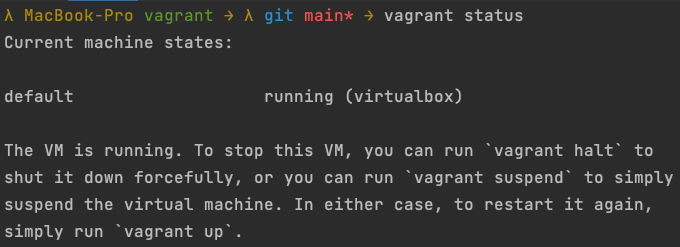
When Vagrant has finished the provisioning, you can verify that your VM is up and running using vagrant status.
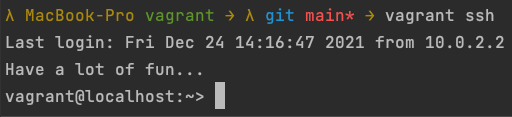
By using vagrant ssh you can then directly ssh into your VM and are good to go.
Create a connection from your host machine to your Kubernetes cluster
Now that we have provisioned the VM on our local machine and verified that everything is up and running, it's time to confirm that our setup script also worked, Kubernetes was installed on our VM, and enable our host machine to run kubectl commands on the VMs cluster.
First of all, let's check if kubectl works and if K3s created all the resources in the kube-system namespace.
For this, we can run the following command on our VM to get all resources for all namespaces.
kubectl get all --all-namespaces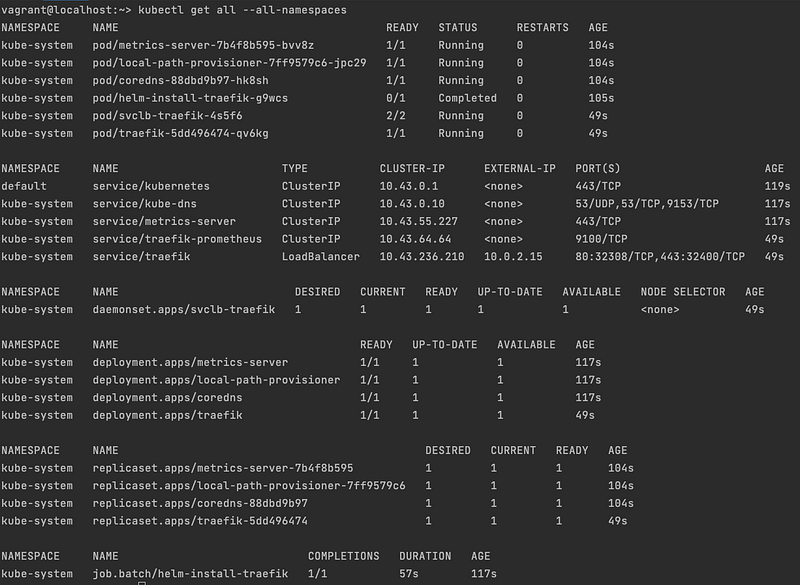
As you can see, many resources are already up and running, and no apparent errors are visible. Great, then let's set up the connection from the host machine to our Kubernetes cluster.
Per default, K3s creates a Kubernetes Config resource at the location /etc/rancher/k3s/k3s.yaml. This configuration contains connection information like the server address and certificates used to create a connection with the cluster.
Using cat /etc/rancher/k3s/k3s.yaml on the VM, we can print the file's content to the terminal, copy it, and paste it into the ~/.kube/config file on our host machine. The configuration file at ~/.kube/config is used by the kubectl command to know the address of the Kubernetes API server and how to connect to it.
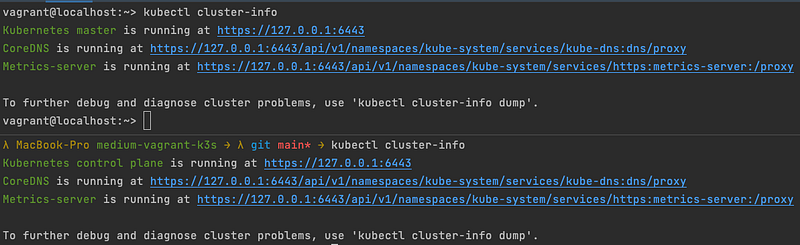
After editing the config, we can verify that everything is working as expected by running any kubectl command and see if it works. For my example, I've chosen kubectl cluster-info to make sure the command is pointing to the correct server and not to any other server I may have configured somewhere in the past. To be 100% confident, you can also run the same command on your Vagrant VM and compare the outputs.
The following image shows the output running kubectl cluster-info on my Vagrant VM and my host machine. Both display the same result.
Create your first application on the new cluster
Now that everything works as expected and we can access our new cluster from our host machine, it's time to create and run our first application on the cluster.
I prepared a Kubernetes deployment and a service definition in the GitHub repository for this demo. You can find the YAML definitions for this example in the manifests folder of the repository.
The service is of the NodePort type and exposes the 30001 port (remember that we exposed this port in our Vagrantfile ? 😉) and points to port 80 of our deployment. The deployment, on the other hand, runs the nginxdemos/hello:0.2 Docker image with two replicas on port 80 and as such can be accessed through our service. You can find more information on the used Docker image on DockerHub.
The purpose of this Docker image is straightforward and perfect for demoing. According to the official docs:
NGINX webserver that serves a simple page containing its hostname, IP address and port as wells as the request URI and the local time of the webserver.
So now the only thing left is to apply our manifest files via kubectl apply -f manifests/ to spin up our application and the service.

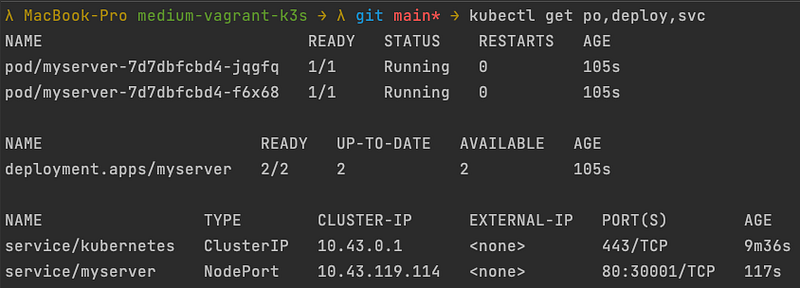
The application should spin up pretty fast due to its small size. Querying our Kubernetes cluster via kubectl get po,deploy,svc we can check if everything is already up and running.
As you can see in the following image, our two pods are in the Running state, and also our deployment tells us that two out of two pods are ready and available.
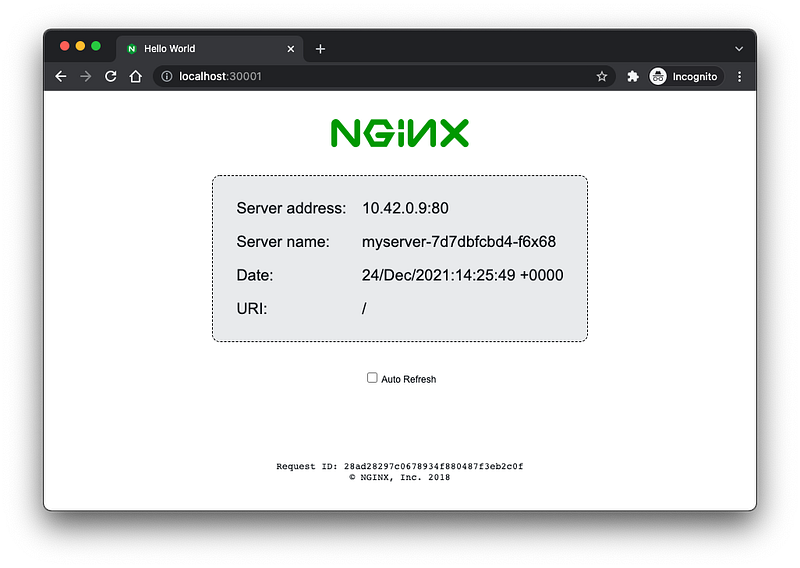
Last but not least, let's do our final test and check if we can access the pods running on our Kubernetes cluster.
Opening a new browser window and navigating to http://localhost:30001:
Summary
As you can see, it's not that difficult to spin up a new Kubernetes cluster on your local machine if you know the how. Hopefully, I could provide you with a quick start setting up your local machine properly for your Kubernetes development journey.
Do you want to get in touch?
If you want to contact me, please hit me up on LinkedIn.
Also, feel free to check out my book recommendation 📚.


