
Linux on Windows? Totally! How to Install WSL 1 and WSL 2
Lately, I have been working with lots of Linux deployments using Terraform and this requires SSH virtual machines to test scripts. Usually, I use Putty on my Windows machines, which is just OK.
However, there are better options and personally, the best one around for me is using WSL (Windows Subsystem for Linux), developed between Microsoft and Canonical (the company behind Ubuntu).
WSL version 1 was introduced on the Windows Fall Creators Update Version 1709 and WSL version 2 was released on the Windows Feature May 2020 Update Version 2004.
Note: this story was updated in May 2020 to add the installation of WSL in Windows 10 LTSC versions and Windows versions without the Microsoft Store .
1. Requirements for WSL
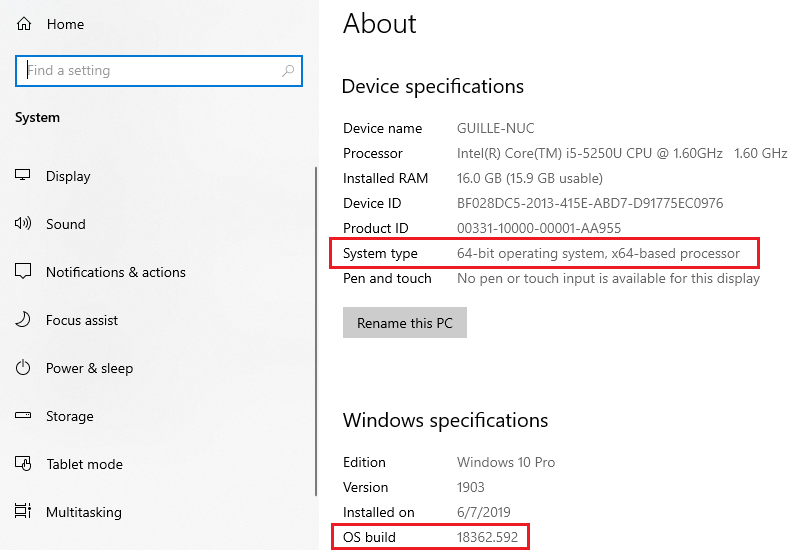
Currently, WSL 1 and WSL 2 are only supported on both Windows 10 64-bit and Windows Server 2019.
We need to run Windows Build 16215 or later to install WSL 1.
WSL 2 is only available in Windows Builds 18917 or higher.
Follow these steps to check your build:
Open PowerShell (as administrator) and type:
systeminfo | Select-String "^OS Name","^OS Version"
From the Windows GUI, go to Settings, System, About.
Note: If we are running Windows 10, we need to verify the OS version is 64-bit.
2. How to install WSL 1 from the Command Line?
Open PowerShell (as administrator) and type:
Enable-WindowsOptionalFeature -Online -FeatureName Microsoft-Windows-Subsystem-LinuxThen, we need to restart our computer when it is asked.
3. Installing WSL 2
WSL 2 is only available in Windows builds 18917 or higher.
Note Abril 2020: Currently, we need to join the Windows Insider Program and enable the Slow or Fast Ring access on Windows Insider Build settings to get access to the newest Windows builds.
This first step is enabling the Virtual Machine Platform optional component on Windows. We open our PowerShell console as Administrator and type:
dism.exe /online /enable-feature /featurename:VirtualMachinePlatform /all /norestart
Then, we enabled the WSL with this command:
dism.exe /online /enable-feature /featurename:Microsoft-Windows-Subsystem-Linux /all /norestart
After that, we restart our machine.
When the machine is ready, we need to download and install the WSL 2 Linux kernel update package, available on this link.
To configure our machine to use WSL 2 by default, we open our Command Prompt as Administrator and we type
wsl --set-default-version 24. Installing a Linux Distro on WSL
After we installed WSL 1 or WSL 2, we are ready to install our favorite Linux distro.
Note: if we don’t have the Microsoft Store installed or our version doesn’t have the Microsoft Store, we need to follow instructions in the step 7.2
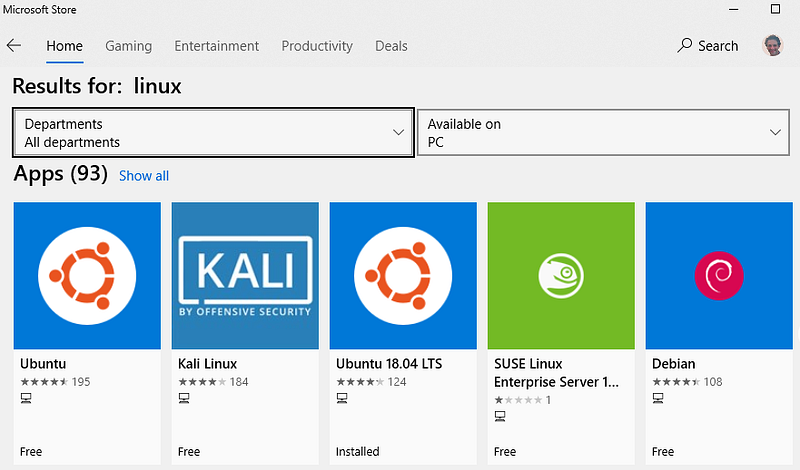
We open the Microsoft Store and select our favorite Linux distro:
We click on the desired Linux distro and version and launch the installer:

When is done, we click the Launch button:

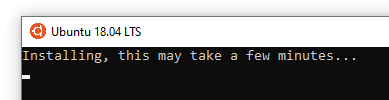
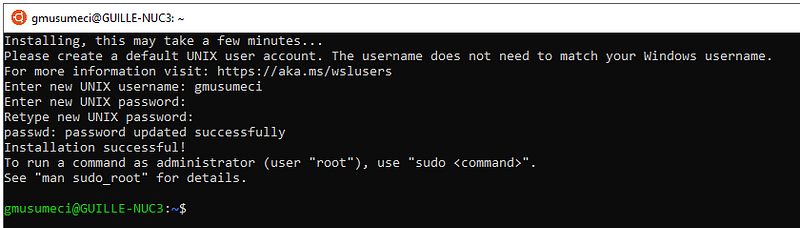
It will start the setting up of Linux in our machine:
And after a few minutes, the setup will ask for a username & password and we are done!
5. Verifying what Versions of WSL our distro are using
To verify what versions of WSL each Linux distro is using, we need to use the following command:
wsl --list --verbose or wsl -l -v
Note: the
--verboseparameter is only available in Windows Build 18917 or higher

6. Upgrading WSL 1 to WSL 2
To upgrade a Linux distro to WSL 2, first, we need to install WSL 2. Please follow the step listed above in the Installing WSL 2 section.
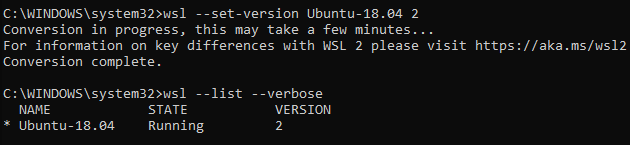
Then we verify the version of our Linux distro, with the following command:
wsl --list --verbose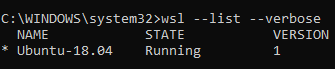
After that, we need to upgrade our Linux distro to version 2 with this command:
wsl --set-version <Linux-Distro> 2It will take a few minutes to convert the Linux distro to version 2 and then we are ready:
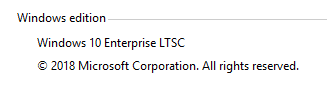
7. Installing WSL in Windows 10 LTSC
The Long-Term Servicing Channel (LTSC) is designed for Windows 10 devices and use cases where the key requirement is that functionality and features don’t change over time.
7.1. Installing Prerequisites
Open PowerShell (as administrator) and type:
Enable-WindowsOptionalFeature -Online -FeatureName Microsoft-Windows-Subsystem-LinuxThen, we need to restart our computer when it is asked.
7.2. Downloading the Linux Distribution
Then we need to download the desired distribution.
Note: we don’t need administrative privileges to install the distribution because this takes place in the user’s profile.
The download links are:
- Ubuntu 16.04 → https://aka.ms/wsl-ubuntu-1604
- Ubuntu 18.04 → https://aka.ms/wsl-ubuntu-1804
- Ubuntu 18.04 ARM → https://aka.ms/wsl-ubuntu-1804-arm
- Debian GNU/Linux → https://aka.ms/wsl-debian-gnulinux
- Kali Linux → https://aka.ms/wsl-kali-linux
- OpenSUSE Leap 4.2 → https://aka.ms/wsl-opensuse-42
- SUSE Linux Enterprise Server 12 → https://aka.ms/wsl-sles-12
- Fedora Remix for WSL → https://github.com/WhitewaterFoundry/Fedora-Remix-for-WSL
To download Ubuntu 18.04, we will use the following PowerShell command:
Invoke-WebRequest -Uri https://aka.ms/wsl-ubuntu-1804 -OutFile c:\temp\Ubuntu.appx -UseBasicParsing7.3. Installing the Linux Distribution
We run the following PowerShell command to install the Linux distro:
Add-AppxPackage c:\Temp\Ubuntu.appxWhen is done, we click on the Start Menu and see our Linux distribution available, then we click on the distro icon to launch the setup.

It will start the setting up of Linux in our machine:

And after a few minutes, the setup will ask for a username & password and we are done!

And that’s all folks. If you liked this story, please show your support by 👏 this story. Thank you for reading!


