
Web Development
Let’s Parse the Web
We create a small web app (in Flask) that serves some data on the food habit of different countries

Introduction
The web is full of valuable data (mostly public) that can be used for research or other purposes. Now at the age of AI and Machine Learning, data is more valuable than ever before! But most of these data are for humans to read (aka, they are presented in HTML) and not available in formats that are easier to be read by computers (e.g. XML, JSON or CSV).
To collect these data for our purposes, we use scrapers that “scrape” these web pages that we are interested in. They just fetch the page, parse the HTML and extract the data (texts, images, links etc etc) from that HTML. We define hierarchies or paths (XPath) or simply use CSS Selectors to identify which part of the HTML we are interested in.
In this lesson, we will create a small web app (in Flask) that serves some data on the food habit of different countries. in HTML and we will write a spider (or crawler, if you will) using the Scrapy framework.
Why Scrapy? (Optional, you can skip)
Scrapy is the most popular framework for writing web crawlers. Even Google uses Scrapy to parse webpages. Plus Scrapy is very scalable and has Twisted at its core. Twisted is a networking library and it gives Scrapy the advantages of so-called “async io”. However, Scrapy does not use the standard async io library. They use generators to achieve this asynchronous behavior.
Scrapy also has a nice dataflow architecture that allows us to write middlewares, pipelines, and exporters to customize Scrapy’s behavior.
Overview
We have a page with login and when we login we see some content, today we are going to make a script that will log in automatically and parse the data from the main page.
The Project
For this project, it will be better if you have basic knowledge about HTTP you don’t have to know anything other than that beforehand. However, we will write the web app using Flask because it is small, simple, and fits our purpose nicely. This is the link to our final code. The software requirements for the project is as follows:
- Python 3.4 (or newer)
- Virtualenv (recommended but not mandatory)
Setup
First, we need to create a folder (we will use the term “directory” interchangeably) called Scraper. Then create two sub folders called webapp and scraper. In the Scraper folder, we will open a terminal (or a Command Prompt, if you are on Windows) and write the following command:
pip install --user flask scrapyThis command will install both Flask and Scrapy for us. We used the --user switch so that we do not need admin privileges (not required if you are using virtualenv).
The Web App
To create the web app, we create a file called __init__.py and a directory called templates under the webapp directory.
Now we put the following code inside __init__.py.
Now to run the web app, we write the following command:
python __init__.py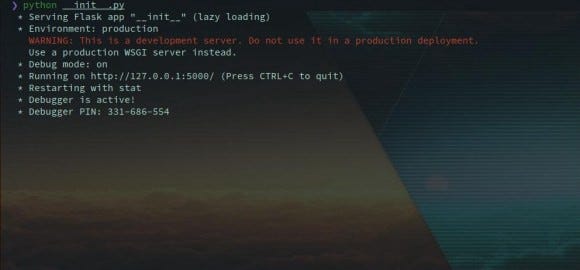
Then we create and populate the files inside the template directory one by one.
Contents of templates/base.html:
Contents of templates/index.html:
Contents of templates/login.html:
Contents of templates/food_by_country.html:
Now, the directory tree of the webapp directory should look like:
webapp/
├── __init__.py
└── templates
├── base.html
├── food_by_country.html
├── index.html
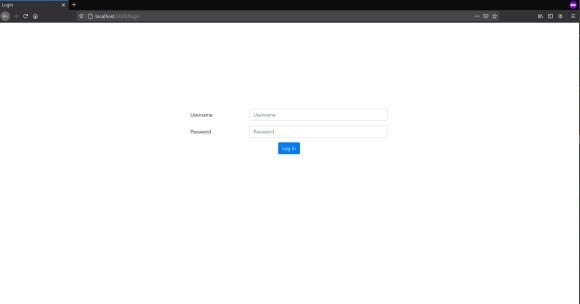
└── login.htmlNow in a browser, we go to the url http://localhost:5000.
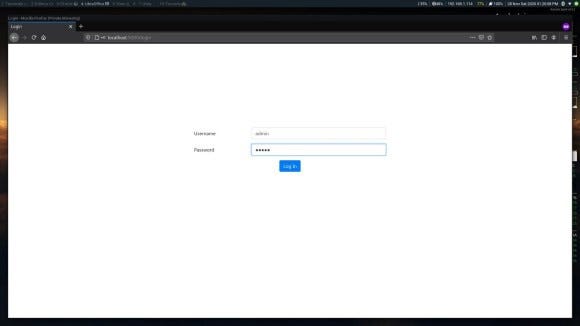
Log in using the username “admin” and password “admin” (without quotes).
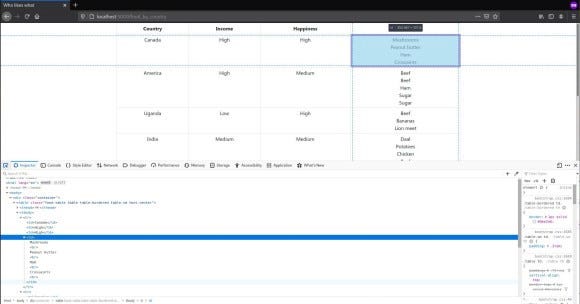
Then after logging in, click on the link (this step is here to demonstrate how to follow links using Scrapy) and now you can see a table consisting of the food data.
Note: We will discuss Flask on a different tutorial.
Note: We keep the web app running for the scraper to scrape. However, if you want to stop it, you can just press Control-C.
The Spider
To create a Scrapy project we write the following command:
scrapy startproject scraper
Then we go inside the scraper directory. Now we can see the contents of this folder using the ls (on Mac, Linux or BSD) or dir (on Windows) command. As we can see, there is a file named scrapy.cfg and a directory named scraper. In this tutorial, we will not talk about the cfg file. However, you can read about it in the Scrapy documentation. Now we go inside the scraper directory (now we are at Scraper/scraper/scraper) and write the command:
scrapy genspider countryfood localhost:5000
Here, you can change countryfood with anything you want and it will create a Python file with a default template in that name under the folder spiders (location is Scraper/scraper/scraper/spiders). The spider will scrape the url localhost:5000 and it will have a restriction on which urls it is allowed to scrape (the domain restriction).
Note: Scrapy gave us a warning and we will not ignore it. We will deal with it later in this tutorial.
After generating the spider, the directory tree should look like,
scraper/
├── scraper
│   ├── __init__.py
│   ├── items.py
│   ├── middlewares.py
│   ├── pipelines.py
│   ├── settings.py
│   └── spiders
│       ├── countryfood.py
│       ├── __init__.py
└── scrapy.cfg
Now, we modify the code in the countryfood.py into the following code.
Here, the CountryfoodSpider is our scraper (each spider in Scrapy is a class). Scrapy starts a spider with the url(s) provided in the class attribute start_urls. For each element of this attribute, Scrapy calls the parse method of the spider and passes a response object.
Some Attributes
Also notice that previously, the class`s allowed_domains list had the element localhost:5000 but that was changed to localhost because port number is not a part of the domain. So when Scrapy is filtering requests by domains, it might block our requests.
parse Method
Now let us look inside the parse method. As mentioned before, this is the entry point of any Scrapy spider. First we checked if we are logged in. If not, we send a POST request (by passing the string 'POST' to the method parameter) to the server with our credentials (url encoded, passed using the body parameter). In either case, we call the parse_index function. It is also important to set the content-type header to application/x-www-form-urlencoded. Else, Flask will just ignore the body of the request as it does not know what type of data is inside the body. The first parameter of this method is discussed later in this tutorial.
BUT, we see that there is a else branch in the function and the parse_index is called inside it. Then how do we call the function if we are not logged in and we get the response after logging in? Well, for that, we use the parameter callback to the follow (line 15) method of the response object. Each response handler function in scrapy is run standalone. In order to pass data among them, we use the cb_args parameter. The follow function returns a request with the URL set to an absolute URL.
Generators and, yield and yield from
Also notice that we did not use return here. Scrapy uses generators to interleave code. Hence, we have to use yield. Read more about Python generators here. Since every function called in a Scrapy spider returns a generator, then how are we supposed to yield from that generator? For that, notice line 25. We use yield from to yield from a generator.
parse_index Method and Selectors.
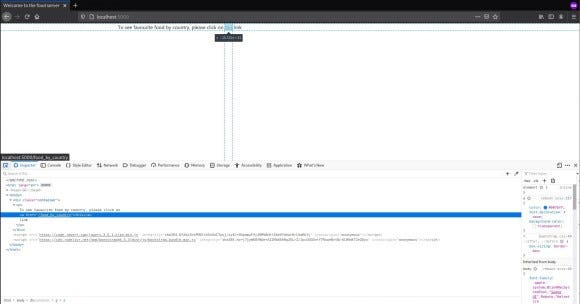
As mentioned before, we have to click on a link in order to see the data after logging in. So now, how do we look for this link?
If you are on Chrome (or Chromium even) or Firefox, if you press Control-Shift-C you will see a window show up in the browser. Then click on the “Inspector” tab. Or you can directly go there by right-clicking anywhere on the page, then by selecting the “Inspect element” menu. This shows us the elements and tree of the HTML document. We can see that the link (aka the anchor or <a> tag) is inside a <p> tag. So our path is basically p > a. Interpret it as "go-to a from p". Now we have two options. We can either use CSS Selectors or XPath. XPath is very powerful and has a lot of functionality. However, CSS Selectors can get the job done perfectly and are far more simple. So for this tutorial, we will use CSS Selectors.
To select an <a> tag inside the <p> tag, we can simply use the selector string p a. This will select all the paragraph tags anchor children (both direct and indirect). But we want direct children here. So we use p > a. To get an attribute of a selected tag in CSS Selector, we use a "pseudo-element selector" called attr() and pass the name inside the parentheses of the attribute whose value we are interested in. We use double colons to specify that we are using a "pseudo-element selector". So the selector string is, "p > a::attr(href)" and now we pass this as the first argument of the response object’s css method (which tages a CSS Selector and returns all the selected elements aka a selection). To get the first value off of this, we use the get method of selection. There is also a method called extract for selection objects but that will return a list of all the values from all the elements of the selection, which we don’t want right now.
I hope now you can understand what was going on in line 15.
Then as usual, we yield a request object using response.follow with the appropriate values (url and callback function).
parse_data Method
Now you know most of Scrapy. But how do we export the data? Well, for that, we either yield a dictionary or a Scrapy Item. But I prefer using a dictionary for this tutorial.
Notice that in the for loop, we have iterated over a selection object. The selection the object is essentially a list and its elements also have the css method and can use selectors inside on their children. This is what we did in line 35. Then in the dictionary, we extracted text from all the <td> selections by using the pseudo selector text and calling the get method on it. However, in the value of the food key, we used a list comprehension. This is because there was a <br> tag at the end of the body of the <td> which will yield an empty string (because tags and texts are treated separately. I would recommend you to play and ponder with selectors).
Running the spider
As mentioned before, we left the web app running. Now, we will first list all spiders available using the following command:
scrapy list
We can see that the countryfood spider is listed. Now we are good to go! Enter the following command to run the spider:
scrapy crawl countryfood -L WARN -o -:jl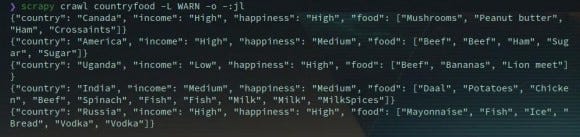
Here, the command crawl tells Scrapy to start a spider. The -L option sets the log level from debug to WARN. This is helpful because otherwise, Scrapy will produce a lot of log output including the items it has scraped. the -o option specifies the output file and format. Here, -:jl is a value passed for the -o option which is saying that set the output file to stdout and format to JSON lines. And the colon is separating these two values. Usually, we use JSON lines instead of JSON because, if it produces a lot of output, JSON will not scale very well.
Here is the final code for the tutorial.
The final directory tree:
scraper/
├── scraper
│   ├── scraper
│   │   ├── __init__.py
│   │   ├── items.py
│   │   ├── middlewares.py
│   │   ├── pipelines.py
│   │   ├── settings.py
│   │   └── spiders
│   │       ├── countryfood.py
│   │       ├── __init__.py
│   └── scrapy.cfg
└── webapp
    ├── __init__.py
    └── templates
        ├── base.html
        ├── food_by_country.html
        ├── index.html
        └── login.html
Wish you the best of luck on your scraping journey!


