
Learn the Basics and Get Started with Firebase — an App Development Platform Backed by Google
Learn the essentials of Firebase and related services with a hands-on tutorial

Firebase is an app development platform backed by Google. It’s a one-stop service for mobile and web apps and provides all kinds of services including authentication, database, storage, monitoring, notification, hosting, etc. Firebase can accelerate the development process and liberate us from the tedious and demanding authentication, database, and infrastructure management jobs and let us really focus on business-related code and data.
In this series of posts, we will introduce how to create a Firebase project, register apps, set up security rules, perform CURD operations to databases, etc. And in this first part, we will introduce the fundamentals of Firebase and set it up properly in the console so it can be accessed in the code.
Create a Firebase project
To use Firebase, the first step is to create a Firebase project, which works like a container for all Firebase apps and resources provisioned for the project.
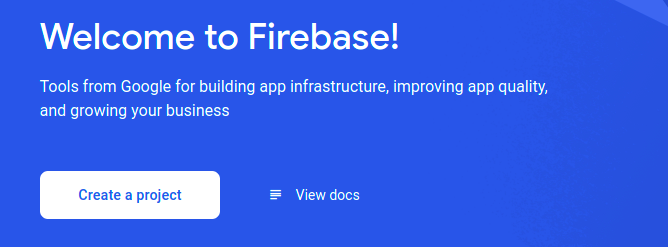
Navigate to Firebase in your browser and click “Go to console” in the upper right corner to go to the Firebase console. Then click “Create a project” to create a new project:
Give a meaningful and identifiable name for your project. If you have an existing Google project, you can select it and add Firebase to it as well. We will create a new Firebase project in this example. It’s recommended to create separate Firebase projects for different apps and also different environments for stability and convenience of management.
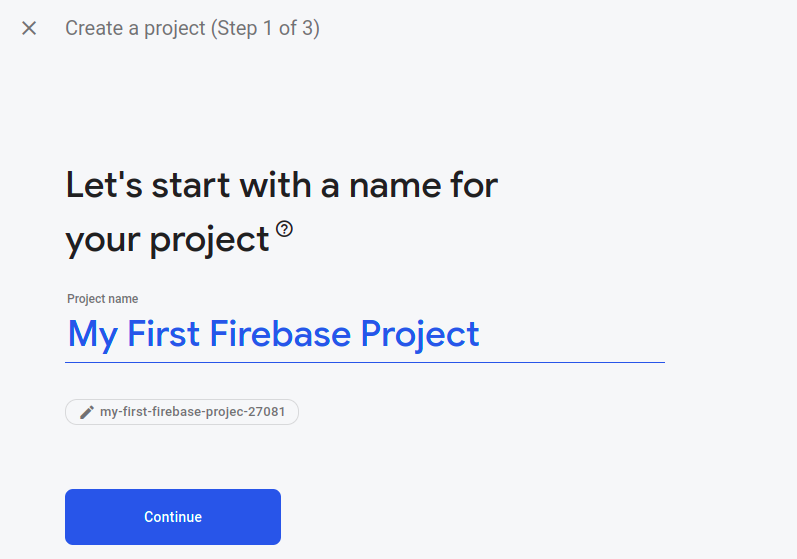
Note that we can edit the Project ID here, and only here. The project ID is a unique identifier that will be used when connecting to the project later.
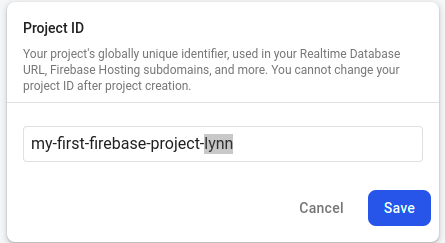
You can give it a unique and also easily identifiable ID. When the ID is set, click “Save”, and then “Continue”.
In the next step, you will be prompted to enable Google Analytics. You should enable it in production. However, for our demo project, there will be no real users and thus no traffic. We can disable it to make the project a bit easier to set up:
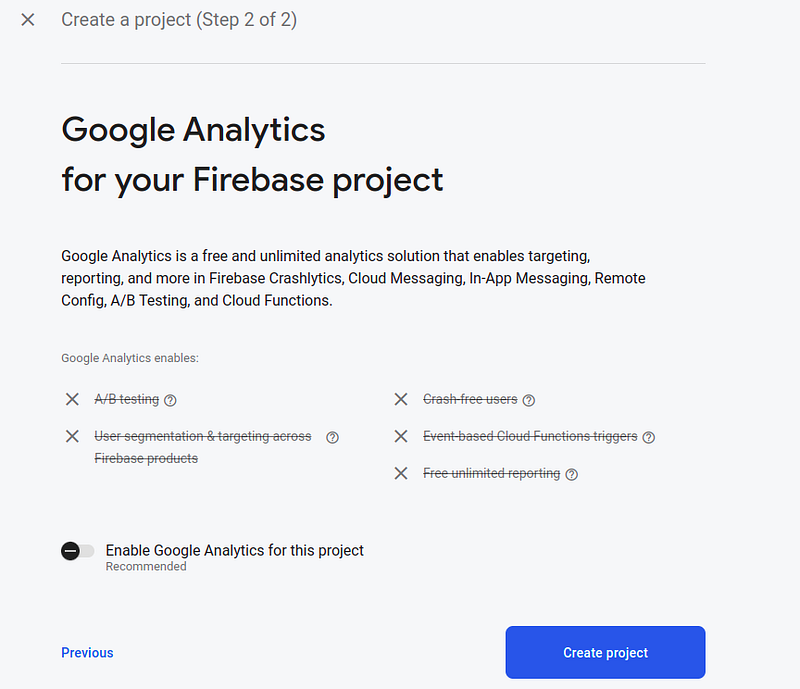
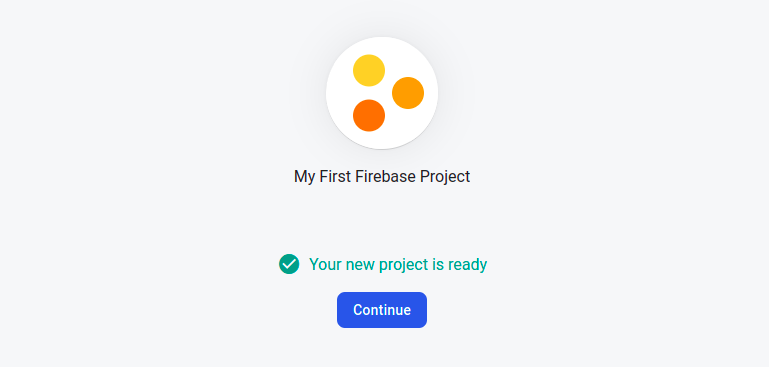
And now when you click “Create project”, your Firebase project will be created:
Add an app to the project
When you click “Continue” in the previous step, you will be led to the project overview page. Note that by default we are in the Spark plan, which is free and sufficient for learning purposes and even for small projects.
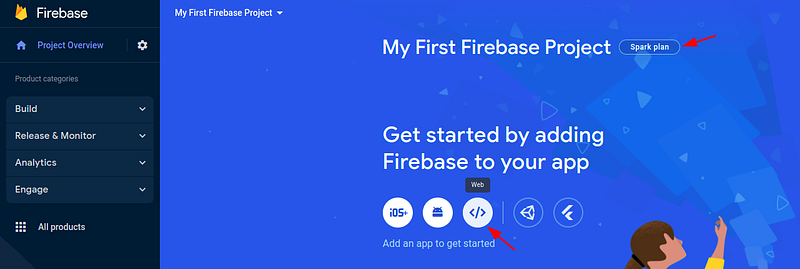
At this step, we need to register an app and add Firebase to it. We will register a web app in this example. Click the </> button as shown above to register a web app:
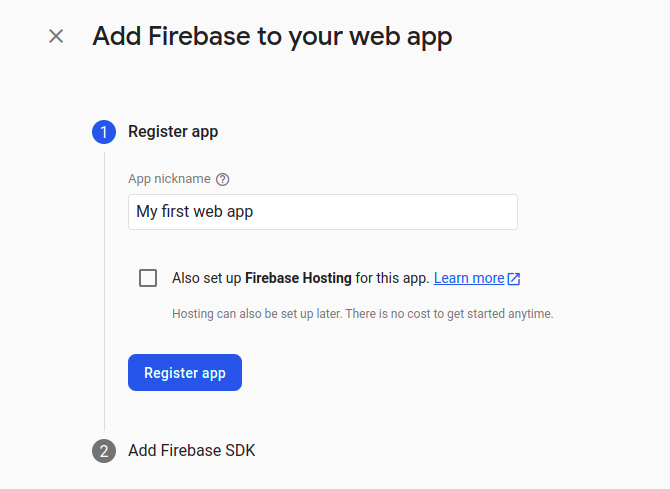
Specify a nickname for the app. Normally, we would set up Firebase Hosting and host our web app on Firebase. However, in this example, we would not host our app in Firebase. And it can be set up later when needed.
When you click “Register app”, the web app will be registered for you, and you will be prompted to add Firebase SDK.

We should use npm to add Firebase SDK, which is recommended in most cases. The code snippet shown above is for the latest modular version 9 rather than the to-be-deprecated namespaced version 8. Check here if you want to learn more about the comparison between SDK version 8 and version 9. Basically, we should use version 9 for all new Firebase web apps because it integrates well with build tools like webpack which can remove code that is not used by the app and thus reduce the size of code to be distributed. This process is known as tree-shaking.
You don’t need to copy and backup the code above, it can be found for the web app in the console. Now you can click “Continue to console” to go back to the console. In the console, if you click on the web app just created, and select configuration, you can see the code snippet for configuration as shown above.
Set up authentication
Although we won’t have a login/logout form in this example, it’s worth mentioning the Authentication feature of Firebase because it’s so powerful that adding authentication to a website becomes a very simple task. We will have a dedicated post for adding Firebase authentication to a web app later.
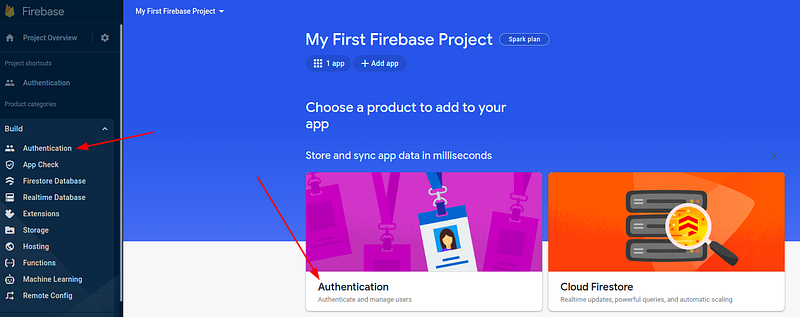
In the Firebase console, find and select “Authentication” under the Build section if it’s not shown in the middle of the console as shown below.
Click the “Sign-in method” tab, and we can see all kinds of authentication methods. There are native providers with Email/Password, and all kinds of popular third-party OAuth providers like Google, Facebook, GitHub, etc. You can choose one that is suitable for your practical case. For learning purposes, in this example, we will choose “Anonymous” as the sign-in method.
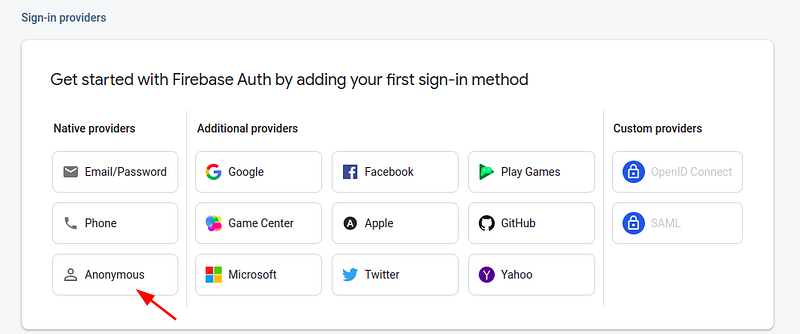
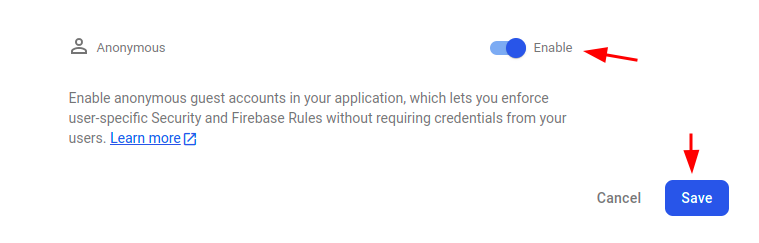
Anonymous authentication is different from having no authentication at all. With anonymous authentication, some temporary anonymous accounts are created silently for the user to authenticate with Firebase. It allows users to browse your web app and add products to the cart (if this feature exists). And when the users need to access some protected data, for example, to check out in the cart, they would need to sign in with a real account so their data can be stored correctly in the database.
Enable Cloud Firestore
Cloud Firestore is a NoSQL document database that stores structured data for Firebase apps. Cloud Firestore can be seen as the the successor of Firebase Realtime Database although both of them exist in Firebase. Cloud Firestore is more scalable and has more features than Realtime Database. If you just start with Firebase and don’t know which one to choose, Firestore would normally be a better option. For a detailed comparison, please check this link.
As a NoSQL database, Cloud Firestore is very similar to MongoDB. Both of them have the concepts of database, collection, document, and fields. However, with Firestore, you don’t need to manage the database infrastructure by yourself, which is provided by Firebase as a service. Also, the authentication to the database is managed differently. For Firestore, the security and access control are not controlled by username/password but by some security rules as we will see soon.
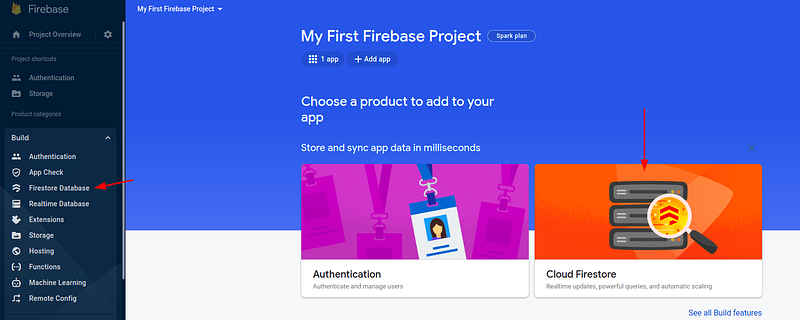
Now let’s Enable Cloud Firestore which will store the data we are going to play with in Firebase. In the Firebase console, find and select “Firestore database” under the Build section if it’s not shown in the middle of the console as shown below.
Then click “Create database”:

We will be prompted to select a start mode for the database.
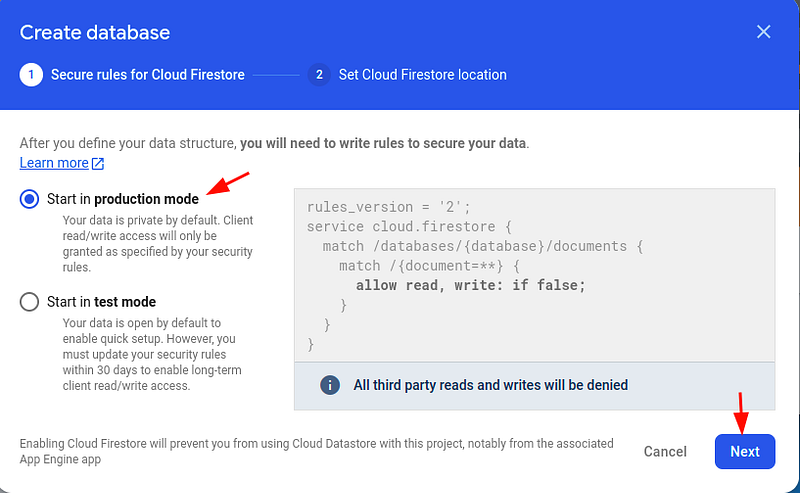
- Production mode — The data is private by default. All third-party access will be denied.
- Test mode — The data is open to the public by default. All users can read and write in the next thirty 30 days.
Actually, it doesn’t matter which mode we choose because we will later update the security rules to only allow authenticated users to read and write.
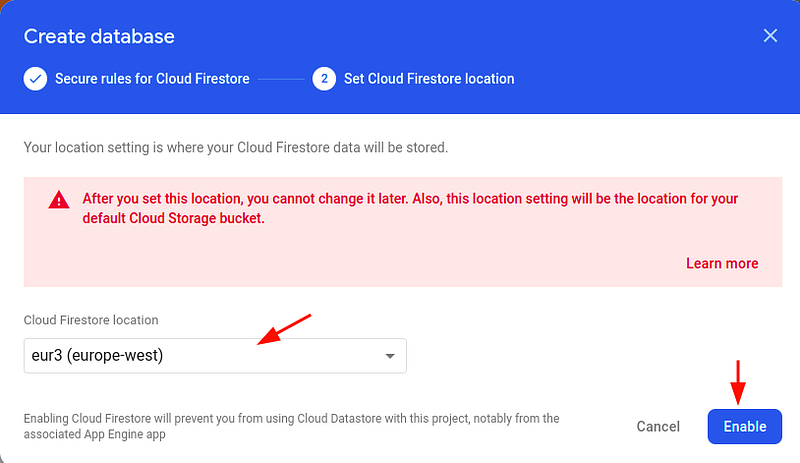
Now choose a region that is closest to you and click “Enable”:
Wait a few seconds until the security rules are set up. Then on the page opened for Firestore, click the “Rules” tab to update the rules. As methoned above, we will update the rules to allow reads and writes for authenticated users, which may seem strange here because the sign-in method we chose is anonymous. However, if you check carefully above, sign-in anonymously also creates some anonymous accounts which make the actions of the current user trackable.
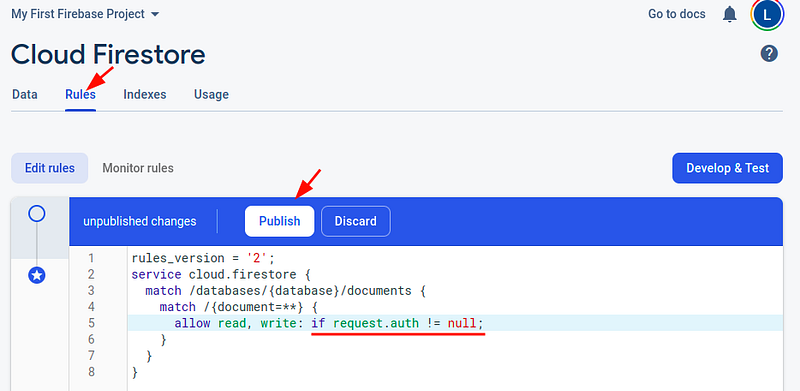
The security rules are written in a special domain-specific language (DSL) for Firebase. It’s a bit like JavaScript. We will have a dedicated post for the security rules later. One thing that’s worth mentioning here is that the request.auth variable is a special variable that contains information about an authenticated user.
When the security rules are updated, you can click the “Rules Playground” to play with the rules. And if everything is OK, click “Publish” to make it published.
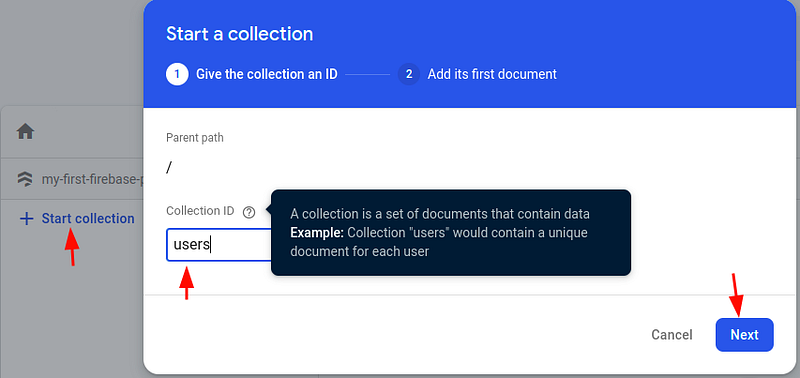
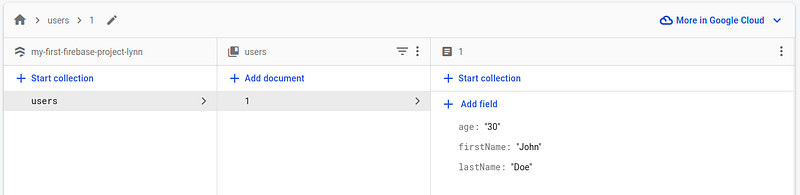
Let’s create a collection and add a document to it before proceeding to the coding part. Click the “Data” tab and you can start to input data:
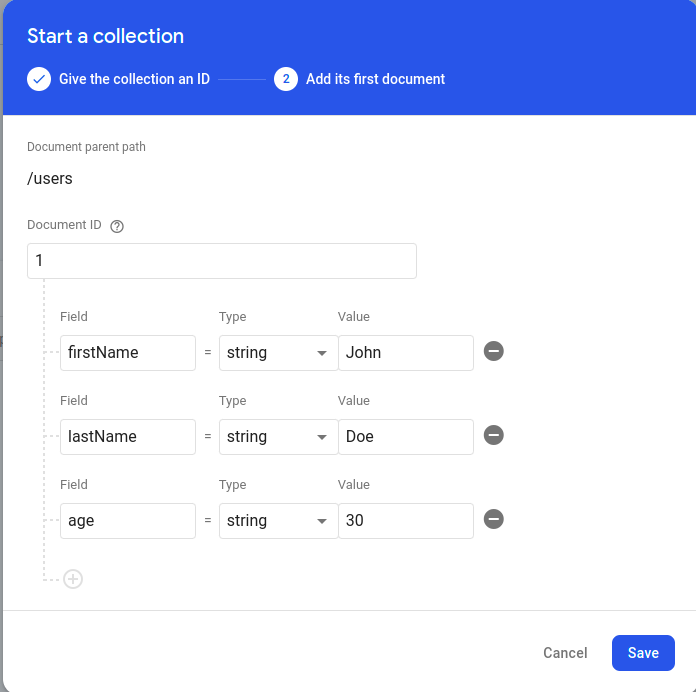
You can generate a document ID automatically if you don’t have a unique key in your documents. When you click “Save”, the collection and document will be saved:
Up to now, we should have a basic understanding of what Firebase is, and how to create a project and register an app. Besides, the basic authentication methods in Firebase are introduced briefly and we should not get surprised by the anonymous sign-in method anymore. Last but not least, Cloud Firestore is introduced, which is the most important part of our next section. Firestore has some similarities to other popular NoSQL databases like MongoDB and also to the traditional Realtime Database. However, it also has its own features which makes it a unique and robust database for Firebase. In the next section, we will start coding and demonstrates how to set up a Firebase project locally, how to authenticate anonymously, and how to read from and write to Cloud Firestore.
Related articles:


