
Learn How To Build: Astronomy Picture of the Day App With NASA API and React + Redux — Part I
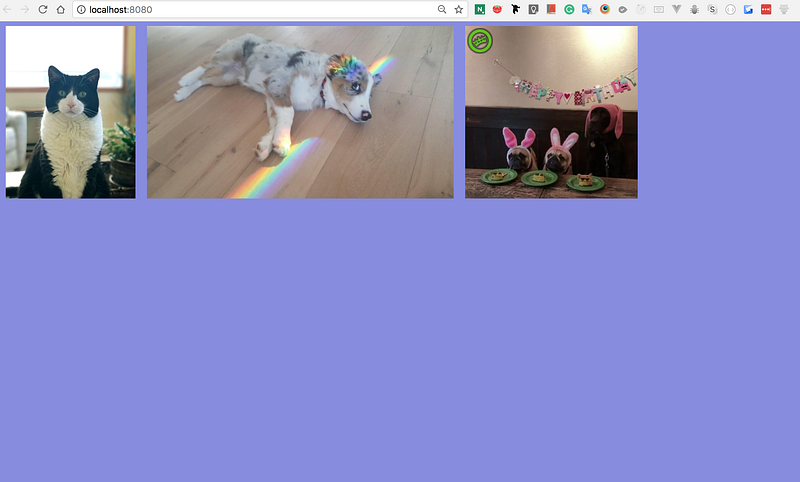
Demo
I recently found out that NASA has a public API. Cool! Let’s build something with the API today!
What are we going to build? We’re going to build an app called astronomy picture of the day!
Prerequisites
Basic JavasScript experience.
We are using React for building the application UI, Axios for fetching data and Redux for managing our application state.
Also, let’s not forget about Webpack, which will compile it all down for our browser. Great workflow!
Step 1 — Scaffolding
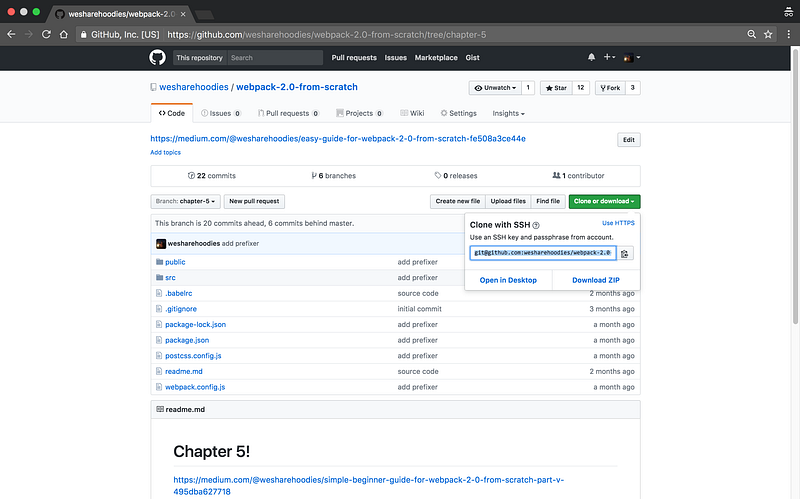
Please grab our Webpack config from this repository.
- We’re going to rename the current project to
nasa-react-redux. - Change directory, jump to branch
chapter-5and do agit pull origin chapter-5. - Remove
.gitsince we don’t want our little project to be associated with the Webpack guide repository. - Install npm dependencies:
npm installornpm ifor short.
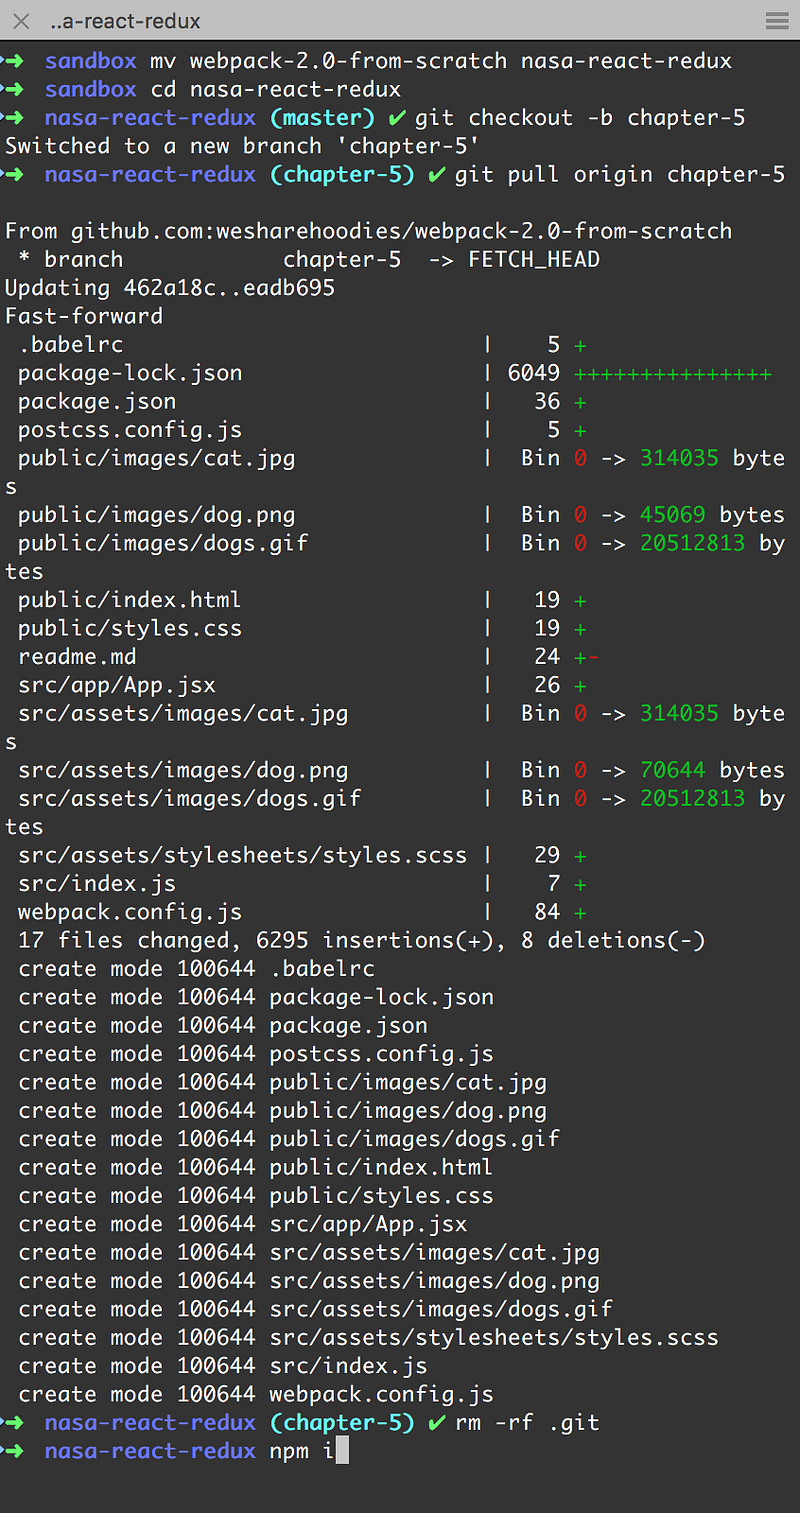
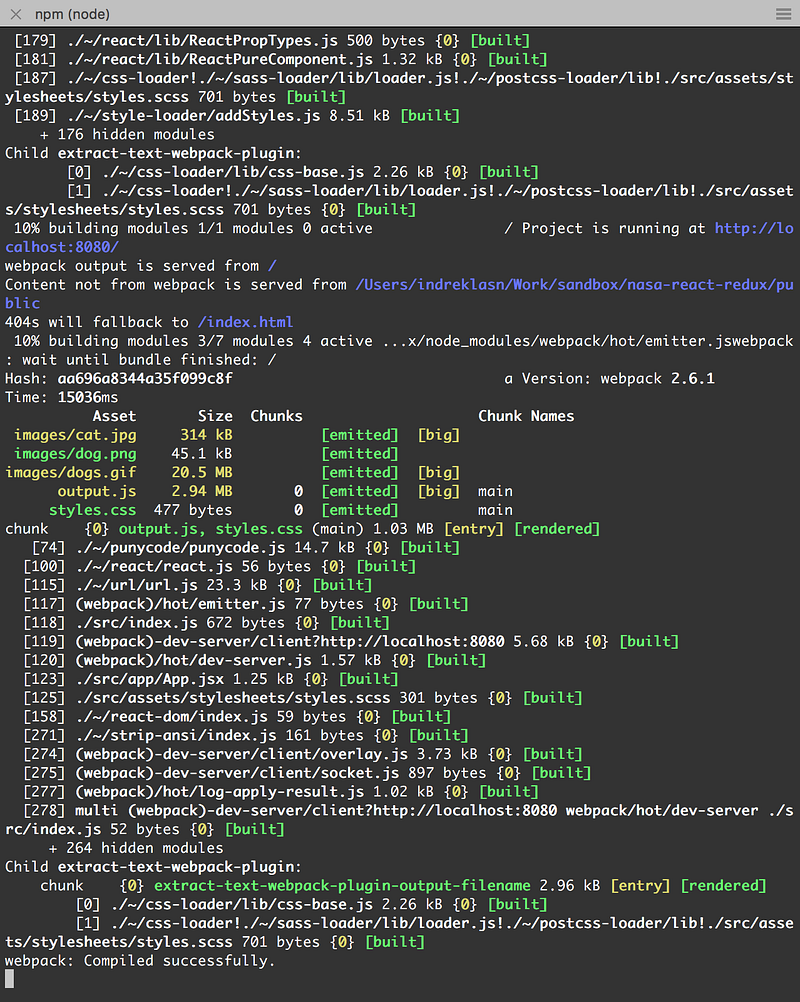
Let’s boot up our Webpack config and open the project with our favourite text editor.
The command to boot up Webpack is npm run start and you should see something like the following if everything works correctly.
You’ve made it past the scaffolding part, on to step two!
Step 2 — Sign Up for a NASA API Key
Head over to the official NASA website and sign up for a API key. It’s very straight forward. The key should be available instantly.
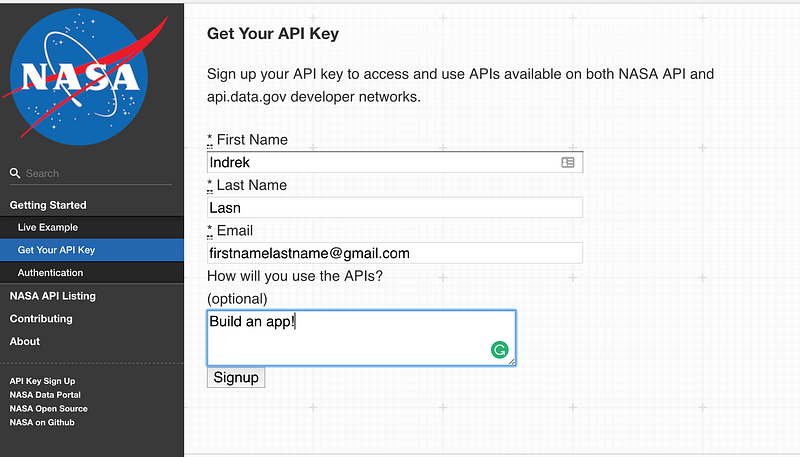
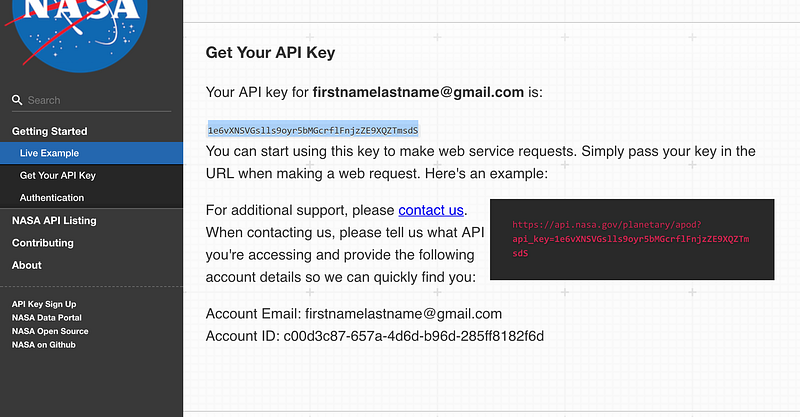
The API key will be sent to your email as well. Store the key somewhere safe.
Step 3 — Building the App Itself With React
As this is a fairly easy application to build, let’s begin by building the app with just React itself, and after that with React+Redux so we can compare the workflow. We’ll also understand why we even need a state container like Redux.
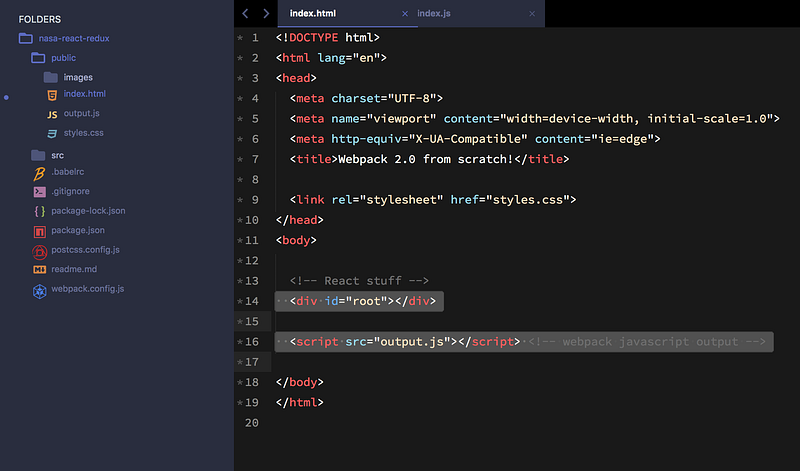
Brief explanation on how React is setup currently:
We have an index.html inside public/ and a index.js inside src/.
In a nutshell — we have a #root div inside index.html which hooks up to React. We let Webpack do all the magic of compiling our React to plain JavaScript which the browser reads.
Obviously this is a ridiculously oversimplified explanation, but you get the main concept.

Note: If you feel this might be too much for you, try building a couple of websites with plain HTML/CSS/JS, and come back when you feel more confident — it can be hard when you’re just starting out.
Picking up some pace now.
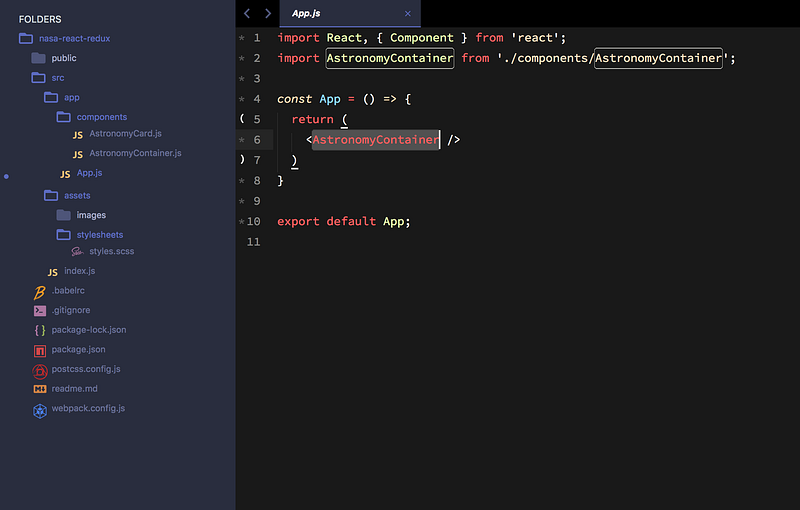
- We make a new
directoryinsidesrc/appand we call itcomponents. - Inside
components, we make two additional files, calledAstronomyContainer.jsandAstronomyCard.js. - Let’s clean up
src/app/App.jsand importAstronomyContainer.js.
Stateful and Stateless
There are a couple of things we need to do now.
We need to write two components, one of them is called stateful (aka the smart/dynamic component) and the second one is stateless (aka the dumb/dummy/static component).
Can you guess which is which?
- Stateless — Always returns the same output. Component where data “flows” inside. Mostly used for representing something. Does not include the state, only props!
- Stateful — Has some activity and the component has an internal state. Examples of activity: data fetching, user interaction (for example button clicks), and data passing.
Hopefully that didn’t sound too complicated, it’s a really simple concept.
Let’s write the backbone for the two components.
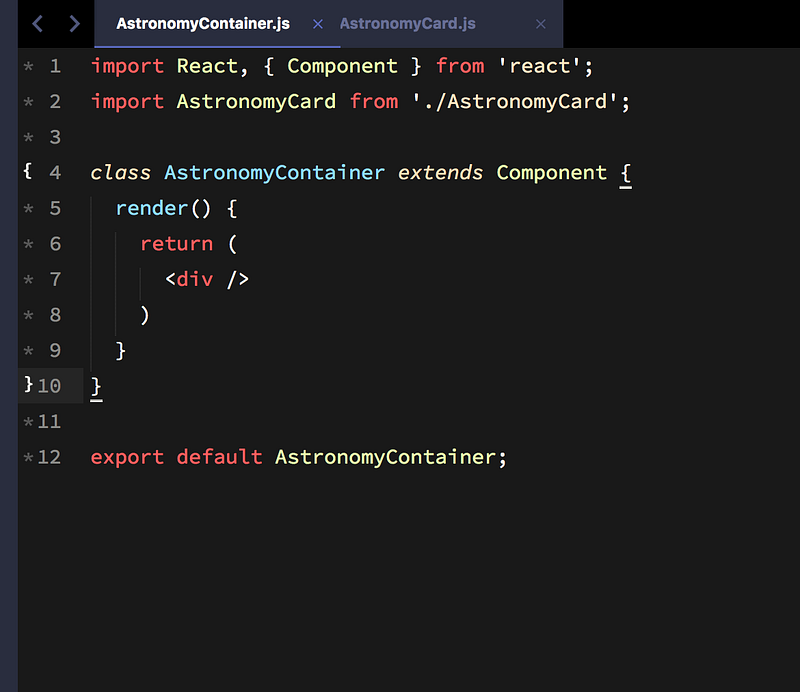

Notice how one of the components is class based and the second is not?
The class based component will carry the state. Why do we need state? We need state, so we can save what’s happening with our dynamic application.
Think about it. If a user clicks a button, how does the app know what to do next? Before clicking, we have a default state. After the user clicks the button, we change the state to represent what will happen next.
Example:
We have a counter with a starting number at zero. The initial state is zero. The user clicks on the button. How are we going to fit the pieces together, and more importantly, increment or decrement the number?
We need some kind of dynamic mechanism to represent our actions, and convert it into representational feedback/data. We call it State. Once you use state — you can’t live without it.
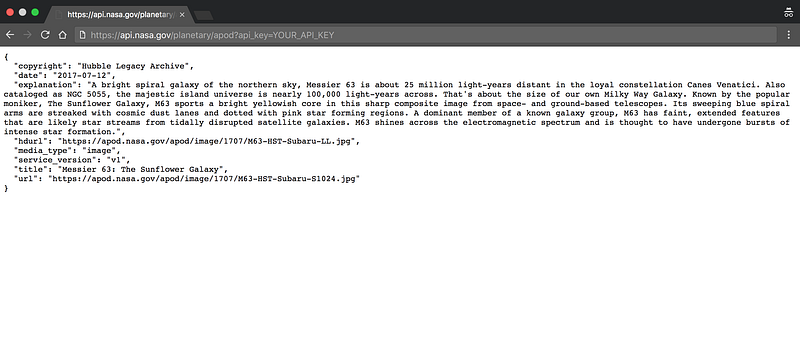
Back to building the app. Take a look at the NASA astronomy picture of the day endpoint.
Make sure you look at the URL, and change the api_key= to your personal key.
We need to somehow fetch the data. Lucky for us this is relatively easy.
Go to the root of your project and install Axios.
npm i axios
I’ll show you some code now. Try to understand it — I will explain it below.
Don’t forget to replace the API key with your personal one.

- We import
axios - We call the
constructor()method where we initialize our state. The initial state is just an empty array. - We call a lifecycle called
componentDidMountand inside the lifecycle method we declare ourEND_POINTandAPI_KEYconstants. - Inside the
componentDidMountmethod we call aGETrequest withaxios. Axiosreturns a promise, and inside that promise we have access to the data. The data is underresponse.data.
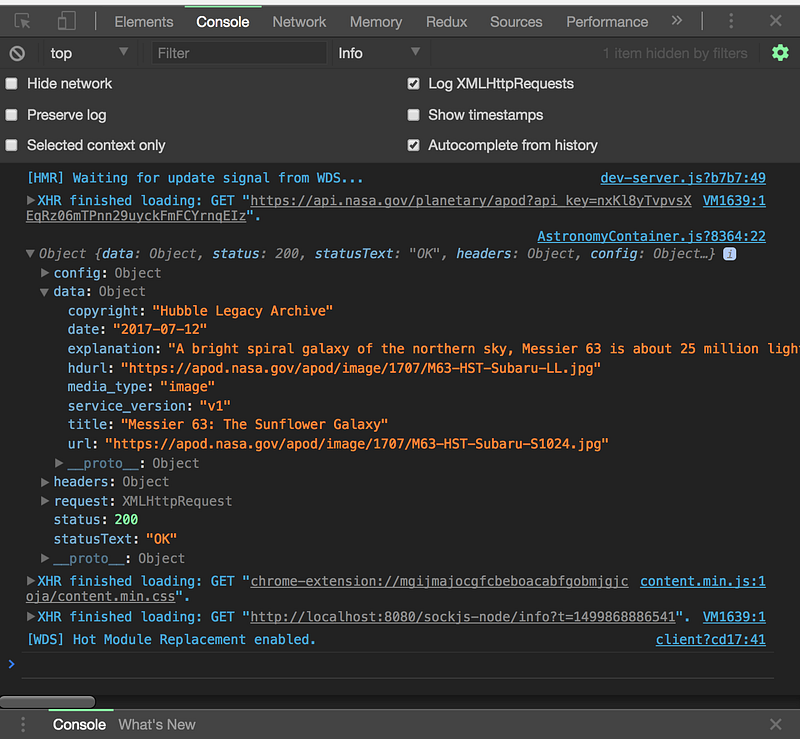
If you open the browser console you should be able to see the response.
We’re almost there. Now we need to save the response to the current state.
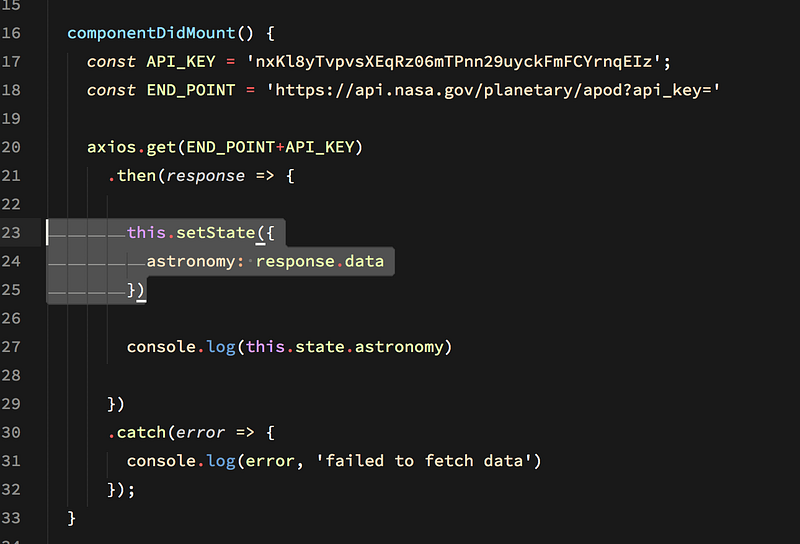
We call the setState() method and pass in our state object.
If we console.log() our state, we should see the data! One last step with the current component, we also need to pass this state down to our child/stateless component.
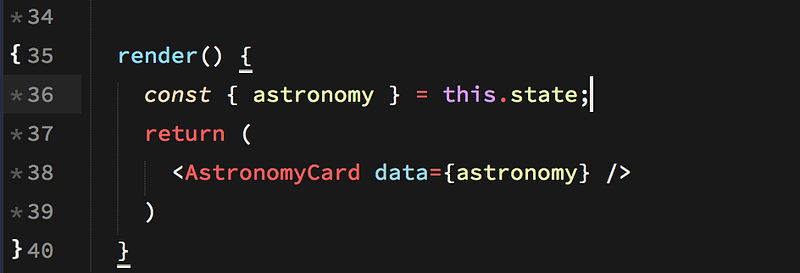
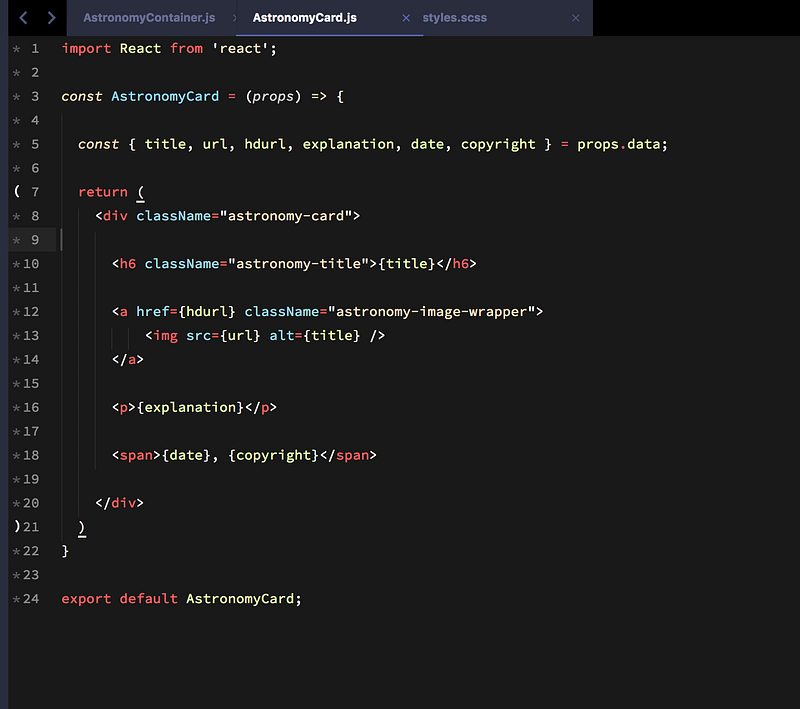
We pass the AstronomyCard a prop as our state. I’ve included fancy little object destructuring.
So how do we use the parent data inside our sibling? Turns out, it’s not hard — React is easy and intuitive to work with.
We have access to the data under props.data in our sibling. What I’m doing is deconstructing the object, so we don’t have to write out the long props each time. Instead of props.data.title we can write {title}.
One last thing. Grab the styles here and place them in src/assets/stylesheets/styles.scss
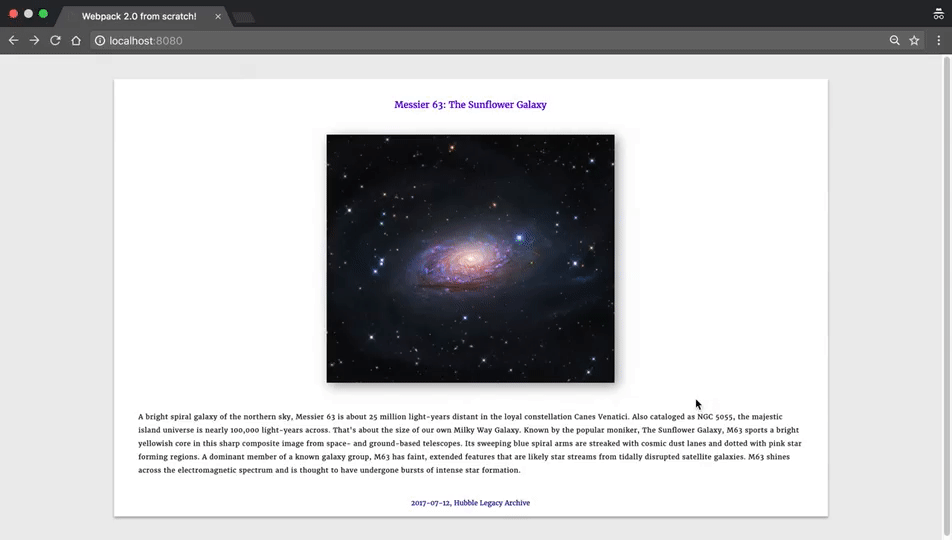
Let’s take look at our app.
Not too overwhelming, but we definitely got a lot done today. There is so much more you can do with this API — here is the full list of endpoints — feel free to experiment.
Our next goal will be refactoring using Redux, which will be covered in the next chapter. Redux is complicated and I will dedicate a full chapter just for Redux.
NASA may include videos instead of URLs. Check out the AstronomyCard.js file here for the solution.