avatarAbhishek koserwal

Summary

The web content provides a guide on setting up a Keycloak realm and configuring a client with OpenId-Connect or SAML protocols, including steps for client creation, user registration, and token lifespan settings.

Abstract

The article titled "Keycloak: Realm & Client Configuration" outlines a detailed process for creating a Keycloak realm, such as "keycloak-demo," and configuring a client within that realm. It emphasizes the importance of not using the master realm for application integration, reserving it for management purposes. The guide covers the creation of clients, specifying necessary fields like Client ID, Protocol, and Root URL. It also highlights the significance of setting Valid Redirect Urls and Web Origins to prevent errors. For OpenId-Connect and SAML protocols, specific configurations are detailed, including the handling of tokens and user registration. The article concludes with a reminder to manage token lifespans carefully and to utilize the updatetoken API for refresh tokens.

Opinions

  • It is recommended to use a dedicated realm for application integrations rather than the master realm for better management.
  • The process of adding a client is described as simple and uniform across different types of applications.
  • Configuring Valid Redirect Url and Web Origin is stressed as crucial to avoid errors related to Web Origin configuration.
  • The article suggests keeping the token life span small for security reasons and using the updatetoken API to manage refresh tokens effectively.
  • User registration can be enabled, or users can be added directly for testing purposes, indicating flexibility in user management.

Keycloak: Realm & Client Configuration

In this post, we will see: step by step process to create a realm and configure a client with the protocol OpenId-Connect. If you want to understand keycloak key-concepts please check out Keycloak Essentials before going ahead.

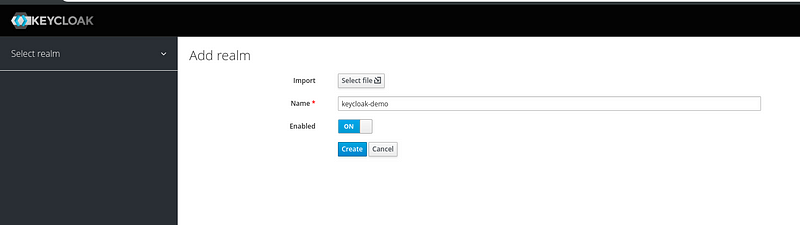
1. Creating a realm:

let’s say “keycloak-demo” as an example. Avoid using the master realm for direct integration with the application, keep it for management only, and create a realm for all application integrations. You don’t have to create the realm every time. It’s a one-time process.
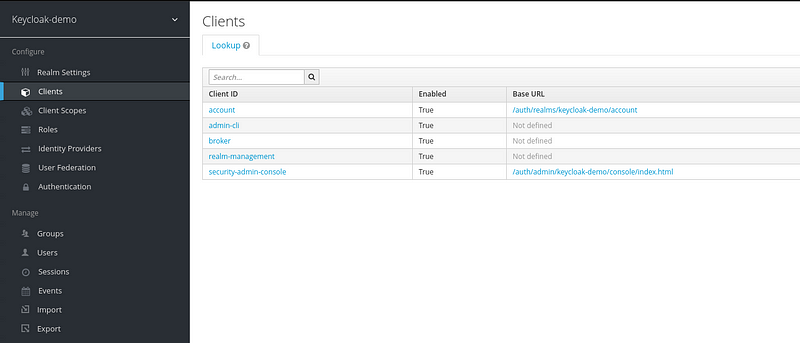
2. Clients:

Clients tab allows you to manage your allow application clients
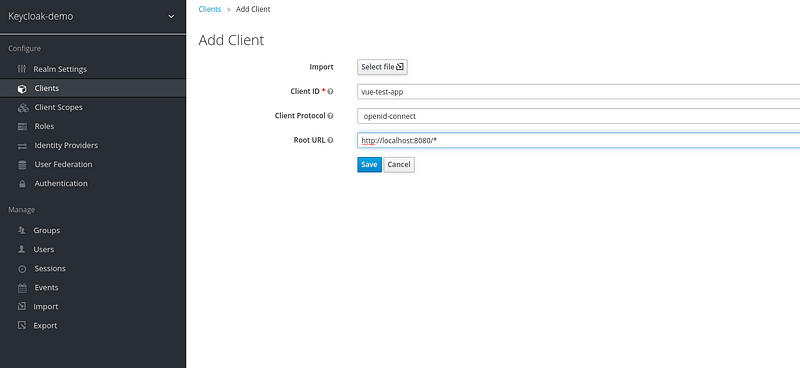
3. Adding a Client:

It is simple to add a client, the same process works for any type of application.

  • Client ID: You can give any suitable name for your application
  • Protocol: ‘OpenID-Connect/SAML’
  • Root Url: Application Hostname
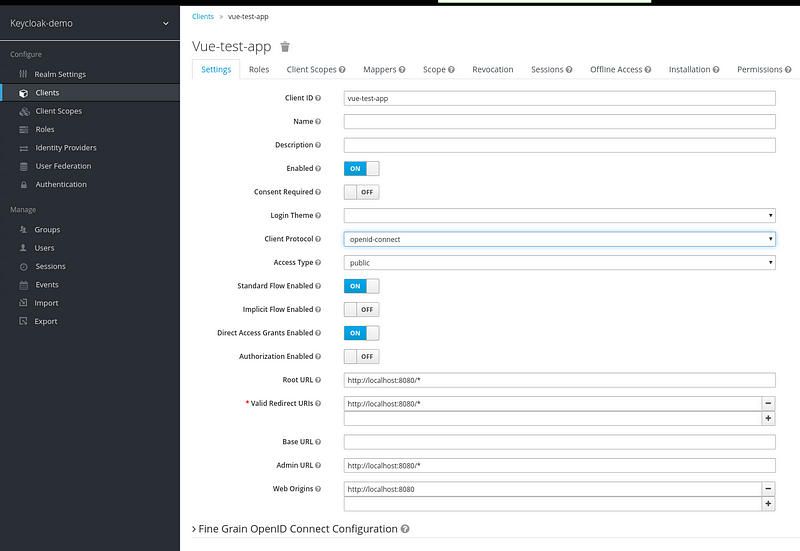
4. Client Config

  • A client using OpenID-Connect (Protocol)

Configure these two fields are important

  • Valid Redirect Url: After Authentication where should keycloak redirect? (dependent upon Web Origin config, otherwise you will see an error: Invalid request URI)
  • Web Origin: * or + ( * for wildcard redirection and + for domain-specific(validate all sub-domains): eg: *.redhat.com)
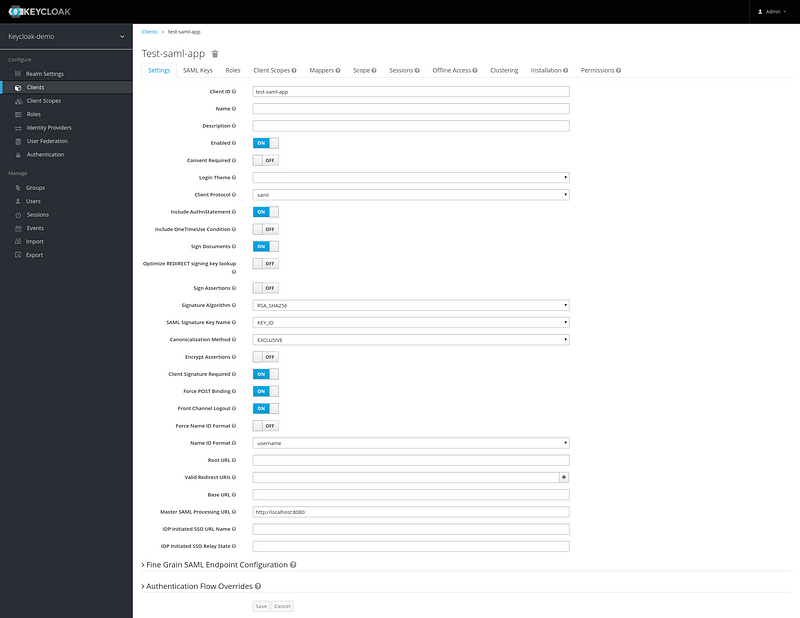
  • A client using SAML (Protocol)

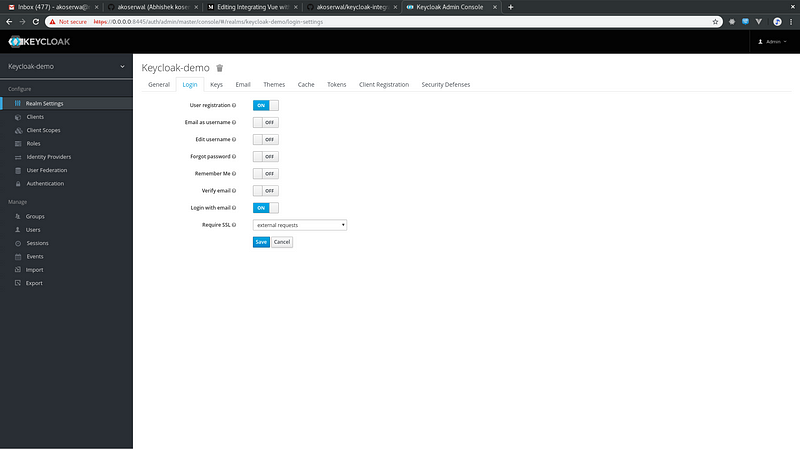
5. Enabling User Registration:

Either you can enable User Registration or Add a user directly which can be used for testing.
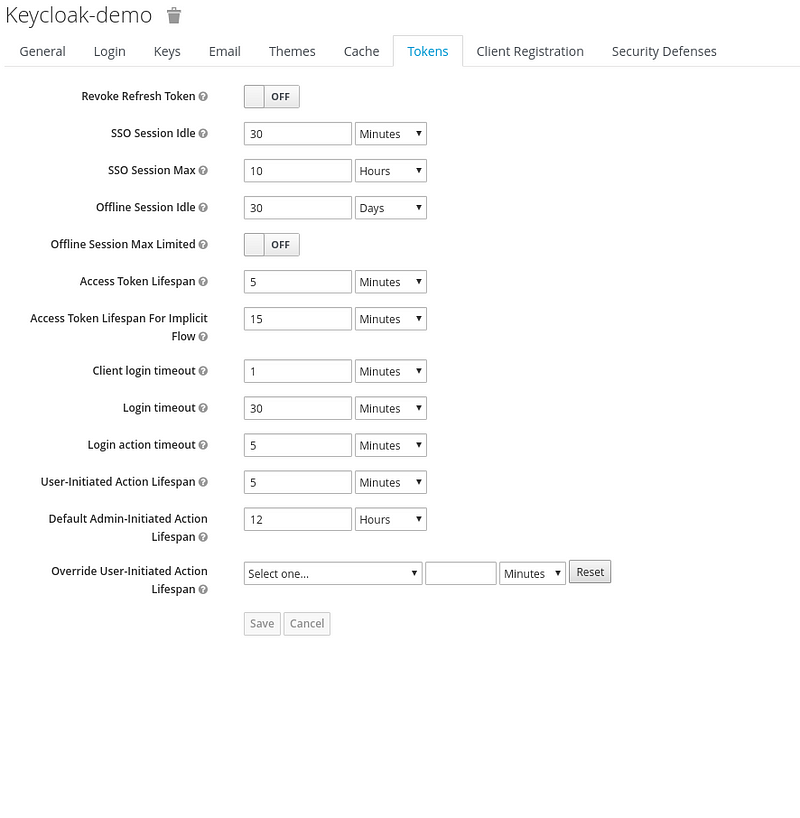
6. Token

Setting SSO Session and Token Life Span, These settings are validated for the clients configured within the keycloak-demo realm. Make sure to keep token life span to be small and keep refresh token using updatetoken` API.

Thanks for reading this post.

Keycloak
Configuration
Openid Connect
Security
Identity Management
Recommended from ReadMedium