
Is Your Keycloak Not Working behind Nginx Ingress Controller? Here’s How to Fix the Issues
Deploying Keycloak to GKE in high availability and solving incoming issues
You’ll face a lot of deployment issues with Keycloak behind the NGINX Ingress Controller. I for sure did.
You don’t need to go through the same issues. Just follow what I’ve done to get this setup off the ground.
This guide is for developers who have some knowledge of Kubernetes. Most of the commands we’ll use are helm or kubectl. This is what's enough for us to set up everything in GKE.
Let’s dive in and deploy Keycloak with Postgres-HA to GKE with TLS enabled.
Starting with the Bitnami Keycloak helm chart
I’ll be using the helm charts to deploy the Keycloak. I’ll also skip the GKE cluster creation as I suppose that’s not hard to do.
Below are the helm values you should use to configure the Keycloak helm chart.
ingress:
  enabled: false
proxy: edge
externalDatabase:
  host: "postgresql-ha-1-pgpool.keycloak.svc.cluster.local"
  port: 5432
  user: "postgres"
  password: null
  existingSecret: "postgresql-secret"
  existingSecretPasswordKey: "password"
  database: "postgres"
persistence:
  enabled: true
  size: "8Gi"
postgresql:
  enabled: false
auth:
  adminUser: admin
production: true
extraEnvVars:
  - name: KC_HOSTNAME_ADMIN_URL
    value: https://<your-domain>
  - name: KC_HOSTNAME_URL
    value:  https://<your-domain>
What’s important in the config above? proxy:edge and extraEnvVars. Without these, you'd run into a lot of issues with NGINX.
For deploying PostgreSQL-HA you can follow the following story. The gist is to deploy Postgres first and then deploy the Keycloak chart using the above values-ha.yaml.
In your cluster create a namespace and point to it.
kubectl create namespace keycloak
kubens keycloak
From the previous story I’ve linked run the Postgres setup first:
helm install postgresql-ha-1 bitnami/postgresql-ha -f postgresql-values.yaml
Then run the installation for Keycloak:
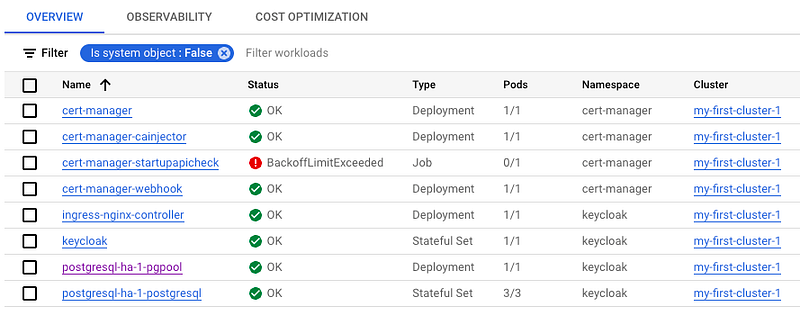
helm install keycloak bitnami/keycloak -f new-values.yaml --namespace keycloakIf you’ve already installed some charts, use the following command:
helm upgrade keycloak bitnami/keycloak -f new-values.yaml --namespace keycloakHere’s one potential issue with Postgres pods
One issue I’ve faced while provisioning Postgres was:
Pod errors: Unschedulable
Does not have minimum availability
I solved this by creating another node pool. Another solution here is auto scaler although I haven’t gone this route.
Applying ingress without TLS first
There’s a lot of info about how to create your ingress to work with NGINX. But most of it doesn’t work. Here’s what worked for me.
I’ve first applied ingress to this namespace without the TLS setup. This was to check if I could access the Keycloak from outside at all.
First, install NGINX Ingress Controller:
helm install ingress-nginx ingress-nginx/ingress-nginx
Here’s the configuration for ingress without TLS. TLS will come in next section.
This ingress is my own you could also use the one from Keycloak helm chart. To enable the one from bitnami helm chart just flip the ingress: true in values.yaml.
apiVersion: networking.k8s.io/v1
kind: Ingress
metadata:
name: nginx
spec:
rules:
- host: auth.zivcexdomainame.online
http:
paths:
- path: /
pathType: Prefix
backend:
service:
name: keycloak
port:
number: 8080
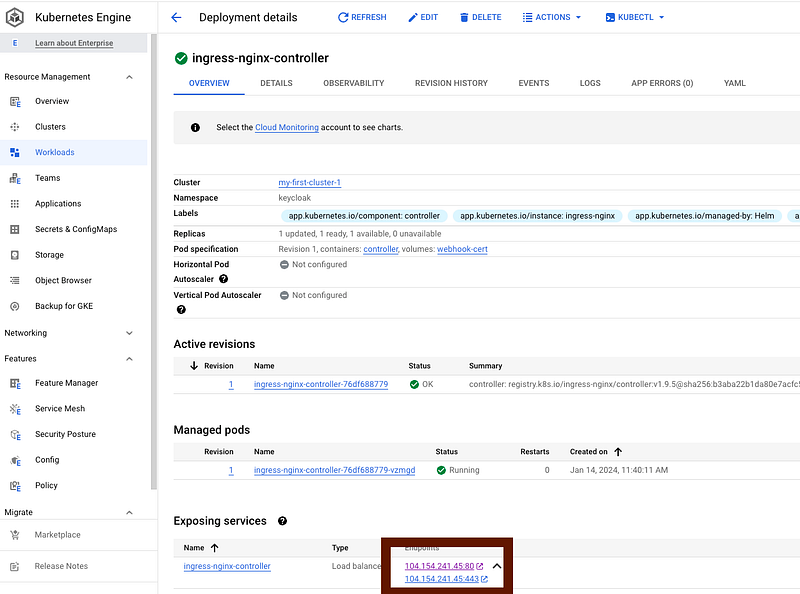
ingressClassName: nginxIf all of this works out you’d be able to access Keycloak using LoadBalancer IP address. You can find this under Workloads > ingress-nginx-controller.
There’s still work to be done to access the admin console, but this should open the Keycloak landing page.
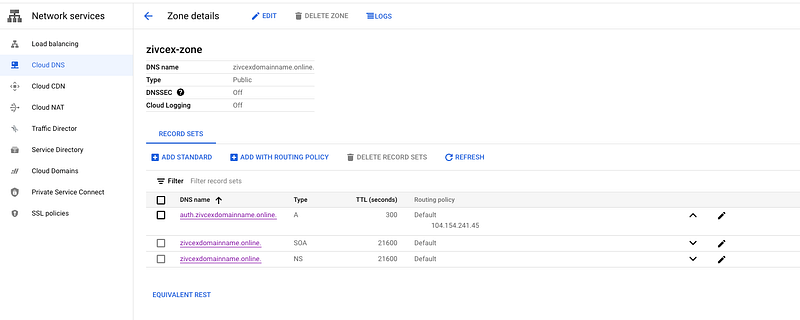
Create an A record in the Cloud DNS
I’ve used Cloud Domains + Cloud DNS to register the A record that will point to Load Balancer.
First, create a DNS zone for your domain. And add an A record that points to the above IP address.
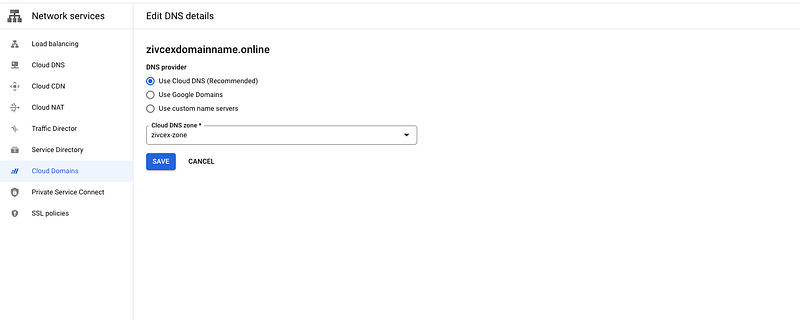
Then in cloud domains point the the domain to use this zone for DNS details.
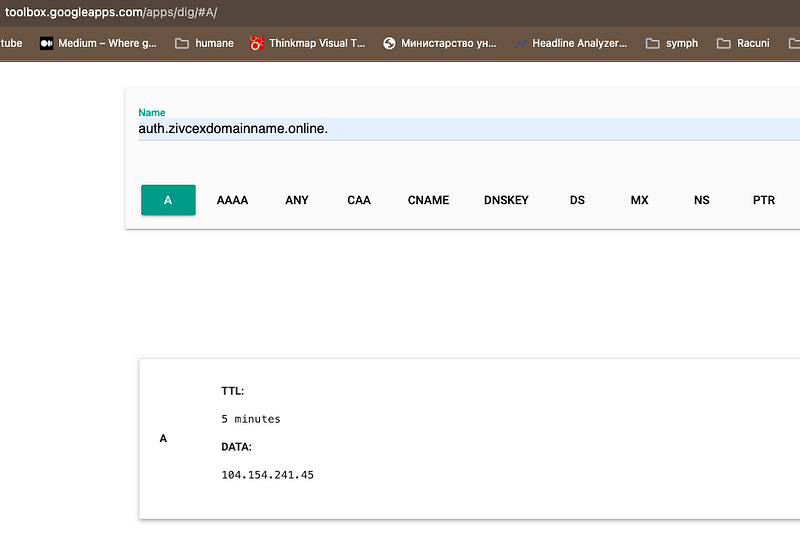
After this is done look into Dig (DNS lookup) to check if your record got propagated. Propagation should be faster than 24h, mine got propagated under 1h.
This is how DIG should respond for your domain/subdomain:
Adding cert-manager to help with TLS
Let’s go with the nginx ingress cert-manager for our case: Securing NGINX-ingress — cert-manager Documentation
You can go with their flow and test out staging issuer and then move to prod. I’ve also followed these steps to get familiar with issuers.
First, you need to add the custom resource definition.
kubectl apply -f https://github.com/cert-manager/cert-manager/releases/download/v1.13.3/cert-manager.crds.yaml
Be sure that the issuer is in the same namespace as Keycloak pod. In this case, it’s keycloak namespace.
Create both letsencrypt-staging and letsencrypt-prod issuer. We can later on switch between these two.
apiVersion: cert-manager.io/v1
kind: Issuer
metadata:
  name: letsencrypt-staging
spec:
  acme:
    # The ACME server URL
    server: https://acme-staging-v02.api.letsencrypt.org/directory
    # Email address used for ACME registration
    email: <put your valid email here>
    # Name of a secret used to store the ACME account private key
    privateKeySecretRef:
      name: letsencrypt-staging-auth
    # Enable the HTTP-01 challenge provider
    solvers:
      - http01:
          ingress:
            ingressClassName: nginx
apiVersion: cert-manager.io/v1
kind: Issuer
metadata:
name: letsencrypt-prod
spec:
acme:
# The ACME server URL
server: https://acme-v02.api.letsencrypt.org/directory
# Email address used for ACME registration
email: <your mail>
# Name of a secret used to store the ACME account private key
privateKeySecretRef:
name: letsencrypt-prod
# Enable the HTTP-01 challenge provider
solvers:
- http01:
ingress:
ingressClassName: nginxThen in your ingress change the spec.tls to use the newly created secret.
apiVersion: networking.k8s.io/v1
kind: Ingress
metadata:
  name: nginx
  annotations:
   cert-manager.io/issuer: "letsencrypt-staging" # later on change this to use letsencrypt-prod
spec:
  tls:
   - hosts:
     - auth.zivcexdomainname.online
     secretName: quickstart-authzivcex-tls
  rules:
    - host: auth.zivcexdomainname.online
      http:
        paths:
          - path: /
            pathType: Prefix
            backend:
              service:
                name: keycloak
                port:
                  number: 80
  ingressClassName: nginx
First, try things out letsencrypt-staging and then switch to letsencrypt-prod.
After ingress gets created you can track what’s going on with secret for TLS. Also, you can track certificate events.
Here are certificate events:
Events:
  Type    Reason     Age   From                                       Message
  ----    ------     ----  ----                                       -------
  Normal  Issuing    42s   cert-manager-certificates-trigger          Issuing certificate as Secret does not exist
  Normal  Generated  42s   cert-manager-certificates-key-manager      Stored new private key in temporary Secret resource "quickstart-authzivcex-tls-552dp"
  Normal  Requested  42s   cert-manager-certificates-request-manager  Created new CertificateRequest resource "quickstart-authzivcex-tls-1"
  Normal  Issuing    38s   cert-manager-certificates-issuing          The certificate has been successfully issued
And secret events:
kubectl describe secret quickstart-authzivcex-tls -n keycloak
Name:         quickstart-authzivcex-tls
Namespace:    keycloak
Labels:       controller.cert-manager.io/fao=true
Annotations:  cert-manager.io/alt-names: auth.zivcexdomainname.online
              cert-manager.io/certificate-name: quickstart-authzivcex-tls
              cert-manager.io/common-name: auth.zivcexdomainname.online
              cert-manager.io/ip-sans:
              cert-manager.io/issuer-group: cert-manager.io
              cert-manager.io/issuer-kind: Issuer
              cert-manager.io/issuer-name: letsencrypt-staging
cert-manager.io/uri-sans: Type: kubernetes.io/tlsData
====
tls.crt: 5688 bytes
tls.key: 1675 bytesIf you’ve first used an issuer letsencrypt-staging, just delete the secret and re-apply the ingress so the certificate gets regenerated.
kubectl delete secret quickstart-example-tls
secret "quickstart-example-tls" deleted
Be sure that the current namespace is set to keycloak.
Keep secret names unique
Another important thing is that the secret in the ingress should have a different name than the secret in the issuer.
tls:
- hosts:
- auth.zivcexdomainname.online
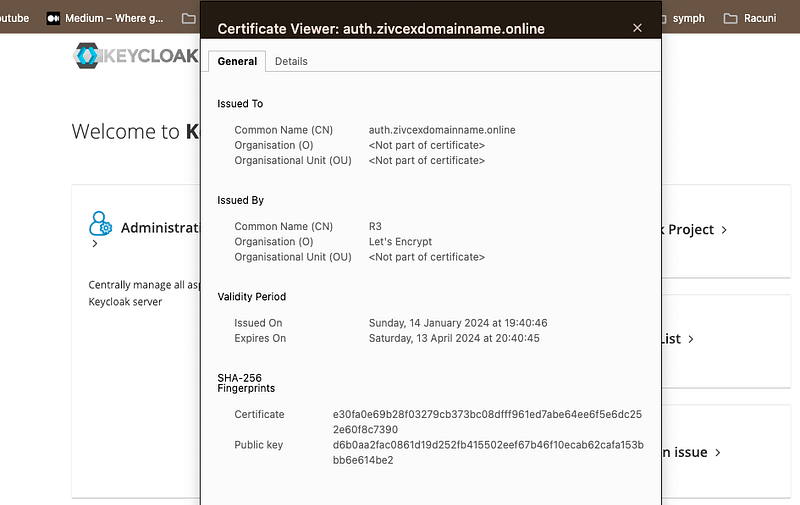
secretName: quickstart-authzivcex-tls < this shouldn't be `letsencrypt-staging-auth` or `letsencrypt-prod`TLS should now be working with the correct and valid certificate from Let’s Encrypt.
Configuration lives inside the cluster
I’ve created all of the above files within the cluster itself. This should probably be done outside and stored in Git repo so it’s easier to keep track of things.

I’ve also used cloud shell from GCP to apply stuff to Kube cluster directly.
Admin password by default is stored in kube secret. So to pull that one out:
kubectl get secret --namespace keycloak keycloak -o jsonpath="{.data.admin-password}" | base64 -dThe user by default is user or admin with the password above.
Cleanup
Setup gets costly fast so you should bring the cluster down.
What needs to be deleted?
- Cluster from Kubernetes Engine
- PVC (console.cloud.google.com/compute/disks)
- DNS zone
Once all of the above resources are deleted, check billing if there’s anything left for deletion.
What’s the cost of the setup?
This setup cost me around $30 on GCP. Another thing you’ll is a domain of your choice that will also cost. There’s a GCP cloud trial so you can use it to cover the cost.
Let me know in the comments what’s your setup for Keycloak-HA deployment. What issues have you faced? What do you think of this approach?


