
Start a project without storyboard | UIKit, Xcode 12 &Swift 5
When starting a new Xcode project you have two main options: starting with a SwiftUI interface or with the Storyboard. However, if you want to create your app entirely programmatically in UIKit, there are a few steps needed to set up your app!

Step 1: Create a new Xcode project
Open Xcode and select “Create a new Xcode project” from the homepage. Then, select “App” as a template inside the iOS platform and select Storyboard as an interface.

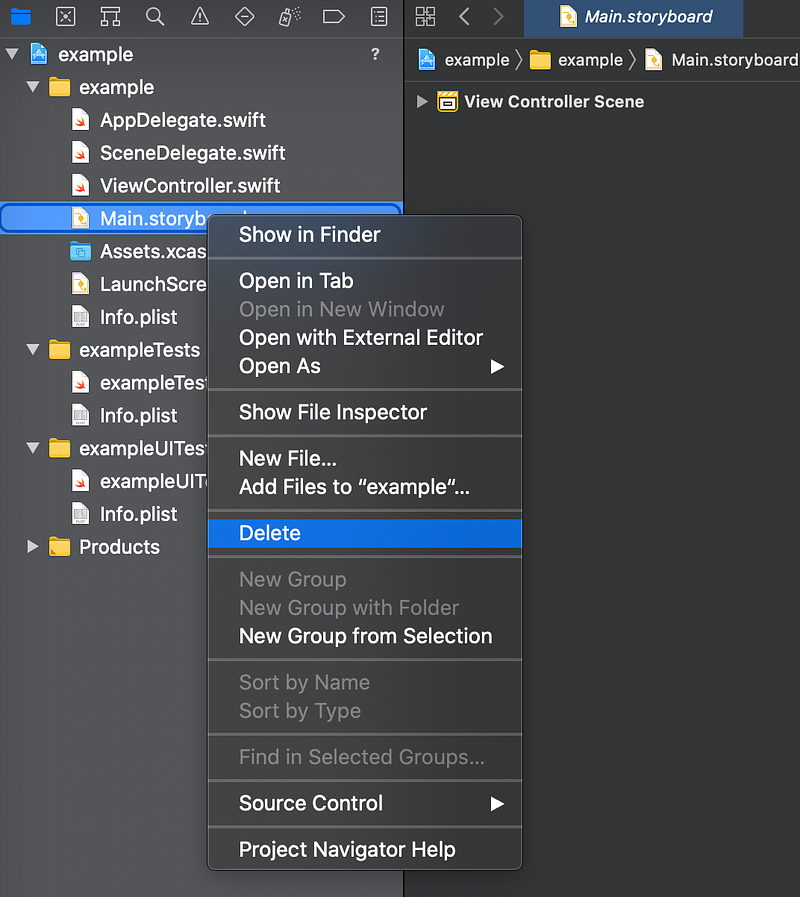
Step 2: Delete the Storyboard
Your new project has been created, now navigate to the left side of your interface, select the “Main.storyboard” file in the main folder, left-click and hit delete.
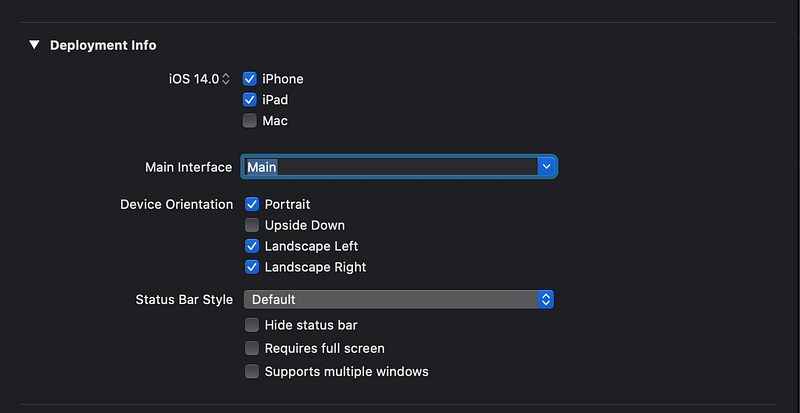
Step 3: Remove the main interface
Still on the left corner, select the first file: the main bundle of your application. Under General > Deployment Info select the world “Main” and delete it.
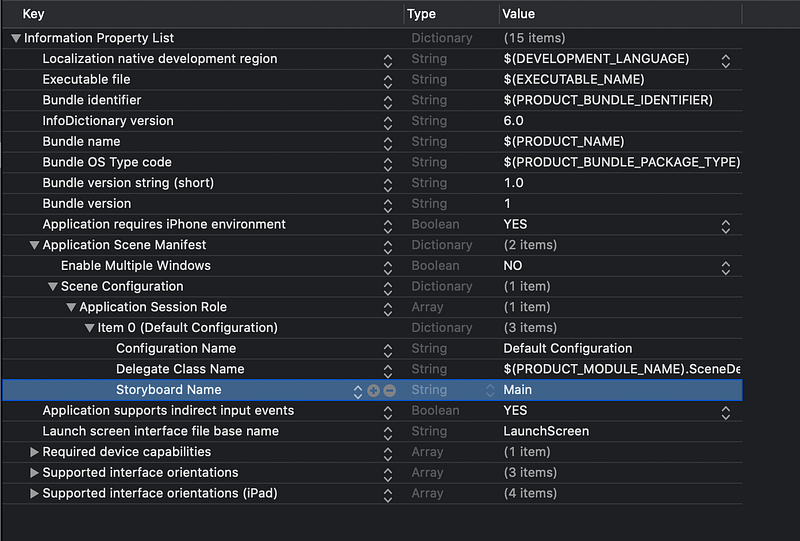
Step 4: Delete the Storyboard key inside Info.plist
Navigate to the Info.Plist file on the left side. Under the keys, Application Scene Manifest > Scene Configuration > Application Session Role > Item 0 (Default Configuration), select the string “Storyboard Name” and delete it with the minus button.
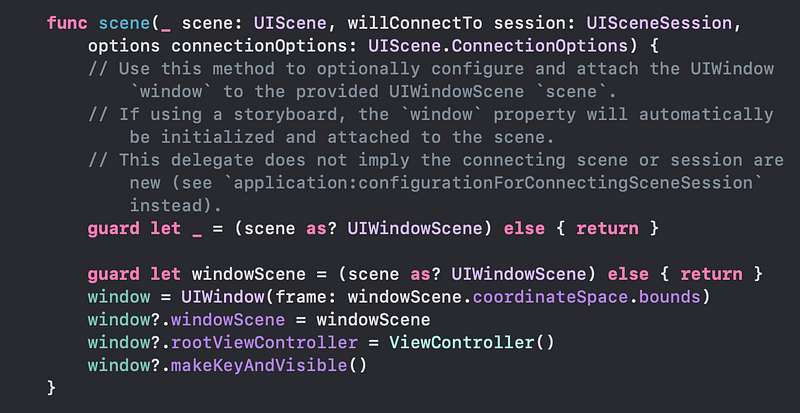
Step 5: Add the code in the Window Scene
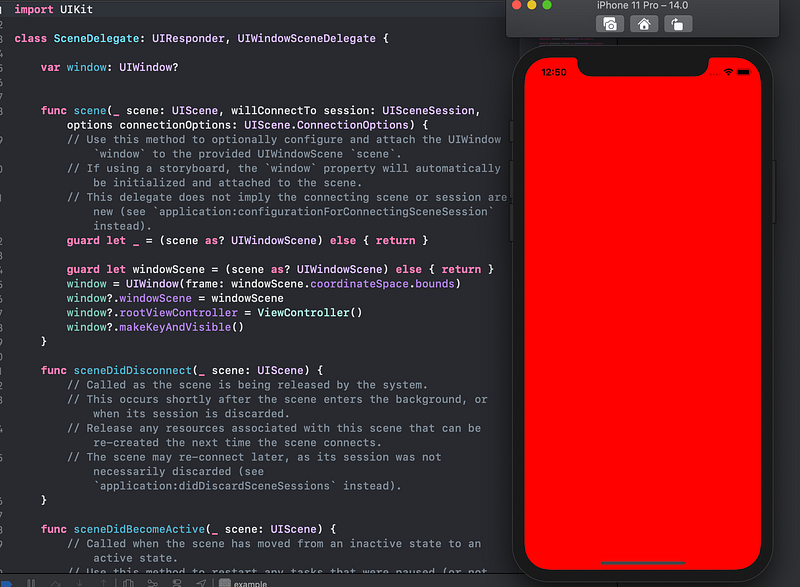
Now, go to the SceneDelegate.Swift file and add the code below inside the scene function (the first function present in this file).
Then your function should look like this:
Step 6: Run your App!
It’s time to see if your app runs correctly! Here is a little trick: Add the code below to the ViewDidLoad function inside your ViewController.Swift file so when the screen gets red when you launch the app, it means that everything works perfectly.
Thanks for reading! I’m always happy to have a chat and collaborate at [email protected]. Consider subscribing to enjoy unlimited access to my articles and all of Medium through my referral link.


