
Introduction to Shap-E: Text-to-3D
Generate 3D objects conditioned on text or images
By reading this article, you will learn to use Shap-E for 3D objects generation. As of 5 May 2023, OpenAI officially released Shap-E, which is
a system to generate 3D objects conditioned on text or images
Similar to its predecessor Point-E, Shap-E is capable of generating coherent 3D objects when conditioned on a rendering from a single viewpoint (image) or text prompt directly.
Shap-E contains the following models:
encoder— converts 3D assets into the parameters of small neural networks which represent the 3D shape and texture as an implicit function. The resulting implicit function can be rendered from arbitrary viewpoints or imported into downstream applications as a mesh.latent diffusion— generates novel implicit functions conditioned on either images or text descriptions. It produce latents which must be linearly projected to get the final implicit function parameters.
Both models are trained on the same datasets as Point-E with the following improvements:
- rendering is based on 60 views of each model when computing point clouds. Previously, Point-E used 20 views and the final output is prone to small cracks
- final output produces 16K points in each point cloud instead of 4k points used in Point-E
- the lighting and material setup only include diffuse materials
- datasets enlargement with a million more 3D assets and 120K captions from human annotators
Note that the generated 3D objects are typically lower fidelity than professional 3D assets and geared towards cartoonish assets.
Let’s proceed to the next section for setup and installation.
Setup
It is recommend to create a new virtual environment before you continue with the installation.
Activate it and clone the whole repository as follows:
https://github.com/openai/shap-e
Then, run the following command to install Shap-E:
cd shap-e
pip install -e .
Note that the setup.py file in the official repository is incomplete and lacks quite a number of Python packages. For example:
blobfile
pyyaml
ipywidgets
You have to install them manually via pip install.
If you have problems with torch, kindly head over to the official page and install it accordingly.
Have a look at the following working requirement file as example (contains other unused packages):
blobfile==2.0.2
certifi==2022.12.7
charset-normalizer==3.1.0
clip @ git+https://github.com/openai/CLIP.git@a9b1bf5920416aaeaec965c25dd9e8f98c864f16
colorama==0.4.6
contourpy==1.0.7
cycler==0.11.0
filelock==3.12.0
fire==0.5.0
fonttools==4.39.3
ftfy==6.1.1
humanize==4.6.0
idna==3.4
imageio==2.28.1
ipywidgets
Jinja2==3.1.2
kiwisolver==1.4.4
lazy_loader==0.2
lxml==4.9.2
MarkupSafe==2.1.2
matplotlib==3.7.1
mpmath==1.3.0
networkx==3.1
numpy==1.24.3
packaging==23.1
Pillow==9.5.0
pycryptodomex==3.17
pyparsing==3.0.9
python-dateutil==2.8.2
PyWavelets==1.4.1
PyYAML==6.0
regex==2023.5.5
requests==2.30.0
scikit-image==0.20.0
scipy==1.10.1
six==1.16.0
sympy==1.11.1
termcolor==2.3.0
tifffile==2023.4.12
torch==2.0.0+cu118
torchvision==0.15.1+cu118
tqdm==4.65.0
typing_extensions==4.5.0
urllib3==2.0.2
wcwidth==0.2.6
Usage
At the time of this writing, the official repository comes with the following notebooks:
- sample_text_to_3d.ipynb — sample a 3D model, conditioned on a text prompt
- sample_image_to_3d.ipynb — sample a 3D model, conditioned on an synthetic view image.
- encode_model.ipynb — loads a 3D model or a trimesh, creates a batch of multiview renders and a point cloud, encodes them into a latent, and renders it back. For this to work, install Blender version 3.3.1 or higher, and set the environment variable
BLENDER_PATHto the path of the Blender executable.
Feel free to explore the notebooks on your own. The tutorial covers only the text to 3d part with some slight differences to make it runnable as a single Python script, which will save the output locally instead of displaying it on Notebook.
Create a new Python file called inference.py and append the following import statements:
import torch

from shap_e.diffusion.sample import sample_latents
from shap_e.diffusion.gaussian_diffusion import diffusion_from_config
from shap_e.models.download import load_model, load_config
from shap_e.util.notebooks import create_pan_cameras, decode_latent_images
Then, instantiate the encoder and latent diffusion model as follows:
device = torch.device('cuda' if torch.cuda.is_available() else 'cpu')

xm = load_model('transmitter', device=device)
model = load_model('text300M', device=device)
diffusion = diffusion_from_config(load_config('diffusion'))
During the initial run, it will download the following files in a new folder called shap_e_model_cache:
- diffusion_config.yaml
- text_cond.pt (1.26GB)
- text_cond_config.yaml
- transmitter.pt (1.78GB)
- transmitter_config.yaml
- ViT-L-14.pt (890MB)
Note that image to 3d requires a different model for image conditioning. Subsequent run will reuse the same cache for inference.
Continue by appending the following lines of code for latent diffusion process:
batch_size = 4
guidance_scale = 15.0
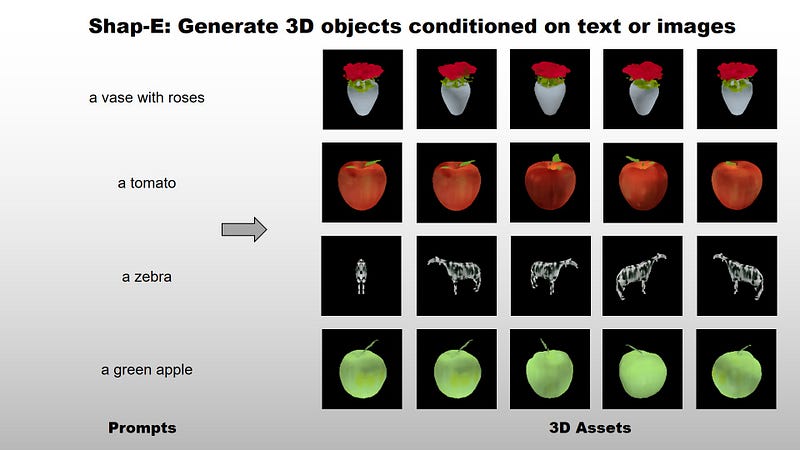
prompt = "a vase with roses"
latents = sample_latents(
batch_size=batch_size,
model=model,
diffusion=diffusion,
guidance_scale=guidance_scale,
model_kwargs=dict(texts=[prompt] * batch_size),
progress=True,
clip_denoised=True,
use_fp16=True,
use_karras=True,
karras_steps=64,
sigma_min=1e-3,
sigma_max=160,
s_churn=0,
)Feel free to modify the prompt based on your preferences
Finally, use the following code snippet for 3D rendering:
render_mode = 'nerf' # you can change this to 'stf', 'nerf'
size = 64 # this is the size of the renders; higher values take longer to render.

cameras = create_pan_cameras(size, device)
for i, latent in enumerate(latents):
    images = decode_latent_images(xm, latent, cameras, rendering_mode=render_mode)
    images[0].save(f"{prompt}.gif", format="GIF", save_all=True, append_images=images[1:], duration=100, loop=0)
Note that you have to install pytorch3D when setting
render_modetostf.
It is recommended to start with size of 64 during the initial test. Then, slowly increase it by multiple of 64 (e.g. 128, 256, etc.) depending on your needs.
Save the Python script and run the following command to generate a GIF file locally:
python inference.py
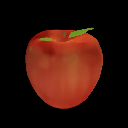
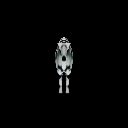
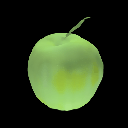
Have a look at the following generated GIF(s) as reference:

Feel free to adapt the code above for image to 3D generation.
As of 6 May 2023, you can now save the generated latent as ply file with the following code snippet:
# Example of saving the latents as meshes.
from shap_e.util.notebooks import decode_latent_mesh

# code to generate latent
...

for i, latent in enumerate(latents):
    with open(f'example_mesh_{i}.ply', 'wb') as f:
        decode_latent_mesh(xm, latent).tri_mesh().write_ply(f)
Conclusion
Let’s recap the learning points for today.
This article started off with a brief introduction on Shap-E and its differences with Point-E.
Then, it covered on setup and installation process.
Subsequently, it continued with the implementation section and provided a few example output as reference.
Thanks for reading this piece. Have a great day ahead!


