

Introducing TaskWeaver
An implementation with Azure OpenAI
TaskWeaver is a code-first agent framework that uses large language models (LLMs) and generative AI to plan and execute tasks.
“Code-first” means that users‘s query will be interpreted and executed by large language models (LLMs) via code snippets that call various plugins (functions) to perform the tasks.

TaskWeaver supports rich data structures, customized algorithms, domain-specific knowledge, stateful execution, and code verification. It also allows users to create their own plugins and orchestrate multiple AI agents for complex tasks. It is an open-source project developed by Microsoft Research and you can read the original paper here.
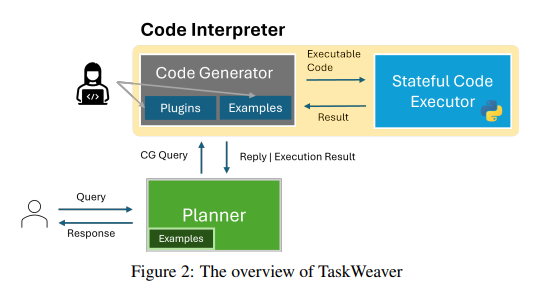
The document introduces four key components of TaskWeaver: the Planner, the Code Interpreter (CI), the Code Generator (CG), and the Code Executor (CE). Here is a brief explanation of each component:
- Planner: This is the component that interacts with the user and manages the task execution process. It converts the user’s request into a plan consisting of sub-tasks, and communicates with the CI to generate and execute code for each sub-task. It also responds to the user in natural language with the execution results or any additional information needed.
- Code Interpreter (CI): This is the component that leverages the LLM to generate and execute Python code for a given sub-task. It consists of two sub-components: the Code Generator (CG) and the Code Executor (CE).
- Code Generator (CG): This is the sub-component of the CI that generates Python code based on the user’s request, the available plugins, and the domain-specific examples. It also verifies the generated code for safety and correctness, and can auto-correct the code if it fails to execute.
- Code Executor (CE): This is the sub-component of the CI that executes the generated code in a separate process and maintains the execution state throughout the session. It also returns the execution results, logs, and artifacts to the Planner.
Let’s see what are the main elements that feature an interaction with Taskweaver:
- Session: A new session is established once the user submits their initial request to the TaskWeaver. This session is terminated if the user intentionally resets the conversation or when a predetermined expiration time is reached following the last interaction.
- Round: A round commences with TaskWeaver receiving a user request and concludes upon providing a response to the user. Subsequently, TaskWeaver awaits the user’s next input. Typically, a session consists of numerous rounds. Responses to the user may either involve a message after completing a specific task or TaskWeaver requesting further input to successfully carry out the task.
- Post: Within a round, there can be several messages exchanged between the Planner, CG, and CE, each of which is referred to as a post. A post contains the text message, such as the request from the Planner to CG for code generation, and may also include other relevant information like the generated code and execution logs.
- State: TaskWeaver retains essential information throughout the conversation, known as the state (or context) of the session. The state encompasses the chat history between the user and TaskWeaver, the model’s internal thoughts and plans, generated code, execution results, and more. The session state functions as a short-term memory for the LLM, guiding it towards making appropriate decisions.
In the next section, we are going to see how to get started with TaskWeaver and its capabilities.
Getting started with TaskWeaver
To enable your environment, you can clone the repository and install the requirements in the requirements.txt file via pip install requirements.txt.
Starting from the root, go under the projectfolder, where you will find the taskweaver_config.json file:
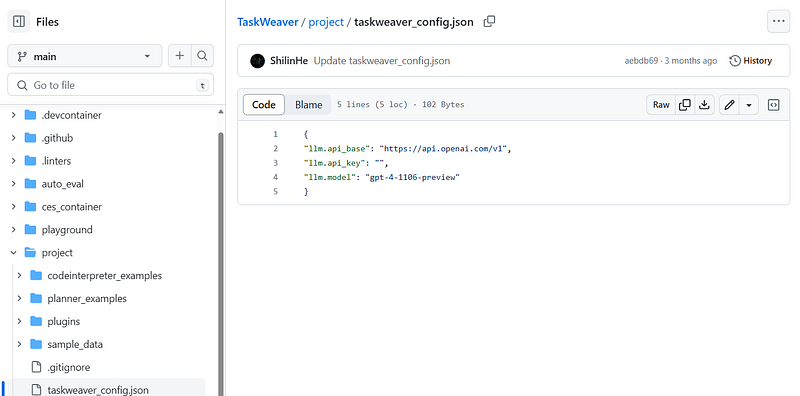
Here you can set your secrets to leverage the LLMs. I leveraged Azure OpenAI, so my config file looks like the following:
{
    "llm.api_base": "xxx",
    "llm.api_key": "xxx",
    "llm.api_type": "azure",
    "llm.api_version": "2024-02-15-preview",
    "llm.model": "gpt-4",
    "llm.response_format": null

    }
You can retrieve your secrets in your Azure OpenAI instance on the Azure Portal under the tab “Keys and endpoint”.
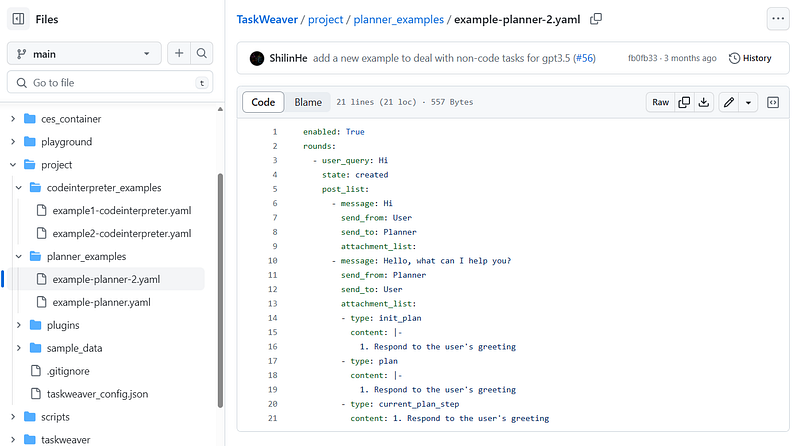
Under the same project folder, you can see some sub-folders:
codeinterpreter_examplesandplanner_examplescontain two examples each of typical interactions between the user’s and the component.
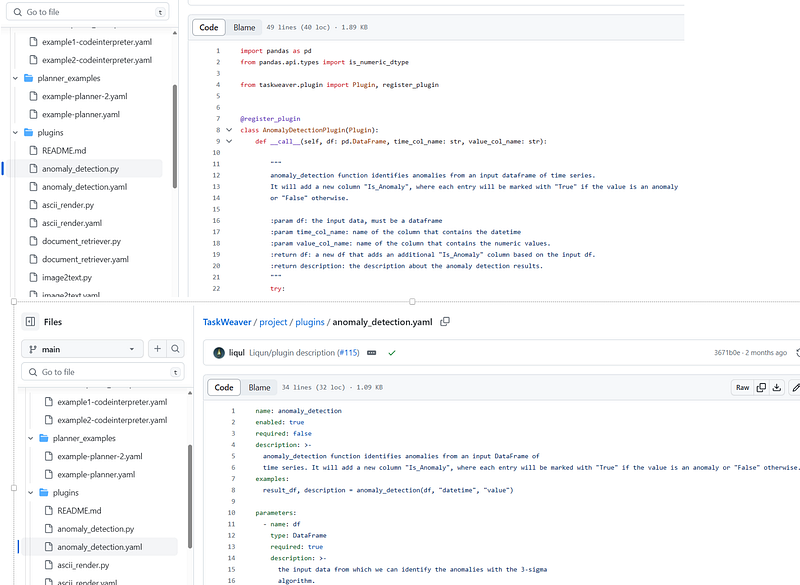
pluginsare python functions that extend the LLM’s capabilities for specific tasks and can be invoked by the Planner. Each plugin is described by a.py(the proper python script) and ayamlfile that describes the plugin and its configuration:
sample_datacontains some datasets and domain-specific knowledge base.
Great, now let’s start using TaskWeaver in our Anaconda Prompt. From the root of your cloned repository, launch the following command to initialize TaskWeaver:
python -m taskweaver -p ./project/
Let’s start asking a basic question. By default, there are no enabled plugins for the agent to interact with, so all the tasks will be executed solely with code generated at runtime (we will see how to enable plugins in the next section):
Show me the plot of the distribution of 100 random numbers
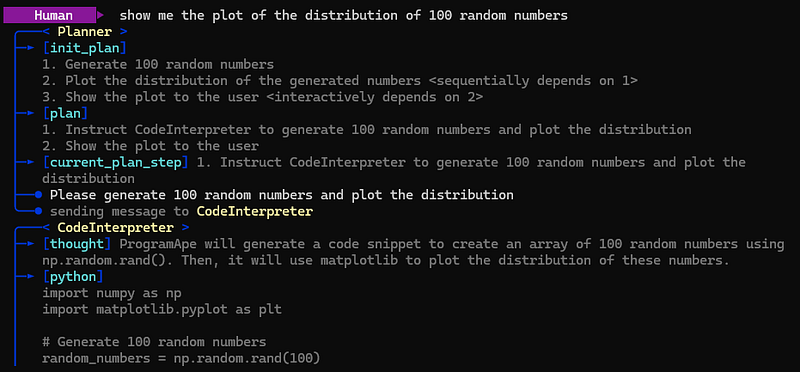
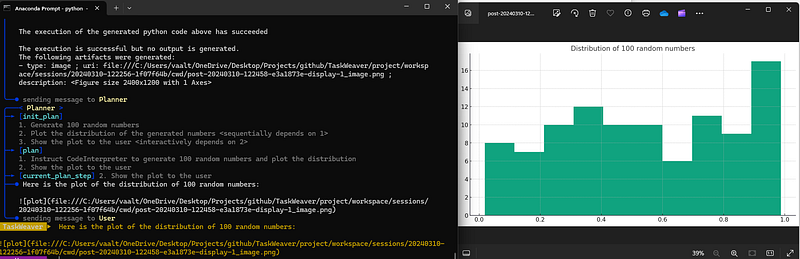
The above screenshot shows the sample activities of the Planner and the CI. Below you can see the result:
Note that we can also leverage the web UI provided in the github. Do enable it, navigate under the folder plauground/UI and run the command chainlit run app.py (make sure to have installed the chainlit library via pip install chainlit). Once you run the command, your web app will be running at http://localhost:8000.
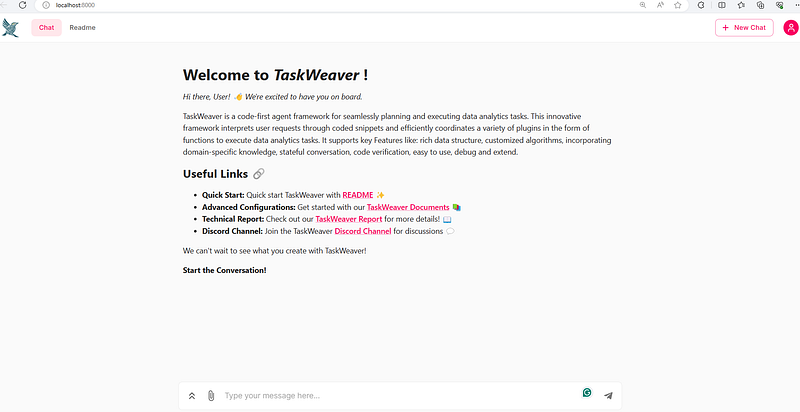
Let’s now ask the same questions we tested above:
The Web UI is particularly useful for demo purposes or if you prefer a GUI experience.
Enabling Plugins
We said that plugins aren’t enabled by default, so in this section we are going to understand how to provide them as tools to our agent. To do so, you will need to add the taskweaver_config.json the following information:
    "llm.embedding_api_type":"openai",
    "llm.embedding_model": "text-embedding-ada-002",
    "code_generator.enable_auto_plugin_selection": true,
    "code_generator.auto_plugin_selection_topk": 2
We need the embedding models to generate the embeddings of plugins’ descriptions, so that the model will be able to dynamically invoke them (this is made possible by setting the “code_generator.enable_auto_plugin_selection”: true parameter).
Once you set your additional parameters, you can run the following command under the folder “scripts”:
python -m plugin_mgt --refreshThis will create a .main file under the folder plugins, where their corresponding vectors will be stored.
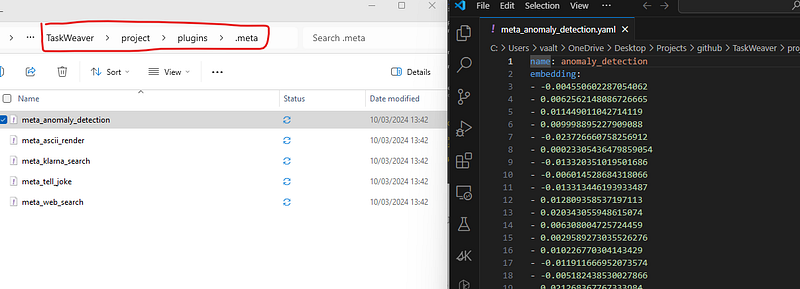
Note: there are some plugins that will not be embedded by default, as you can read from the README file under the pluginsfolder:
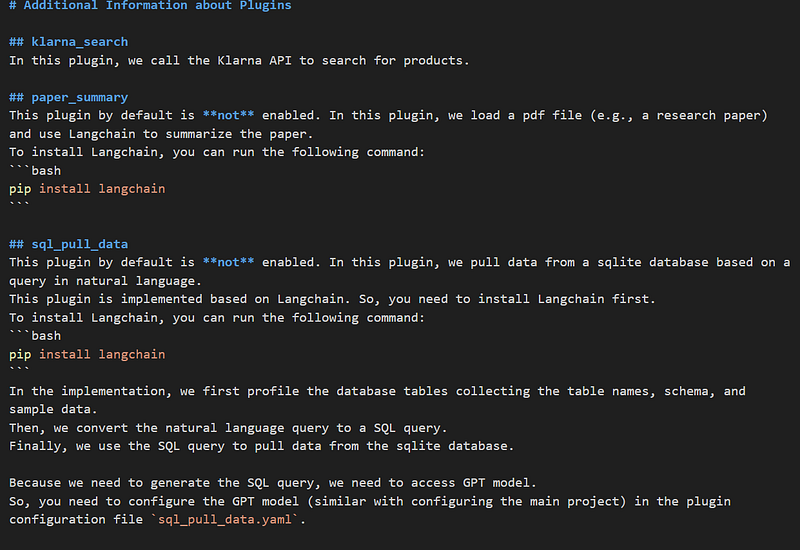
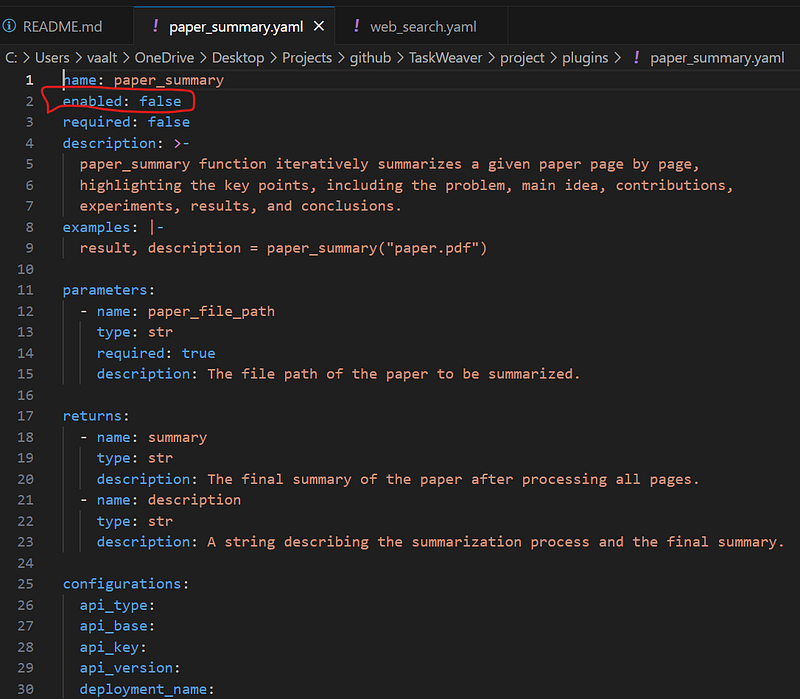
In the above picture for example, the klarna_search plugin is embedded by default, while the paper_summary is not. To enable it so that the Code Interpreter will be able to leverage it, we need to modify its .yaml file, changing the parameter “enabled” from “false” to “true”:
Once enabled the desired plugins, we can start asking our query to the agent. In this case, I’ll be asking the following question:
Search for merchandise from Klarna and generate a comparison table of 5 nike sneakers for women.
Let’s see the generated plan:
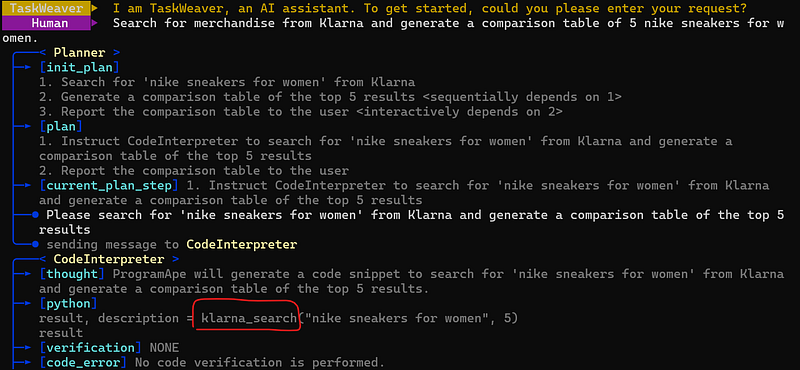
As you can see, the CI is invoking the plugin, producing the following result:

We can also replicate a similar scenario in the Web UI for a better rendering:
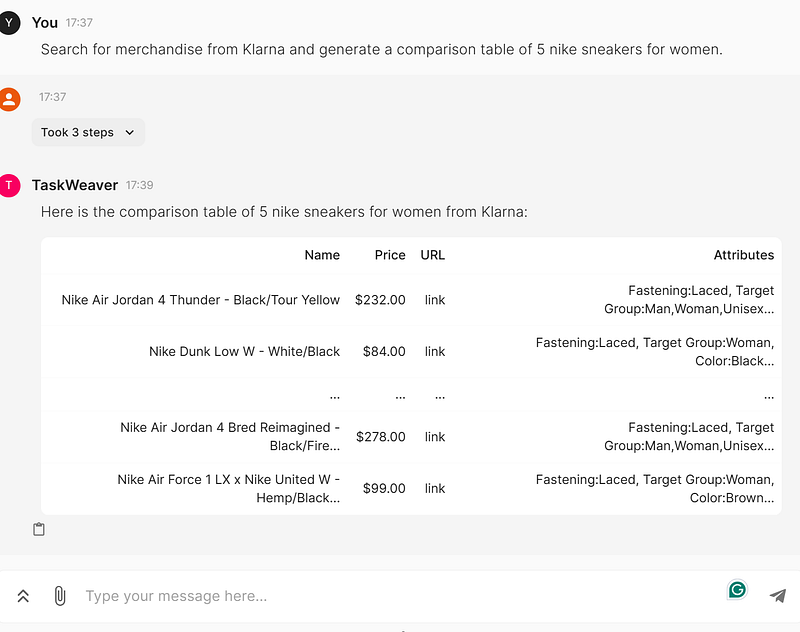
The final result is a list of items along with URLs and prices, as per my request.
Conclusions
In the rapid evolving landscape of LLMs and multi-agent applications, TaskWeaver emerges as an extremely promising tool, allowing users to express their requests in natural language and converts them into executable code that can leverage user-defined plugins as functions.
With the continuous improvement of LLMs, TaskWeaver can enable more advanced and sophisticated applications, so it is definitely something to keep an eye on!


