
Internal Developer Portals — Backstage vs Port: Part 2

Check out Part 1 of this series for a summary of internal developer portals, a comparison with development platforms, and a breakdown of the capabilities Software Catalog and TechDocs for both Backstage and Port. This post will focus on the following capabilities of the portals:
- Scorecards
- Software Templates
- CI/CD Integration
- Kubernetes
Scorecards
Scorecards weren’t a feature I was initially intrigued by when looking at the functionality of developer portals. That said, I wanted to keep an open mind and go through an implementation. The goal of scorecards is to enforce a level of standardization and quality across an organization’s software. You can then assign a ‘grade’ to an application based on the qualities you define.
Backstage
The backstage scorecard support is done via a 3rd party plugin maintained by Cortex. Documentation can be found here, however, it requires registering with Cortex to obtain an API key. I felt that was beyond the scope of what I wanted to investigate so I did not take it any further.
Port
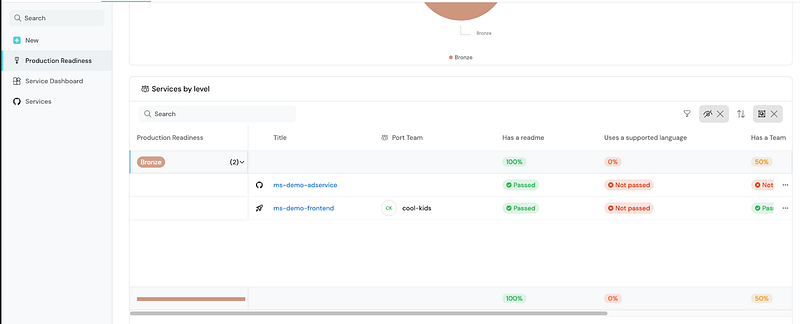
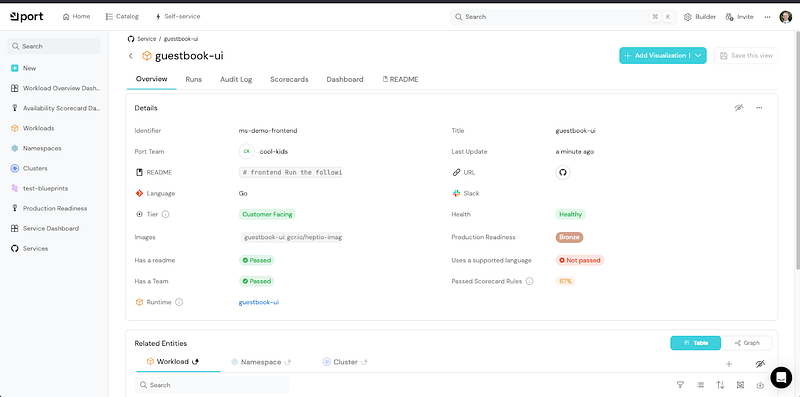
Port has first class support for scorecards and is one of their main features. Port starts you with a basic Production Readiness scorecard that grades on 3 things:
- Has a readme
- Uses a supported language
- Has a team
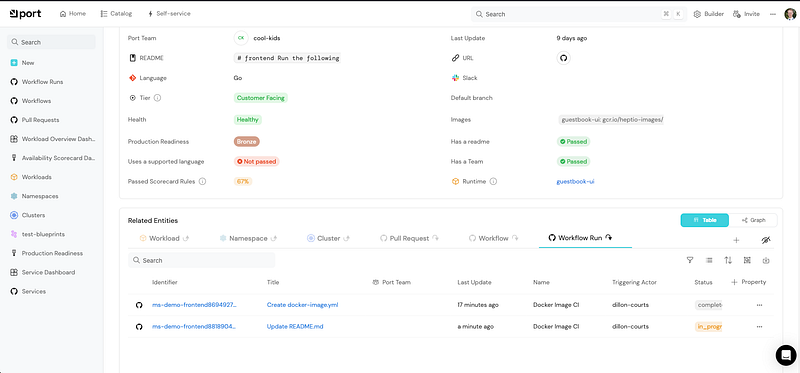
You can see my 2 services are grading out at Bronze level due to the lack of a supported language.
To customize the production readiness you can modify the blueprint for a service to evaluate any property assigned to that blueprint. You can add additional properties to a blueprint as well and create relationships between one asset and another.
This was the first time I played around with blueprints and it is an interesting concept, allowing a user to create any relationship they’d like. Port’s documentation lists the following examples for blueprints:
- Microservices
- Packages
- Package versions
- CI jobs
- K8s Clusters
- Cloud accounts
- Cloud environments
- Developer environments
- Service deployment
- Pods
- VMs
You can imagine how you might associate a set of environments with a service for example. Perhaps I want the presence of a CI job to be a part of my scorecard, it would be simple enough to create the blueprint for the CI job, create the property on my service, and then add that property as a criteria for the scorecard on that service.
While I’m still not sold on this concept, I could see it being a valuable tool to enforce standards at a large organization.
Software Templates
Software templates are a mechanism to bootstrap new service and/or application repositories with the existing standards and best practices of your organization. Imagine you need a new service and instead of copy pasting another service and renaming things, you can generate a brand new service with the naming conventions you’d like. More than likely this application already contains any necessary dependencies and configuration for observability, continuous integration, and deployment.
Backstage
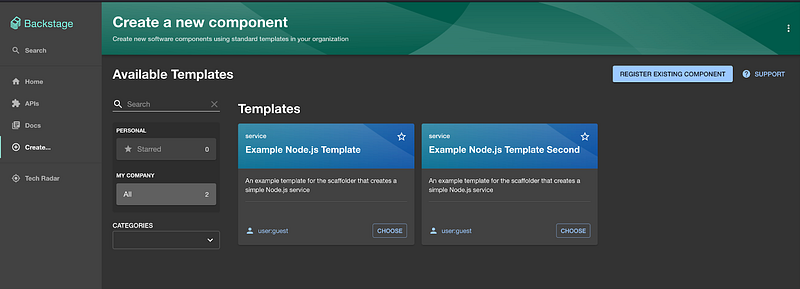
Software templates are a core feature of Backstage and there is extensive documentation to support it. Creating a service from a template is a simple process that involves navigating to the create section, choosing your template, and filling out some information. I used the built in Example Node.js Template to try this out.

It’s worth noting that after I created my service it did not auto register as a component in my software catalog. I had to manually register it and point my backstage instance at the catalog-info.yaml file in the repository.
Next, I wanted to see how I could add my own custom templates. I followed the documentation from above and was able to add a custom template. This was an interesting exercise as it took some time for me to understand how things fit together.
Adding a template involved modifying the backstage repository to add an additional template.yaml configuration file. I copied the original example as a starting place and didn’t change much else. You can specify what inputs are required from the user, the location of the base repository you will scaffold from, and how that base repository will be modified.
I was able to add the new template and create a repository for it, but I got the impression the learning curve here would be a bit steep to take my customization any further. So I moved on to Port.
Port
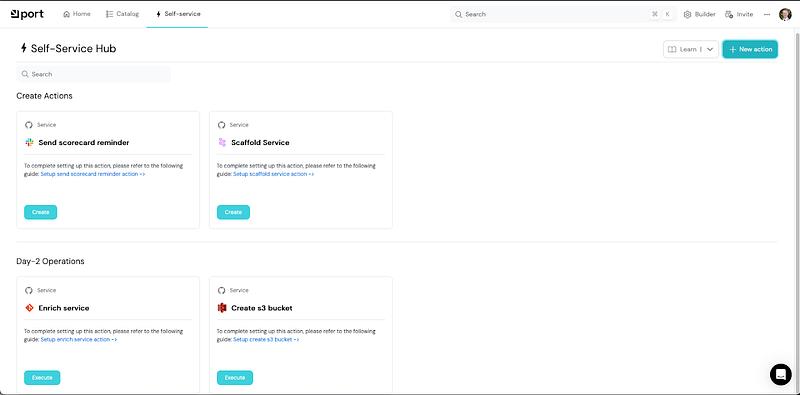
Setting up the software template in port was pretty straightforward. I followed the tutorial and everything went smoothly. You just click the create button on the Self-service tab to scaffold a new service, as shown below.
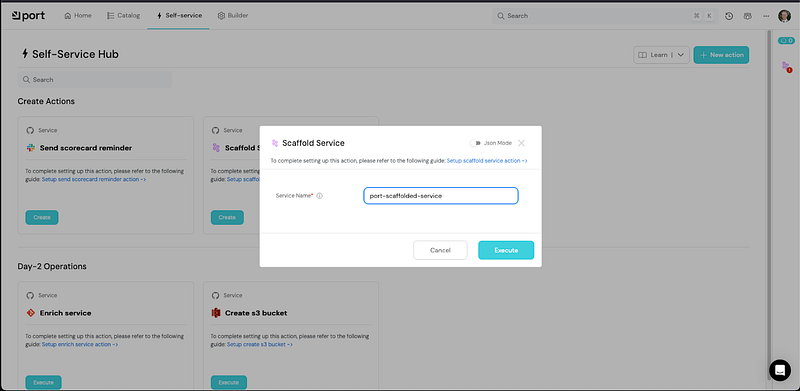
Port breaks this down into 4 components, and I’ll discuss 2 of them here.
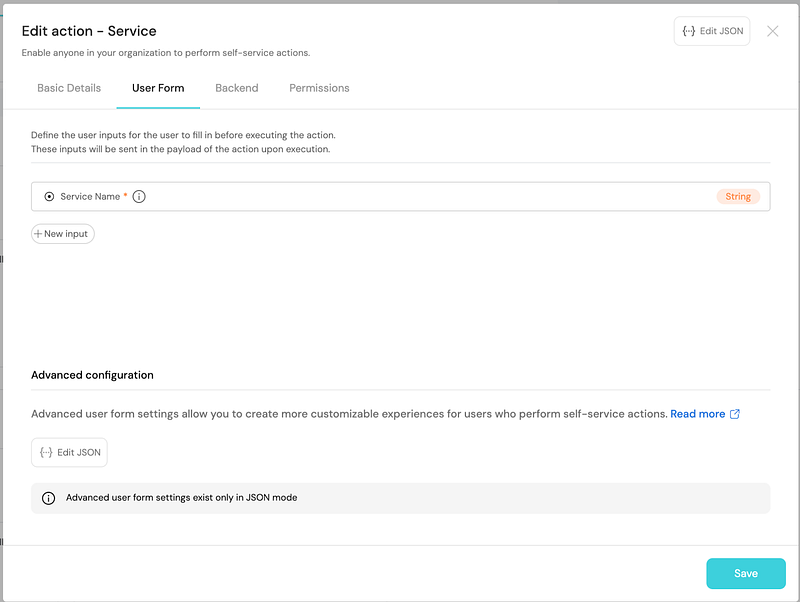
The first is the User Form. This is where you enter the information required to create a new repository. The default is to provide your service name but you can add whatever you’d like. You may want to specify programming language, or hosting location for example. This info is forwarded along to your repository generation process later.
The second is the Backend. Port leverages your automation tooling to generate a new repository. It has prebuilt hooks for Github Actions, Gitlab, Jenkins, and Azure DevOps. I chose to use Github Actions and leverage their pre-built workflow. But you can customize your automation however you’d like to generate a repository. All I had to do was generate an API key for Port to use to access my github organization, and then point the Backend of the service creation action at my workflow file in a repository.

Once that was set up I clicked create and entered a name in for my new repository. Github Actions reported the progress back to port and let me know when it was done.
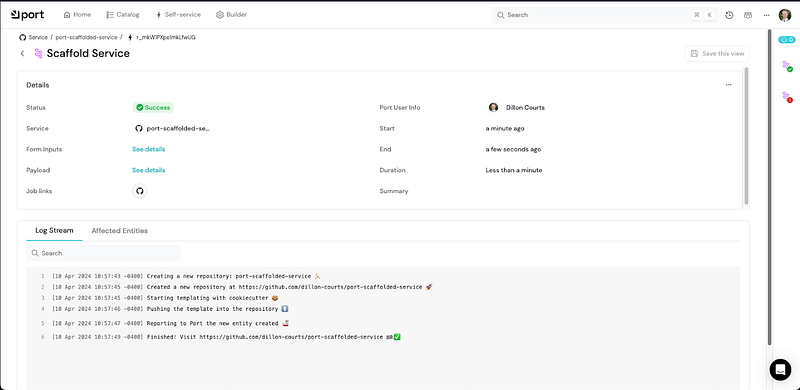
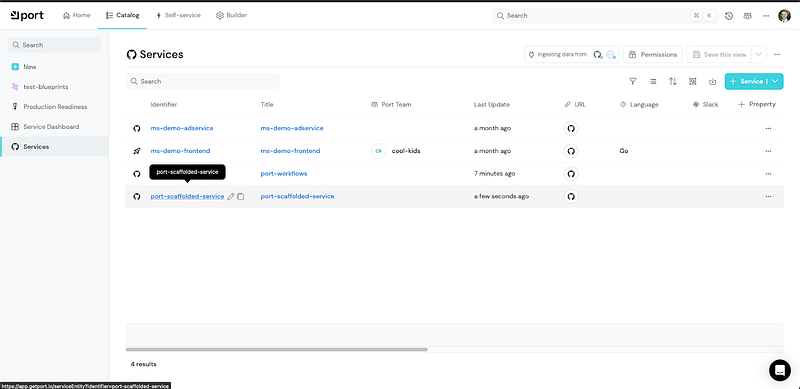
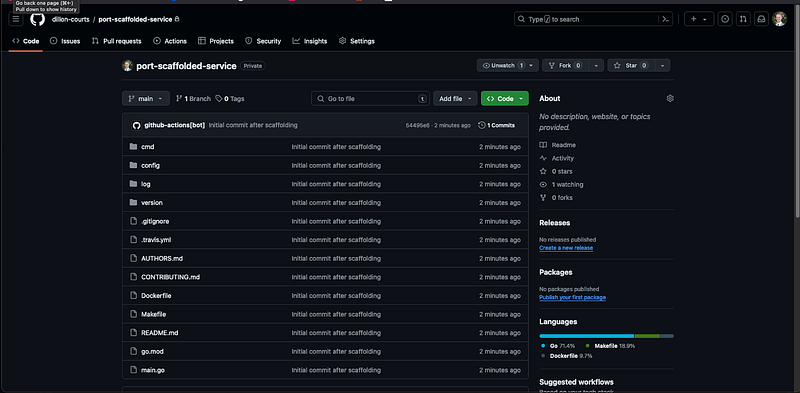
After it was complete I could see my service in the Service Catalog and my repository in the organization.
I felt like Port shined here in my limited experience. And I was beginning to feel this way overall. Backstage is clunky and requires a lot more knowledge of the source code, and Angular, to be productive.
CI/CD
Backstage
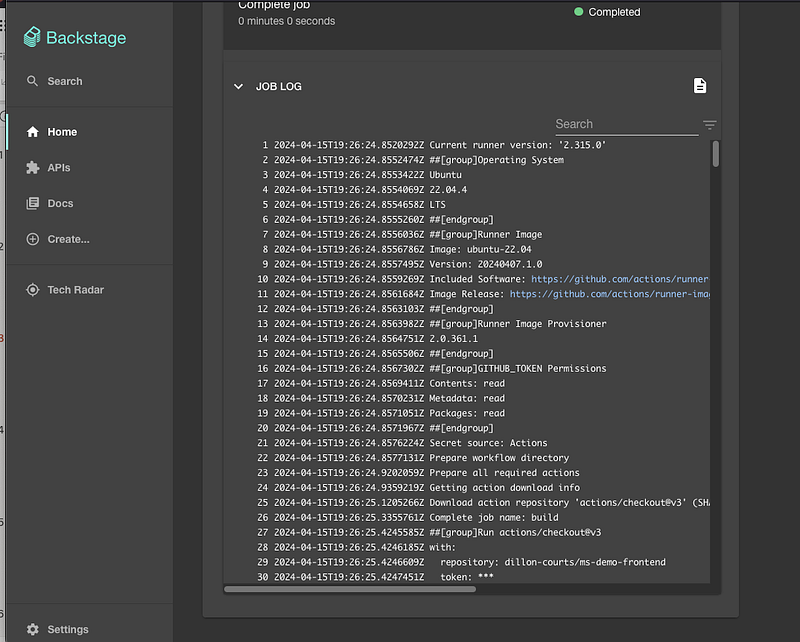
Backstage has a plugin that supports Github Actions that is maintained by Spotify. The implementation for this was pretty straightforward with my sample app. I followed the instructions for the plugin and quickly was able to view my docker build step on the entity page for my service. My catalog-info file already contained the annotation to point to the appropriate github action repository, so I didn’t need to make any code changes.
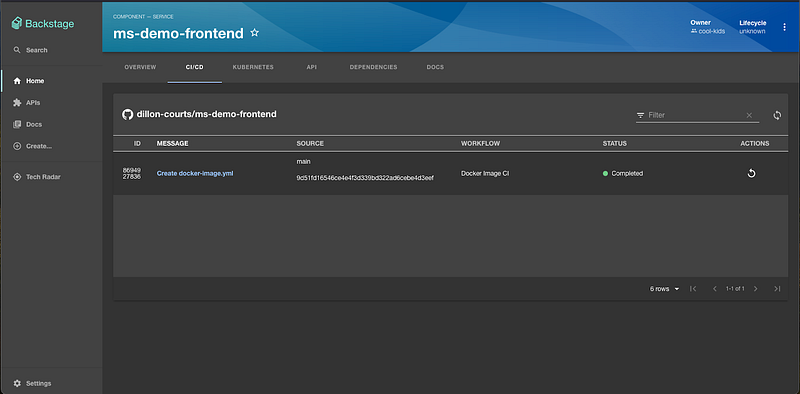
I was even able to dive deeper into a specific run to see its logs.
I didn’t need to rely on any Backstage functionality here to set up my workflows. I leveraged what I already knew with Github Actions and Backstage only functioned as a place to showcase that information.
Port
Note: Revision — I was informed that Port does indeed have an integration with Github Actions. The original version of this article reflected that believe. What follows is an updated version.
Port does define self-service actions that use Github Actions as a backend. This is the same concept we used to scaffold a new service earlier in the Software Templates section.
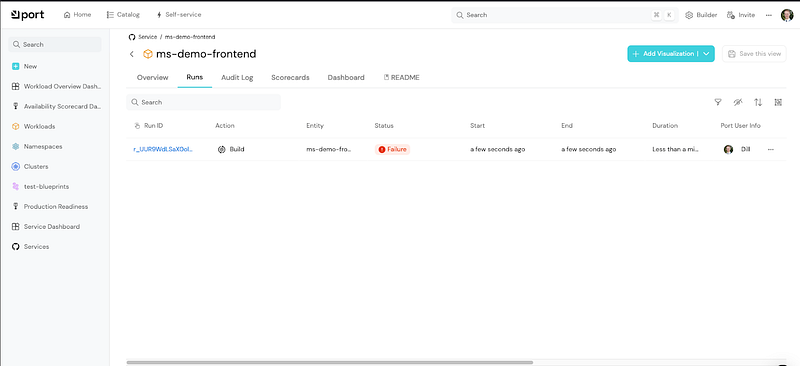
For example, you may define an action to roll back the most recent deployment of your application. You would use Github Actions to perform the rollback, but define the action within Port. Port then allows you to view these executed actions in the runs section of your service. I went ahead and added a build self-service action just as an example.
Port also allows you to connect your Github Action workflows and even your pull requests! So you can see all this data in one place. I followed the guide to get it set up and everything was pretty straight forward. I did have a false start trying to set up my port-app-config.yml file in my organization. I didn’t realize that Port maintains its own version of this file in the data sources section of its Builder. You can use either the file in your Github org or the one on the Port platform. But the one on the Port platform takes priority.
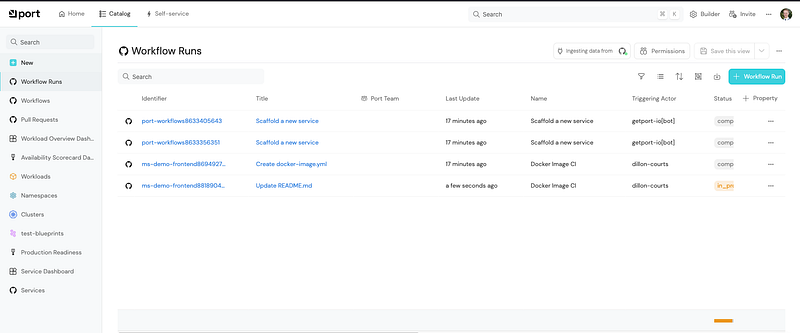
I was able to view my workflows and pull requests across my entire org in one view.
I could also view them in relation to the service they are attached to. I found this view much more helpful. I could not view logs from a workflow run but I did have a link to get to the run in Github.
Things were continuing to come together for me at this point in terms of the relationship mapping and the power of the dashboard you could build around individual services, or even larger systems.
Kubernetes
Seeing where your services are running and their health is a key component of a developer portal. If you aren’t running your services in kubernetes, visibility becomes a bit more difficult as you are likely going to need to rely on some other mechanism like an application performance monitoring tool.
Backstage
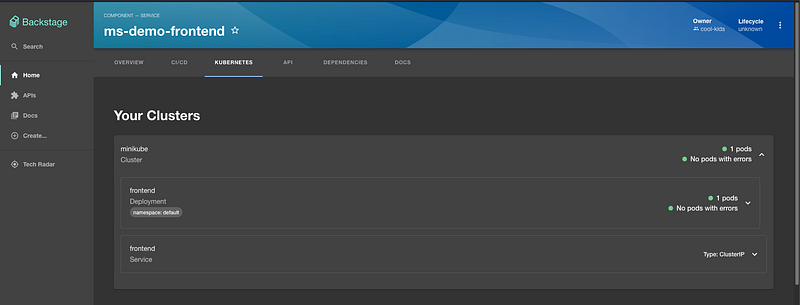
Kubernetes support is one of the core features of backstage. Installation follows a similar pattern of installing the dependency and editing your Backstage installation’s source code to get the tab added to your component. Once this was done I added the configuration code to point to my minikube cluster and I was up and running. I found a detailed walkthrough of the setup. I struggled to get the plugin working on my local setup as the ssl connection between backstage and my minikube cluster seemed to be configured incorrectly. Check out the walkthrough I linked for some images of what the integration looks like. After some troubleshooting I disabled tls verification and was able to get up and running myself. My application now showed the cluster it was deployed in as well as any deployments, pods, and services associated with it, and their health.
Set up required editing catalog-info files to set an annotation for the kubernetes-id and then applying that same id as a label within my kubernetes manifest files for each resource.
Port
Port’s kubernetes integration was a breeze. I followed the instructions and was given a set of commands to run that installed an exporter inside my minikube cluster. I cannot express how many times I thought to myself during the Backstage portion of this, that it would make way more sense to report from within the cluster instead of having to query it from Backstage. It would have saved me from the ssl errors I was encountering, and not required me to set up service accounts in kubernetes.
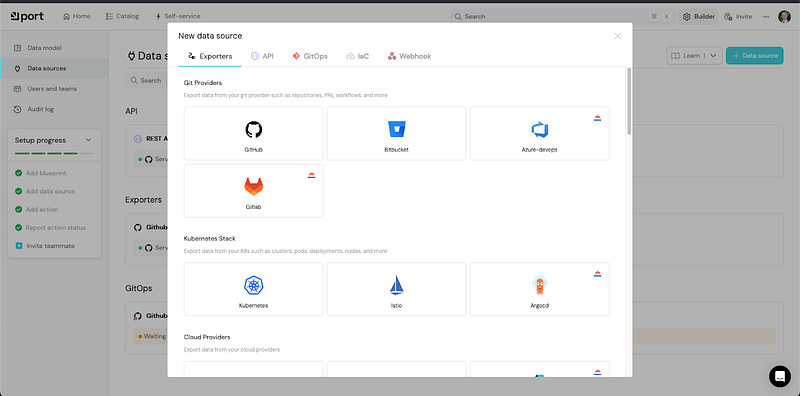
I’m pleased to say Port came to the same conclusion. I selected Kubernetes as my data source on Port’s Builder page.
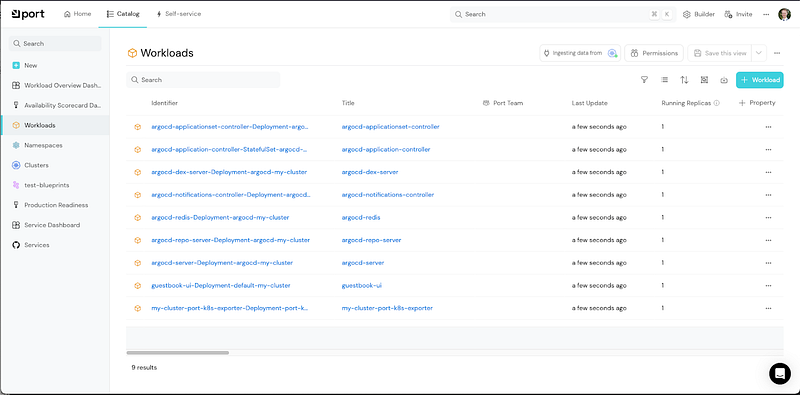
Within about 10 seconds of installing the helm chart from the commands I was given, my cluster was reporting into my Port instance. I could view my cluster, namespaces, and workloads.
Next step was to link a service running in my cluster to a service defined in my catalog within Port. Unfortunately, it didn’t work the first time. But, I was able to view the logs on the data exporter that Port installed in my cluster, and I saw that there was a property name mismatch. I had changed a name from their tutorial that I didn’t like. After the quick fix I could see my runtime, images, and health on my service page.
I’d like to take the time to explore this a bit further at some point. One differentiator is that Backstage seemed to include all parts of a workload, including the service and individual pods. It could just be the limited example, but I did not see the additional support available in the tutorial.
Wrap Up
This concludes my experimentation with the internal developer portals Backstage and Port. In the 3rd and final installment of this series I’ll give my high level impressions and recommendations on the usage of internal developer portals as a whole, and these two products individually.