
可擴展的 JupyterHub with Kubernetes
如何在 GKE 建置 JupyterHub
A multi-user version of the notebook designed for companies, classrooms and research labs.
TL; DR 摘要
我們在這篇文章中介紹如何在 GCP(Google Cloud Platform) 的 Kubernetes Engine(GKE) 上建置一個可供數百至數千位課堂學員使用的 JupyterHub with Kubernetes,亦被稱為 JupyterHub with K8s。
什麼是 JupyterHub with K8s?
在最輕量化的 JupyterHub:The Littlest JupyterHub 一文曾經討論過在選擇用哪種方式建置 JupyterHub 的時候可以自問自答兩個問題:
- 是否要使用伺服器叢集?
- 是否要使用容器技術?
如果這兩個問題的答案為「是」,那麼我們就可以考慮採用 JupyterHub with Kubernetes!Kubernetes(K8s)是一個提供「跨伺服器叢集的自動部署、可延展以及運行容器化應用程式」的開源系統,K8s 建構於 Google 正式環境運行工作負載的 15 年經驗以及社群開發者的想法和投入,隨著 2015 年 v1.0 版本的發行,Google 遂與 Linux 基金會創辦 Cloud Native Computing Foundation(CNCF)提供 K8s 技術支援和推廣;K8s 的特點有:
- 強大的擴展度:K8s 基於 Google 每週執行數十億容器的原則進行開發,在擴充延展服務規模的時候不需同時擴充維護運作團隊人數
- 彈性:K8s 的服務範疇從個人電腦的測試環境到全球型企業的正式環境都能兼顧
- 便利攜帶:K8s 是開源系統並且可以在任何雲端服務商的主機上建置,包含 Google Cloud(GKE)、Microsoft Azure(AKS)、Amazon Web Services(EKS)、Red Hat OpenShift、IBM Cloud 與 Digital Ocean 等。
接著我們將依循下列步驟建置一個可供數百至數千位課堂學員使用的 JupyterHub with K8s:
- 建置 Kubernetes
- 設定 Helm
- 安裝 JupyterHub
- HTTPS 設定
建置 Kubernetes
Kubernetes 將負責雲端伺服器上的資源管理,官方文件 https://kubernetes.io/docs/setup/ 列出數十間支援 Kubernetes 建置的雲端服務供應商,我們選擇(理應是)最簡單的 Google Cloud Platform(GCP)。
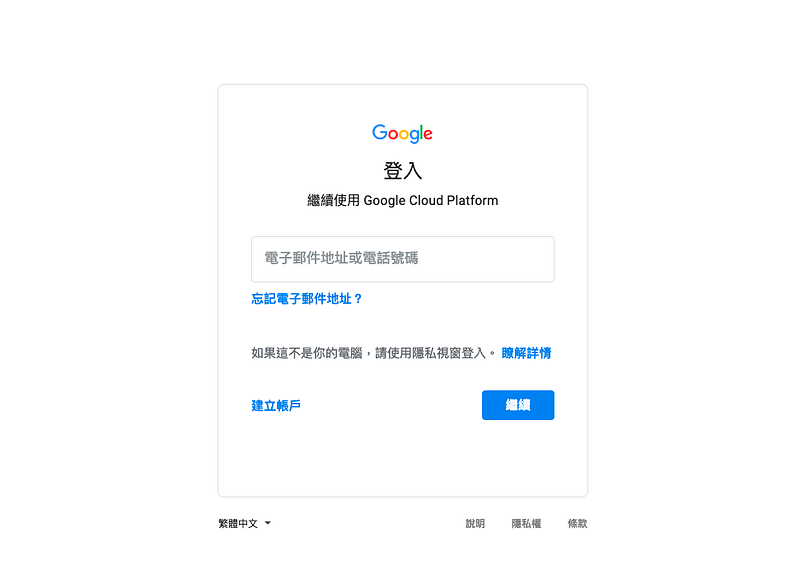
首先前往 https://console.cloud.google.com/ 登入。
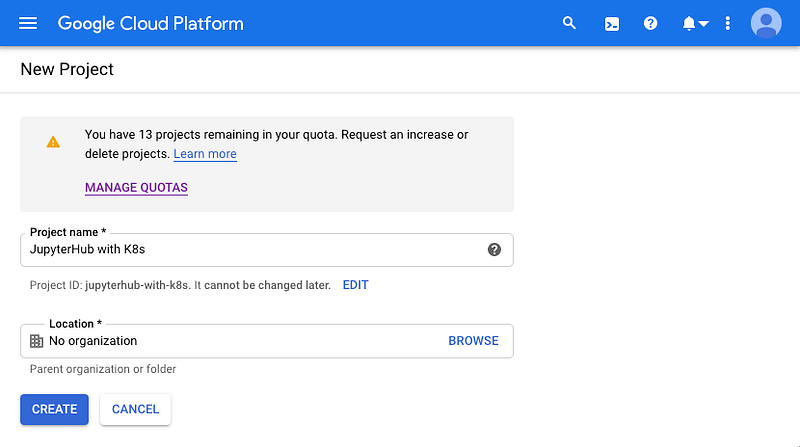
創建一個新的專案。
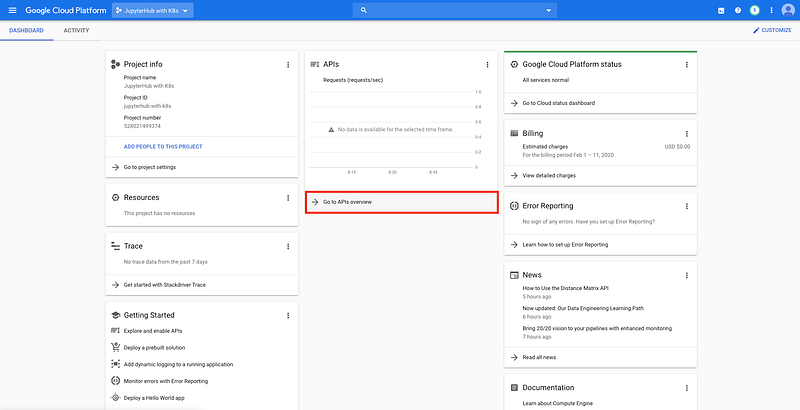
來到新專案的儀表板之後,點選 Go to APIs overview。
點選 ENABLE APIS AND SERVICES。
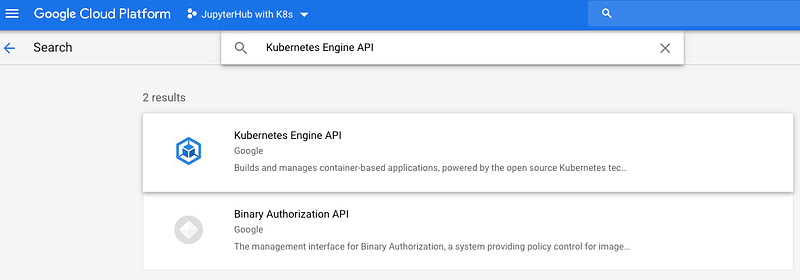
在搜尋文字方框中輸入 Kubernetes Engine API。
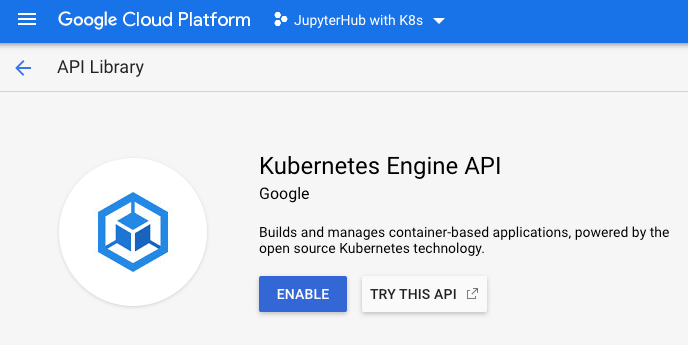
點選 Kubernetes Engine API。
啟動 Kubernetes Engine API。
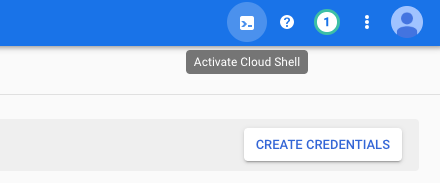
在右上角點選 Activate Cloud Shell。
我們將要使用在 Google Cloud Shell 中已經安裝妥當的命令列工具程式 gcloud 來建置 Kubernetes,因此先運用 gcloud --version 確認是否能直接引用。
username@cloudshell:~ (jupyterhub-with-k8s)$ gcloud --version
Google Cloud SDK 278.0.0
alpha 2019.05.17
app-engine-go
app-engine-java 1.9.78
app-engine-php " "
app-engine-python 1.9.88
app-engine-python-extras 1.9.87
beta 2019.05.17
bq 2.0.52
cbt
cloud-build-localcloud-datastore-emulator 2.1.0
cloud_sql_proxycore 2020.01.24
datalab 20190610
docker-credential-gcrgsutil 4.47
kubectl 2019.11.04
pubsub-emulator 2019.09.27
以 gcloud container clusters create 指令建置 Kubernetes。
gcloud container clusters create --machine-type n1-standard-2 --num-nodes 2 --zone asia-east1-a --cluster-version latest jupyterhub目前需要自行調整輸入的參數有:
- zone:我們調整輸入為 asia-east1-a 指向台灣彰化縣的機房,可供選擇的清單可以參考 https://cloud.google.com/compute/docs/regions-zones/#available
- CLUSTERNAME:我們調整輸入為 jupyterhub
username@cloudshell:~ (jupyterhub-with-k8s)$ gcloud container clusters create --machine-type n1-standard-2 --num-nodes 2 --zone asia-east1-a --cluster-version latest jupyterhubThis will enable the autorepair feature for nodes. Please see https://cloud.google.com/kubernetes-engine/docs/node-auto-repair for more information on node autorepairs.
Creating cluster jupyterhub in asia-east1-a... Cluster is being health-checked (master is healthy)...done.
Created [https://container.googleapis.com/v1/projects/jupyterhub-with-k8s/zones/asia-east1-a/clusters/jupyterhub].To inspect the contents of your cluster, go to: https://console.cloud.google.com/kubernetes/workload_/gcloud/asia-east1-a/jupyterhub?project=jupyterhub-with-k8s
kubeconfig entry generated for jupyterhub.NAME LOCATION MASTER_VERSION MASTER_IP MACHINE_TYPE NODE_VERSION NUM_NODES STATUS
jupyterhub asia-east1-a 1.15.9-gke.8 104.199.133.219 n1-standard-2 1.15.9-gke.8 2 RUNNING使用 kubectl get node 指令檢查叢集是否已經啟動,先前我們在 num-nodes 參數輸入 2 因此可以在這裡看到兩個狀態為 Ready 的 nodes。
username@cloudshell:~ (jupyterhub-with-k8s)$ kubectl get nodeNAME STATUS ROLES AGE VERSIONgke-jupyterhub-default-pool-2a2f588b-c291 Ready <none> 20m v1.15.9-gke.8gke-jupyterhub-default-pool-2a2f588b-jml2 Ready <none> 20m v1.15.9-gke.8把帳號調整至最大的管理員權限,替換
username@cloudshell:~ (jupyterhub-with-k8s)$ kubectl create clusterrolebinding cluster-admin-binding \
  --clusterrole=cluster-admin \
--user=<GOOGLE-EMAIL-ACCOUNT>clusterrolebinding.rbac.authorization.k8s.io/cluster-admin-binding created做一個最適化調整,完成建置 Kubernetes。
gcloud beta container node-pools create user-pool \
  --machine-type n1-standard-2 \
  --num-nodes 0 \
  --enable-autoscaling \
  --min-nodes 0 \
  --max-nodes 3 \
  --node-labels hub.jupyter.org/node-purpose=user \
  --node-taints hub.jupyter.org_dedicated=user:NoSchedule \
  --zone <ZONENAME> \
  --cluster <CLUSTERNAME>
替換
username@cloudshell:~ (jupyterhub-with-k8s)$ gcloud beta container node-pools create user-pool \> --machine-type n1-standard-2 \> --num-nodes 0 \> --enable-autoscaling \> --min-nodes 0 \> --max-nodes 3 \> --node-labels hub.jupyter.org/node-purpose=user \> --node-taints hub.jupyter.org_dedicated=user:NoSchedule \> --zone asia-east1-a \> --cluster jupyterhubThis will enable the autorepair feature for nodes. Please see https://cloud.google.com/kubernetes-engine/docs/node-auto-repair for more information on node autorepairs.Creating node pool user-pool...done.
Created [https://container.googleapis.com/v1beta1/projects/jupyterhub-with-k8s/zones/asia-east1-a/clusters/jupyterhub/nodePools/user-pool].
NAME MACHINE_TYPE DISK_SIZE_GB NODE_VERSIONuser-pool n1-standard-2 100 1.15.9-gke.8恭喜完成建置 Kubernetes!接下來是設定 Helm。
設定 Helm
Helm 是 Kubernetes 的套件管理工具,可以協助我們在安裝、升級和管理套件,Helm 之於 K8s 就像是 pip 之於 Python、npm 之於 nodejs 的關係;我們將使用 Helm chart 管理 Kubernetes 設定檔,如此透過編輯 config.yaml 檔案即可完成 JupyterHub 的安裝與部署。
使用 curl 指令下載安裝指令並執行。
curl https://raw.githubusercontent.com/kubernetes/helm/master/scripts/get | bash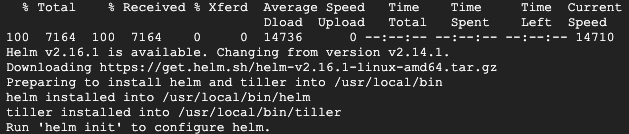
curl 指令下載安裝指令並執行依序輸入下列指令啟動 Helm。
username@cloudshell:~ (jupyterhub-with-k8s)$ kubectl --namespace kube-system create serviceaccount tillerserviceaccount/tiller created
username@cloudshell:~ (jupyterhub-with-k8s)$ kubectl create clusterrolebinding tiller --clusterrole cluster-admin --serviceaccount=kube-system:tillerclusterrolebinding.rbac.authorization.k8s.io/tiller createdusername@cloudshell:~ (jupyterhub-with-k8s)$ helm init --service-account tiller --waitCreating /home/username/.helmCreating /home/username/.helm/repositoryCreating /home/username/.helm/repository/cacheCreating /home/username/.helm/repository/localCreating /home/username/.helm/pluginsCreating /home/username/.helm/startersCreating /home/username/.helm/cache/archiveCreating /home/username/.helm/repository/repositories.yaml
Adding stable repo with URL: https://kubernetes-charts.storage.googleapis.comAdding local repo with URL: http://127.0.0.1:8879/charts
$HELM_HOME has been configured at /home/tonykuoyj/.helm.Tiller (the Helm server-side component) has been installed into your Kubernetes Cluster.Please note: by default, Tiller is deployed with an insecure 'allow unauthenticated users' policy.To prevent this, run `helm init` with the --tiller-tls-verify flag.For more information on securing your installation see: https://docs.helm.sh/using_helm/#securing-your-helm-installationusername@cloudshell:~ (jupyterhub-with-k8s)$ kubectl patch deployment tiller-deploy --namespace=kube-system --type=json --patch='[{"op": "add", "path": "/spec/template/spec/containers/0/command", "value": ["/tiller", "--listen=localhost:44134"]}]'deployment.extensions/tiller-deploy patched
以 helm version 指令檢視 Helm 是否設定妥當。
username@cloudshell:~ (jupyterhub-with-k8s)$ helm versionClient: &version.Version{SemVer:"v2.16.1", GitCommit:"bbdfe5e7803a12bbdf97e94cd847859890cf4050", GitTreeState:"clean"}Server: &version.Version{SemVer:"v2.16.1", GitCommit:"bbdfe5e7803a12bbdf97e94cd847859890cf4050", GitTreeState:"clean"}恭喜完成設定 Helm!接下來是安裝 JupyterHub。
安裝 JupyterHub
Helm chart 是一組 Helm 模板讓管理員能夠以 yaml 檔對 Kubernetes 叢集進行套件的安裝、升級與管理。
在終端機以 openssl rand -hex 32 指令生成一組金鑰,並複製起來。
在家目錄(/home/username)新增 config.yaml 檔,並貼入以下的內容,替換
proxy:
  secretToken: "<RANDOM_HEX>"
新增 JupyterHub Heml chart 為安裝做準備。
username@cloudshell:~ (jupyterhub-with-k8s)$ helm repo add jupyterhub https://jupyterhub.github.io/helm-chart/"jupyterhub" has been added to your repositoriesusername@cloudshell:~ (jupyterhub-with-k8s)$ helm repo updateHang tight while we grab the latest from your chart repositories...
...Skip local chart repository
...Successfully got an update from the "jupyterhub" chart repository
...Successfully got an update from the "stable" chart repository
Update Complete.安裝 JupyterHub Heml chart,在執行這個指令前要確定工作目錄中 config.yaml 檔案已創建並儲存。
RELEASE=jhub
NAMESPACE=jhub

helm upgrade --install $RELEASE jupyterhub/jupyterhub \
  --namespace $NAMESPACE  \
  --version=0.9.0-beta.3 \
  --values config.yaml
安裝過程可以 kubectl get pod --namespace jhub 指令檢視。
username@cloudshell:~ (jupyterhub-with-k8s)$ kubectl get pod --namespace jhubNAME READY STATUS RESTARTS AGEhub-5c67f4798-vnqmd 1/1 Running 0 97sproxy-5c4b5cb574-mxfrd 1/1 Running 0 97s將自訂的名稱 jhub 輸入為 namespace 參數的預設值。
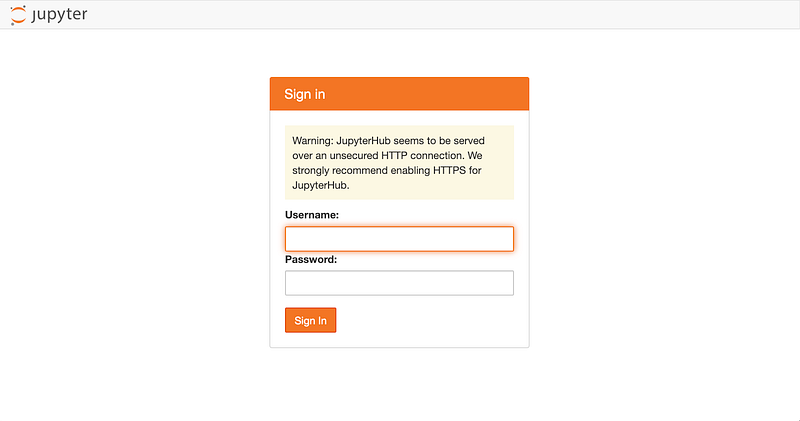
username@cloudshell:~ (jupyterhub-with-k8s)$ kubectl config set-context $(kubectl config current-context) --namespace ${NAMESPACE:-jhub}Context "gke_jupyterhub-with-k8s_asia-east1-a_jupyterhub" modified.安裝完成後可以 kubectl get service — namespace jhub 指令檢視我們將使用哪個 EXTERNAL-IP 登入 JupyterHub,將 proxy-public 所對應的 EXTERNAL-IP 複製貼上至瀏覽器網址列即可來到 JupyterHub 的登入頁面。此時可以注意到登入頁面有一個警告訊息,JupyterHub with K8s 提示下一步應該要進行 HTTPS 設定,我們將在下個小節進行,如果您也想要跟著操作,要先購買一個網域名稱或在既有的網域中新增一個子網域,並且為它購買一個 SSL 憑證。
恭喜完成安裝 JupyterHub,接下來是 HTTPS 設定。
HTTPS 設定
接著要手動設定 HTTPS 讓使用者安全地傳輸帳號、密碼與資料,首先我們要購買自己的網域(或子網域)以及一個 SSL 憑證,購買 SSL 憑證之後要先前往 Google Cloud Shell 以 openssl req指令生成憑證簽署要求 server.csr 與私有金鑰 server.key。
openssl req -new -newkey rsa:2048 -nodes -keyout server.key -out server.csr這時就要將 server.csr 的內容:
-----BEGIN CERTIFICATE REQUEST-----
...
-----END CERTIFICATE REQUEST-----
回傳給 SSL 憑證的供應商,並依照驗證方式操作,以選擇 DNS 驗證為例,還需要新增 CNAME 記錄來讓供應商驗證我的身份,稍待片刻信箱就會收到 SSL 憑證:
-----BEGIN CERTIFICATE-----
...
-----END CERTIFICATE-----
接著修改 config.yaml 檔的內容,替換 <RANDOM_HEX> 為先前使用 openssl rand -hex 32 指令所生成的金鑰、替換 <your-domain-name> 為網域(子網域)名、替換 <your-server-key> 為 openssl req 指令所生成的 server.key 以及替換
proxy:
  secretToken : "<RANDOM_HEX>"
  https:
    hosts:
      - <your-domain-name>
    type: manual
    manual:
      key: |
        -----BEGIN RSA PRIVATE KEY-----
        <your-server-key>
        -----END RSA PRIVATE KEY-----
      cert: |
        -----BEGIN CERTIFICATE-----
        <your-certificate>
        -----END CERTIFICATE-----
更新 config.yaml 檔之後,再執行一次 helm upgrade。
RELEASE=jhub
NAMESPACE=jhub
helm upgrade --install $RELEASE jupyterhub/jupyterhub \
--namespace $NAMESPACE \
--version=0.9.0-beta.3 \
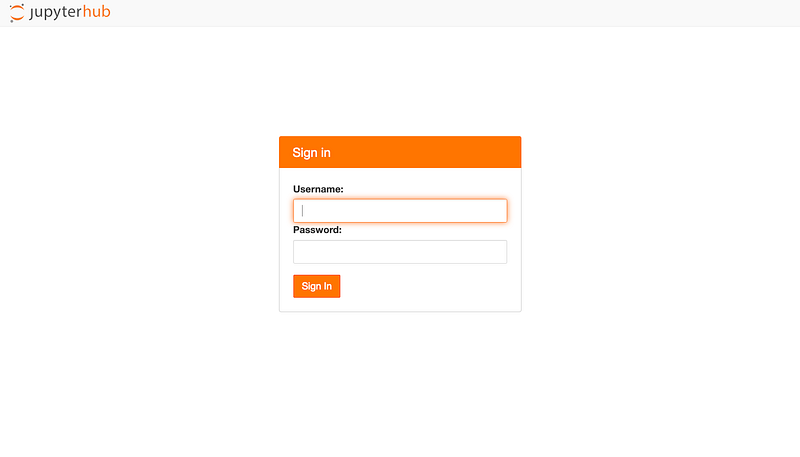
--values config.yaml等候片刻,我們就能夠在瀏覽器的網址列以 https://yourhub.yourdomain.edu 來到 JupyterHub with K8s 的登入頁面,也可以注意到登入頁面的警告訊息已經消失了。
大功告成,恭喜完成設定 HTTPS,我們在 GCP(Google Cloud Platform) 的 Kubernetes Engine(GKE) 上建置了一個 JupyterHub with K8s!
小結
我們在這篇文章中介紹如何在 GCP(Google Cloud Platform) 的 Kubernetes Engine(GKE) 上建置一個可供數百至數千位課堂學員使用的 JupyterHub with Kubernetes,內容包含建置 Kubernetes、設定 Helm、安裝 JupyterHub 與 HTTPS 設定。