
Installing Jupyter Notebook Support in Visual Studio Code
Easily open up .ipynb files by double-clicking on them

If you are a Data Scientist (or working to become one), you would be familiar with Jupyter Notebook. Jupyter Notebook provides a convenient way to combine your Python code (or other languages) together with your Markdown text into a single canvas known as a notebook. The advantage of Jupyter Notebook is that it allows you to selectively run and modify parts of your code easily, without needing to run the program in its entirety. In addition, you can embed formatted text (and figures) into your file, thereby making it easy for others to read and modify your code directly.
However, using Jupyter Notebook requires you to start the built-in Jupyter Notebook server. And you often have to navigate to the directory containing your .ipynb files before starting the server, or else you will have a hard time locating them.
Until now. You can now run Jupyter Notebook in Visual Studio Code (VS Code). In this short article, I will show you how to install Jupyter Notebook support in VS Code so that you can open up a .ipynb file by directly double-clicking on it and editing it in VS Code.
Assumptions
In this article, I am going to assume you already have Python installed on your computer, together with the Jupyter packages. The easiest way to achieve this requirement is to install Anaconda — https://www.anaconda.com/products/individual-d.
Why do you need to use Jupyter Notebook in VS Code when you already have Anaconda installed? Well, doing so allows you to quickly open up a .ipynb file without needing to start the Jupyter Notebook server.
Installing the Jupyter Extension
First, launch your VS Code and type “jupyter notebook” in the extension search box. Select the first result (Jupyter) and click on the Install button displayed in the middle of the screen:
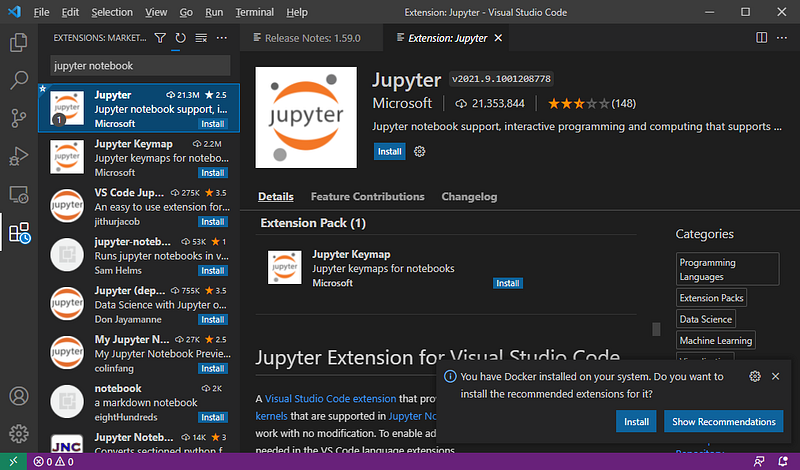
That’s it! Once the installation is done, you already have Jupyter Notebook on your VS Code.
Creating a New Jupyter Notebook File
To create a new Jupyter Notebook file, press Ctrl-Shift-P (Shift-Cmd-P for macOS) to invoke the Command Palette. Type “Jup” and you will see a list of options. Select “Jupyter Notebook: Create New Blank Notebook”:
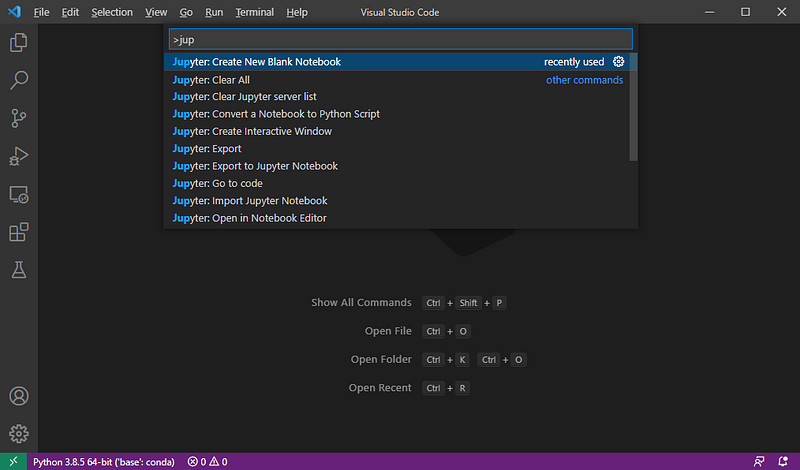
A new blank Jupyter Notebook will be created:
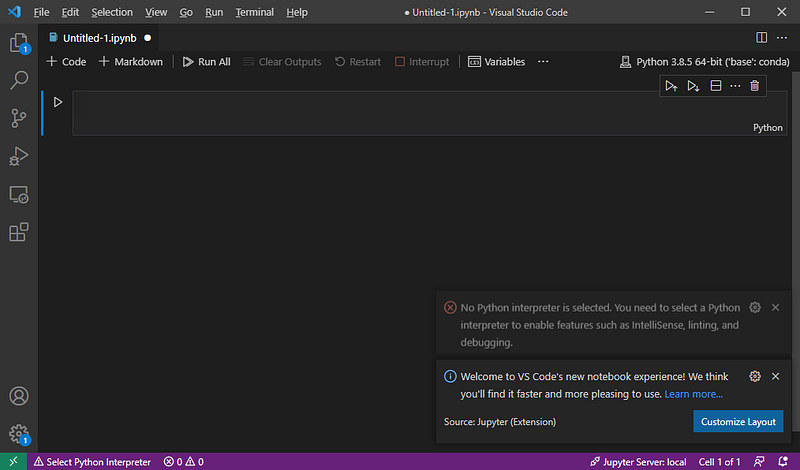
Selecting a Kernel
Before you can run your Notebook, you need to select a kernel by clicking on the button at the top-right corner of the Window. For my machine I will select the Python version that is installed by Anaconda:
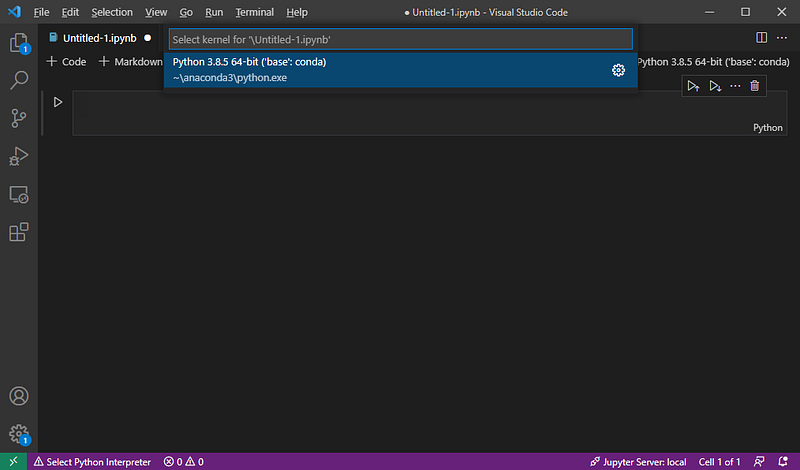
A notebook kernel is a code engine that executes the code contained in a Notebook document. It is what enables you to run your Python program in a Jupyter Notebook.
Once your kernel is selected, you may see a Windows Security Alert dialog. Click Allow access:

Running Your Python Code
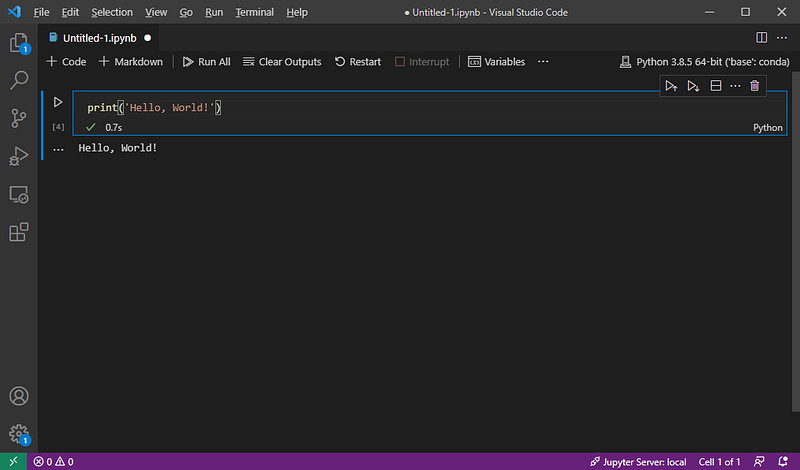
You can now test your Jupyter Notebook by writing some Python statements. Press Ctrl-Enter to run the current cell, or press Shift-Enter to run the current cell and move to the next cell (if the current cell is the last cell in the notebook, a new cell will be created):
Opening an Existing .ipynb File
As mentioned earlier, the advantage of installing Jupyter Notebook support for VS Code is the ability to quickly open up an existing .ipynb file.
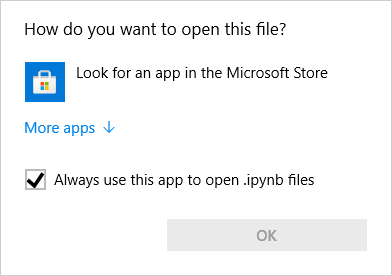
When you double-click an existing .ipynb file in File Explorer, a dialog will appear. Click More apps:
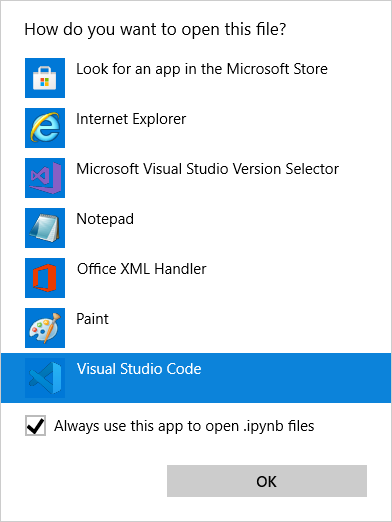
Scroll down the list and select Visual Studio Code and click OK:
Your .ipynb file will now open in Visual Studio Code. Have fun!
Conclusion
Personally, I love the original Jupyter Notebook that runs on my browser. However, there are many occasions where I need to quickly view the content of a .ipynb file. Allowing me to view my .ipynb files in VS Code saves me a lot of time. Give it a try and let me know your experience!


