
Install Windows 11 ARM Virtual Machine on M1 Mac using UTM
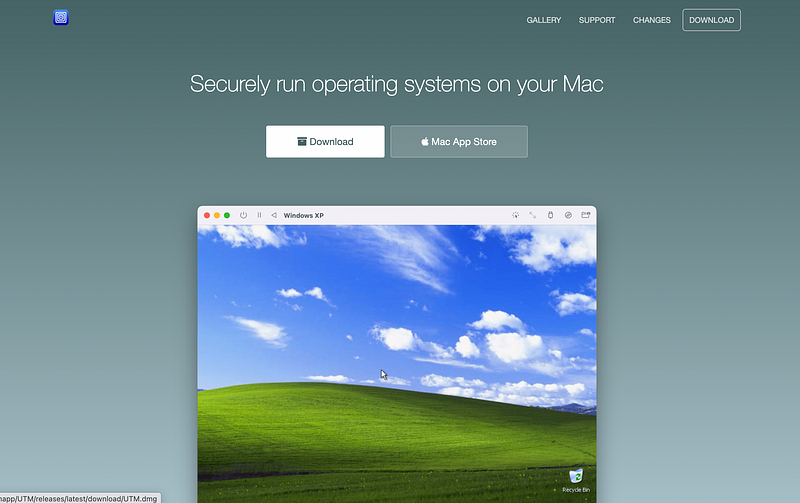
I was having trouble loading VirtualBox on my M1 Mac, so after some googling I found you can’t run VirtualBox on non-Intel chip computers. UTM is a great (and free) alternative for spinning up virtual machines on a Mac with an M1 chip. There are a lot of tutorials out there and they are pretty long (some of them). I really tried to do the bare bones in this tutorial in order to spin up a VM as fast as possible (and it’s still long).
Step 1: Download UTM
Step 2: Download Spice Tools
https://mac.getutm.app/support/
Step 3: Set up VM
Go back to UTM
- Select ‘Create a New Virtual Machine’
- Select ‘Virtualize’
- Choose ‘Windows’ Operating System

Clicking ‘Download Windows 11 for ARM64 Preview VHDX’ will bring you to a Microsoft page: https://www.microsoft.com/en-us/software-download/windowsinsiderpreviewARM64
You need an insider email here, which you may need to sign up for. Follow prompts to get the VHDX file.
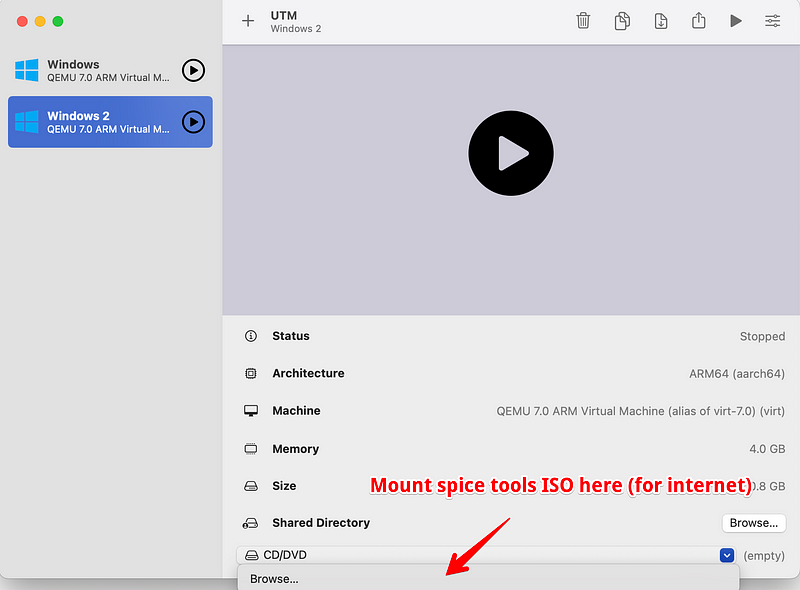
Step 4: Load Windows file and Spice Tools ISO

Go back to UTM and load the downloaded Windows 11 VHDX shown in the screenshot above. Next, follow the wizard to set up your specifications for your VM.
Next, mount the spice tools ISO you downloaded in Step 2 by clicking CD/DVD drive. Otherwise you wont be able to get wifi inside your VM.
Step 5: Start VM
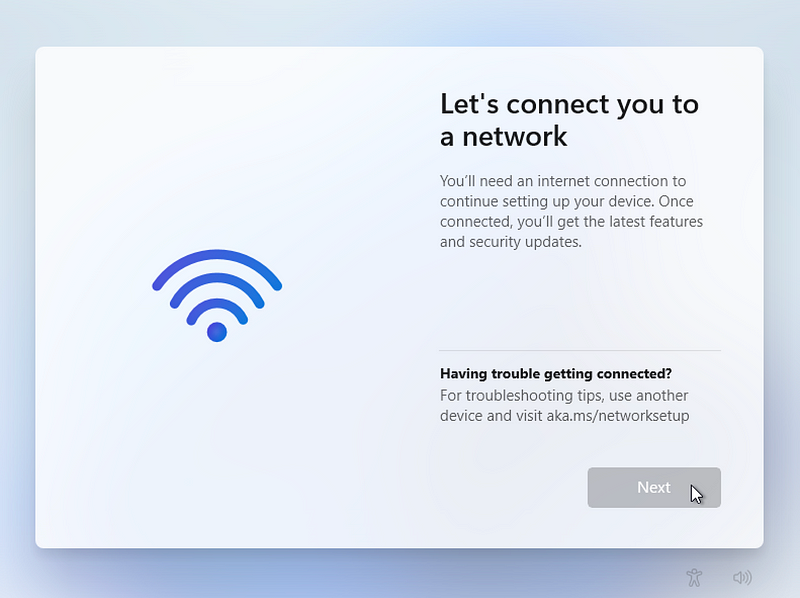
Press the play button. Wait for Windows to load and then go through initial Windows set up. You will eventually get stuck on this screen:
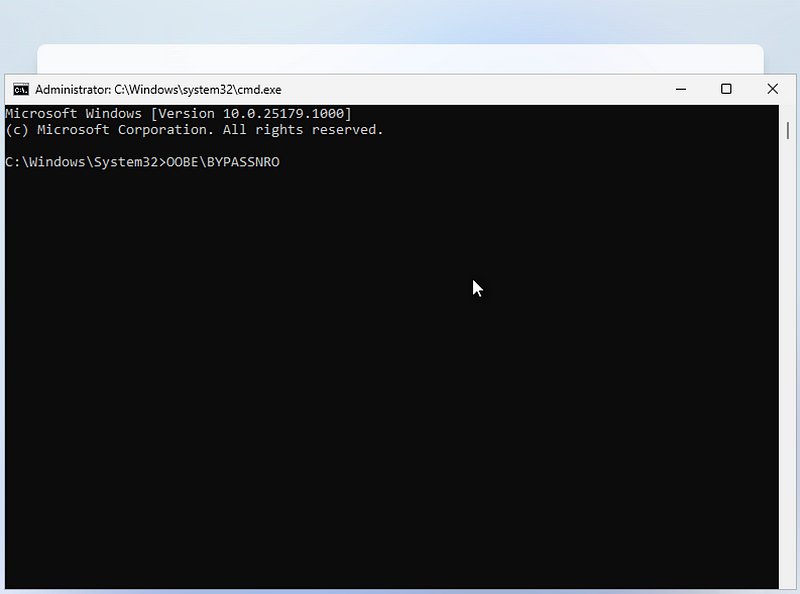
Step 6: Bypass Wifi for Now
At this point, you will need to do shift + fn + F10 which will bring up the console. You may need click the console in order to start typing. Type OOBE\BYPASSNRO (Those are O’s, not zeros, note the backslash direction.) and press Enter.
Windows will then restart and you will have the option to bypass the wifi by clicking ‘I don’t have internet’ when you get to this point:

Next, finish setting up Windows through the prompts and wait for Windows to load.
Step 7: Set up Wifi
Inside the Windows VM, navigate to CD/DVD Drive via the File Explorer:

Double click spice tools and install:

Reboot and you should have Wifi automatically.
Step 8: Add Shared Directory between your computer and VM (optional)
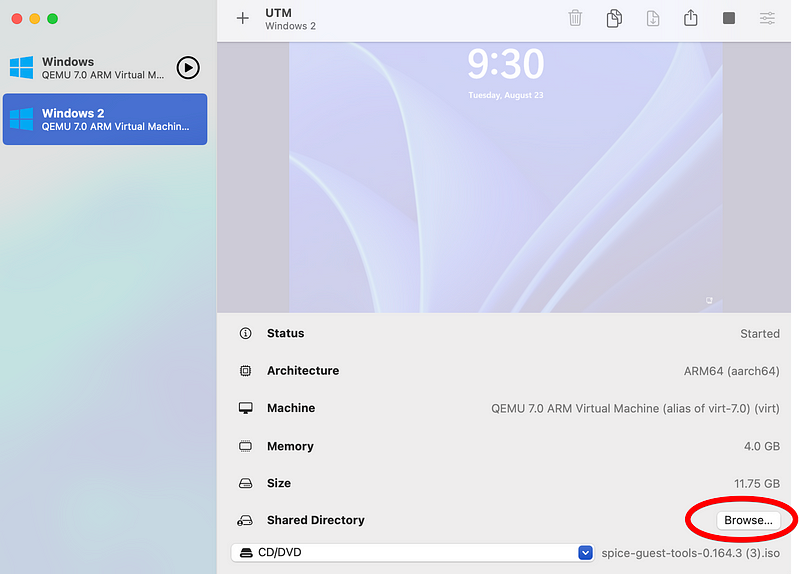
Go back to the UTM screen for your VM and click the Browse button next to Shared Directory (see screenshot above). Whatever file you choose on your home computer will load as a Drive called Network Drive Z: in the Windows VM under This PC.


