Install Python 3 with venv environments within 5 minutes
In this page, we will walk through basic installation to get Python 3 up and running for most of common operating systems.

Microsoft Windows:
To install Python 3 in Windows environment, follow below steps:
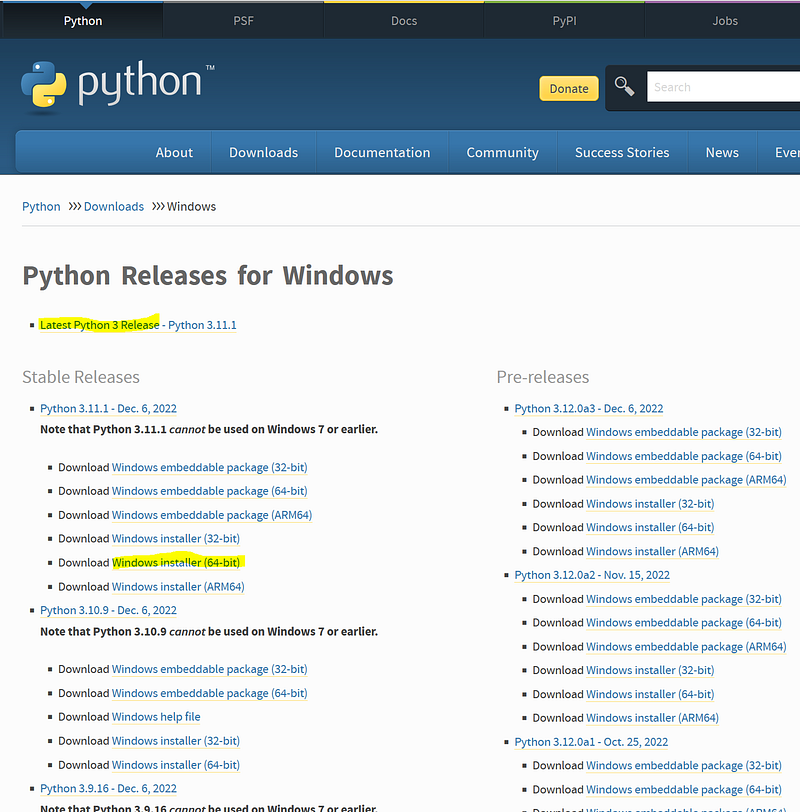
- Download Python installation package from Official Python website. Always select latest stable python release. In our scenario, we picked Python 3.11.1 64-bit Windows installer for our installation.
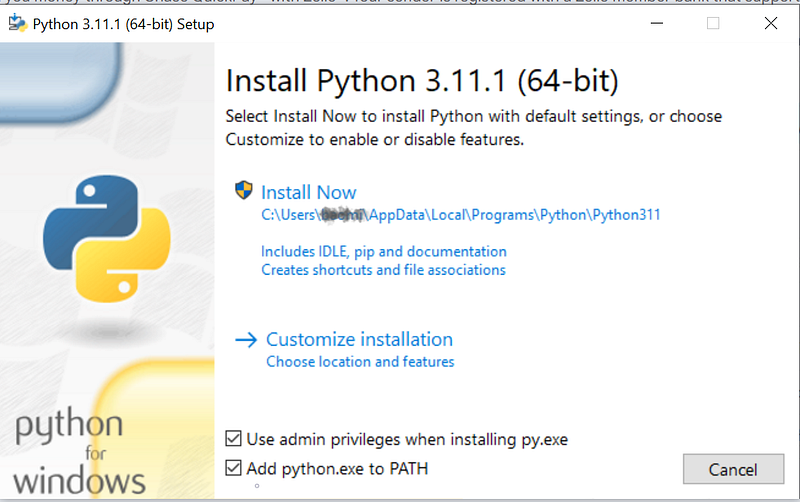
2. Run the installer after downloaded. From the first screen, check “Add python.exe to PATH”, and click on “Customize installation”.
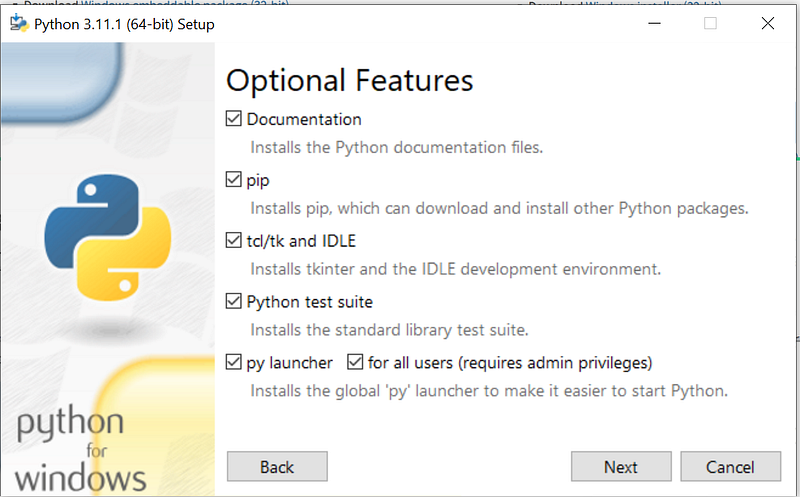
3. Click on “Next” button on “Optional Features”.
4. Make below changes:
- select “Install Python 3.11 for all users”. This action will make “Precompile standard library” selected as well. Keep both.
- Select “Add Python to environment variables”.
- Unselect “Associate files with Python”. In most of situation, we do not want to execute .py scripts by double click.
- Unselect “Create shortcuts for installed applications”. We typically use Python and Python applications in command line (terminal) or inside IDE, not by shortcuts.
After making changes, the “Advanced Options” window will look like below screenshot. Then, click on “Install” button.

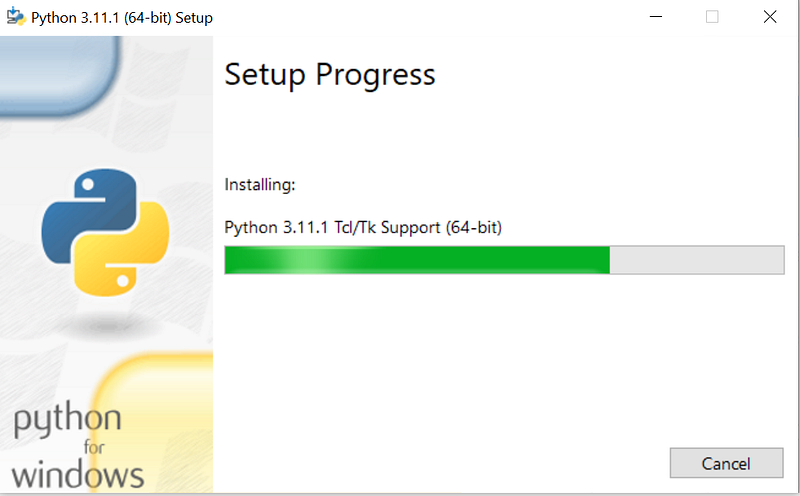
5. Depending on your computer’s speed, the installation process might take a few minutes.
When installation completed, you will see below window.
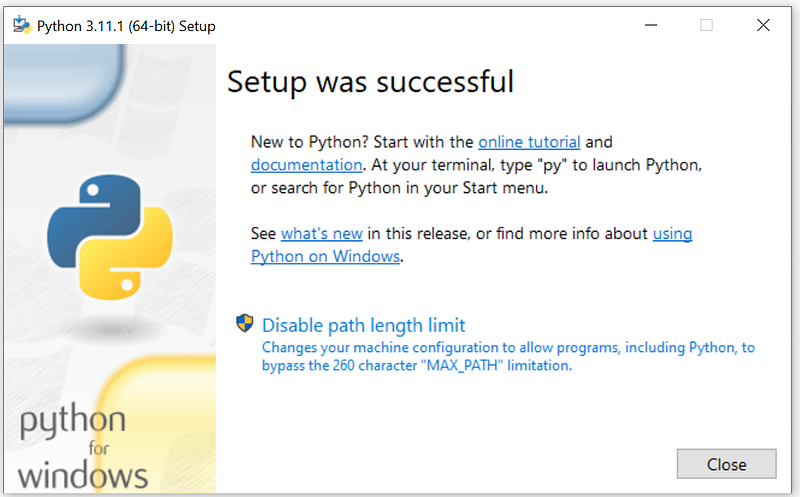
Click on “Disable path length limit” if you haven’t done so before in your computer. It is helpful especially you use the current computer for software development.
Last, click on “Close” button.
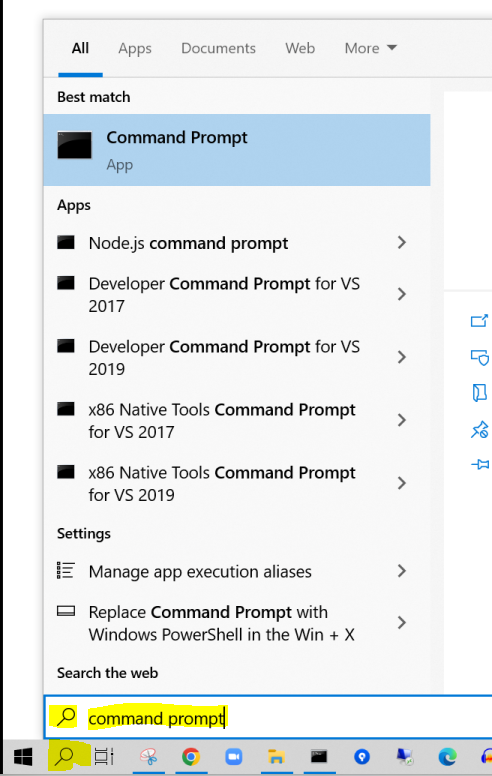
6. Next, let’s verify the installation. Open a DOS window, or search “Command Prompt” like below.
7. Enter below commands to validate Python versions we installed.
C:\Users\user1>python --version
Python 3.11.1

C:\Users\user1>python -V
Python 3.11.1
Next, let’s verify where the Python was installed by typing below command:
C:\Users\user1>where python
C:\Program Files\Python311\python.exe
C:\Users\user1\AppData\Local\Microsoft\WindowsApps\python.exe
Oops! Why we got two responses. Which one is the one we just installed? The answer is the first one, “C:\Program Files\Python311\python.exe”. You could find this from step 4 above, as well as below commands:
C:\Users\user1>"C:\Program Files\Python311\python.exe" -V
Python 3.11.1

C:\Users\user1>"C:\Users\user1\AppData\Local\Microsoft\WindowsApps\python.exe" -V
Python was not found; run without arguments to install from the Microsoft Store, or disable this shortcut from Settings > Manage App Execution Aliases.
Don’t forget the double quotes because the space insight the “Program Files” folder name.
So, what does the second “python.exe” for? It is installed originally when your Windows Operating System being setup at beginning. It is a Microsoft App Store launcher to install Microsoft Python. Since we picks Python Official binary, we could just ignore it.
Linux
Lots of Linux comes with Python versions as part of initial installation. Before installing another Python, use below commands to find out if any python already installed. If so, what are the installed versions.
$ python --version

$ python2 --version

$ python3 --version
In below example, we have Python 3.10.4 installed from operating system, and latest available version for current operating system is 3.10.6.
user1@lubuntu2204a:~$ python3 -V
Python 3.10.4
user1@lubuntu2204a:~$ sudo apt list -a python3
Listing... Done
python3/jammy-updates 3.10.6-1~22.04 amd64 [upgradable from: 3.10.4-0ubuntu2]
python3/jammy,now 3.10.4-0ubuntu2 amd64 [installed,upgradable to: 3.10.6-1~22.04]

python3/jammy-updates 3.10.6-1~22.04 i386
python3/jammy 3.10.4-0ubuntu2 i386

user1@lubuntu2204a:~$
Python venv: Create, Activate, Deactivate, and Delete
For Linux environment, we could check if Python-venv package is installed by using below command:

If not found, we need find which version to install. Since venv package always go with Python version. Let’s run below command:
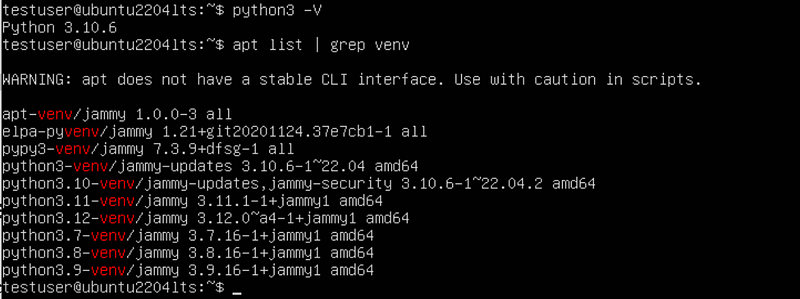
From above, we know our Python version is 3.10.6. And venv package for 3.10 is the most close one for us. Let’s get it installed using below command:

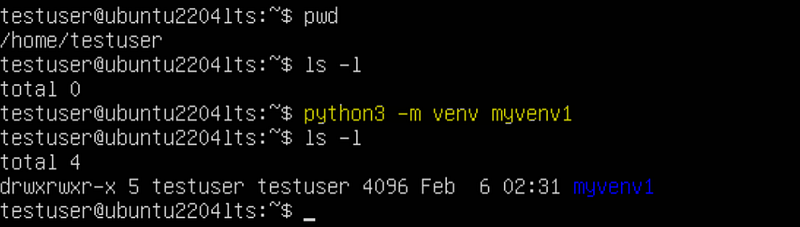
- Create venv environment
To create a new venv environment, use command:
python3 -m venv <my venv environment name or full directory>

or

python -m venv <my venv environment name or full directory>
Below is an example in Linux:
Below is an example in Windows:

2. Activate a venv environment
To activate venv from Linux or MacOS, run below command:

To activate venv from Windows, run below command:

3. Deactivate a venv environment
The deactivate command is same between Linux, MacOS and Windows.

4. Delete a venv environment
To delete a venv environment, simply delete its directory. Make sure you do not delete an activated venv environment.
Conclusion
Now you learned how to install Python 3 and how to create, activate, deactivate, and delete virtual environments. To learn more on picking right Python environments, and modernized Python development, please visit: https://readmedium.com/setup-modernized-python-development-environment-52f17a3d92c.


