
Image Classification using TensorFlow Lite on Raspberry Pi 3
IoT, automation systems or embedded systems with limited hardware resources, TFLite to the rescue!
TensorFlow itself is already a tough package to pick up on my own, let alone build projects using it. Today, I finally am ready to share this as I got this working! I got TensorFlow Lite working on my Raspberry Pi 3 performing image classification for my university project called Reverse Vending Machine (RVM)— with over 90% accuracy!
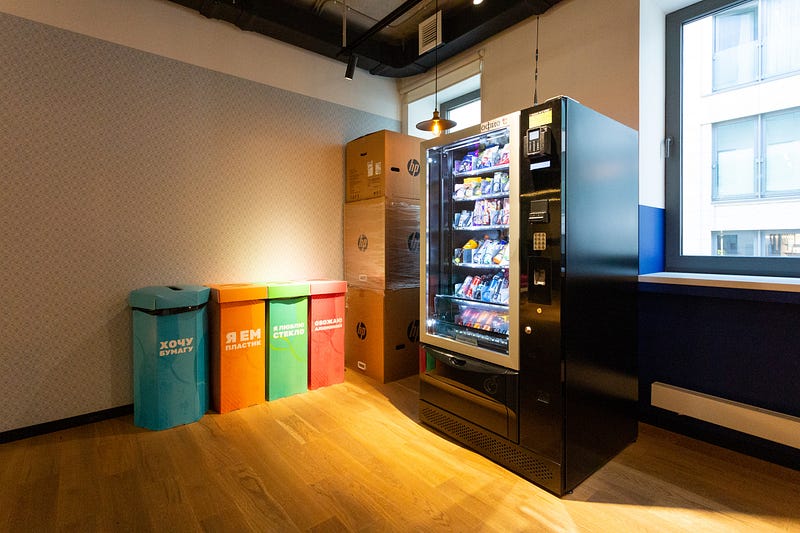
Reverse Vending Machine — Encouraging Recycling in Communities
This is going to be a straightforward tutorial, no bells and whistles because I had previously scrambled to find such a tutorial here on Medium, consider this an updated one for year 2022. This is for those who work with IoT, automation systems or embedded systems with limited hardware resources.
A little background about the project here:
The RVM is supposed to take in recyclable materials from students in our campus and sort them automatically in the machine, which later performs grinding to turn them into smaller pieces. For the sake of this tutorial and also the initial scale of the project, I’ll go about in a smaller scope with only two objects — plastic bottles and aluminum cans. A binary image classification!
We don’t have a high end PC to run the machine! Sponsor?
Now, you might be wondering why we are going with image classification and not object detection. The main reason is that in the RVM, it is more of a passive system where it responds to students’ inputs rather than tracking students’ inputs. Hence, only when students initiate a button or some sort of inputs will the machine capture photos of the materials. Needless to say, the microcontroller we are going for is a Raspberry Pi with limited hardware resources, so saving every single piece of resource we could is extremely crucial.
Here’s what the AI team in the project did:
1. *Collect images of plastic bottles and aluminum cans - we had ~1200 images per class.2. Train the classifier in Google Colab (Free GPU, why not!)3. Convert the TensorFlow model into TensorFlow Lite4. Export the model to the Raspberry Pi and install all necessary packages to run TFLite5. Modify the code slightly to fit our use case6. Make predictions! *Again, the images we collected are not going to be shared here, but just know that there are plenty out there :)
Let’s start from Step 2!
Step 2
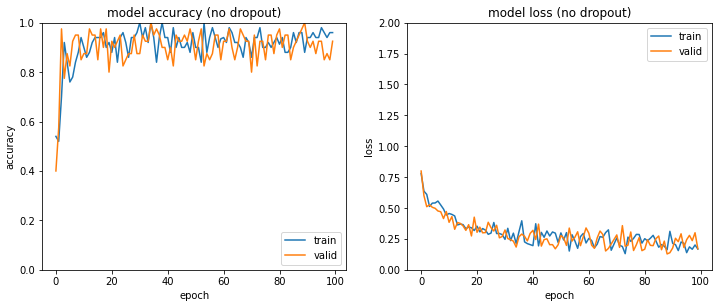
We employed transfer learning in a basic VGG16 model and we trained it for 100 epochs. Bear in mind that this will undergo fine-tuning after we establish a pipeline for catching errors and retraining the model. The offline training pipeline should be triggered automatically when enough errors are accumulated, I’ll have another article updating the process once that is done! But at 100 epochs, it is pretty good at differentiating plastic bottles and aluminum cans! Check out the Colab notebook here for the training process.
This is what the confusion matrix looks like:

Step 3
The trained model can be exported as a typical TensorFlow model in a folder, like this:
# Save the modelmodel.save(“/content/drive/My Drive/Reverse Vending Machine/.../saved_model/my_model”)Step 4
To convert a TensorFlow model to a TensorFlow Lite model, we can follow the example given by TensorFlow itself!
# Convert the model to TFLite modelconverter = tf.lite.TFLiteConverter.from_saved_model(“/content/drive/My Drive/Reverse Vending Machine/.../saved_model/my_model”) # path to the SavedModel directorytflite_model = converter.convert()with open(‘/content/drive/My Drive/Reverse Vending Machine/.../saved_model.tflite’, ‘wb’) as f:f.write(tflite_model)To install the necessary packages in order to use this TFLite model, here’s what we need:
argparse
numpy>=1.20.0 # To ensure compatibility with OpenCV on Raspberry Pi.
opencv-python~=4.5.3.56
tflite-runtime>=2.7.0
tflite-support>=0.3.1
To simplify the installation process, follow this link and run setup.sh to get all the necessary packages.
Step 5
To use TFLite models, we actually only need one class from TFLite called Interpreter from tflite_runtime.interpreter. Check out my GitHub link here for the code modification which is slightly different from the original TensorFlow examples. I modified it to only classify between the two classes ‘plastic bottles’ and ‘aluminum cans’.
Things to note in image_classifier.py:
- I removed the metadata displayer since when exporting the original TensorFlow model to TFLite model, the metadata is not exported together, hence the TFLite model does not have any metadata. You can write your own metadata using the Metadata Writer API here.
- I prepared my own labels since the labels are supposed to be from the metadata. It’s a simple list containing two elements representing our target classes.
- In the set_input_tensor() function, I change the original way of converting the image to a tensor to a method that I’m more familiar with using np.expand_dims().
- In the preprocess() function, feel free to add any of our own image preprocessing pipeline that might give a boost to your model’s predictions.
- Make sure to also change how the output tensor is decoded depending on how your predictions are presented.
Things to note in classify.py:
- Instead of reading every frame from the camera, I opted for taking a still image and making predictions based on that image.
Step 6
If you are able to follow until this step, congratulations! You can already run TFLite models on Raspberry Pi 3, classifying between plastic bottles and aluminum cans! I’m going to have you tell me which line in the classify.py script makes the prediction :) Leave a comment down below.

Alternative Method
Aside from TensorFlow Lite, we could also use a web application called Lobe.ai that simplifies most of the processes for us, even the training process is cut down to the bare-bones of the original steps! Lobe.ai could even export the trained model in many different formats such as ONNX, TensorFlow, TensorFlow Lite and TensorFlow.js, and with minimal installation, we got it up and running in our Raspberry Pi with comparable performance. Here’s a quick tutorial showing how to get it working on your Raspberry Pi:
In conclusion, I showed how we can actually run a full-fledged computer vision task on an embedded system like a Raspberry Pi 3. From data collection, data preprocessing until model building and model exporting to running inferences, I am glad to put this article out for you! Be sure to check out the references below if you are still unsure, or just leave a comment, I’ll get in touch with you :)
References
TensorFlow Lite Examples on Raspberry Pi
TensorFlow Lite for Python
Metadata Writer API