
I Performed Daily Yoga Asanas for 365 Days — The Results Blew Me Away
A comprehensive overview of my routine, lessons learned, and best practices
I knew something was wrong when I heard a pop.
It was June 2022. I was dancing in my living room, celebrating I’d finished writing an article, when scream-inducing pain overcame my back.
It extended from the upper right side of my back to the base of my skull. And whenever I turned my head from one side to the other, the pain was absolute. Agonizing.
Endless.
Or at least it seemed endless to me. I’d never had such intense back pain that lasted weeks.
Then again, none of the 540 million people worldwide who suffer from back pain knew anything similar until theirs started. No one is prepared, even if 8 in 10 people (at least in America) will experience back pain in their lifetime.
Fortunately, my pain subsided after weeks of home remedies — asking my husband for a back rub, pressing a hot towel against the affected region, and taking ibuprofen.
I thought that was it.
But then it came back in November 2022, more vicious than ever.
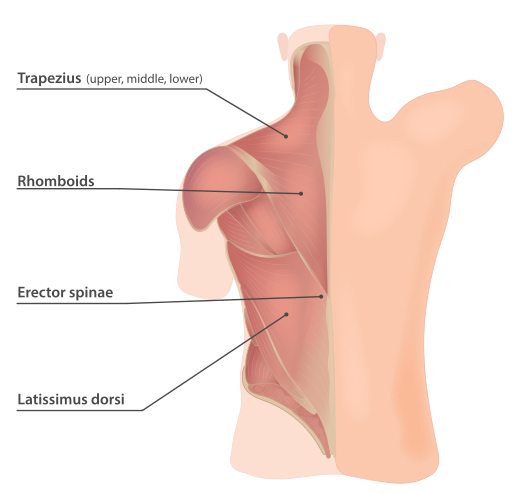
Desperate, I went to a physiotherapist, who examined my back and unveiled the pain’s origin: the rhomboid muscles.
One of the most painful massages I’ve ever received followed. Then, the physiotherapist took me to a small fitness room and gave me the key to my recovery.
Besides addressing stress and posture (key if you have back pain), my physio recommended three stretches to relieve my rhomboids: cat-cow, warrior II modified, and a seated spinal twist.
These were exercises I’d learned while doing a three-month yoga course a few years back, so I thought: Why don’t I try a morning routine with many yoga asanas, including these three?
This may seem overkill; why do more than needed?
But doing these exercises with the physiotherapist reminded me of how much I missed the connected feeling I’d experienced during the yoga course. Not to mention the flexibility gains I’d reaped that had long since vanished.
Then and there, I decided that 2023 would be the year of morning yoga poses (also of quitting social media, which I discussed here). I wanted to keep my back pain in check, improve my flexibility, and experience the other benefits of yoga.
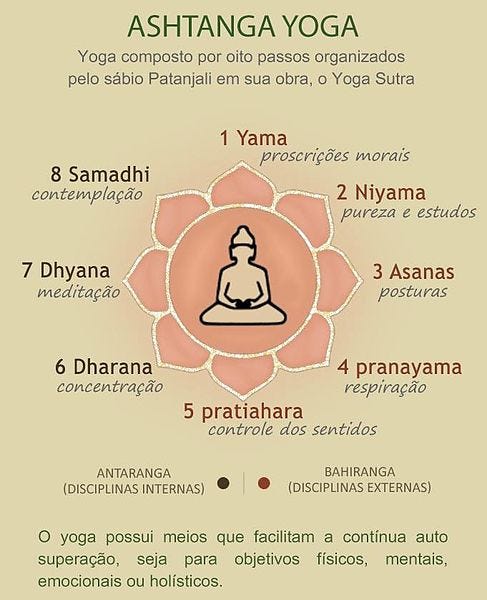
However, please note that I call my morning routine yoga-based because it consists of many stretching exercises inspired by yoga asanas, but this is just one small part of yoga.
Fast forward to today, it’s been more than 365 days since I started my morning practice, one I’ll share here, covering:
- The routine itself, including why I do each exercise and the variations I’ve devised for days when I’m super busy or just not feeling it.
- The best practices I’ve learned through this journey (and that’ll likely improve yours).
- The results.
I hope that by sharing my journey, you’ll be inspired to create a routine — based on your needs and available time — and reap the amazing benefits of gifting your body a moment of love and joy.
Disclaimer: I’m not a yoga expert or a physiotherapist. I’m just sharing my experience to inspire you to seek ways to keep your back pain in check. However, please remember that exercise — whether weight-lifting or yoga — is only one lever that can aid in your recovery. Seek professional help to get more personalized attention, especially if your pain is the result of an injury or an underlying medical condition.
My Magic Formula
My routine evolved as I learned more about what my body needed and what felt good.
Like with any recipe, I tried different ingredients and quantities until I found my magic formula, which consisted of five blocks:
Block #1: Hello Sun!
“Sun salutations are all you need to improve your health,” my yoga teacher said at the start of my three-month course.
He was trying to motivate the students — which he did — but it turns out there’s truth in his words.
Regularly doing sun salutations can help improve our cardiovascular health, energy levels, and strength. And they’re the perfect way to ease into a morning yoga practice when our limbs feel stiff.
That’s why I always do at least three sun salutations to begin my routine (if I have more time, I might do five or even more).
They warm my muscles and help me get into the zone. Inhaling and exhaling at the opportune times allows me to release distracting thoughts and focus on my movements.
Here’s how to do it:
- Prayer pose: Stand with your feet slightly apart, press your hands together, and bring them to your chest. Inhale and exhale.
- Standing backward bend: Inhale deeply as you raise your hands above your head. Bend your body backward and suck in your stomach. Hold your breath for 10–15 seconds.
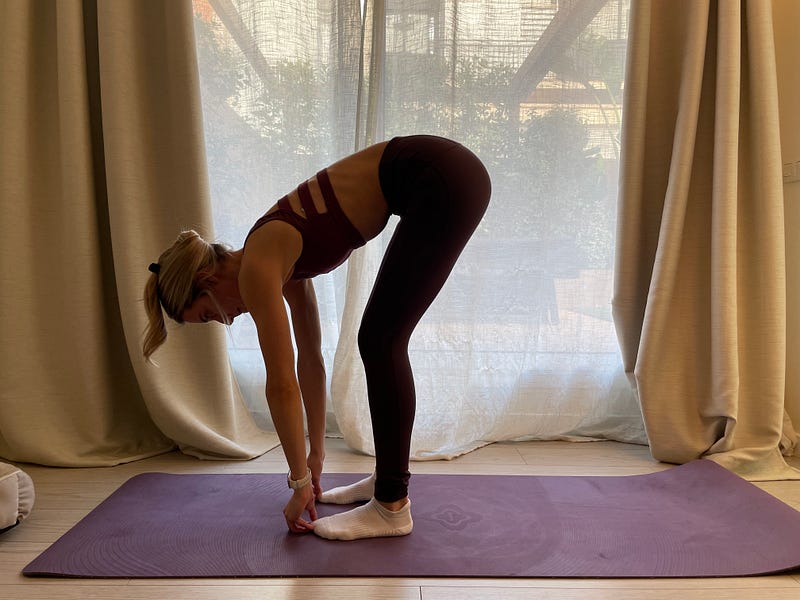
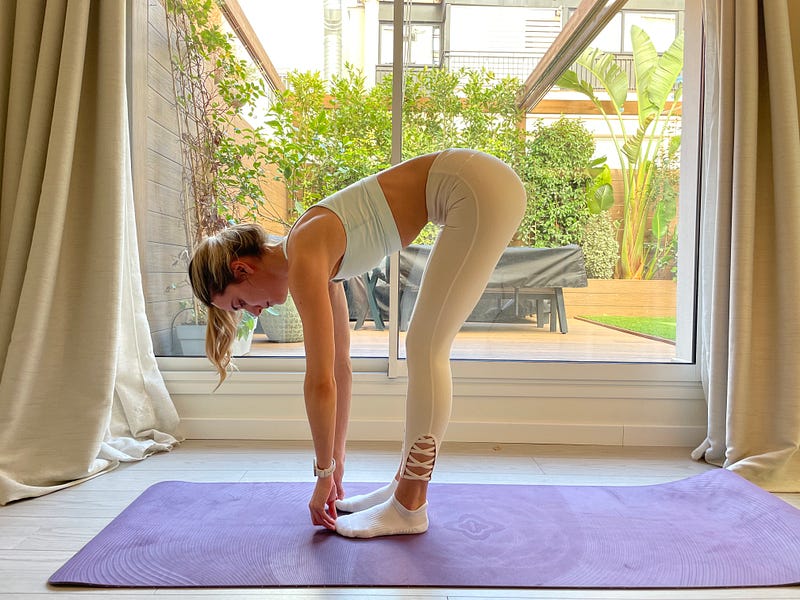
- Standing forward bend: Exhale and bend forward, extending your spine and keeping your knees straight. Touch your toes or place your palms on the floor.
- Equestrian pose: Inhale as you lift your left leg back and bend your right knee, keeping your hands on the floor. Your left knee and toes should be touching the floor, and your right leg should be between your arms. To finish, exhale and look toward the sun.
- Plank: Inhale and move your right leg back while raising your left knee to parallel the right, keeping your toes on the ground. Your body should form a plank parallel to the floor, with straight arms. Exhale.
- Eight-point salutation: Inhale and lower your knees to the ground while bending the elbows. Exhale and press your chest and chin against the floor. Your abs should be pulled in to avoid contact with the ground.
- Cobra pose: Inhale and raise your upper body, starting with the spine, before straightening your arms. Your feet should be flat on the floor.
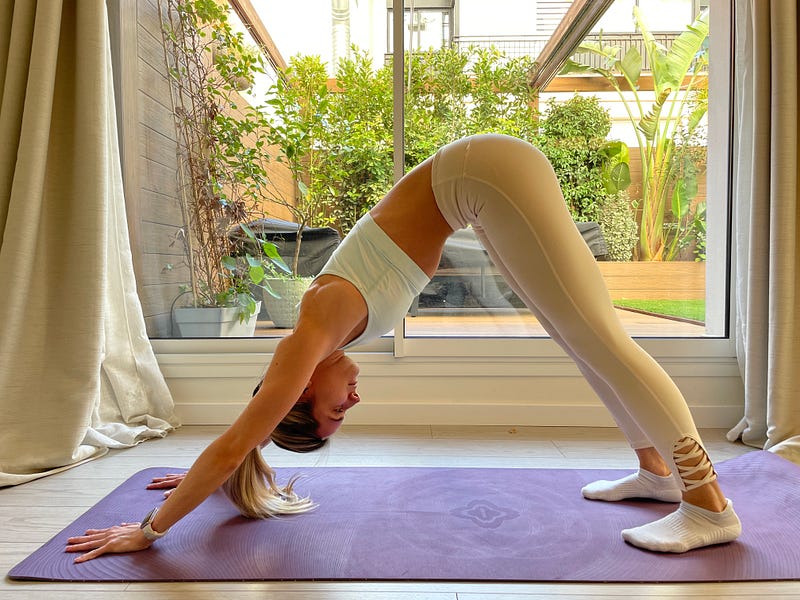
- Downward dog: Exhale and raise your body from the hips. Move your feet to create an inverse V, your knees and back straight, your hips at the highest point.
- Equestrian pose 2: Inhale and return to the equestrian pose but with the opposite leg. In other words, your left knee is the one that should be between your arms.
- Standing forward bend 2: Exhale and bring the right leg forward. Mirror pose #3.
- Standing backward bend 2: Inhale and mirror pose #2.
- Prayer pose 2: Exhale and come forward, straightening the spine. Bring your arms to your chest like in pose #1.
Block #2: Embracing the warrior within
After the sun salutations, I practice three warrior poses and the extended triangle pose on each leg. These help strengthen and stretch our entire musculature.
My routine usually looks like this (based on the yoga course I did in the past):
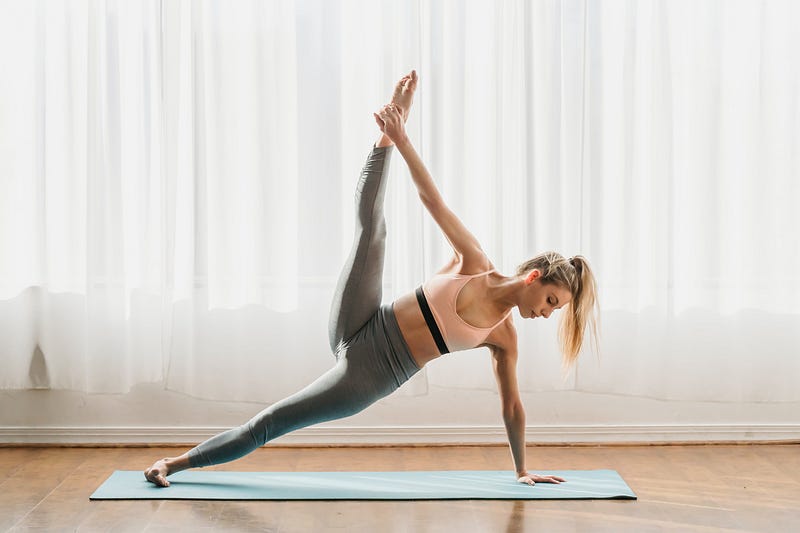
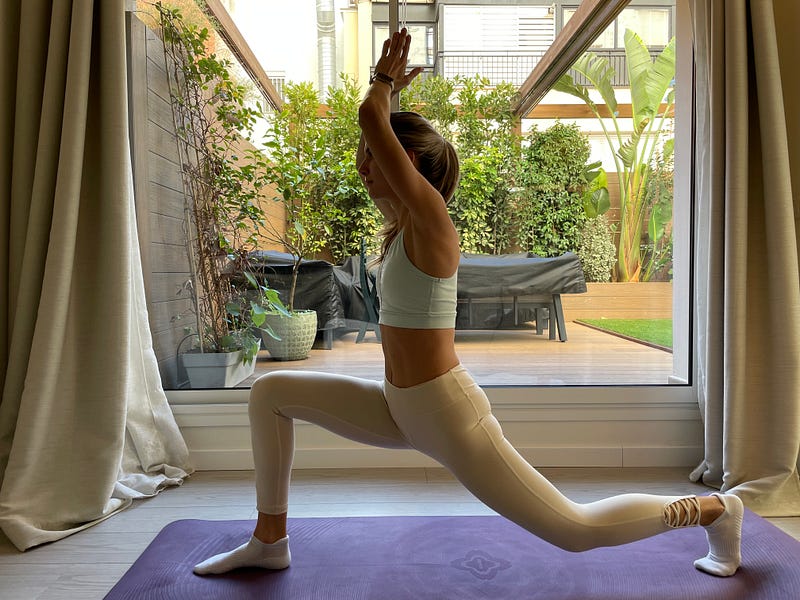
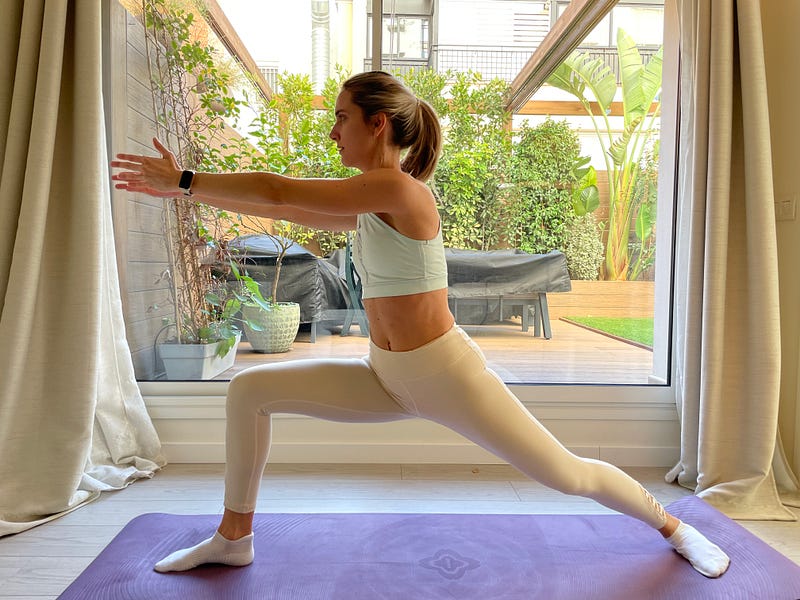
- Warrior I (pictured above): I bend the front knee, turn the hips forward, and raise my arms.
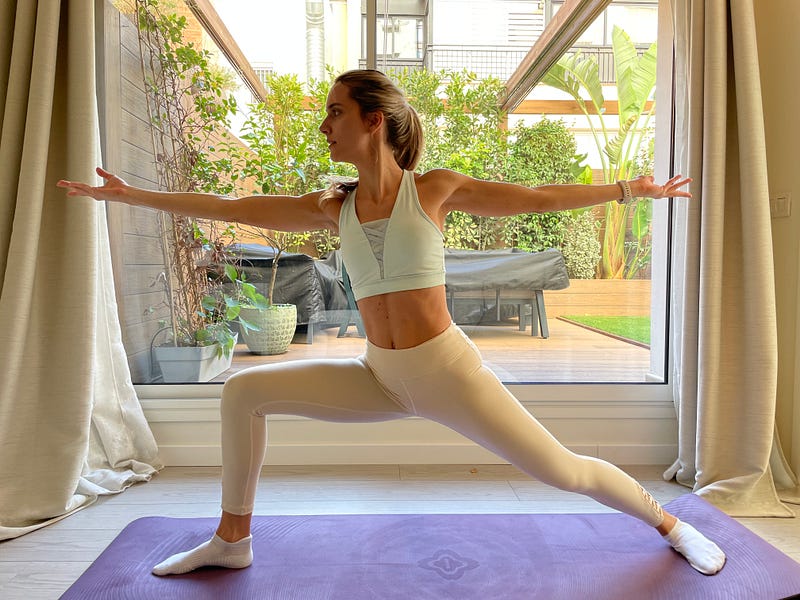
- Warrior II modified (pictured below): First, I keep the front knee bent but turn the hips to the side and keep my arms parallel. Then, I slowly bring my arms together, giving a delicious stretch to my rhomboid. However, if you have no upper back pain, feel free to do Warrior II without the modification.
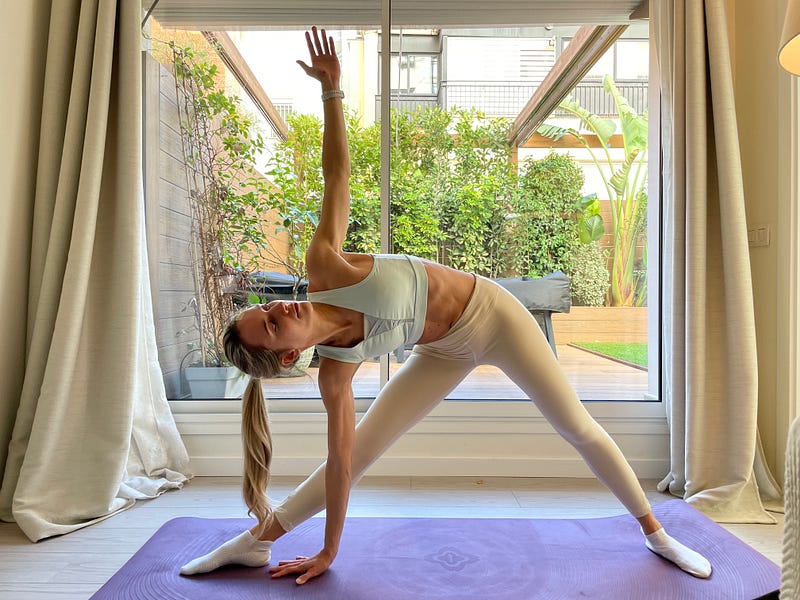
- Extended triangle pose (pictured above): Keeping my legs open, I stretch my front leg and bring my front arm to the floor and the other to the ceiling. Note: You can also bring the front hand to your front leg or place it atop a yoga block.
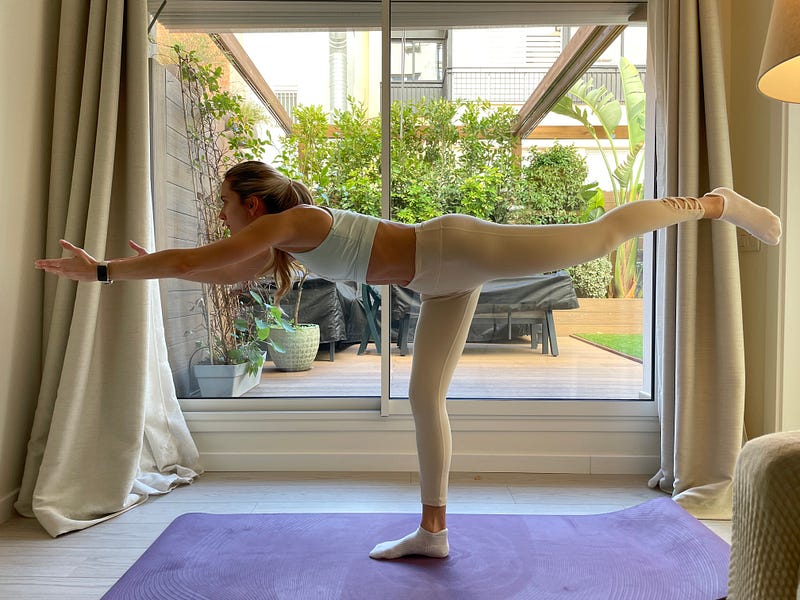
- Warrior III (pictured above): Balancing on one foot, the standing leg is straight, and the opposite leg is lifted with the arms reaching forward.
This warrior “block,” however, is optional.
I only do it on days I have time. Otherwise, I’ll go from the sun salutations to block #3, and maybe I’ll do Warrior II modified if I notice my rhomboids are beginning to struggle.
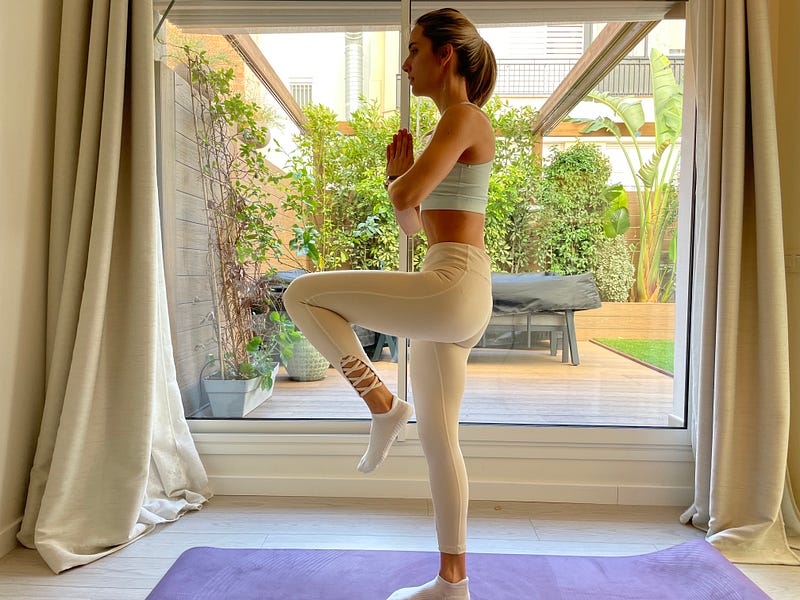
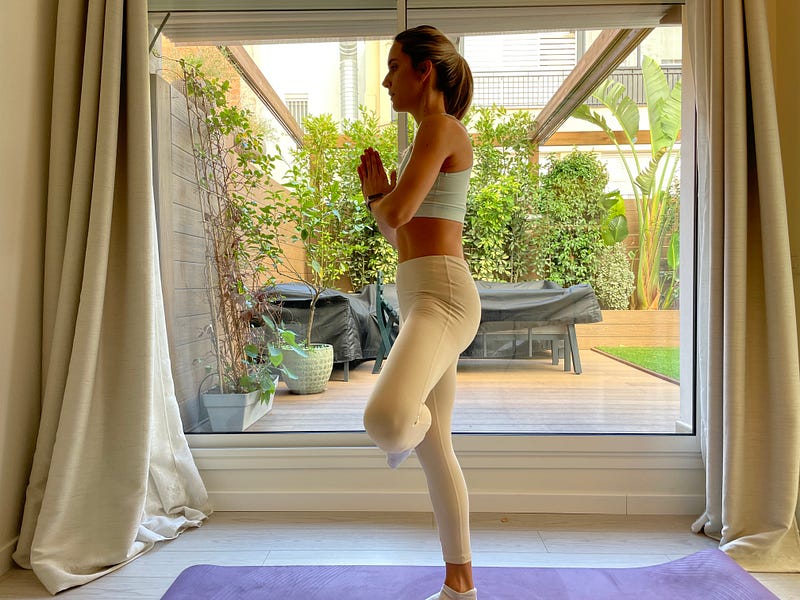
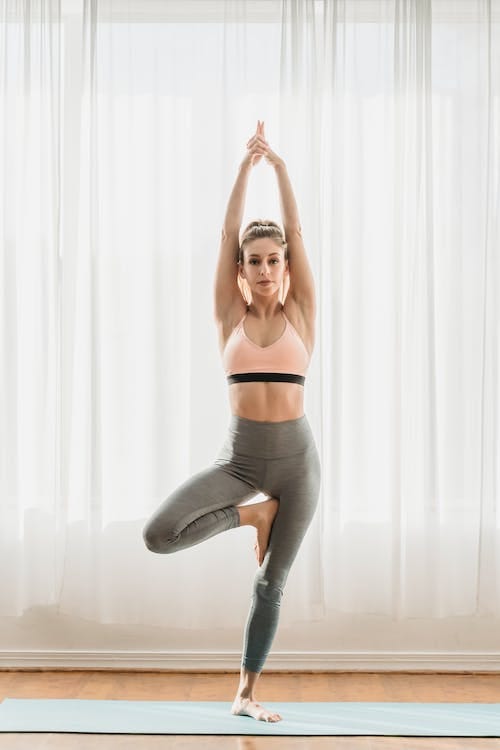
On the days I have more time, though, I usually spend 15 to 30 seconds on each pose (1 to 2 minutes per leg), and I’ll even add the tree pose for another 15 to 30 seconds to train my core and balance, as this can improve memory and cognition.
To do this, I bring my back leg forward after Warrior III and my hands to my chest, keeping my balance on the same leg I was using. Then, I twist the raised leg to the side, pressing the foot against my thigh and opening my hips.
Embracing the warrior within can prepare your body to tackle the day.
Block #3: The essentials
This is the most important block.
It consists of the stretches I do every day, even before going to bed because I’ve had no time throughout the day. I’ll do three sun salutations and then the five in this block.
On the days I have more time, though, this block actually comes after the warrior poses and block #4, as I consider this the “cooldown” of my morning yoga practice.
Once I’ve finished the more “intense” poses, I usually do another sun salutation and then start with the essentials, which include:
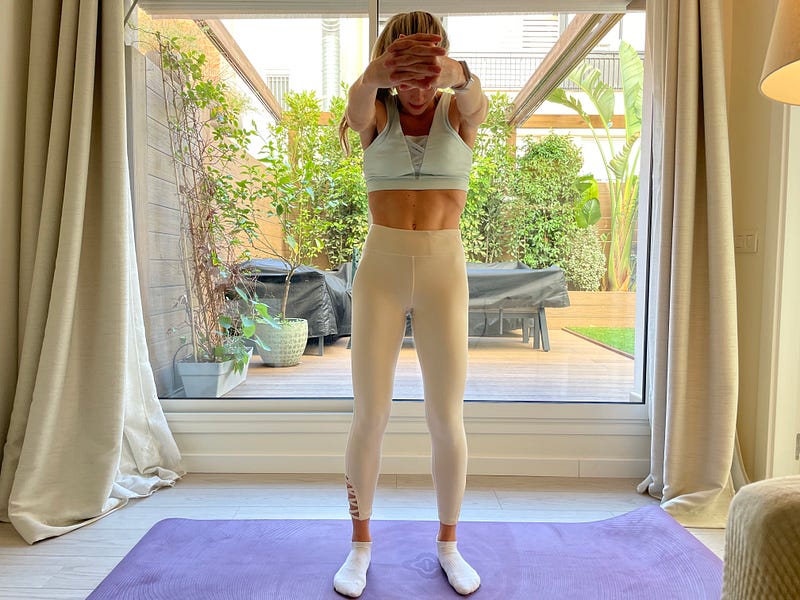
- Upper back stretch: Standing up, interweave your fingers, and bring your arms forward so your back is fully arched.
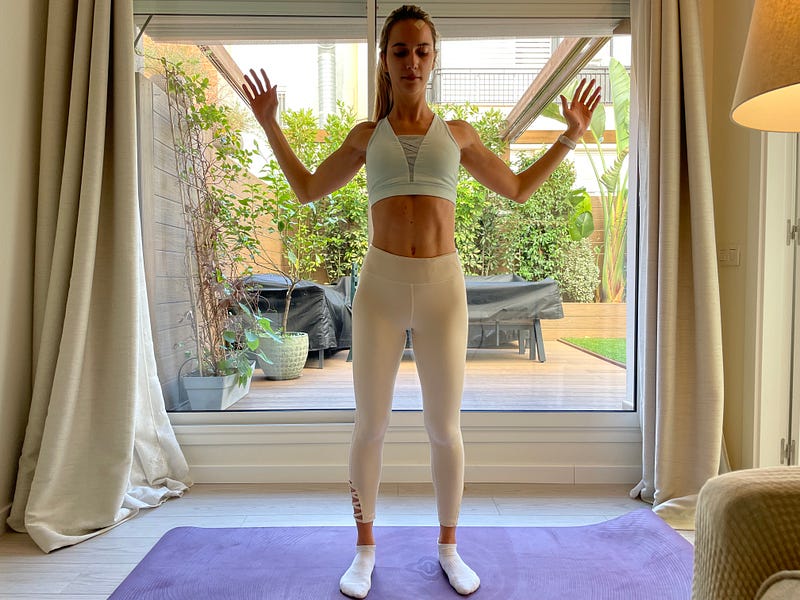
- Chest stretch: Open your hands and bring them to the sides, creating a W and opening your chest.
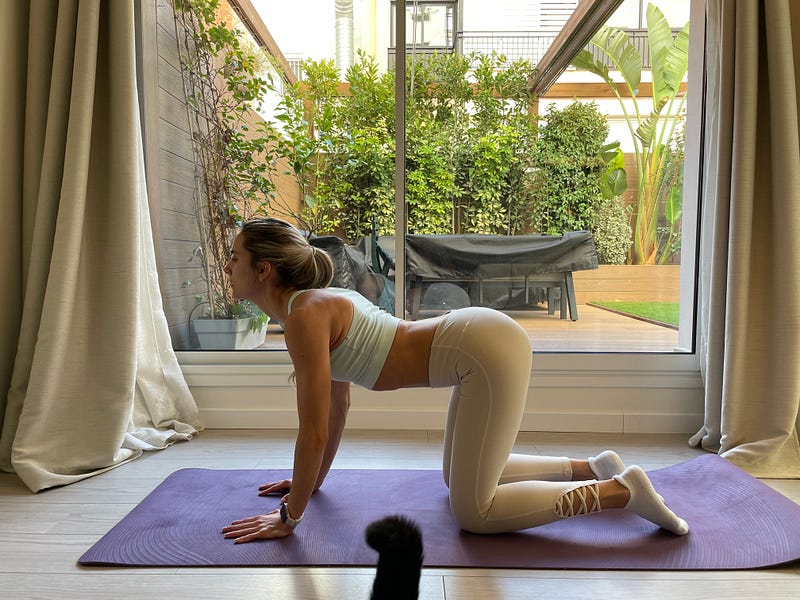
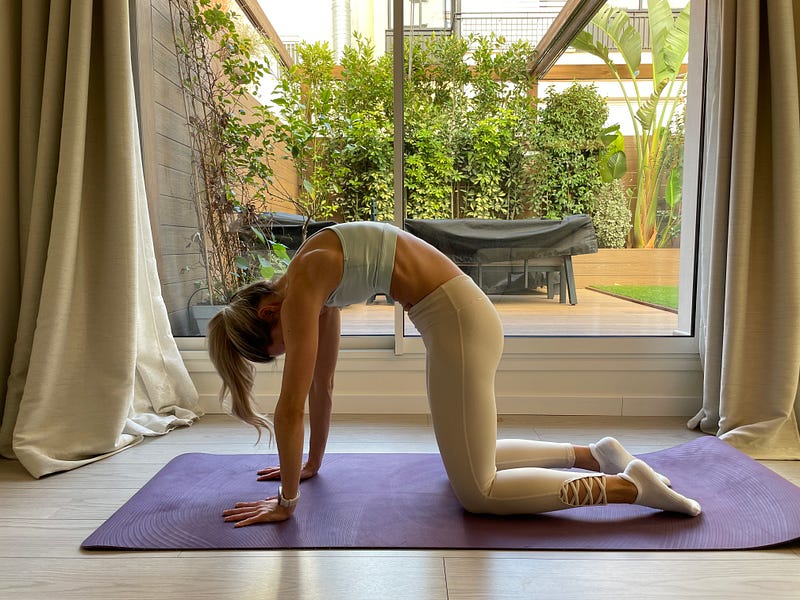
- Cat-cow pose: Get on all fours, with your wrists under your shoulders and your knees under your hips. Inhale as you look up and let your stomach drop toward the mat. Exhale as you tuck your chin into your chest, draw your navel toward your spine, and arch your back toward the ceiling.
Note: Repeat as many times as you want. I usually do between 5 and 10, depending on how much time I have or whether I feel that my rhomboids need extra love.
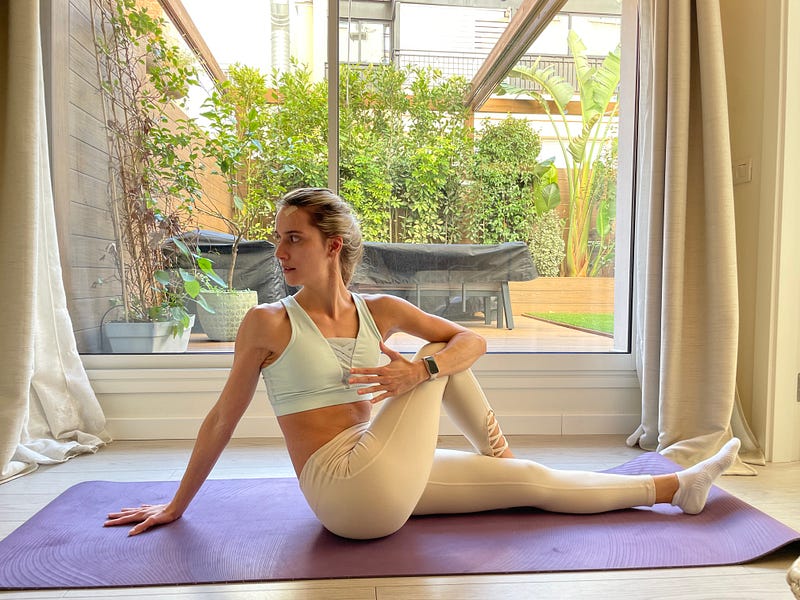
- Seated spinal twist: Sit on the floor with your legs straight and your arms behind your back, with your fingers facing away from you. Then, bring your left leg over the other so your left foot is outside your right knee. Inhale and bring your right arm around your left knee. Turn your chest, head, and eyes to the left. Breathe and hold this pose for 30 seconds to a minute. Then repeat on the other side.
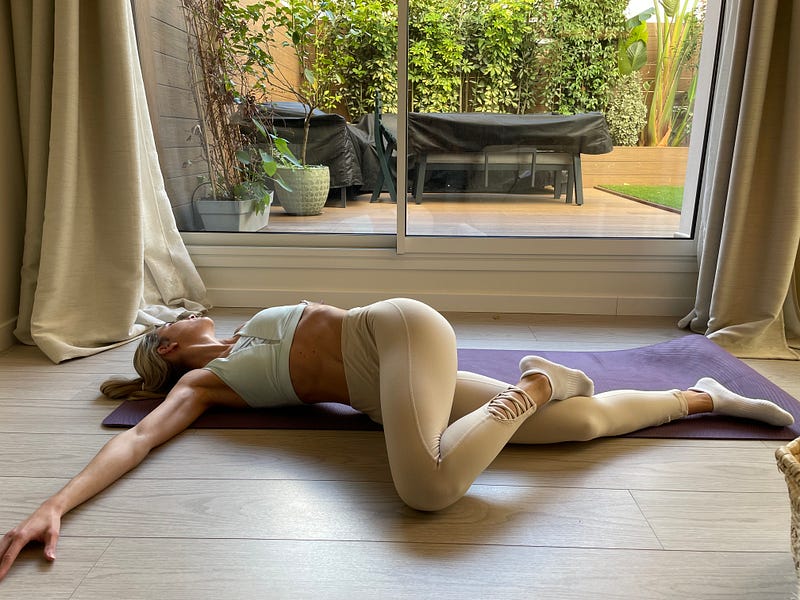
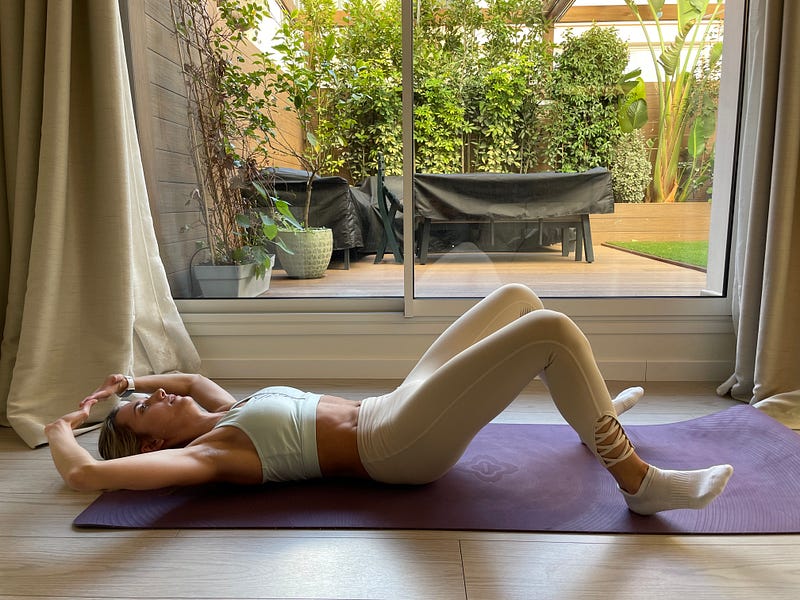
- Supine spinal twist with one leg: Lying on your back, bring your arms to the sides with the palms facing down in a T position. Bend the right knee and place the right foot on the left knee. Then, drop the right knee over to the left side of your body, twisting the spine. Look at the right fingertips and breathe for 30 seconds to a minute.
Note: I added this one because it offers immense relief to my lower back, especially useful after doing squats or deadlifts.
This block is the meat of the entire routine.
Whenever I feel my rhomboid pain wants to return or that my lower back is aching, I devote more time to these five stretches — making sure my movements are slow and controlled — and the relief is immediate.
Block #4: The cherries on top
This block consists of all the poses I’ve added throughout the year. They include:
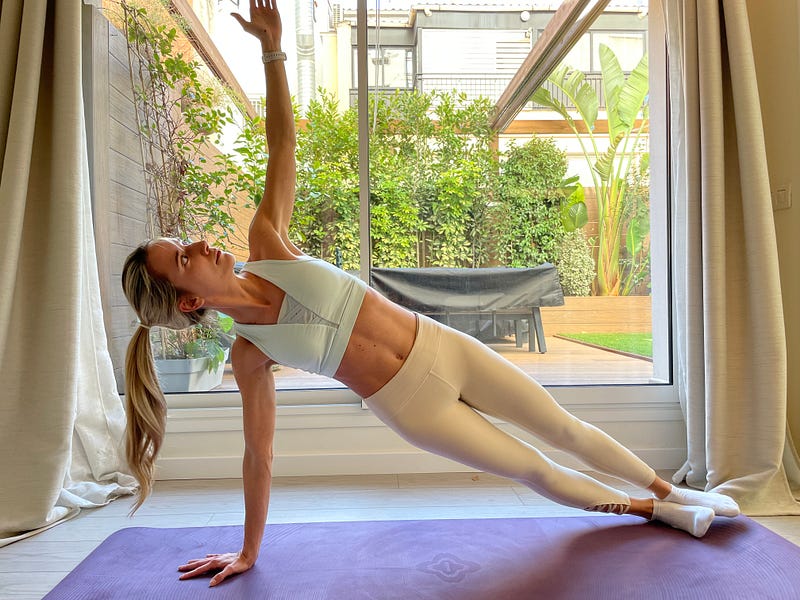
- Side plank: From a plank pose, roll onto your left side and stack your right foot on top of your left one. Reach your right arm straight toward the ceiling and slowly turn your head to look at your right hand. Your body should create a long line from your heels to your head.
Note: I’ve incorporated this pose to strengthen my core, especially the obliques.
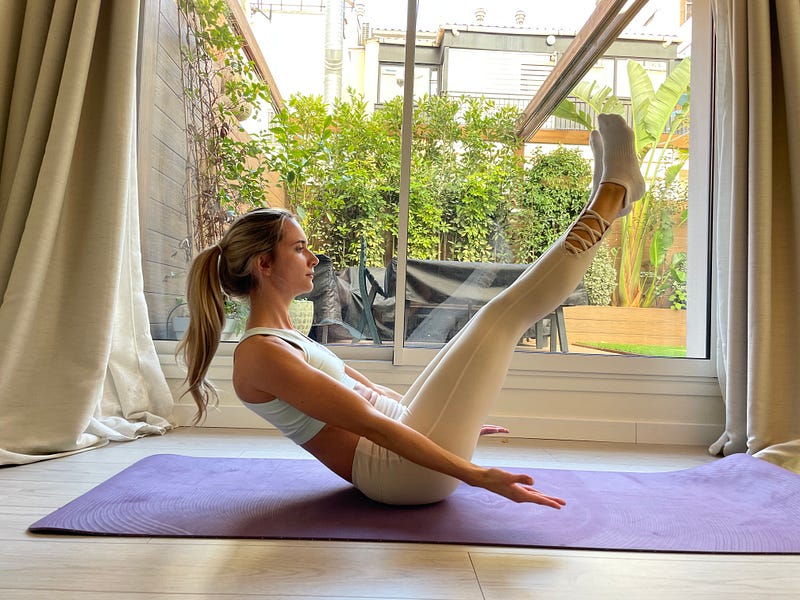
- Boat pose: Flip over and sit with your knees bent. Place your hands underneath your knees and tip back as you hug your abs toward your spine. Then, stretch your arms forward and your knees (if you can).
Note: I’ve incorporated this pose also to strengthen my core. Plus, I often did it during my yoga course, and I really like it.
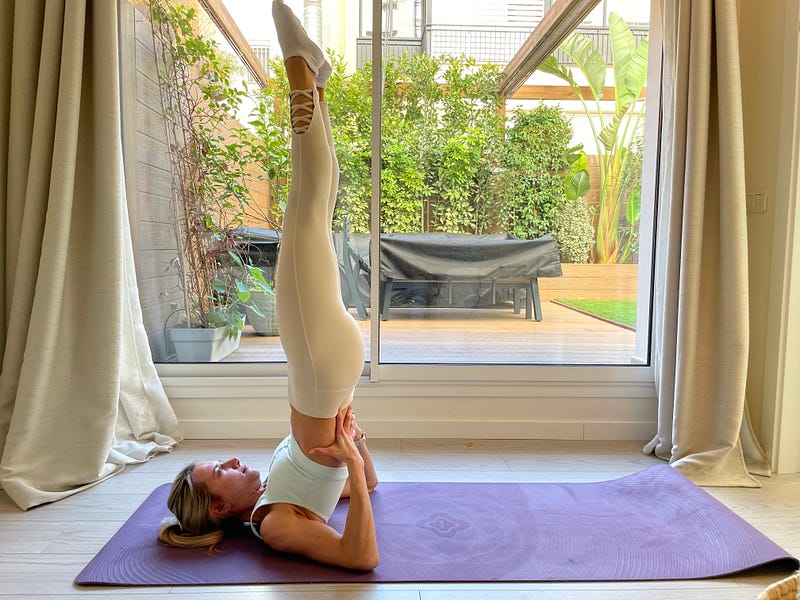
- Shoulder stand: Lie face up on the mat, place your arms at your sides, and bring your knees in toward your chest as you inhale. As you exhale, straighten your legs and send them toward the sky. Place your hands on your lower back to support your posture.
Note: I’ve included this pose because it’s the one inversion I can do well. However, you can pick any inversion (headstand or handstand). They’re great for strengthening your upper body and improving your circulation.
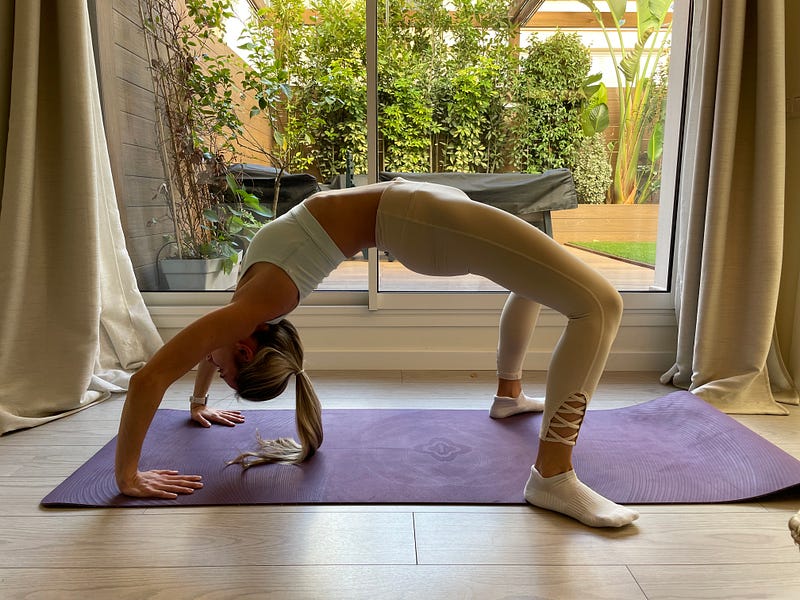
- Wheel Pose: Lie face up with knees bent and feet flat on the floor. As you inhale, bring your hands to the floor, framing your ears. As you exhale, lift your hips and chest off the floor.
Note: I’ve incorporated this pose because it strengthens our upper body and hamstrings and because it used to be something I could do as a child but couldn’t do it anymore. Now I’m proud to say I’ve regained this ability (yay!)
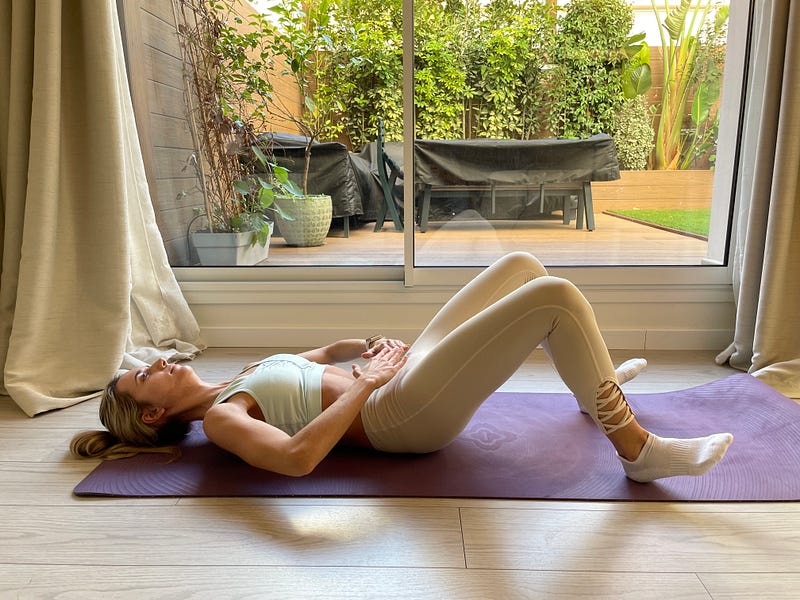
- Three-step hypopressives: Lie face up on the mat, legs bent, feet pointed upward. Your hands should be above your hips, elbows raised (your entire body should be tense). Once in position, inhale, release the air completely, and then suck the abdominal muscles inwards towards the spine. Keep this contraction for 10 to 20 seconds, breathe normally, and repeat this 2 to 3 times with your hands over your hips, then over your chest, and lastly over your head (6 to 9 repetitions total).
Note: I’m considering becoming a mother next year, so I want to prepare my pelvic floor. However, even if I weren’t, I’d still incorporate this exercise, as having a healthy and strong pelvic floor is essential as we age.
Though I love this block, I only do it when I have time.
If I don’t, I’ll either shorten the time I spend on each pose or cut this block altogether (like block #2) and just focus on sun salutations and the essentials.
However, I do try to find the time, especially as I’ve started noticing the benefits of strengthening my core and pelvic floor (no more sneezing and peeing a bit #win).
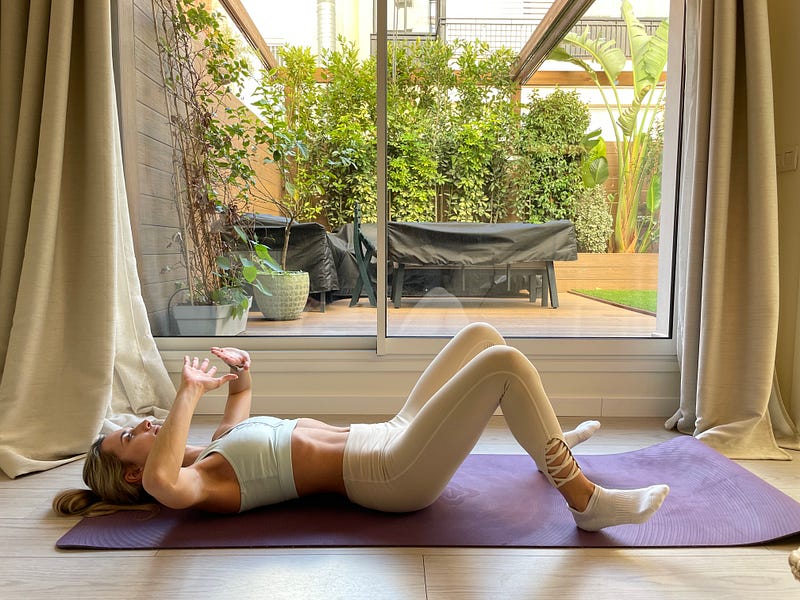
Block #5: The reward
Block #5 is my favorite.
After moving and stretching my body — and especially my back — I get to lie down on the mat, staring out my window and at the blue sky. Morning light seeps in as I bring my hands to my belly and inhale in a count of three, hold for 6, and exhale in 7.
I do this 3 to 10 times, and this little treat always gives me peace and joy at the start of my day.
I love this because it seems like we always have to wait until the end of the day to enjoy ourselves, but this little moment is already so rewarding. Moreover, it’s helped me ease into meditation.
Though I still struggle, this breathing exercise has helped me connect with my thoughts and surroundings. It has allowed me to just be.
That’s why this block is non-negotiable. On the days I have little time, I’ll do three sun salutations, the essential poses, and this. The rest can wait, but this moment is a present for myself.
An act of self-love.
How To Make the Most Out of This Moment
Here are the best practices I wish to share with anyone who wants to try this for themselves:
- Go to the physio at least once. Learning what exercises are the best for your specific pain can make this morning routine more effective. This is especially important if you suspect your back pain may be caused by something other than stress or poor posture.
- Don’t be afraid to copy others. If you have no previous yoga experience, follow YouTube videos at first or sign up for a class. Learn the movements and determine which ones you like before creating your routine. Note: If signing up for a course, warn your teacher of your back pain. If using YT, stop any pose if you notice too much discomfort, or search for videos tailored for people with back pain.
- Practice safety. Before practicing yoga, seek medical help to ensure your back pain isn’t due to a condition that could be worsened with this type of exercise (i.e., a herniated disk). Once you have the green light, follow tip 2 and remember to stop any move that feels uncomfortable. You can read more safety tips here.
- Listen your way into the Now. A great way to get into “the zone,” when you’re completely present, is to listen to sounds of nature or meditation music as you practice yoga. I used these two YouTube videos for the longest time until I got a subscription to an app called Synctuition (not an affiliate link).
- Move and learn. There are days when I can’t bring myself to listen to calming music while doing my morning yoga — and that’s ok too. These days, I listen to a podcast (Huberman Lab and Zoe Science & Nutrition are my current favs) or a YT video as I make each pose.
- Try productive meditation. If you’re stuck with a professional or personal problem, try devoting your morning yoga practice to finding a solution. This is what Cal Newport calls productive meditation in his bestselling book, Deep Work. Whenever I’ve felt unsure about how to proceed with something, I’ve reflected on my issue and have always come up with a new angle or strategy.
- Keep a journal nearby. I’ve had some of my best ideas for writing or my personal life (i.e., what to give my husband for his birthday) while doing my morning yoga practice. That’s why I keep a journal nearby — or use your phone’s note app — to jot down your inspired thoughts.
- Embrace PJ yoga. A barrier for many of us is having to change into workout clothes before doing our morning yoga. That’s why on the days I’m feeling super lazy, I’ll do my routine with my PJs.
- Sip, sip, sip. A morning yoga practice can be an excellent moment to get much-needed hydration. That’s why I always keep a glass of water and a warm cup of tea nearby, and I’ll take sips between each pose. Once I finish the routine, I often sit on the mat and finish my warm tea. This always makes me feel super energized.
- Flexibility above all. Rigid routines fail 99% of the time. That’s why I have different routines that can fit my life depending on the day. When I’m super busy or wake up late, I only do blocks #1, #3, and #5. When I can spend more time but I’m still a bit tight, I’ll do all blocks but only do each pose for 10 to 15 seconds (and sometimes even less). When I have plenty of time (on the weekends), I do the full routine with calming music and all the toppings mentioned here.
- Say goodbye to what doesn’t work. My routine has evolved throughout the year, and I’ve tried and discarded many poses I didn’t even mention. Ultimately, what matters is that you like your practice and that it makes you feel good (while also helping you avoid back pain), so remove what’s bringing you down.
In a nutshell, get professional help first, find a way to feel comfortable, and make the most out of this morning practice by learning, thinking through your problems, and hydrating.
The Results — And Why They Blew Me Away
I went into a yoga-based practice seeking back pain relief, flexibility, and connectedness — and I have to say I got them (in varying degrees).
First, though my rhomboid pain returned several times throughout the year, it usually went away after a day or two of doing the stretches my physio recommended.
Second, though I still have A LOT of room for improvement, my flexibility improved. Now I can reach my toes without bending my legs so much (even if it’s just a tiny bit). Perhaps 2024 will be the year of flexibility.
Lastly — and the reason why my results blew me away — is that I created a deeper connection to my body and self.
As I did every pose, I felt deeply grateful for how my body allows me to move. How — even if imperfect — it helps me get through life.
As I inhaled and exhaled, my mind cleared of distracting thoughts, and I could simply be or think about what truly mattered to me. Every breath was charged with stillness or insightful thoughts about my life. Most of the breakthroughs I had this year struck me as I moved and stretched.
And once I finished, the most overwhelming pleasure racked across my body. Lying down and simply breathing and being was a gift I’d never given myself — especially in the morning.
It felt amazing to start my days with a sense of joy and peace, with an appreciation for my body, life, and loved ones.
A truly magical moment.
The Never Ending Practice
As you can probably tell, I’m sticking with my morning yoga-based routine.
It will be a never-ending practice that’ll hopefully accompany me throughout life, strengthening my muscles, relieving pain, teaching me flexibility, and helping me love myself.
I hope I’ve now inspired you to gift yourself a moment like this.


