
Hyperparameter Tuning of Neural Networks with Optuna and PyTorch
How to find that perfect neural networks model for our use case with the help of Optuna

Developing the right neural network model can be time-consuming.
As you might know, there are a lot of hyperparameters in a neural network model that we need to tweak to get that perfect fitting model such as the learning rate, optimizer, batch size, number of units in a layer, activation function, dropout rate, you name it.
The problem is, we don’t know in advance the combination of hyperparameter values that will work best for our model.
We can, of course, use the default value for any of the hyperparameters and then see how good is the performance of the model, and then tweak the value of each hyperparameter one by one iteratively to find the best combination.
However, this is obviously very time consuming and not a very efficient method due to these reasons:
- You need to monitor and document the combination of hyperparameters that you’ve tried manually.
- There’s a high possibility that you need to run hundreds or even thousands of trials before you come up with the optimum model as your search space is growing.
To tackle these problems, we can tune the hyperparameters of our neural network model with Optuna.
What is Optuna?
Optuna is a python library that enables us to tune our machine learning model automatically.
You can use Optuna basically with almost every machine learning framework available out there: TensorFlow, PyTorch, LightGBM, XGBoost, CatBoost, sklearn, FastAI, etc.
Of course, there are a lot of Python libraries out there that will help us to tune the hyperparameters of our machine learning model automatically. However, there are several features that make Optuna stands out from the other hyperparameter tuning libraries, which we will discuss later.
In this article, we will use Optuna to tweak the hyperparameters of a neural network model in PyTorch. So let’s start with a few introductions about the dataset that we will use in this article and the code to fetch this dataset.
About the Dataset
If you want to follow along, you can download the dataset that we’ll be using in this article on Kaggle. This dataset is licensed under the Open Database Licence (ODbL), which means that we can use the data for our purpose as long as we cite the official data source.
The goal of our machine learning model is to predict whether a patient has heart disease or not considering each patient’s age, gender, cholesterol level, etc.
The dataset itself has a combination of continuous and categorical features. We need to transform all categorical features into their one-hot encoding representation.
Next, let’s create a simple data generator class with PyTorch to fetch this dataset in a batch as the input to our neural network model during model training.
Now that we have defined a code to generate our data, we are ready to play around with Optuna to tune a neural network model! As a first step, let’s learn about how to use Optuna in general.
Getting Started with Optuna
To use Optuna, make sure to install it first via pip:
pip install optunaEach of Optuna hyperparameter tuning session is called study. We instantiate a study session by calling create_study method. We can pass a couple of important arguments into this method as follows.
As you can see, we pass direction and sampler variables as arguments into create_study method.
Direction
direction value can be set either to maximize or minimize , depending on the end goal of our hyperparameter tuning.
- If the goal is to improve the performance via metrics like accuracy, F1 score, precision, or recall, then set it to
maximize. - If the goal is to decrease the loss function such as log-loss, MSE, RMSE, etc, then set it to
minimize.
Sampler
sampler value indicates which sampler method that you want Optuna to implement. There are several sampler options that you can choose, such as:
GridSampler: the set of hyperparameter values are chosen based on every combination in the defined search space.RandomSampler: the set of hyperparameter values are randomly chosen from the defined search space.TPESampler: this is the defaultsamplerwhen we’re using Optuna. It’s based on Bayesian hyperparameter optimization, which is an efficient method for hyperparameter tuning. It will start off just like random sampler, but this sampler records the history of a set of hyperparameter values and the corresponding objective value from past trials. Then, it will suggest the set of hyperparameter values for the next trial based on the set with promising objective values from past trials.
Next, we can call optimize method in our study and pass our objective function as one of the parameters.
The n_trials parameter above indicates the number of trials in a study that you want Optuna to perform.
So far, we haven’t created the objective function just yet. So let’s create our objective function by first defining the search space.
Search Space Definition
In every hyperparameter tuning session, we need to define a search space for the sampler. Search space is the range of value that the sampler should consider from a hyperparameter.
As an example, let’s say we want to tune three hyperparameters: the learning rate, the number of units of a layer, and the optimizer of our neural network model. Then, we can define the search space as follows:
In the objective function, we pass a parameter called trial , which comes from Trial class from Optuna. This class enables Optuna to log a set of selected hyperparameter values and record the value of our objective function (in our case is accuracy) in each trial.
As you can see above, we define the search space of each hyperparameter as a dictionary called params. For each hyperparameter, we define the range (min and max value) of search space with suggest_* method.
The suggest_* method has several extensions, depending on the data type of your hyperparameter:
suggest_int: if your hyperparameter accepts a range of numerical values of type integer.suggest_categorical: if your hyperparameter accepts a selection of categorical values.suggest_uniform: if your hyperparameter accepts a range of numerical values and you want each value to be sampled equally likely.suggest_loguniform: if your hyperparameter accepts a range of numerical values and you want each value to be sampled equally likely in the log domain.suggest_discrete_uniform: if your hyperparameter accepts a range of numerical values in a specific interval and you want each value to be sampled equally likely.suggest_float: if your hyperparameter accepts a range of numerical values of type float. This is a wrapper method forsuggest_uniform,suggest_loguniform, andsuggest_discrete_uniform
Build PyTorch Model, Training Loop, and Evaluate Objective Function
Now we can use the selected hyperparameter values saved in params dictionary to build a PyTorch model. Next, we will train the model and evaluate our objective function, which in our case is the accuracy.
Run Hyperparameter Tuning
We have created our objective function, we have defined the search space, we have built the model and the training loop, now we are ready to run hyperparameter tuning with Optuna.
To run hyperparameter tuning, we need to instantiate a study session, call optimize method, and pass our objective function as the parameter. We’ve seen this code in ‘Getting Started with Optuna’ section above.
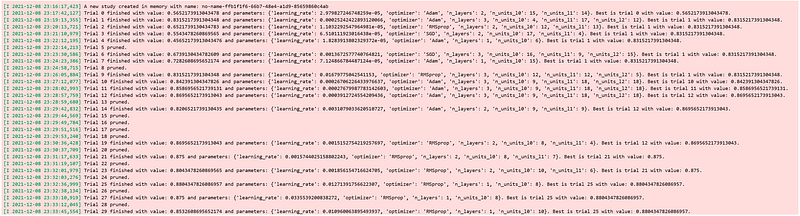
You’ll get the following output as the hyperparameter tuning process runs:

After hyperparameter tuning process is done, we can fetch the best combination of hyperparameters by accessing best_trial method as follows:
And that’s all you need to do to get started to tune your neural network hyperparameter with Optuna!
However, Optuna offers more features to make our hyperparameter tuning pipeline more efficient. Let’s go through some of these features.
Define-by-run Design
Most of the time whenever we build a neural network, we don’t want to tune just the number of units in a layer, but also the number of layers itself. How many layers should we build in a neural network model to achieve optimum performance? Is one layer enough? Two? Three? We never know in advance.
Optuna allows us to tune the number of layers due to its modular design. This means that the user is allowed to dynamically construct the search space.
As an example, let’s say we want to tune a) the number of layers and b) the number of units per layer in a neural network model. We can do so by implementing the following method:
Notice that we didn’t define any specific number of layers nor the number of units in a layer for our neural network model in advance.
Instead, the algorithm will pick a specific number of layers in each trial, then pick the number of units in each layer, and then build the corresponding neural network. All processes are done in a dynamic fashion.
You can apply this concept to more advanced neural network layers such as the convolutional layer as well.
Pruning Mechanism
We know that hyperparameter tuning is a time-consuming process, especially when we have a large selection of hyperparameters and search space. To save us some time, Optuna offers a pruning mechanism feature.
What this pruning does is that it will terminate unpromising trials in the early stages of the training process, such that we don’t need to waste time and resources.
There are several pruning methods that you can use with Optuna, which are:
MedianPruner: this will prune a trial if the intermediate value (in our case is accuracy) of the current trial is worse than the median of intermediate values from previous trials at the same training epochs.PercentilePruner: this will prune a trial if the intermediate value of the current trial is in the bottom percentile of trials at the same training epochs.SuccessiveHalvingPruner: this is a pruning strategy based on Successive Halving Algorithm (SHA) implemented in this paper. The principle is that this algorithm will allocate more epochs to promising trials by reducing the number of trials to half (by pruning unpromising trials).HyperbandPruner: this is a pruning strategy that will run several Successive Halving with different amount of set of hyperparameter values.
It’s very straightforward to integrate a specific pruner into our code. First, we need to add pruner variable as an argument and assign it with our preferred pruning method when we create a study session with create_study as follows:
Next, we activate the pruner by calling report and should_prune methods at the end of each training step. With neural networks in PyTorch, these methods are called after each epoch of training loop as follows:
Code Implementation with Define-by-run Design and Pruner
Below is the full code implementation of the whole hyperparameter tuning process after we integrate pruning mechanism and define-by-run design to tune the number of layers in our neural networks .
After you run the study, you’ll notice that the number of layers and the number of units per layer of our neural network varied between trials. Moreover, some of the unpromising trials were pruned to speed up the hyperparameter tuning process.
And the same as before, we can access the hyperparameter of the best trial with best_trial method.
There is one more very useful feature from Optuna that we can use, which is the visualization feature.
Visualization of Tuning Process
Optuna offers a feature that enables us to visualize the history of the tuning process after it‘s finished. We will cover some of them now.
The first visualization is the plot of our objective function (in our case is accuracy) of each trial in every training step.

As can be seen from visualization above, several unpromising trials were pruned right in the very first step as their accuracy was pretty low.
You can also visualize the optimization history as follows:

This visualization is useful to see which trial is the best trial and how the objective value of other trials compares to the best trial. Several data points are missing at specific trials because of the pruning mechanism.
Next, we have parallel coordinate plot:

If you have a large selection of hyperparameters and search space, parallel plot can be difficult to see and interpret. However, this plot will be useful if we have a reasonable amount of hyperparameters and search space. We can see the value combination of hyperparameters and their performance on our objective function in each line.
Optuna also enables us to plot hyperparameter importance as you can see below:

The plot shows us the importance of each hyperparameter on improving the score of our objective function. As an example in the visualization above, it turns out that the number of units in the first layer is the most important hyperparameter, while the number of layers is the less important one.
This plot is very useful to improve the efficiency of tuning process, particularly if you have a wide selection of hyperparameters.
As a first study, you can run hyperparameter tuning for about 50 trials, and then check which hyperparameters are the most important. Next, you can omit the less important hyperparameters for the second study, which can save you time and resources.
Conclusion
In this post, we have covered step-by-step tutorial on how you can tune the hyperparameters of your neural network model with Optuna and PyTorch.
We have seen that define-by-run design, pruning mechanism, and a handful of visualization options are the main benefits of hyperparameter tuning with Optuna.
I hope that this post helps you to get started with Optuna and if you want to see the full code implementation covered in this article, you can always refer to this notebook.
Dataset Citation
[1] fedesoriano. (September 2021). Heart Failure Prediction Dataset. Retrieved 14–12–2021 from https://www.kaggle.com/fedesoriano/heart-failure-prediction.


