
How To Write Serverless Python REST API With Azure Functions
A step by step guide with an example project

An Azure Function is a simple way of running small pieces of code in the cloud. You don’t have to worry about the infrastructure required to host that code. You can write the Function in C#, Java, JavaScript, PowerShell, Python, or any of the languages that are listed in the Supported languages in the Azure Functions article. In addition, with the consumption plan option, you only pay for the time when the code runs. Azure automatically scales your function in response to the demand from users.
In this post, we will go through how to write Python REST API using Azure Functions.
- Basics of Azure Functions
- Prerequisites
- Example Project
- Creating a Function App
- Creating a Python REST API
- Deploy to the Function App
- Demo
- Monitor the API
- Summary
- Conclusion
Basics of Azure Functions
As I stated above you can run the small pieces of code with Azure Functions without worrying about any underlying infrastructure required. Azure Functions scales based on demand. We have a number of templates you can choose from based on the trigger types below.
HTTPTrigger
You need to use this trigger when you want to execute the code in response to a request sent through the HTTP protocol
TimerTrigger
Use this template when you want the code to execute according to a schedule.
BlobTrigger
Use this template when you want the code to execute when a new blob object is added to an Azure Storage account.
CosmosDBTrigger
Use this template when you want the code to execute in response to new or updated documents in a NoSQL database.
By default, functions have a timeout of 5 minutes. you can extend up to 10 minutes. This timelimit is even restricted to 2.5 minutes when the Azure functions are driven by HTTPTrigger.
Prerequisites
You need to know a lot of things as prerequisites if you want to write a serverless Python REST API. First, you need to create two accounts: a Github account to store the source code and Microsoft Account to deploy that code using Function App Service. Let’s create these accounts by following the below links. You can start both for free.
All the API code are written in Python Azure functions. You need to be familiar with the following.
- Azure Functions
- Azure Functions extension for Visual Studio Code
Example Project
This is a simple Python REST API where you can add tasks, delete tasks, update tasks, and get tasks. Here is an example project you can clone and run on your local machine.
// clone the project
git clone https://github.com/bbachi/serverless-python-restapi-azure.git
// With Azure Fuctions extension installed
func startTesting

Creating a Function App
Functions are hosted in an execution context called a function app. You define function apps to logically group and structure your functions and a compute resource in Azure.
You can create a function app in two ways: you can directly create that in the Azure portal and another way is to create it through VSCode. We will see how we can create a function app through VSCode.
First, you need to install the Azure Functions extension. Once you install the Azure Functions extension for Visual Studio Code you can create the entire project from VSCode itself. The first thing you should do is to authenticate with Azure Account and select the appropriate subscription by logging in to Azure.

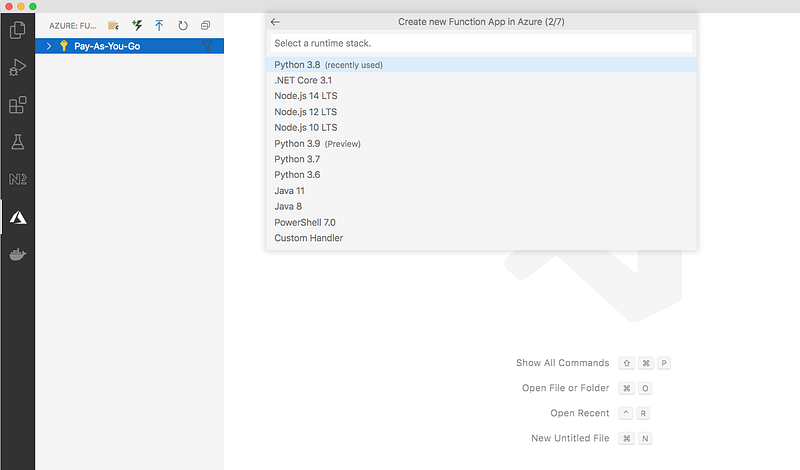
You can right-click on any available subscriptions and select the create Azure Function App option and select the tech stack. I selected Python 3.8 as a runtime stack.

You need to select the hosting plan and we usually select the consumption plan if your functions don’t run longer than 10 minutes.
Function apps may use one of two types of service plans. The first service plan is the Consumption service plan. This is the plan that you choose when using the Azure serverless application platform. The Consumption service plan provides automatic scaling and bills you when your functions are running. The Consumption plan comes with a configurable timeout period for the execution of a function. By default, it is 5 minutes, but may be configured to have a timeout as long as 10 minutes.
The second plan is called the Azure App Service plan. This plan allows you to avoid timeout periods by having your function run continuously on a VM that you define. When using an App Service plan, you are responsible for managing the app resources the function runs on, so this is technically not a serverless plan. However, it may be a better choice if your functions are used continuously or if your functions require more processing power or execution time than the Consumption plan can provide.

Select the resource group or create the new one

Every function app should be linked with a storage account. When you create a function app, it must be linked to a storage account. You can select an existing account or create a new one. The function app uses this storage account for internal operations such as logging function executions and managing execution triggers.

You can create an Application insights resource to monitor your application.

Once the creation is done you can see the function app like below.

All the things such as resource group, storage account, function app, etc you created in the VSCode can be seen in the Azure portal.

Creating a Python REST API
We have created a function app and let’s create a new local project by clicking on the folder icon in the VSCode.

You need to select the language and template which HTTP trigger in this case.


Once you are done with the creation you will see the below function

The above window showed you the overview of the Azure functions, But the actual codebase you can see them when you click on the source in the VSCode.

The entire project is automatically created for you. If you look at the requirements.txt file you have one dependency azure-functions.
It even created Virtual environment and activated for us.

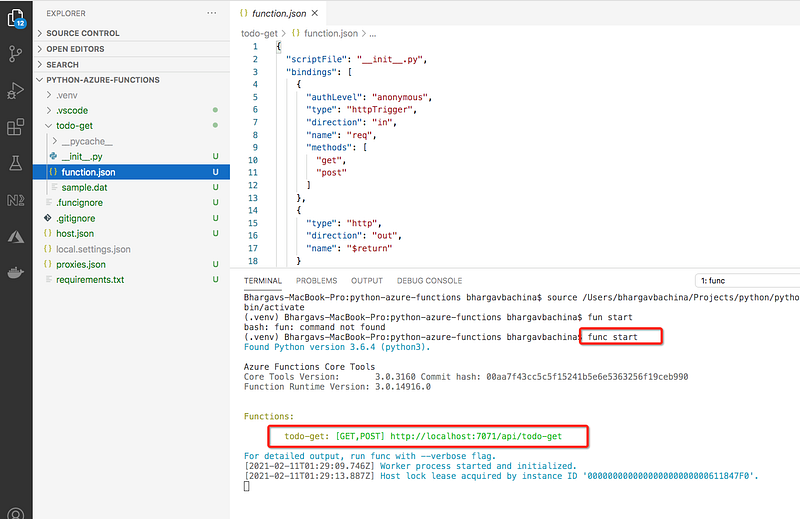
When you run the command func start and you can see the function running on port 7071.
We have seen how to test the project. Let’s implement the four functions for that we need some helper classes as below. I have defined these helper classes under the folder called services.
We have four functions defined for the four API routes. Let’s have a look at the todos-get function. We have two files for each function: __init__.py and function.json.
todo-get __init__.py
Every function has an __init__.py file as the starting point and receives an HTTP request and sends an HTTP response back. You can access the request params and body in the HTTP request and you can add the response body in the Response Object. You can import other files into this for the processing, database access layer, etc.
todo-get function.json
Every function has a function.json file which defines the route, type of HTTP method, directions of the request, and response objects. For example, This is the get request and the direction is in with the req object. The object is res for the direction out.
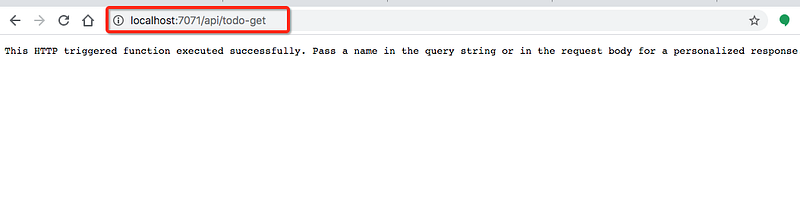
You can test the API by starting the app with the command func start

todo-post __init__.py
Since this is a post request you can see that we are reading the body of the request and passing it to helper functions.
https://gist.github.com/bbachi/c5cc88071d5572ce42289d622d2c5bfa
todo-post function.json
You can notice that there is a change in the methods array.
You can define the other two functions in the same way. You can see four functions in total.

Deploy to the Function App
We have developed the whole REST API as the local project. Let’s deploy this into the Function App. When you deploy it to the function app you can actually see it in the Azure portal.
To deploy this, you can click on the up arrow icon in the Azure Functions extension in the VSCode.

Select the subscription and the functions app we created above


Finally, deploy

Once the deployment is done, you can see all the Azure Function app functions like below.

You can actually see your functions in the Azure portal as well.

Demo
Let’s have a quick demo from the Azure portal. You can see all the functions in the Azure portal. You can even see the code and test it out by clicking on the specific function. When you go to the overview page you can see the API endpoint you can access it from the browser or any other client with it.

Monitor the API
Since we have opted in Application insights while creating the function API. You can see the logs on the Azure portal. You can check the logs when you click on any function and click on the Monitor.

Summary
- The container that groups functions into a logical unit for easier management, deployment and sharing of resources is called Function app
- Serverless compute can be thought of as a function as a service (FaaS), or a microservice that is hosted on a cloud platform. Your business logic runs as functions and you don’t have to manually provision or scale infrastructure.
- Azure Functions is a serverless application platform. It allows developers to host business logic that can be executed without provisioning infrastructure.
- You can write Azure functions in a number of languages such as C#, java, javascript, typescript, Python, etc.
- You need to use this trigger when you want to execute the code in response to a request sent through the HTTP protocol
- you need to install the Azure Functions extension. Once you install the Azure Functions extension for Visual Studio Code you can create the entire project from VSCode itself.
- Function apps may use one of two types of service plans. The first service plan is the Consumption service plan and another is the App Service Plan.
- Every function app should be linked with a storage account. When you create a function app, it must be linked to a storage account.
- You need a Azure Functions extension for Visual Studio Code to develop the entire thing locally.
- When you deploy it to the function app you can actually see it in the Azure portal.
- To deploy from local, you can click on the up arrow icon in the Azure Functions extension in the VSCode.
- You can monitor logs of the API by accessing the Monitor section of each function on the Azure portal.
Conclusion
Azure Functions is a serverless application platform where you write stateless logic and it is event-driven, you don’t have to provision infrastructure manually so that you never over provision. There are some drawbacks as well with these such as execution time and execution frequency. Make sure you consider all the pros and cons before deciding on this option.


