How to Work With Mailchimp Transactional (Mandrill) API
I saw different kinds of APIs during my career — weird ones, broken ones, those that pretend to be RESTful when in fact they are not. But no matter how functional the API in front of you is, if the company doesn’t provide decent documentation, you are screwed.
Mailchimp provides decent developer documentation. Their API is not that hard to work with (simple authorization process, no headers, just put everything in the body of the request and call it a day). But when it comes to different services they offer — this is where the fun begins.

Here is my story: one of my clients loves Mailchimp and one day they decided that all their company’s emails, not only email campaigns, should be designed in Mailchimp builder. Reset password, you are approved, thanks for your request…you name it. Great idea — I said — and opened the Mailchimp API documentation. A few hours later, I was so frustrated that this article was born.
Why Mandrill
At first, I naively thought that sending one on one emails is already included in their platform. After all, you can send a test email when building a template and the whole idea of Mailchimp is to send emails, right? Well…no. Mailchimp sends email campaigns only but apparently, my client was not the first one who wanted to build pretty “Reset your password” emails using their platform. After 20 minutes of digging, I found Mandrill — the email delivery API that developers used to send transactional emails from websites and applications for free. In 2016, it became a paid add-on available only for monthly MailChimp accounts. At the same time, Mailchimp tried to rename it to be a Transactional Emails but somewhere along the way somebody got tired of updating it and added a few notes like the one below.
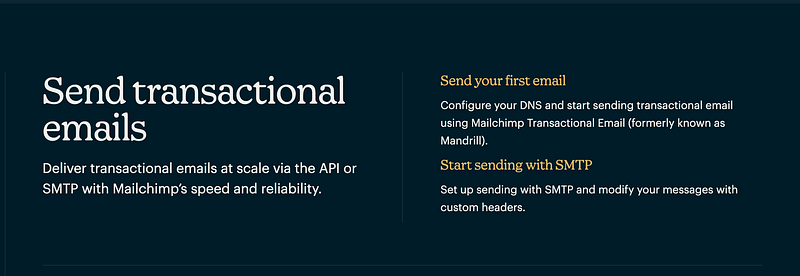
If someone really needs those emails, they figure it out — decided the Mailchimp employees and left lots of confusing Mandrill remarks in their documentation. So let's get it straight — if you need to send one-on-one transactional emails using Mailchimp, you:
- Will need their Standard and Premium plans, or the legacy Monthly Plan
- Install the add-on that can be found in your Mailchimp account under Automations > Transactional Email
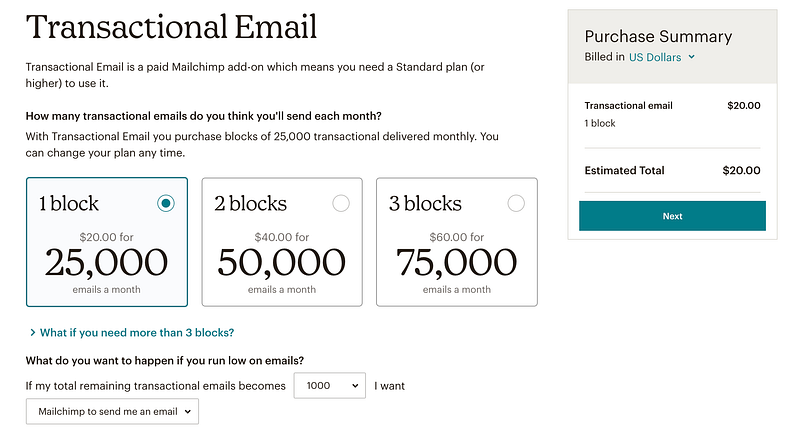
- Buy at least one block (each block is a credit for 25,000 emails) to start sending transactional emails via API or SMTP or sign up for the demo (it allows sending up to 500 emails but only to verified domains. In most cases, you'll have only one domain — yours. So while this is perfect for testing, you do need to get at least one block of emails to start sending real emails)
Get an API key
As I mentioned above, the authorization process is pretty simple. Once you signed up for a demo account, head to the Mandrill website (use the Launch App button in Mailchimp). Even though you are on a completely different website now, it’s connected to Mailchimp so no worries. For now, go to Settings and obtain an API key. You are ready for your first test call!
Ping the Transactional API
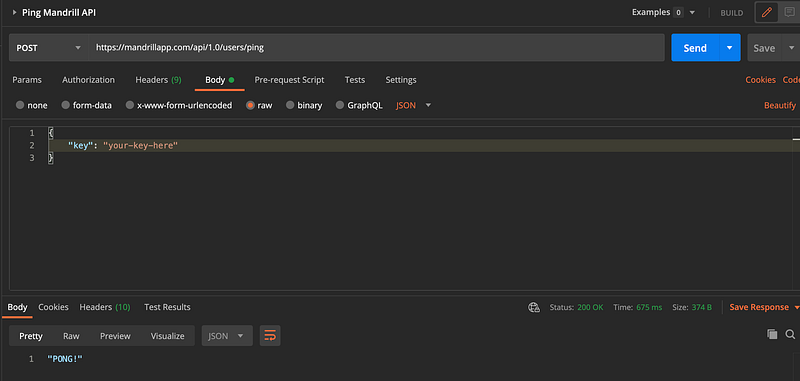
I usually start all API integrations with either a ping API call, by getting or token, or by writing something simple like A GET request. So open your favorite app, be it postman, insomnia, or something else, and create the first POST call with the key in the body of a JSON as shown below. If your key is valid and you did everything right, you get a status of 200 and a “PONG!” as a response.
Verify your sending domain
Chances are you rushed to send your first email right after the ping call. You can go ahead and try it but you’ll get an “unsigned” error and here’s why.
Before you can use your email account to send any outbound emails, you need to go here and verify your email and adjust some email settings. They have a detailed guide and detailed error messages which is nice but this is probably the most confusing step out of all. Only when you get all three green checkmarks in that console, you are good to go. An alternative way to check the connection would be to send the POSt request to https://mandrillapp.com/api/1.0/senders/domains.json with the same body. If you see three “true” in the body of the response it means that everything is configured properly.
Use Mailchimp Templates in transactional emails
Transactional emails might be a part of Malcihimp, but they have their own template management space you can access by going to Outbound > Templates on the Mandrill website. Their editor is not as fancy but the good news is you can use Mailchimp’s editor and tools to build a perfect email and send click on “Send to Mandrill” on your template to make it available on the Mandrill platform. It’s not very intuitive and you need to remember to click that button every time you change something.
Send using a template
Finally, we can get to the fun part and send the first email. How to send a regular email is described here but it’s not as fun as sending a colorful template you spent hours building, right? Moreover, you can add your custom HTML to each email, meaning you can pass usernames, emails, and passwords as variables. The documentation has the full list of all possible key values but here is the bare minimum you can use to send that first template:
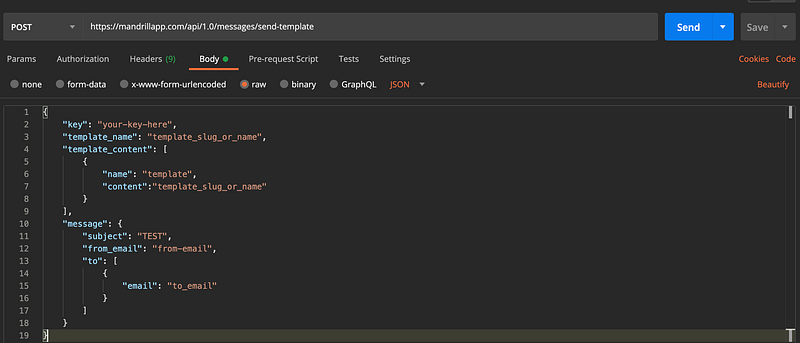
Again, it’s a POST request to this URL: https://mandrillapp.com/api/1.0/messages/send-template. In addition to the key that we used in a ping call, we now need to specify the template name or slug. This should match the name your template has on Mandrill, not Mailchimp. If you prefer to get the list of all available templates via API, just change the URL of the ping call to https://server.api.mailchimp.com/3.0/templates and do another call. It will return an array of templates with slugs, names, and whatever else you might need (or not).
As you see, I also specified the subject name but if you prefer to use Mandrill’s UI to manage templates (in my case, I wanted my client to have full control over their templates in case they need to change something), omit that key-value pair completely. When the subject is not specified, Mandrill will use the default subject and other options specified in the template management space.
Here is one more thing to be aware of — if you make a mistake while building your JSON and created an array instead of an object, for example, it will still give status 200 (OK) with an empty array as a response. Of course, it’s not a valid request and you won’t get an email, but the status will be still 200. Always check the body of the response — you’re doing everything right only when you get an object like this:
[
{ "email": "email-here", "status": "sent", "_id": "id-of-the-newly-created-email", "reject_reason": null}
]
I hope this little guide was helpful to anyone who has to deal with Mailchimps and their add-ons. Would I recommend using this API/SMTP if you don’t have a Mailchimp account? Probably not, since there are a lot of cheaper and easier to use alternatives. But for those who use Mailchimp already, it’s a great way to manage all emails in one place.