
How to use Flow with Room Database (Complete Guide — Part 4)

in the previous article we were working on Contacts List App , and we could add new contact and see the list of our contacts .
you can read the previous article here (Part1-Part2 👇) :
and also we added search , sort and delete All functionality :
let me show you , what I want to doin this article :
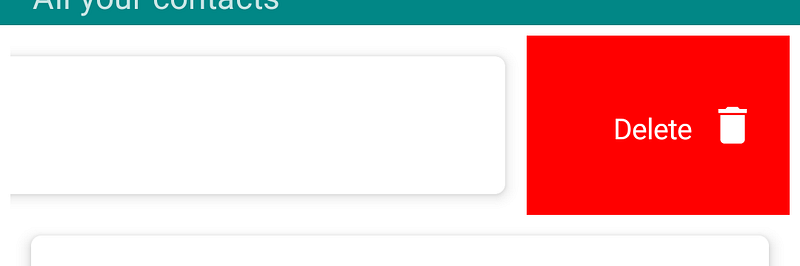
Delete: swipe to left for deleting
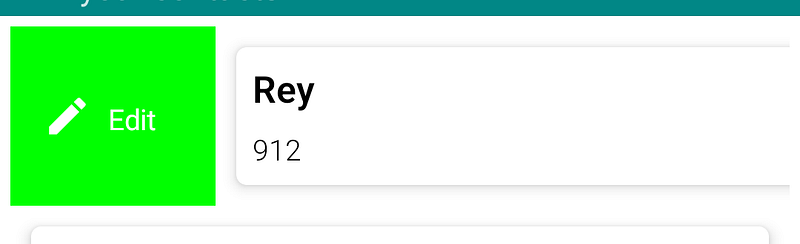
Edit: swipe to right for editing
Add this dependency into your gradle for decorating RecyclerView Swipe :
//RecyclerView Decorator
implementation 'com.github.xabaras:RecyclerViewSwipeDecorator:1.3'
Sync your project and then , inside your binding.app{…} in the main activity, insert this block :
val swipeCallback = object : ItemTouchHelper.SimpleCallback(0, ItemTouchHelper.LEFT or ItemTouchHelper.RIGHT) {
    override fun onMove(recyclerView: RecyclerView, viewHolder: RecyclerView.ViewHolder, target: RecyclerView.ViewHolder): Boolean {
        return false
    }
override fun onSwiped(viewHolder: RecyclerView.ViewHolder, direction: Int) {
val position = viewHolder.adapterPosition
val contact = contactsAdapter.differ.currentList[position]
when (direction) {
ItemTouchHelper.LEFT -> {
viewModel.deleteContact(contact)
Snackbar.make(binding.root, "Item Deleted!", Snackbar.LENGTH_LONG).apply {
setAction("UNDO") {
viewModel.saveContact(false, contact)
}
}.show()
}
ItemTouchHelper.RIGHT -> {
val addContactFragment = AddContactFragment()
val bundle = Bundle()
bundle.putInt(BUNDLE_ID, contact.id)
addContactFragment.arguments = bundle
addContactFragment.show(supportFragmentManager, AddContactFragment().tag)
}
}
} override fun onChildDraw(
c: Canvas,
recyclerView: RecyclerView,
viewHolder: RecyclerView.ViewHolder,
dX: Float,
dY: Float,
actionState: Int,
isCurrentlyActive: Boolean
) {
RecyclerViewSwipeDecorator.Builder(c, recyclerView, viewHolder, dX, dY, actionState, isCurrentlyActive)
.addSwipeLeftLabel("Delete")
.addSwipeLeftBackgroundColor(Color.RED)
.addSwipeLeftActionIcon(R.drawable.ic_baseline_delete_24)
.setSwipeLeftLabelColor(Color.WHITE)
.setSwipeLeftActionIconTint(Color.WHITE)
.addSwipeRightLabel("Edit")
.addSwipeRightBackgroundColor(Color.GREEN)
.setSwipeRightLabelColor(Color.WHITE)
.setSwipeRightActionIconTint(Color.WHITE)
.addSwipeRightActionIcon(R.drawable.ic_baseline_edit_24)
.create()
.decorate()
super.onChildDraw(c, recyclerView, viewHolder, dX, dY, actionState, isCurrentlyActive)
}}
val itemTouchHelper = ItemTouchHelper(swipeCallback)
itemTouchHelper.attachToRecyclerView(rvContacts)
let me explain what happen inside this block :
the blowing block is for deleting and here I’m using an action of Snackbar, it called → UNDO ( setAction(“UNDO”) )
so i can re-insert my deleted item into database :
ItemTouchHelper.LEFT -> {
                viewModel.deleteContact(contact)
                Snackbar.make(binding.root, "Item Deleted!", Snackbar.LENGTH_LONG).apply {
                    setAction("UNDO") {
                        viewModel.saveContact(false, contact)
                    }
                }.show()
            }
and for Editing ,
ItemTouchHelper.RIGHT -> {
                val addContactFragment = AddContactFragment()
                val bundle = Bundle()
                bundle.putInt(BUNDLE_ID, contact.id)
                addContactFragment.arguments = bundle
                addContactFragment.show(supportFragmentManager, AddContactFragment().tag)
            }
I sent my data as bundle into my add fragment . for that i added this variable into my Constants.kt
const val NEW = "new"
const val EDIT = "edit"
const val BUNDLE_ID = "bundle_id"
and then in my AddContactFragment :
first add :
private var type = ""
private var isEdit = false
and then get the bundle data :
contactId = arguments?.getInt(BUNDLE_ID) ?: 0and I should check the id for future action:
if (contactId > 0) {
type = EDIT
isEdit = true
} else {
isEdit = false
type = NEW
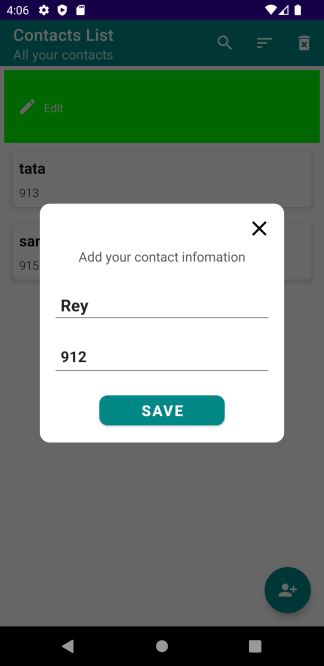
}and then , inside binding .apply {…} , for getting data and showing into EditText :
if (type == EDIT) {
    viewModel.getDetailsContact(contactId)
    viewModel.contactsDetail.observe(viewLifecycleOwner) { itData ->
        itData.data?.let {
            edtName.setText(it.name)
            edtPhone.setText(it.phone)
        }
    }
}
and the last step to save new data or update , i have to do some changes into my ViewModel :
fun saveContact(isEdite: Boolean, entity: ContactsEntity) = viewModelScope.launch {
    if (isEdite) {
        repository.updateTask(entity)
    } else {
        repository.saveContact(entity)
    }
}
I added new parameter as boolean to understand the data that i wanted to save is a new record or is used for update.
so my button’s code should change like this:
btnSave.setOnClickListener {
    name = edtName.text.toString()
    phone = edtPhone.text.toString()
    if (name.isEmpty() || phone.isEmpty()) {
        Snackbar.make(it, "Name and Phone cannot be Empty!", Snackbar.LENGTH_SHORT).show()
    } else {
        entity.id = contactId
        entity.name = name
        entity.phone = phone
        viewModel.saveContact(isEdit, entity)
        edtName.setText("")
        edtPhone.setText("")
        dismiss()
    }
}
It’s Done 😊 Good work ✨
GitHub Source :
If you would rather watch a video of this tutorial, I have embedded the one I made and put on YouTube below:
Join Medium to read thousands of valuable stories ✨
Thank you for reading, and Happy Coding! 😊
Don’t forget to clap and comment if you enjoyed 👏😊


