
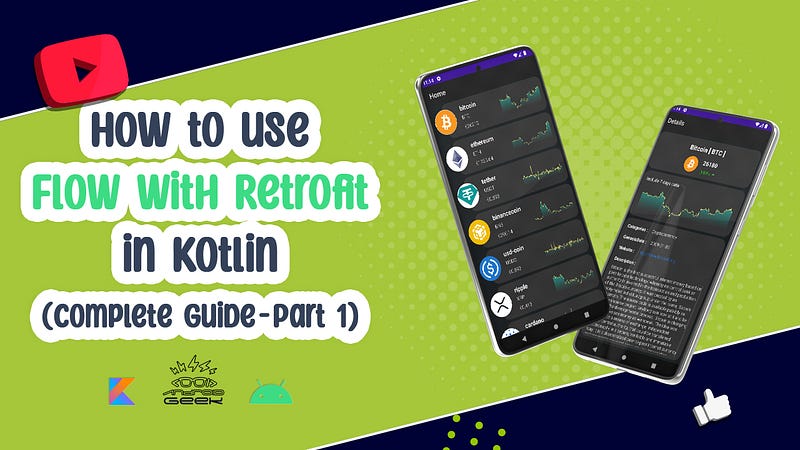
How to use Flow with Retrofit (Complete Guide — Part 1)
In some previous articles we discussed fundamentals of Flow API and also using it in Room Database in Kotlin , Here is the list of those articles :
Fundamentals of Flow API
▶ Part 1 :
▶ Part2:
How to use Flow with Room Database [ 4 Part ] :
🔥🔥🔥🔥🔥🔥🔥🔥🔥🔥🔥🔥🔥🔥🔥🔥🔥🔥🔥🔥🔥🔥🔥🔥🔥🔥🔥🔥🔥🔥
By using the referral code , you will get 500 USD off their annual plan subscription.
Referral code : CGANDGEEK
Subscribe here: coingecko.com/api
🔥🔥🔥🔥🔥🔥🔥🔥🔥🔥🔥🔥🔥🔥🔥🔥🔥🔥🔥🔥🔥🔥🔥🔥🔥🔥🔥🔥🔥🔥
And now , this article is the last article in this series and I will show you How we can use Flow beside Retrofit :
If you would rather watch a video of this tutorial, I have embedded the one I made and put on YouTube below:
Let’s start 😊
Step-by-Step Implementation
Step 1- Adding dependency and plugging
Add these dependencies into your build.gradle [App Level] :
    //navigation
    implementation 'androidx.navigation:navigation-fragment:2.5.3'
    implementation 'androidx.navigation:navigation-fragment-ktx:2.5.3'
    implementation 'androidx.navigation:navigation-ui-ktx:2.5.3'

    //Coroutines
    implementation 'org.jetbrains.kotlinx:kotlinx-coroutines-android:1.6.4'
    implementation 'org.jetbrains.kotlinx:kotlinx-coroutines-core:1.6.4'
    //Lifecycle
    implementation 'androidx.lifecycle:lifecycle-viewmodel-ktx:2.6.0'
    implementation 'androidx.lifecycle:lifecycle-runtime-ktx:2.6.0'
    implementation 'androidx.lifecycle:lifecycle-livedata-ktx:2.6.0'
    implementation 'androidx.activity:activity-ktx:1.6.1'
    //Dagger Hilt
    implementation "com.google.dagger:hilt-android:2.44.2"
    kapt "com.google.dagger:hilt-compiler:2.44.2"
    //Gson
    implementation 'com.google.code.gson:gson:2.9.1'
    //Retrofit
    implementation 'com.squareup.retrofit2:retrofit:2.9.0'
    implementation 'com.squareup.retrofit2:converter-gson:2.9.0'
    //OkHttp
    implementation 'com.squareup.okhttp3:okhttp:5.0.0-alpha.1'
    implementation "com.squareup.okhttp3:logging-interceptor:5.0.0-alpha.1"
    //Coil
    implementation 'io.coil-kt:coil:2.2.2'
    //Chart
    implementation 'com.diogobernardino:williamchart:3.10.1'
    //working-with-HTML
    implementation 'org.jsoup:jsoup:1.14.3'
Also, add these plugins :
id 'kotlin-kapt'
id 'dagger.hilt.android.plugin'
id 'androidx.navigation.safeargs'
And the last step , add this code into build.gradle [Module Level]
buildscript {
    dependencies {
        classpath 'com.google.dagger:hilt-android-gradle-plugin:2.44'
        classpath 'androidx.navigation:navigation-safe-args-gradle-plugin:2.5.3'
    }
}
Step 2 — Adding permission into AndroidManifest.xml
<uses-permission android:name="android.permission.INTERNET" />Step 3 — Create layout XML
In this tutorial , I don’t want to focused on UI part , so you can get these XMLs from the git repo :
➡️item.xml

for creating these charts, I used a library which we have an article for that :
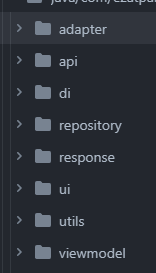
Step 4-Creating package
for having clean structure we can create packages for our class like :
Step 5- Create Model class [ Response class ]
Documentation: https://www.coingecko.com/en/api/documentation
Getting the list of coins :
if you know nothing about how to work with response and how it can be created , please read this article [or video] first , 7th Step of this article can help you better understand what is response and how you can create :
So our first response is :
Step 6- Create API Services Class
Now, we need to create an interface to define the different methods used for network transactions.
The first method is to get the list of coins base on our response:
    @GET("coins/markets?sparkline=true")
    suspend fun getCoinsMarket(@Query("vs_currency")vs_currency: String) :
            Response<ResponseCoinsMarkets>
Step 7- Creating Application class and Module Class
Before, in one article I fully explained how we can work with Hilt and retrofit:
let’s continue :
@HiltAndroidApp
class MyApp : Application() { }
And then add this class to our AndoirdManifest :
<application
    android:name=".MyApp"
    ...
>
...
</application>
inside “di ” package, I created a new Kotlin object class -> ApiModule.kt , in this class we provides our dependency injection :
@Module
@InstallIn(SingletonComponent::class)
object ApiModule {

    @Provides
    fun provideBaseUrl() = BASE_URL

    @Provides
    fun provideNetworkTome() = NETWORK_TIMEOUT

    @Provides
    @Singleton
    fun provideGson(): Gson = GsonBuilder().setLenient().create()


    @Provides
    @Singleton
    fun provideBodyInterceptor() = HttpLoggingInterceptor().apply {
        level = HttpLoggingInterceptor.Level.BODY
    }

    @Provides
    @Singleton
    fun provideClient(
        time: Long, body: HttpLoggingInterceptor,
    ) = OkHttpClient.Builder()
        .addInterceptor(body)
        .connectTimeout(time, TimeUnit.SECONDS)
        .readTimeout(time, TimeUnit.SECONDS)
        .writeTimeout(time, TimeUnit.SECONDS)
        .retryOnConnectionFailure(true)
        .build()

    @Provides
    @Singleton
    fun provideRetrofit(baseUrl: String, client: OkHttpClient, gson: Gson): ApiServices =
        Retrofit.Builder()
            .baseUrl(baseUrl)
            .client(client)
            .addConverterFactory(GsonConverterFactory.create(gson))
            .build()
            .create(ApiServices::class.java)

}
Step 8- Create a Repository class
I want to create this repository class because I don’t want to use my ApiServices’s function directly. The repository class provides information for me. And it needs to @Inject ApiServices here in the constructor to define these functions here like these :
class ApiRepository @Inject constructor(private val apiServices: ApiServices) {

    suspend fun getCoinsList(vs_currency: String) = flow {

        val result = apiServices.getCoinsMarket(vs_currency)
        when (result.code()) {
            200 -> emit(DataStatus.success(result.body()))
            400 -> emit(DataStatus.error(result.message()))
            500 -> emit(DataStatus.error(result.message()))
        }
    }.catch {
        emit(DataStatus.error(it.message.toString()))
    }.flowOn(Dispatchers.IO)

}
Here , I provided a suspending function that returns a Flow which emits DataStatus objects representing the current state of the data being fetched from an API . The DataStatus object contains information such as loading, success or error state.
The reason for handling the Flow in this way is to provide a more robust and flexible way of handling data fetching in our application. By using a Flow, you can easily switch between different data sources or implement caching strategies without modifying the calling code. Additionally, Flow allows for easy transformation and manipulation of data, making it ideal for use in a reactive programming model.
Overall, using a Flow in this way provides a more scalable and maintainable way of handling data fetching in our application.
Step 9 — Create a ViewModel class
We should divide our business logic from the UI logic. The ViewModel is used for that, with the intent of shielding the data for an UI controller so the data can stay intact through configuration adjustments.
@HiltViewModel
class MainViewModel @Inject constructor(private val repository: ApiRepository) : ViewModel() {

    /**
     * List of Coins
     */

    private val _coinsList = MutableLiveData<DataStatus<List<ResponseCoinsMarkets.ResponseCoinsMarketsItem>>>()
    val coinsList: LiveData<DataStatus<List<ResponseCoinsMarkets.ResponseCoinsMarketsItem>>>
        get() = _coinsList


    fun getCoinsList(vs_currency: String) = viewModelScope.launch {
        repository.getCoinsList(vs_currency).collect{
            _coinsList.value =it
        }
    }


}
Step 10 - Create an Adapter
Let’s create our adapter class. As usual adapter, there are some steps
- Create the ViewHolder as an inner class for
- Implement Adapter member
- Create Diff Util Call Back
- Create the ViewHolder() as an inner class for
    inner class ViewHolder() : RecyclerView.ViewHolder(binding.root) {

        @SuppressLint("SetTextI18n")
        fun bind(item: ResponseCoinsMarkets.ResponseCoinsMarketsItem) {
            binding.apply {
                tvName.text = item.id
                tvSymbol.text = item.symbol?.uppercase()
                tvPrice.text = "€${item.currentPrice?.roundToThreeDecimals()}"
                imgCrypto.load(item.image) {
                    crossfade(true)
                    crossfade(500)
                    placeholder(R.drawable.round_currency_bitcoin_24)
                    error(R.drawable.round_currency_bitcoin_24)
                }

                lineChart.gradientFillColors =
                    intArrayOf(
                        Color.parseColor("#2a9085"),
                        Color.TRANSPARENT
                    )

                lineChart.animation.duration = Constants.animationDuration

                val listData = item.sparklineIn7d?.price.toDoubleFloatPairs()
                lineChart.animate(listData)

                }
            }
        }
    }
There is some point here in our ViewHolder class :
1- I should round the price , so I wrote two extension functions for rounding our Double variable :
fun Double.roundToTwoDecimals() = formatter2.format(this).toString()

fun Double.roundToThreeDecimals() = formatter3.format(this).toString()
2-The library that I used for showing our data on Chart , just accept the pair of <String ,Float> and the response for this chart that came from the API is Double, so I should convert these data into <String ,Float> , so I wrote this extension function :
fun List<Double?>?.toDoubleFloatPairs(): List<Pair<String, Float>> {
    return this!!.map { d ->
        val f = d!!.toFloat()
        val s = d.toString()
        Pair(s, f)
    }
}- Implement Adapter member
override fun onCreateViewHolder(parent: ViewGroup, viewType: Int): ViewHolder {
        val inflater = LayoutInflater.from(parent.context)
        binding = ItemBinding.inflate(inflater, parent, false)
        context = parent.context
        return ViewHolder()
    }

    override fun getItemCount(): Int = differ.currentList.size

    override fun onBindViewHolder(holder: ViewHolder, position: Int) {
        holder.bind(differ.currentList[position])
        holder.setIsRecyclable(false)
    }
The last step , we should create our Diff Util callback :
    private var onItemClickListener: ((ResponseCoinsMarkets.ResponseCoinsMarketsItem) -> Unit)? = null

    fun setOnItemClickListener(listener: (ResponseCoinsMarkets.ResponseCoinsMarketsItem) -> Unit) {
        onItemClickListener = listener
    }

    private val differCallback = object : DiffUtil.ItemCallback<ResponseCoinsMarkets.ResponseCoinsMarketsItem>() {
        override fun areItemsTheSame(oldItem: ResponseCoinsMarkets.ResponseCoinsMarketsItem, newItem: ResponseCoinsMarkets.ResponseCoinsMarketsItem): Boolean {
            return oldItem.id == newItem.id
        }

        override fun areContentsTheSame(oldItem: ResponseCoinsMarkets.ResponseCoinsMarketsItem, newItem: ResponseCoinsMarkets.ResponseCoinsMarketsItem): Boolean {
            return oldItem == newItem
        }
    }

    val differ = AsyncListDiffer(this, differCallback)
So the final Adapter’s code should looks like :
class CryptosAdapter @Inject() constructor() : RecyclerView.Adapter<CryptosAdapter.ViewHolder>() {

    private lateinit var binding: ItemBinding
    private lateinit var context: Context


    override fun onCreateViewHolder(parent: ViewGroup, viewType: Int): ViewHolder {
        val inflater = LayoutInflater.from(parent.context)
        binding = ItemBinding.inflate(inflater, parent, false)
        context = parent.context
        return ViewHolder()
    }

    override fun getItemCount(): Int = differ.currentList.size

    override fun onBindViewHolder(holder: ViewHolder, position: Int) {
        holder.bind(differ.currentList[position])
        holder.setIsRecyclable(false)
    }

    inner class ViewHolder() : RecyclerView.ViewHolder(binding.root) {

        @SuppressLint("SetTextI18n")
        fun bind(item: ResponseCoinsMarkets.ResponseCoinsMarketsItem) {
            binding.apply {
                tvName.text = item.id
                tvSymbol.text = item.symbol?.uppercase()
                tvPrice.text = "€${item.currentPrice?.roundToThreeDecimals()}"
                imgCrypto.load(item.image) {
                    crossfade(true)
                    crossfade(500)
                    placeholder(R.drawable.round_currency_bitcoin_24)
                    error(R.drawable.round_currency_bitcoin_24)
                }

                lineChart.gradientFillColors =
                    intArrayOf(
                        Color.parseColor("#2a9085"),
                        Color.TRANSPARENT
                    )

                lineChart.animation.duration = Constants.animationDuration

                val listData = item.sparklineIn7d?.price.toDoubleFloatPairs()
                lineChart.animate(listData)

                root.setOnClickListener {
                    onItemClickListener?.let {
                        it(item)
                    }
                }
            }
        }
    }

    private var onItemClickListener: ((ResponseCoinsMarkets.ResponseCoinsMarketsItem) -> Unit)? = null

    fun setOnItemClickListener(listener: (ResponseCoinsMarkets.ResponseCoinsMarketsItem) -> Unit) {
        onItemClickListener = listener
    }

    private val differCallback = object : DiffUtil.ItemCallback<ResponseCoinsMarkets.ResponseCoinsMarketsItem>() {
        override fun areItemsTheSame(oldItem: ResponseCoinsMarkets.ResponseCoinsMarketsItem, newItem: ResponseCoinsMarkets.ResponseCoinsMarketsItem): Boolean {
            return oldItem.id == newItem.id
        }

        override fun areContentsTheSame(oldItem: ResponseCoinsMarkets.ResponseCoinsMarketsItem, newItem: ResponseCoinsMarkets.ResponseCoinsMarketsItem): Boolean {
            return oldItem == newItem
        }
    }

    val differ = AsyncListDiffer(this, differCallback)

}
Step 11— Working with HomeFragment
Here , first we should call our request :
viewModel.getCoinsList("eur")and then manage the result of this request :
viewModel.coinsList.observe(viewLifecycleOwner) {
    when (it.status) {
        DataStatus.Status.LOADING -> {
            //show loading before load data
            pBarLoading.isVisible(true,rvCrypto)
        }
        DataStatus.Status.SUCCESS -> {
            //here the request was success and we have our list
            //and can submith the data into our differ
            pBarLoading.isVisible(false,rvCrypto)
            cryptosAdapter.differ.submitList(it.data)
        }
        DataStatus.Status.ERROR -> {
            pBarLoading.isVisible(true,rvCrypto)
            Toast.makeText(requireContext(), "There is something wrong!", Toast.LENGTH_SHORT).show()
        }
    }
}
and also I created a fun for managing my recyclerview :
private fun setupRecyclerView() {
    binding.rvCrypto.initRecycler(LinearLayoutManager(requireContext()), cryptosAdapter)
}
note : initRecycler is extension function :
fun RecyclerView.initRecycler(layoutManager: RecyclerView.LayoutManager, adapter: RecyclerView.Adapter<*>) {
    this.adapter=adapter
    this.layoutManager=layoutManager
}
So as result :
@AndroidEntryPoint
class HomeFragment : Fragment() {

    private var _binding: FragmentHomeBinding? = null
    private val binding get() = _binding!!

    private val viewModel: MainViewModel by viewModels()

    @Inject
    lateinit var cryptosAdapter: CryptosAdapter

    override fun onCreateView(
        inflater: LayoutInflater, container: ViewGroup?,
        savedInstanceState: Bundle?,
    ): View? {
        _binding = FragmentHomeBinding.inflate(layoutInflater)
        return binding.root
    }

    override fun onViewCreated(view: View, savedInstanceState: Bundle?) {
        super.onViewCreated(view, savedInstanceState)

        setupRecyclerView()

        lifecycleScope.launch {

            binding.apply {
                viewModel.getCoinsList("eur")
                viewModel.coinsList.observe(viewLifecycleOwner) {
                    when (it.status) {
                        DataStatus.Status.LOADING -> {
                            //show loading before load data
                            pBarLoading.isVisible(true,rvCrypto)
                        }
                        DataStatus.Status.SUCCESS -> {
                            //here the request was success and we have our list
                            //and can submith the data into our differ
                            pBarLoading.isVisible(false,rvCrypto)
                            cryptosAdapter.differ.submitList(it.data)
                        }
                        DataStatus.Status.ERROR -> {
                            pBarLoading.isVisible(true,rvCrypto)
                            Toast.makeText(requireContext(), "There is something wrong!", Toast.LENGTH_SHORT).show()
                        }
                    }
                }
            }
        }
    }

    private fun setupRecyclerView() {
        binding.rvCrypto.initRecycler(LinearLayoutManager(requireContext()), cryptosAdapter)
    }

    override fun onDestroyView() {
        super.onDestroyView()
        _binding = null
    }
}
Step 12 - Working with MainActivity
In the last step of this article , we should sets up the navigation :
navController = findNavController(R.id.fragmentContainerView)Here, we just need to find the navigation controller associated with the fragmentContainerView in the current activity, which is where the app's navigation will take place.
     val appBarConfiguration = AppBarConfiguration(
            setOf(
                R.id.homeFragment,
                R.id.detailsFragment
            )
        )
In this step, i just create an instance of the AppBarConfiguration class, which specifies the top-level destinations in the app's navigation graph that should be considered "top-level" destinations. and set our fragment here.
setupActionBarWithNavController(navController, appBarConfiguration)And here, I set up the navigation controller with the app’s action bar, allowing the app bar to automatically update its title and navigation icon based on the current destination of the navigation controller.
Last step , i should handle navigation events when the user presses the back button in the app bar. When this button is pressed, the navigateUp() method is called on the NavController to handle the navigation event.
  override fun onSupportNavigateUp(): Boolean {
        return navController.navigateUp() || super.onSupportNavigateUp()
    }
so the final code for MainActivity should look like :
@AndroidEntryPoint
class MainActivity : AppCompatActivity() {

    private var _binding: ActivityMainBinding? = null
    private val binding get() = _binding!!

    private lateinit var navController: NavController

    override fun onCreate(savedInstanceState: Bundle?) {
        super.onCreate(savedInstanceState)
        _binding = ActivityMainBinding.inflate(layoutInflater)
        setContentView(binding.root)

        navController = findNavController(R.id.fragmentContainerView)
        val appBarConfiguration = AppBarConfiguration(
            setOf(
                R.id.homeFragment,
                R.id.detailsFragment
            )
        )

        setupActionBarWithNavController(navController, appBarConfiguration)

    }

    override fun onSupportNavigateUp(): Boolean {
        return navController.navigateUp() || super.onSupportNavigateUp()
    }

    override fun onDestroy() {
        super.onDestroy()
        _binding = null
    }
}
it’s Done 😊 The code is now ready to run, so enjoy it ✨
GitHub Source :
Join Medium to read thousands of valuable stories ✨
Thank you for reading, and Happy Coding! 😊
Don’t forget to clap and comment if you enjoyed 👏😊


